Author: pmorris1620@gmail.com

  • Seasonal Living Ideas for Families: Simple Ways to Celebrate Every Season All Year Long

    Seasonal Living Ideas for Families: Simple Ways to Celebrate Every Season All Year Long

    Seasonal Living Ideas for Families: Simple Ways to Celebrate Every Season All Year Long

    🌿 The Short Version: Seasonal living doesn’t have to be complicated or curated — it’s really just about slowing down and letting the rhythm of the year shape your family’s days. This post walks through simple, doable seasonal living ideas for families in every season, with a special nod to life here in Northwest Florida where the seasons look a little different than the rest of the country.

    This post contains affiliate links. I may earn a small commission at no extra cost to you.

    Can I tell you something that took me way too long to figure out?

    I used to plan our homeschool year like one long march forward — unit studies, curriculum checklists, read-alouds scheduled by the quarter. And it was fine. But something felt a little flat. Like we were moving through the year instead of actually living in it.

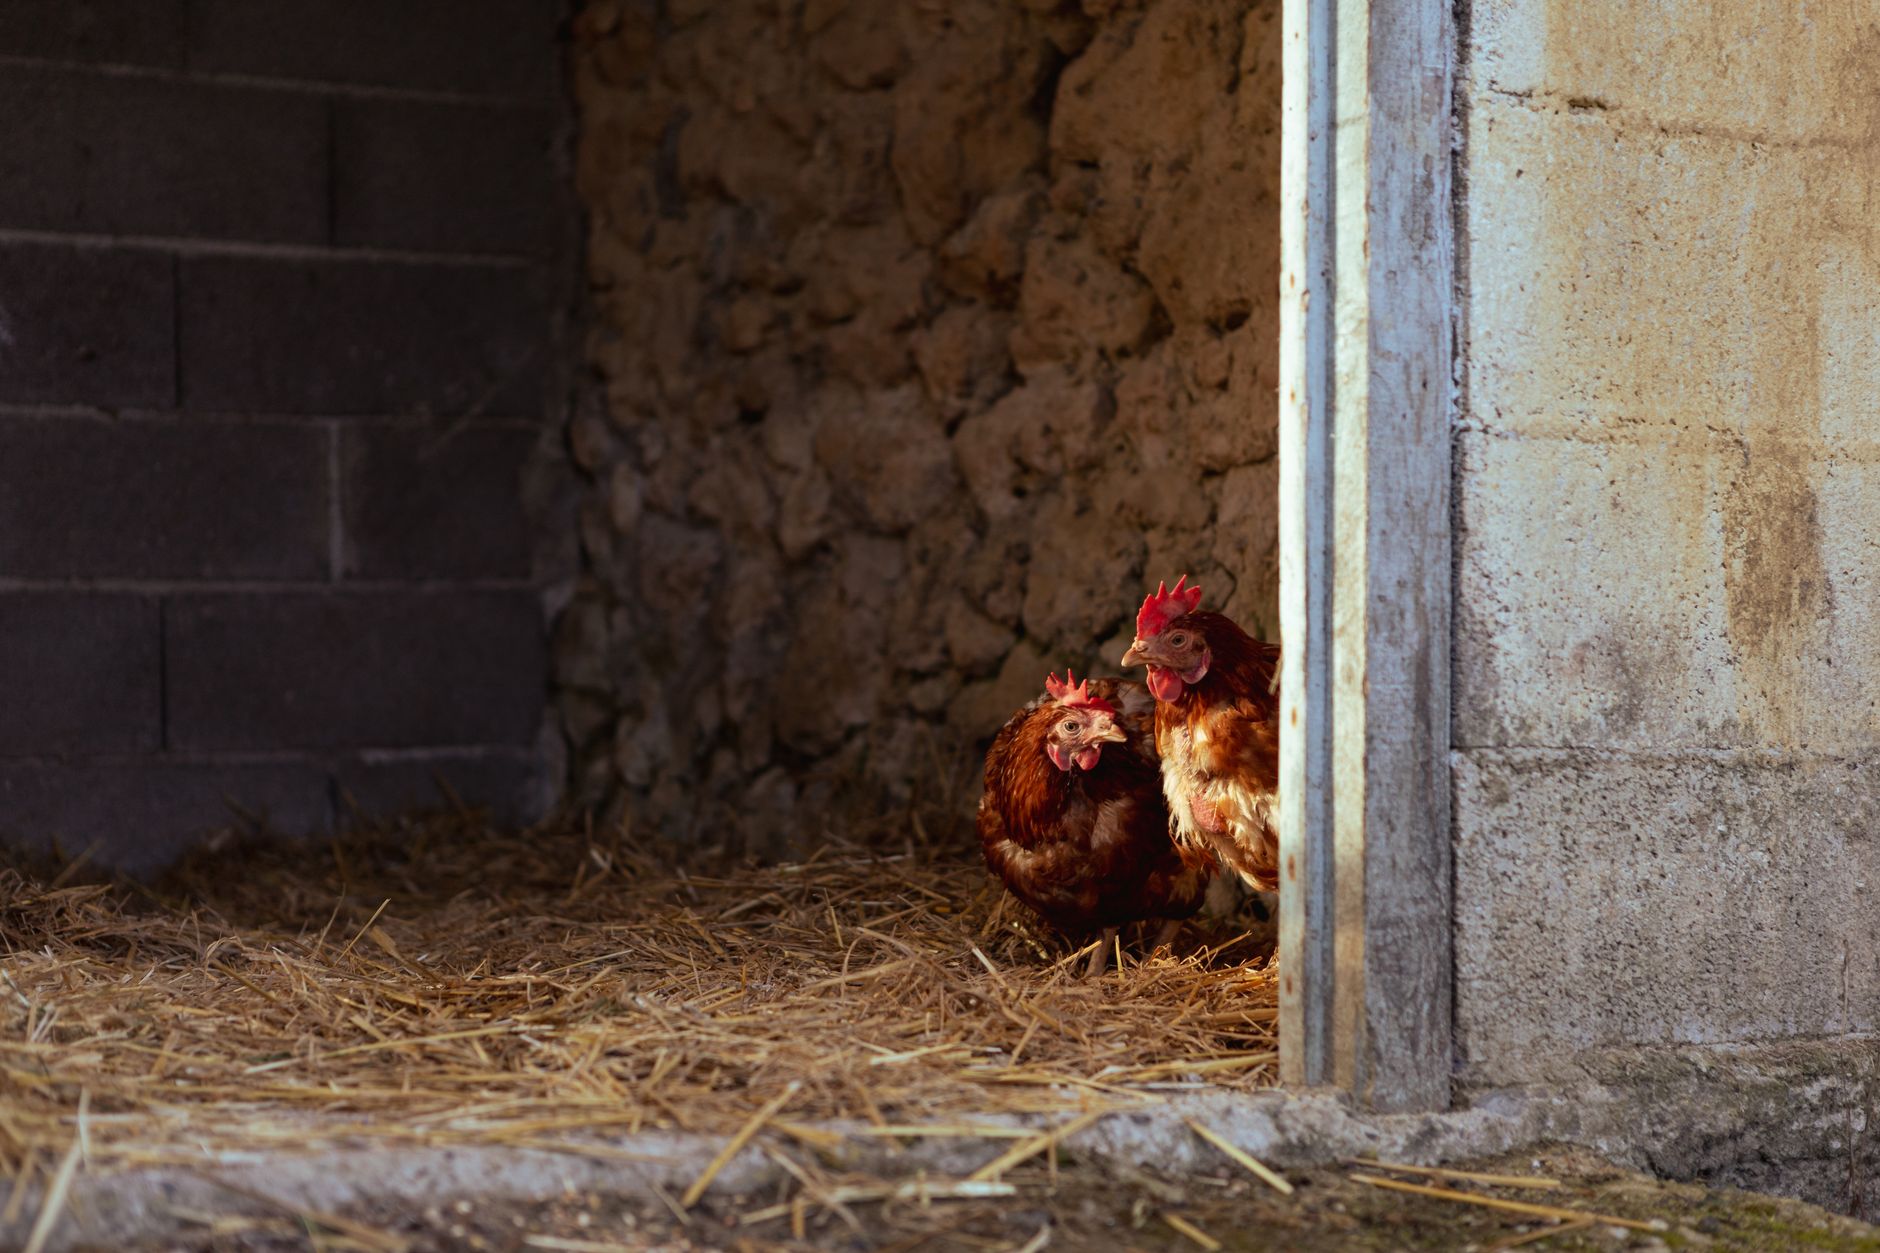
    Then one October morning, my kids found a massive spider web covered in dew out by the chicken coop. We spent forty-five minutes out there. Nobody planned it. Nobody scheduled it. And it was one of the best nature study moments we’ve ever had.

    That’s when it clicked for me. The seasons are the curriculum. The year itself is the rhythm. We just have to slow down enough to notice it.

    So if you’re looking for seasonal living ideas for families that don’t require a Pinterest-perfect home or a $200 seasonal basket — you’re in the right place. This is what it actually looks like at our house.


    What Seasonal Living Actually Means (It’s Simpler Than You Think)

    Seasonal living isn’t an aesthetic. It’s not a fall tablescape or matching linen aprons. It’s just the practice of letting the time of year shape what you do, what you eat, what you notice, and what you celebrate.

    For our family, that means our days look different in July than they do in January. Our morning baskets shift. Our outside time shifts. Even what we’re cooking shifts. And our kids feel that — even without being told about it.

    If you want to dig into how this connects to your daily flow, I wrote more about it in Family Rhythm vs Routine: What Actually Works (and Why the Difference Matters More Than You Think). But the short version is: rhythm is gentler than routine, and seasons give you rhythm for free.


    Fall: Slower Mornings and Noticing the Shift

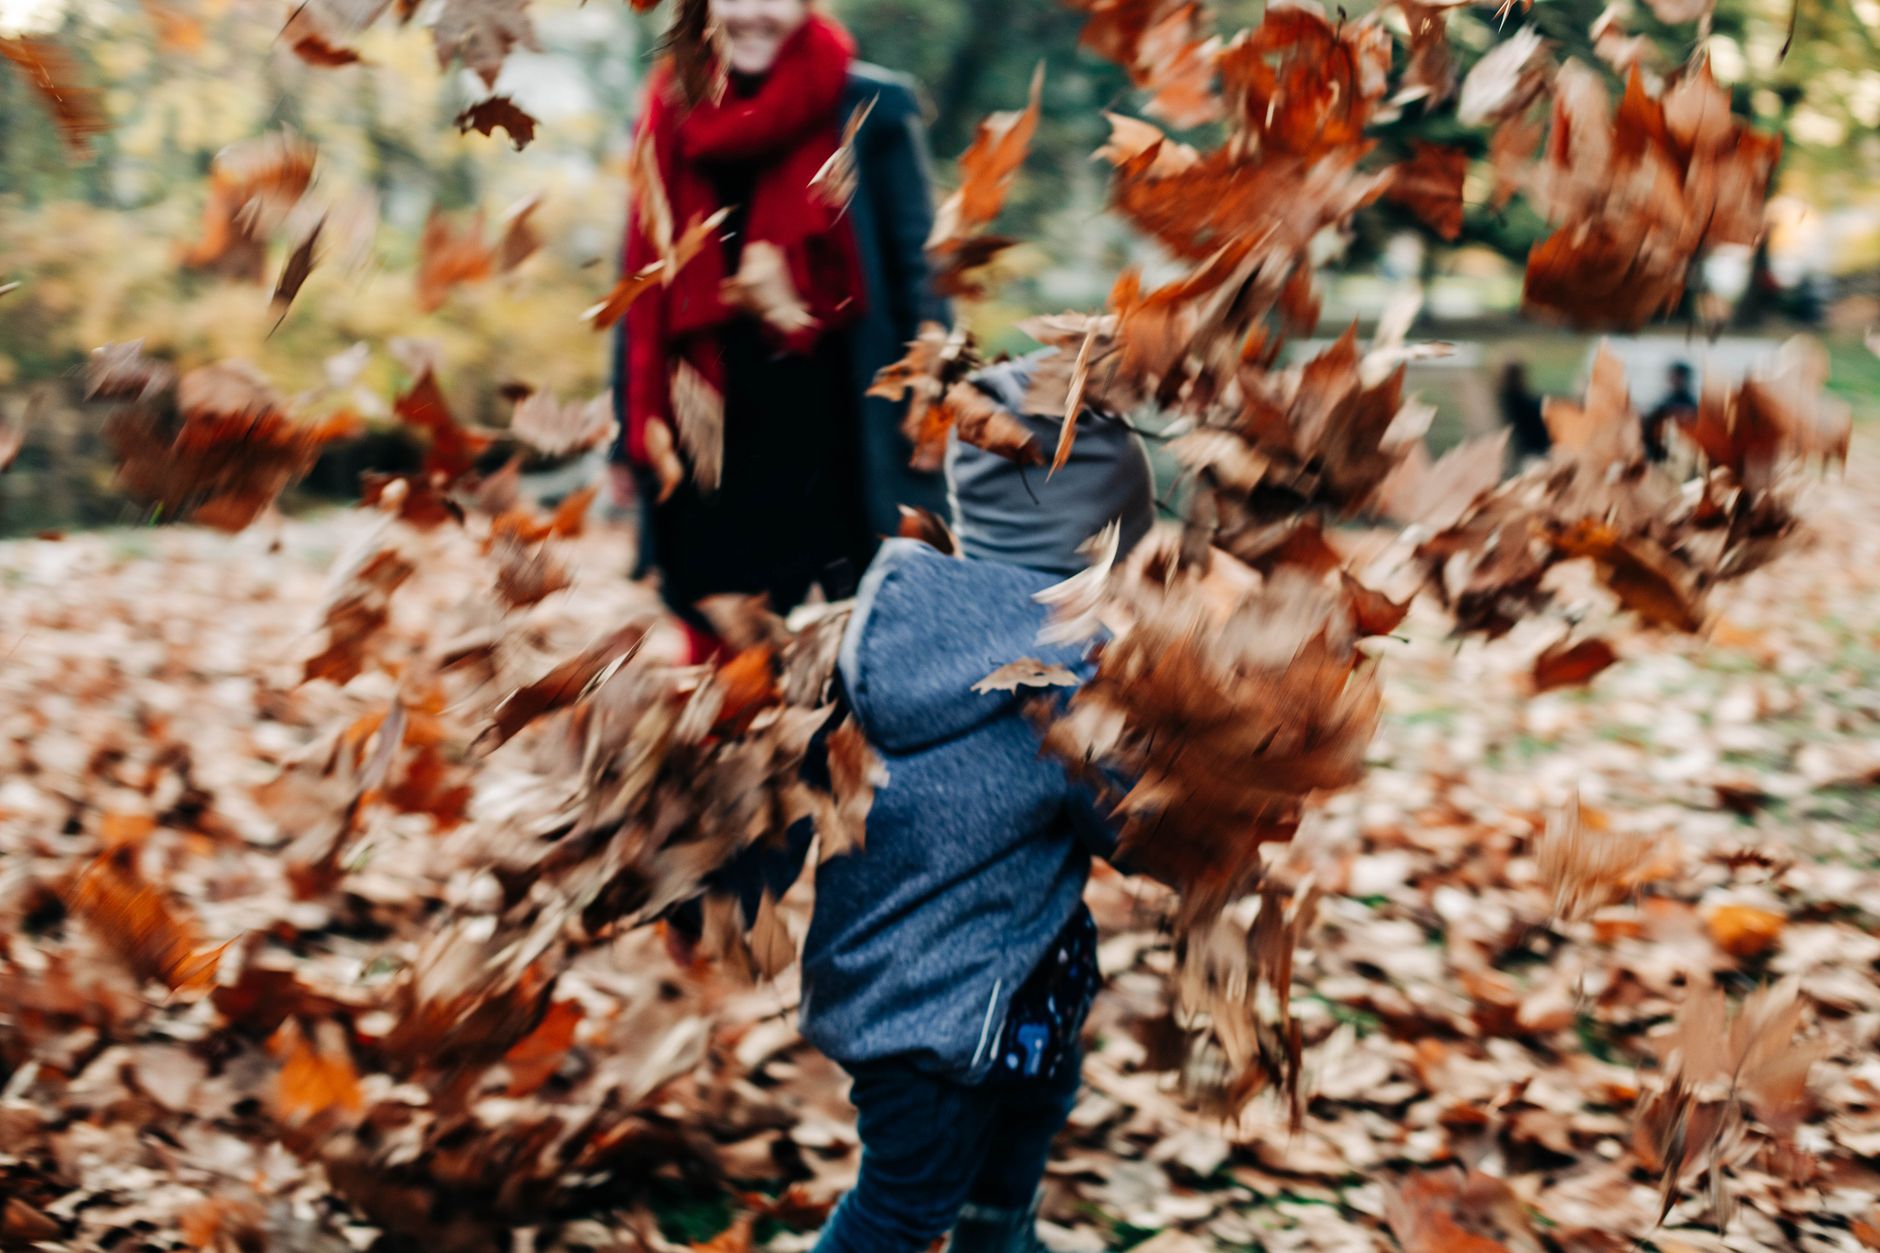
    Here in Pensacola, fall doesn’t look like Vermont. I’ll just say that upfront. We’re not getting a blaze of orange and red in September. But around October and into November, something does shift — the light gets softer, the humidity backs off, and the mornings are finally breathable again.

    We feel it. The kids feel it. Even the chickens seem a little more cheerful.

    What we actually do in fall:

    • Pull the nature journals back out and do a dedicated observation walk. The nature journal I’ve linked here is the one we’ve used for two years — simple, durable, perfect for elementary ages.
    • Watch for migratory birds. Northwest Florida is right in the flyway, and it is spectacular if you know to look. We keep the Sibley Birds guide on the kitchen windowsill this time of year.
    • Start composting in earnest — fall yard waste is gold. If you haven’t started a compost system yet, I’ve got a whole beginner’s guide: How to Build a Simple Compost Bin for Beginners (No Skills Required).
    • Let the kids spend more time outside in the afternoons. After months of noon heat that sends us all indoors, fall afternoons feel like a gift. We lean into it hard.

    Winter: Cozy, Quiet, and Honestly Underrated

    Winter in Northwest Florida is mild but real. We get genuine cold snaps — sometimes into the twenties overnight — and we absolutely make a big deal of it. When you live somewhere that’s hot eight months of the year, a cold gray week feels like an event.

    What winter looks like for us:

    • More slow mornings with hot cocoa and read-alouds. This is when we get through the thicker history books and longer chapter books as a family.
    • Watercolor painting at the table. Faber-Castell watercolors are our go-to — non-toxic, true colors, and they last forever with elementary kids.
    • Seed planning for the spring garden. We pour over seed catalogs and talk about what we want to grow. A seed starting kit makes it hands-on even when it’s too cold to do much outside.
    • Keeping an eye on the chickens during cold snaps. Florida cold is still cold for a flock used to heat. We check on ours more often in January and February, and it’s a great teaching moment for the kids about animal stewardship. If you’re newer to keeping chickens, Storey’s Guide to Raising Chickens has a solid section on cold weather care.

    📌 Love this? Save it to Pinterest so you can find it later!


    Spring: The Season That Does the Most Work For You

    If you want to try seasonal living and you don’t know where to start — start in spring. It basically sells itself.

    Everything is waking up, everything is blooming, and kids are naturally drawn outside. In Florida, spring comes early. By February we’re seeing azaleas. By March the kids are outside barefoot most of the day.

    Spring seasonal living ideas for families:

    • Nature journaling with a focus on what’s new. What flowers just appeared? What birds are nesting? Pull out a pocket microscope and let the kids look at flower structures, soil, pond water — anything. Genuine science, zero worksheet required.
    • Bug season is prime here in Northwest Florida. Get a bug collection kit and let your kids loose. This is the closest thing to a 1990s childhood I can manufacture on purpose — just kids outside, catching things, being curious.
    • Start the garden for real. Get the kids their own garden gloves and give them their own plot, even if it’s just a pot. Ownership changes everything.
    • Check in with your Charlotte Mason nature study rhythm. I’ve written a whole post of seasonal journal prompts that might be helpful: Charlotte Mason Nature Study Journal Prompts by Season (For Real Kids Who’d Rather Be Outside).

    Summer: Lean Into the Wildness

    Okay, Florida summer is intense. I’m not going to sugarcoat it. By June, we are back inside by 11am most days. The heat is not a joke.

    But here’s what I’ve learned: summer is not a season to fight. It’s a season to surrender to.

    What that looks like for us:

    • Early mornings outside — like, really early. Before 9am, outside. After 10am, inside or in the shade. We do morning chores with the chickens, water the garden, take a short walk. Then we come in.
    • Slower school days with more afternoon quiet time. This is when audiobooks, nature journals, and independent reading really shine.
    • Evening outdoor time is sacred. After dinner, when the heat breaks a little, we go back outside. Lawn games, backyard exploring, catching lightning bugs — it’s the closest thing to a classic summer evening we can get.
    • Letting the kids be bored. I mean this sincerely. Boredom is a feature, not a bug. Some of the most creative afternoons in our house have started with “I’m bored.” We don’t fix it for them.

    A Few Things That Make Seasonal Living Stick

    You don’t need a seasonal subscription box or a color-coordinated nature table (though I will not stop you if that’s your thing). What actually makes seasonal living stick is repetition over years.

    When your kids remember that every October you look for migratory birds, that every February you start seeds together, that every summer you have slow mornings and wild evenings — that’s when it becomes part of who your family is.

    And honestly? That’s the whole goal. Not a perfect Instagram moment. Just a family that knows what season they’re in and lives like it matters.

    If you’re thinking about how to weave this more intentionally into your home life, my post on Intentional Parenting: What It Actually Looks Like Day to Day is a good companion read.


    We are not a family who does everything beautifully. Our nature journals have scribbles in them. Our garden has weeds. The chickens occasionally escape and our labradoodle loses her mind about it. But we are a family who pays attention to the year, who lets the seasons set the pace, and who believes that a childhood shaped by the natural world is worth fighting for — even in the Florida heat.

    I hope something in here gives you a starting point, or permission to slow down, or just the reminder that you don’t have to do it perfectly for it to matter. You really don’t.


    📖 You Might Also Like:

    Frequently Asked Questions

    What is seasonal living for families?

    Seasonal living for families is the practice of letting the rhythm of the natural year shape your daily life — what you eat, how you spend your time, what you study, and what you celebrate. It doesn’t have to be elaborate. Even small things like planting a spring garden, watching for migrating birds in fall, or doing more slow indoor activities in winter help your family feel connected to the world around them.

    How do you practice seasonal living in Florida when the seasons aren’t very distinct?

    Florida seasons are real — they’re just subtle. In Northwest Florida, fall brings migratory birds and cooler mornings, winter has genuine cold snaps, spring arrives early with wildflowers and bug season, and summer means intense heat that shapes your whole daily schedule. The key is learning to notice the smaller shifts: the light changing, the wildlife moving, the garden responding. Once you start looking, you’ll find the seasons everywhere.

    What are some simple seasonal activities for elementary-age kids?

    Simple seasonal activities for elementary kids include keeping a nature journal with seasonal observations, starting seeds indoors in late winter, bug collecting in spring and summer, bird watching during fall migration, watercolor painting of seasonal scenes, and tending a backyard garden. The goal is less about structured activities and more about building habits of noticing and engaging with the natural world across the year.

    How does seasonal living connect to Charlotte Mason homeschooling?

    Charlotte Mason’s philosophy is deeply rooted in nature study and living books — both of which connect naturally to seasonal living. She believed children should spend significant time outdoors observing the natural world, keeping nature journals, and developing a real relationship with their environment. Letting the seasons guide your homeschool schedule, nature study focus, and even your read-alouds is a very Charlotte Mason approach to education.

    Do I need to spend a lot of money to practice seasonal living with my family?

    Not at all. The core of seasonal living is attention and presence, not purchases. A nature journal, a field guide, and time outside are really all you need to start. Beyond that, seasonal cooking with what’s in season locally, planting a small garden, and simply adjusting your daily schedule to match the weather and daylight are all free. The investment is mostly time and intention, not stuff.

  • How to Build a Simple Compost Bin for Beginners (No Skills Required)

    How to Build a Simple Compost Bin for Beginners (No Skills Required)

    How to Build a Simple Compost Bin for Beginners (No Skills Required)

    🌿 The Short Version: Building a compost bin doesn’t require fancy supplies, special skills, or a lot of space — just a few materials, a corner of your yard, and a little patience. This post walks you through the simplest setup that actually works, plus how to get your kids involved so composting becomes part of your family’s everyday rhythm.

    This post contains affiliate links. I may earn a small commission at no extra cost to you.

    For the longest time, I had a pile of good intentions sitting right next to my back door. Literally. Every time I peeled a banana or trimmed green beans, I’d think, I really should be composting this. Then I’d toss it in the trash and feel a little guilty about it.

    The thing is, I’d always pictured composting as something that required a special bin, a complicated system, and some kind of degree in soil science. It seemed like one of those things other people did — the really organized homesteaders with Pinterest-perfect setups and color-coded turning schedules.

    Y’all. It is so much simpler than that.

    Once I actually built our first compost bin — like, a real physical structure I could toss scraps into — it clicked. Now composting is just part of our daily rhythm, the kids fight over who gets to dump the kitchen bucket, and our backyard chickens have the most beautiful soil in the whole neighborhood. Here’s exactly how we got there.


    Why Bother Building a Bin at All?

    You can just compost in a pile on the ground. Plenty of people do. But a simple bin keeps things contained (important if you’ve got a dog — our mini labradoodle would absolutely riot in an open pile), holds in some moisture, and helps the pile heat up faster, which means finished compost sooner.

    Down here in Northwest Florida, heat is already on our side for most of the year. A contained bin just helps us use that to our advantage.

    And honestly? A bin makes it feel more intentional. More like a system. Which means we actually use it.


    The Simplest Compost Bin You Can Build This Weekend

    What You’ll Need

    There are about a dozen ways to build a compost bin, but I’m going to give you the one that requires the least skill, the least money, and the least time — because that’s the one you’ll actually do.

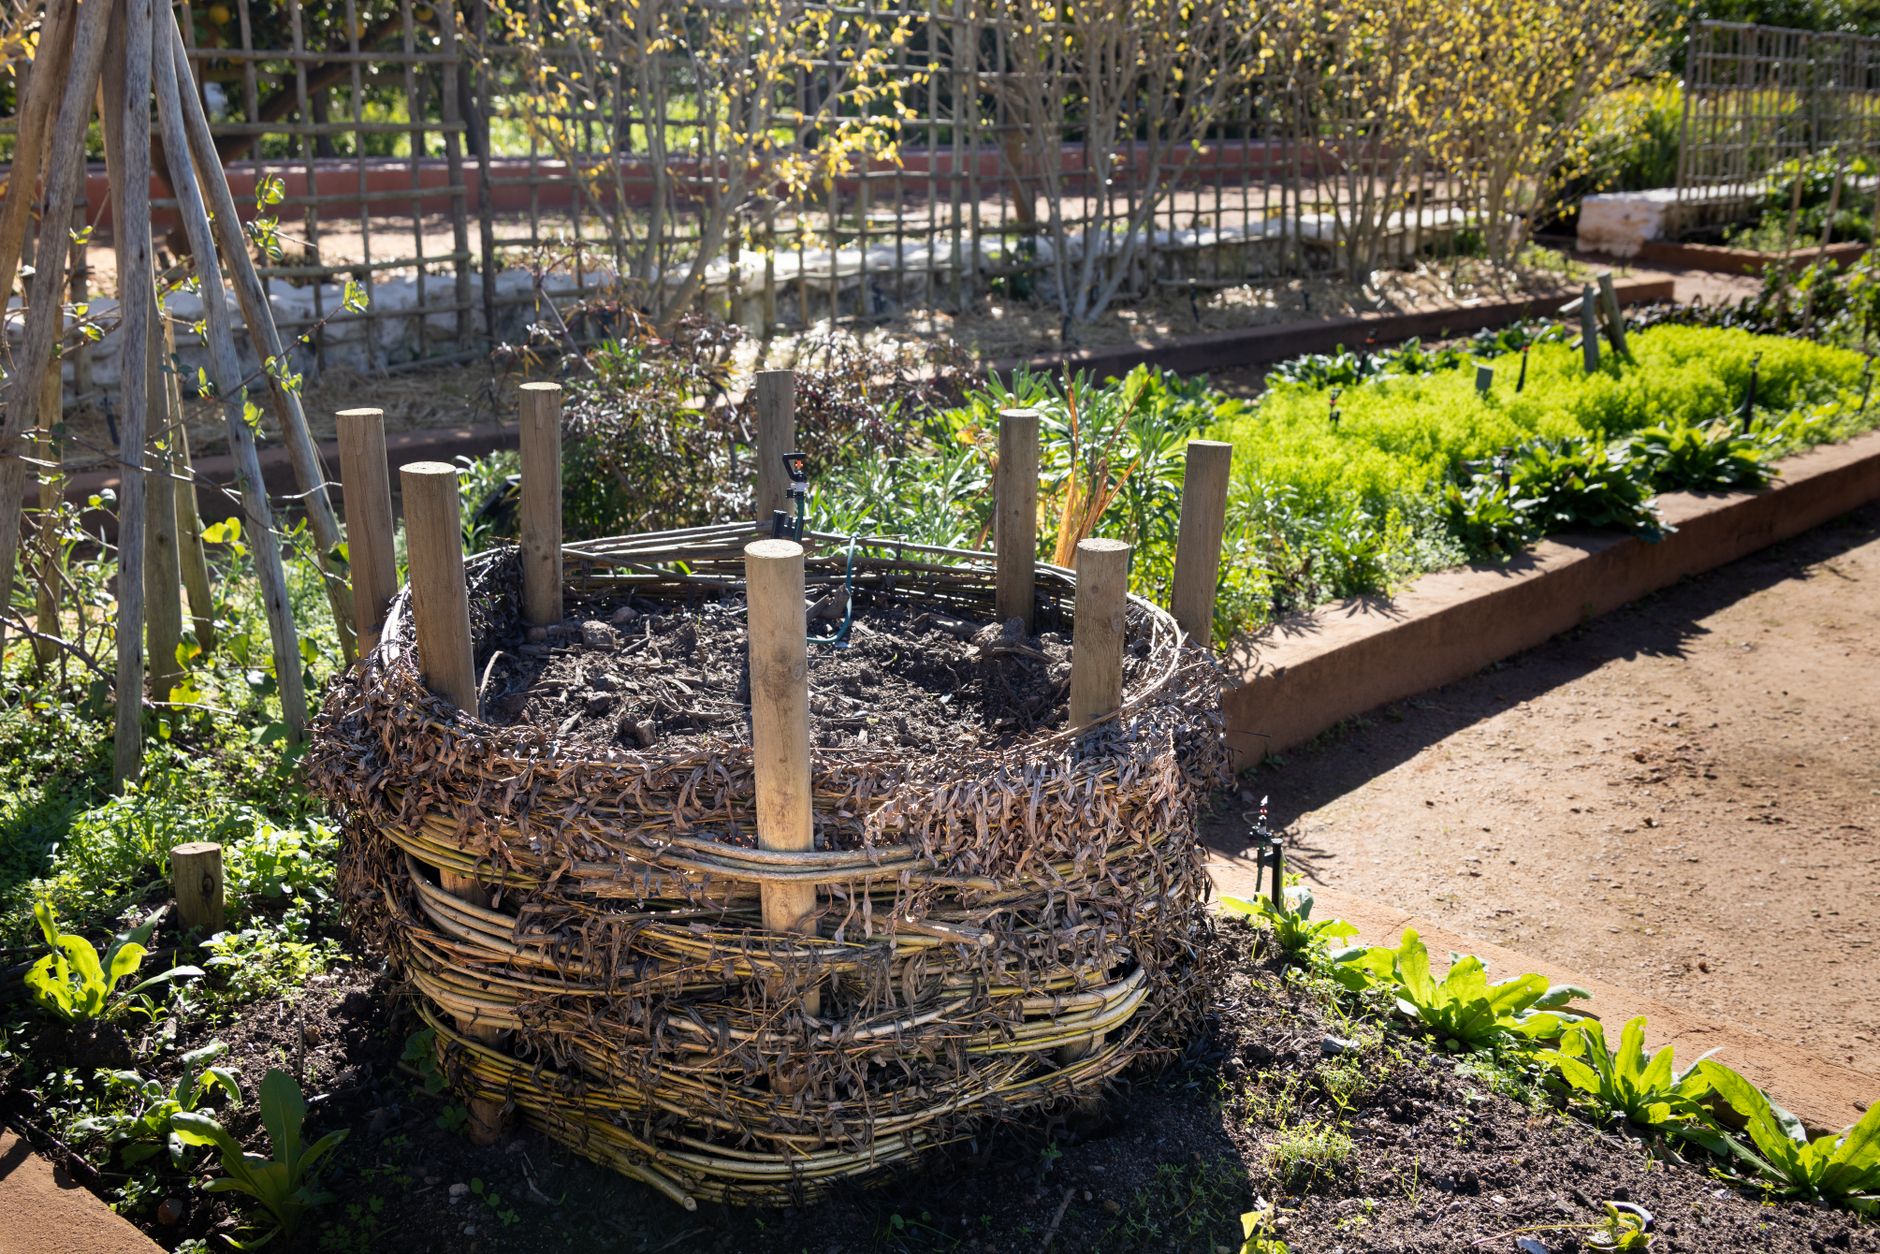
    Option 1: Wire Hoop Bin (Our Favorite for Beginners)

    This is our go-to. It takes about 20 minutes to put together and costs next to nothing if you already have some wire fencing lying around.

    • 10 feet of hardware cloth or welded wire fencing (about 3–4 feet tall)
    • 3–4 wooden stakes or metal T-posts
    • Zip ties or wire to connect the ends
    • Work gloves (wire edges are poky — grab some kids’ garden gloves if the littles are helping)

    Just form the wire into a circle, secure the ends together, and pound your stakes in around the outside for support. That’s it. You’ve got a compost bin.

    Option 2: Wooden Pallet Bin

    If you want something sturdier and more permanent, grab 3–4 wooden pallets (most feed stores and hardware stores give these away free), stand them upright in a U-shape, and wire them together at the corners. Leave the front open or add a fourth pallet that can be removed for easy turning. This is a great Saturday project to do with older kids.

    Option 3: A Purchased Bin

    No shame in this at all. A good kitchen compost bin for countertop scraps plus a basic outdoor tumbler is a perfectly valid setup, especially if you’re short on yard space or time. We use a small countertop bin to collect scraps through the week and then transfer to the outdoor bin — it makes the whole process a lot less messy.


    What Goes In (and What Doesn’t)

    This is the part that trips people up the most, so let’s keep it simple.

    Greens (nitrogen-rich):

    • Fruit and vegetable scraps
    • Coffee grounds and filters
    • Fresh grass clippings
    • Chicken manure and bedding (yes — this is liquid gold from our girls)
    • Fresh plant trimmings

    Browns (carbon-rich):

    • Dry leaves
    • Cardboard (torn up, no glossy coatings)
    • Paper bags and newspaper
    • Straw or pine shavings from the chicken coop
    • Dry garden debris

    The basic rule is to aim for roughly 2–3 parts browns to every 1 part greens. If your pile smells bad, add more browns. If it’s not breaking down, it might need more greens or more moisture.

    Don’t add: meat, dairy, cooked food with oils, diseased plants, or dog/cat waste.


    Getting Kids Involved (The Best Part)

    This is genuinely one of our favorite nature study activities, and it requires zero prep on my end. Kids are naturally fascinated by decomposition — it’s basically science magic happening right in the backyard.

    We keep a small kitchen compost bin on the counter, and it’s become one of the kids’ daily jobs to carry it out and dump it. My youngest calls herself the Compost Queen. I’m not going to argue.

    For a little more structured nature study, we’ve used a pocket microscope to look at compost material up close — the fungi and tiny organisms you can see are absolutely wild. Pair that with some sketching in a nature journal and you’ve got a full Charlotte Mason science lesson without opening a single textbook. We also keep a bug collection kit handy for when we find something interesting while turning the pile.

    If you want more ideas for weaving this kind of daily hands-on work into your kids’ lives without it feeling like school, check out our post on How to Involve Kids in Homestead Chores by Age (Without the Whining or the Burnout). Spoiler: the trick is making it feel less like a chore and more like a role.


    📌 Love this? Save it to Pinterest so you can find it later!


    How to Actually Maintain It (Without Overthinking It)

    Here’s the secret: you don’t have to be perfect at this. A compost pile will do its thing even if you’re not turning it on a schedule or monitoring the moisture levels obsessively.

    That said, a few easy habits make it work a lot better:

    Turn It Occasionally

    Every couple of weeks (or whenever you remember), use a pitchfork or shovel to mix the pile up. This introduces oxygen and speeds up decomposition. In the Florida heat, things break down fast — sometimes we’ve had usable compost in as little as 6–8 weeks in the summer.

    Keep It Moist, Not Wet

    The pile should feel like a wrung-out sponge. Down here, summer rain usually handles this for us. In the drier winter months, you might need to water it a little.

    Layer as You Go

    When you add kitchen scraps, try to cover them with a layer of browns. This keeps smells down (important if your bin is near the back door) and helps balance the pile.

    And if you want to take things even further, consider adding a worm composting bin for kitchen scraps — vermicomposting produces incredibly rich castings and is a great companion to a regular outdoor pile. We wrote a whole post on that: Best Worm Composting Bin for Beginners (What Actually Works and Why We Love It).


    How the Chickens Fit In

    If you’ve got backyard chickens, composting and chicken keeping go hand in hand in the best possible way. Chicken manure and bedding are some of the richest compost ingredients you can add, and the finished compost goes right back into the garden beds that grow food for the family.

    We let our girls scratch through the older parts of the pile occasionally — they eat bugs, turn the material, and seem deeply satisfied with themselves afterward. It’s a whole little ecosystem happening right behind our house.

    For more on keeping a healthy flock without a lot of fuss, Storey’s Guide to Raising Chickens is the book I recommend to every new chicken keeper. It covers everything from manure management to coop setup in a way that’s actually readable.


    You Don’t Need a Perfect System — You Just Need to Start

    Here’s what I want you to take away from this: the best compost bin is the one you actually build and use. It doesn’t have to be pretty. It doesn’t have to be Pinterest-worthy. Ours is a slightly lopsided wire hoop in the corner of the yard, and I love it.

    This is the kind of slow, purposeful, real thing I want my kids growing up doing. Turning scraps into soil. Watching things break down and become something useful again. Understanding in a very concrete way that nothing is wasted. That’s the 1990s-style childhood I’m always chasing — not the nostalgia, but the substance of it. Getting your hands in the dirt and knowing that what you do actually matters.

    Start with whatever materials you have. Make it simple. Get the kids involved. The rest will follow.


    📖 You Might Also Like:

    Frequently Asked Questions

    What is the easiest compost bin to build for beginners?

    The simplest option is a wire hoop bin — just form a circle with hardware cloth or welded wire fencing, secure the ends with zip ties, and stake it in place. It takes about 20 minutes to set up, costs very little, and works really well. If you want something sturdier, three wooden pallets wired together in a U-shape is another great beginner option that requires no special tools or skills.

    What should you not put in a compost bin?

    Avoid adding meat, fish, dairy, cooked foods with oils or sauces, pet waste (dog or cat), and diseased plants. These can attract pests, create odors, or introduce pathogens into your compost. Stick to raw fruit and vegetable scraps, coffee grounds, dry leaves, cardboard, and yard waste for best results.

    How long does it take for compost to be ready?

    It depends on your climate, how often you turn the pile, and what you’re adding. In a warm, humid climate like Northwest Florida, a well-managed pile can produce usable compost in as little as 6–8 weeks in the summer. In cooler weather or with less turning, it might take 3–6 months. You’ll know it’s ready when it looks dark, crumbly, and smells like earthy soil.

    Can you compost chicken manure?

    Yes — and it’s fantastic for your compost pile! Chicken manure is nitrogen-rich and breaks down beautifully when mixed with carbon-rich browns like straw, dry leaves, or cardboard. If you have backyard chickens, the used bedding from your coop is some of the best material you can add. Just make sure it gets well mixed and has time to decompose before adding it directly to garden beds.

    How do I keep my compost bin from smelling bad?

    A smelly compost bin usually means one of two things: too many greens (nitrogen-rich materials) without enough browns to balance them, or too much moisture. The fix is usually simple — add a layer of dry leaves, torn cardboard, or straw on top of any fresh scraps you add, and give the pile a turn to introduce some airflow. Aim for a ratio of roughly 2–3 parts browns to 1 part greens, and make sure your bin has some drainage so it doesn’t get waterlogged.

  • Best Living History Books for Elementary Homeschool (That Kids Actually Want to Read)

    Best Living History Books for Elementary Homeschool (That Kids Actually Want to Read)

    Best Living History Books for Elementary Homeschool (That Kids Actually Want to Read)

    🌿 The Short Version: Living history books replace dry textbook facts with stories that pull kids in and make the past feel real. This is our family’s curated list of the best living books for elementary homeschool history — Charlotte Mason-style, tried-and-true, and genuinely loved by our kids.

    This post contains affiliate links. I may earn a small commission at no extra cost to you.

    If you’ve ever watched a kid’s eyes glaze over during a history lesson, you already know the problem. Dates. Bullet points. Textbook summaries that suck all the life out of something that was actually pretty remarkable. I’ve been there. I handed my oldest a traditional history workbook once and she looked at me like I’d asked her to sort feed corn. Hard pass.

    The Charlotte Mason approach fixed all of that for us — not by dumbing history down, but by letting real storytelling do the heavy lifting. Charlotte Mason called them “living books” — books written by authors who genuinely loved their subject and could make you feel like you were there. And once we made the switch? History became one of our favorite subjects. We read aloud under the oak tree in the backyard, our chickens scratching around nearby, our labradoodle sprawled across someone’s feet, and nobody was watching the clock.

    If you’re homeschooling in Florida or anywhere else and you’re ready to ditch the textbook, this list is for you.


    What Makes a Book a “Living History Book” Anyway?

    A living history book is one that reads like a story, not a report. It’s written with personality and passion. It pulls you into the time period instead of just describing it from the outside. Charlotte Mason believed that children learn best through rich narratives, and honestly? She was right. This is basically the 1990s way of learning — fewer worksheets, more stories, more imagination.

    A good living history book will:

    • Have a real human being (or animal!) at the center of the story
    • Use descriptive, vivid language — not dry summaries
    • Be written by someone who genuinely cared about the subject
    • Leave your kid with feelings about history, not just facts

    For pairing with your Charlotte Mason nature study, check out our Charlotte Mason Nature Study Journal Prompts by Season (For Real Kids Who’d Rather Be Outside) — history and nature study honestly work together beautifully in our rhythm.


    Our Favorite Living History Books by Time Period

    American History

    The Little House Series by Laura Ingalls Wilder — This is the gold standard for living books about 19th-century American life. Frontier living, family rhythms, hard work, and real joy. My kids ask for “just one more chapter” every single time. The whole series covers westward expansion in a way no textbook ever could.

    The Courage of Sarah Noble by Alice Dalgliesh — A short, powerful story about a young girl who travels with her father into the Connecticut wilderness in the 1700s. Great for K-2. Finishes in just a few read-aloud sessions and always sparks conversation.

    Johnny Tremain by Esther Forbes — Older elementary (grades 4–5), but absolutely worth it for the American Revolution. The writing is rich and the characters are compelling. One of those books that sticks with you.

    Amos Fortune, Free Man by Elizabeth Yates — A Newbery Medal winner about an African man captured into slavery who eventually earns his freedom. Honest, dignified, and beautifully written. This is not a comfortable book and it shouldn’t be. It’s the kind of story that changes how kids see history.

    Ancient History

    The Golden Goblet by Eloise Jarvis McGraw — Ancient Egypt through the eyes of a young goldsmith’s apprentice. Suspenseful and immersive. My daughter read this in two days flat and then asked if we could study hieroglyphics. Yes, please.

    The Bronze Bow by Elizabeth George Speare — Set in ancient Israel during the time of Roman occupation. A beautifully written coming-of-age story. Best for grades 4 and up. Another Newbery winner that earns its medal.

    Medieval History

    Adam of the Road by Elizabeth Janet Gray — A 13th-century minstrel boy traveling through medieval England. Rich with detail, warm in tone, and genuinely adventurous. Great for grades 3–5.

    Catherine Called Birdy by Karen Cushman — Middle ages through the eyes of a spirited teenage girl who does NOT want to get married off. Funny, feisty, and packed with historical detail. Slightly older (grades 4–5), but kids who like humor eat this up.

    World History

    Mara, Daughter of the Nile by Eloise Jarvis McGraw — Ancient Egypt again, but this one is more of a spy thriller. Older elementary loves this one.

    The Wheel on the School by Meindert DeJong — Set in a small Dutch fishing village. It’s not action-packed, but it’s deeply human and teaches kids so much about community, perseverance, and cooperation. A quiet favorite in our home.


    📌 Love this? Save it to Pinterest so you can find it later!

    How We Use Living Books in Our Homeschool Day

    We don’t read living history books and then fill out worksheets about them. That kind of defeats the purpose. Instead, we:

    Read aloud together. Most of these books I read aloud to my kids. There’s something about hearing a story told out loud that lands differently than reading silently. Our mornings often start with a chapter before anything else.

    Narrate instead of test. Charlotte Mason used narration — just asking your child to tell back what they heard. No quiz, no worksheet. Just “what happened?” or “tell me about Amos.” The retelling itself is the learning.

    Draw and paint scenes. After a chapter that really landed, we’ll get out the Faber-Castell watercolors and paint a scene. A medieval road. A covered wagon. The Nile at sunset. It deepens the memory without feeling like school.

    Add to the nature journal. If a book mentions plants, animals, or weather patterns from a specific region or era, we sketch them in our nature journal. History and nature study crossing paths is one of my favorite things about Charlotte Mason.

    Let them just absorb it. Sometimes a book just does its job quietly. Kids will bring up a character weeks later at dinner, or connect something they read to something they see outside. That’s living education working exactly the way it’s supposed to.

    For more on building a rhythm that fits your family — not someone else’s schedule — Family Rhythm vs Routine: What Actually Works is worth a read.


    A Few Practical Tips for Florida Homeschool Families

    If you’re using the Florida PEP scholarship, living books absolutely count toward your curriculum spending. Many of these titles are available through vendors like Rainbow Resource and Timberdoodle, both of which are PEP-eligible suppliers. Stock up — a great book library is one of the best investments you’ll make in your homeschool.

    Also — if you’re newer to homeschooling in Florida and still figuring out your legal setup, Florida Homeschool Umbrella School Options Explained is the clearest breakdown I’ve written on the subject.

    One more thing: reading aloud outside is always better than reading inside, especially in fall and winter here in Northwest Florida when the weather is actually perfect. Grab a blanket, let the kids sit in the grass, and read a chapter while they fidget and listen and absorb more than you think they are. It’s the 1990s childhood approach to education — low-tech, high-relationship, and it works.


    Wrapping It Up

    Honestly, living history books changed everything about how history feels in our homeschool. My kids talk about these characters like they knew them. They care about what happened. They ask questions. They want to know more. That’s exactly what a history education should do — not produce kids who can fill in a timeline, but kids who understand that real people made real choices in real moments that shaped the world they’re living in now.

    Start with one book. Read it aloud. See what happens. I think you’ll be surprised.


    📖 You Might Also Like:

    Frequently Asked Questions

    What is a living history book in Charlotte Mason homeschool?

    A living history book is a book written with passion and narrative storytelling that pulls readers into a time period rather than just listing facts. Charlotte Mason believed children learn best through rich stories written by authors who genuinely love their subject, rather than dry textbook summaries. These books have real characters, vivid language, and make history feel personal and meaningful.

    What are the best living history books for elementary-age kids?

    Some of the most beloved living history books for elementary homeschool include the Little House on the Prairie series, Johnny Tremain, The Courage of Sarah Noble, Amos Fortune Free Man, The Golden Goblet, Adam of the Road, and The Bronze Bow. These titles span American history, ancient history, and medieval history and are staples in Charlotte Mason homeschool communities.

    Can I use living books to meet Florida homeschool requirements?

    Yes. Florida law requires that homeschool families provide a sequentially progressive curriculum of fundamental skills, and living books absolutely count as part of your history and language arts instruction. If you’re using the Florida PEP scholarship, many of these books can be purchased through PEP-eligible vendors like Rainbow Resource or Timberdoodle.

    How do I use living history books without worksheets or tests?

    Charlotte Mason recommended narration — simply asking your child to tell back what they heard or read in their own words. This can be verbal, written, or even drawn. You can also pair books with artwork, map work, or nature journal entries connected to the time period. The goal is engagement and retention through relationship with the story, not rote recall.

    How many living history books should I use per school year?

    There’s no set number, but most Charlotte Mason-inspired families use one or two main living history books per term (roughly 12 weeks), supplemented by shorter picture books, biographies, or poetry from the same era. Quality and depth matter more than quantity — one book read slowly and discussed well is worth far more than five books skimmed through.

  • How to Involve Kids in Homestead Chores by Age (Without the Whining or the Burnout)

    How to Involve Kids in Homestead Chores by Age (Without the Whining or the Burnout)

    How to Involve Kids in Homestead Chores by Age (Without the Whining or the Burnout)

    🌿 The Short Version: Kids of every age can genuinely contribute to homestead life — and when the tasks are matched to their ability, they actually want to help. This post breaks down age-appropriate homestead chores from toddler through upper elementary so you can stop doing everything yourself and start raising capable, grounded kids.

    This post contains affiliate links. I may earn a small commission at no extra cost to you.

    Can I be honest with you for a second? There was a season where I was doing basically everything outside by myself — filling waterers, collecting eggs, checking the garden, hauling compost — while my kids played nearby. I thought I was protecting their free time. But what I was actually doing was accidentally teaching them that the homestead was my thing, not our thing.

    The shift happened gradually. My oldest started following me to the coop one morning just because she was curious, and I handed her the egg basket without thinking. She was so proud. That was it. That was the whole turning point.

    Kids genuinely want to contribute. They want to be needed. We just have to match the task to the kid — and have a little grace for the learning curve (and the occasional dropped egg).

    Here’s how we do it in our family, and what’s actually worked by age.


    Why This Matters More Than Just Getting the Work Done

    I grew up in the 90s where kids were just… outside. We helped with real things. We weren’t managed or scheduled into contribution — we were just there, and naturally got pulled in. That’s what I want for my kids.

    Beyond the practical help, involving kids in homestead chores builds something that’s genuinely hard to teach any other way: competence. A kid who knows how to care for a living thing, grow food, and manage a real task carries that confidence everywhere. It spills into their schoolwork, their relationships, their sense of self.

    It also fits beautifully into a Charlotte Mason approach, where learning happens through living — not worksheets. When my daughter is recording the chickens’ laying patterns in her nature journal, that is school. When my son is measuring feed, that’s math. It all counts.

    If you’re curious how this weaves into the bigger picture of our days, I wrote more about that in Intentional Parenting: What It Actually Looks Like Day to Day.


    Ages 2–4: Little Helpers Who Actually Help (Kinda)

    Toddlers want to do what you’re doing. Full stop. Use that window.

    At this age, the goal isn’t efficiency. It’s participation. Let them carry one egg (carefully). Let them pour a scoop of feed. Let them pull one weed. The task takes longer, yes. But you’re planting seeds — the kind that grow into a 10-year-old who just does the chores without being asked.

    Good tasks for this age:

    • Carrying a small basket to the coop
    • Dropping feed into the feeder with supervision
    • Watering a single container plant with a small can
    • Pulling a loose weed in the garden bed
    • Tossing kitchen scraps into the kitchen compost bin
    • Collecting eggs with you right beside them

    Keep it short, keep it fun, and resist the urge to redo everything they did. The mess is the lesson.


    Ages 5–7: Real Responsibility Starts Here

    This is the sweet spot. Kids this age are hungry for real work. They want jobs that matter. In Kindergarten and first grade especially, you can start handing off actual ownership of small tasks.

    In our home, this is the age when kids get their first solo coop chore — usually refilling the waterer or collecting eggs independently. We use a nipple-style chicken waterer that’s easy for little hands to manage, which helps a lot.

    Good tasks for this age:

    • Collecting eggs daily (their job, not yours)
    • Refilling feed or water with minimal help
    • Weeding a designated garden row
    • Watering the garden beds with a hose or watering can
    • Planting seedlings from a seed starting kit
    • Simple composting duties
    • Sweeping the porch or coop area

    This is also the age when nature observation starts getting really rich. A pocket microscope and a bug collection kit can turn a simple chore break into a full nature study session. We’ve had some of our best science moments just wandering around after chicken chores.

    📌 Love this? Save it to Pinterest so you can find it later!


    Ages 8–10: Growing Into Genuine Contribution

    By third through fifth grade, kids can take on tasks with real independence. This is where the homestead starts to feel like a team effort instead of a mama-does-it-all situation.

    My older kids at this age started reading Storey’s Guide to Raising Chickens with me — not as a school assignment, just because they were curious and wanted to understand why we do what we do. That’s the Charlotte Mason spirit right there. We also loved having them read Chick Days: An Absolute Beginner’s Guide to Raising Chickens when they were a little younger — it’s written right at their level and makes them feel like real experts.

    Good tasks for this age:

    • Full coop morning routine with little to no prompting
    • Monitoring flock health and reporting anything unusual
    • Deep-cleaning the coop with food-grade diatomaceous earth (we always talk about why we use it — no mystery chemicals here)
    • Garden planting, weeding, and basic pest management
    • Starting to learn about egg preservation — we’ve got a great post on How to Preserve Eggs Long Term Without Refrigeration that older kids can actually read and follow
    • Mixing simple cleaning solutions
    • Keeping a nature or farm journal with drawings and observations

    For the journaling piece, Faber-Castell watercolors have been our go-to for nature illustrations. They’re good quality without being precious, which matters when you’ve got muddy hands half the time.

    If your kids are getting serious about bird observation — which happens naturally when you have backyard chickens and start noticing what comes to visit — the Sibley Birds field guide is worth having on the shelf. We keep ours near the back door.


    A Note on Making It Work in Florida

    Here in Northwest Florida, we have to think about chores a little differently by season. Summer mornings are non-negotiable — if we’re not out by 8am, the heat index makes everything miserable by 9. So our homestead chores front-load early, and afternoons are for indoor schoolwork or shaded free play.

    We also use an automatic coop door which has been a total game-changer for those mornings when we’re running slow — but the kids still do the rest of the coop routine themselves. It’s a good middle ground.

    For outdoor chore time, I always make sure they’ve got non-toxic sunscreen on and real kids’ rain boots — Florida mud and fire ant mounds are real, y’all. Don’t skip the boots.


    Tips for Making Chores Actually Stick

    A few things that have made the difference for us:

    Give them real ownership, not just tasks. There’s a difference between “go help with the chickens” and “the chickens are your responsibility before breakfast.” Kids rise to ownership.

    Don’t redo their work in front of them. If the waterer isn’t perfectly full, let it be. If you silently fix it every time, they learn their effort doesn’t count.

    Let natural consequences teach. Forgot to collect eggs and one got stepped on? That’s the lesson. You don’t need to add a lecture.

    Build it into your rhythm, not a rigid schedule. We’re not a rigid-routine family — more of a rhythm family. If you want to think more about that distinction, I wrote about it in Family Rhythm vs Routine: What Actually Works.

    Make it normal, not optional. We don’t ask if they want to do chores any more than we ask if they want to eat dinner. It’s just part of our day. That framing alone removes about 80% of the resistance.


    This Is the Stuff They’ll Remember

    I really believe this. Someday my kids will be grown, and they will remember the mornings in the coop. The summer they figured out the garden. The first time they successfully identified a bird because they’d been paying attention. Not because I assigned it — because it was just our life.

    That’s the whole dream, right? Kids who are capable and grounded and know how to care for something. You don’t have to have a big homestead to make this happen. A few chickens, a garden bed, and a mama who hands them the basket instead of just doing it herself — that’s enough.

    You’ve got this. And honestly? They’ve got this too. Give them the chance to prove it.


    📖 You Might Also Like:

    Frequently Asked Questions

    What chores can a 4-year-old do on a homestead?

    Four-year-olds can do more than you’d think — with supervision. Great starter tasks include tossing kitchen scraps into the compost bin, carrying a small egg basket to the coop, pouring a scoop of feed into the feeder, or watering a single potted plant. The goal at this age isn’t efficiency, it’s participation and building the habit of contributing.

    How do I get my kids to actually do their chores without constant reminders?

    The biggest shift is framing chores as ownership rather than tasks. Instead of ‘go help with the chickens,’ try ‘the chickens are your responsibility before breakfast.’ When kids own the outcome — not just the action — they internalize the responsibility differently. Building chores into your daily rhythm (rather than asking each time) also removes a lot of the negotiation.

    At what age can kids take care of chickens independently?

    Most kids are ready for a solo, basic coop routine — collecting eggs, refilling water and feed — around ages 6 to 7, depending on the child. By ages 8 to 10, many kids can handle the full morning routine, monitor flock health, and even help with coop cleaning with minimal supervision. Start with one task at a time and build from there.

    How do I make homestead chores part of our homeschool day?

    Homestead chores integrate naturally into a Charlotte Mason or nature-based homeschool approach. Egg collecting can become math (counting, patterns). Garden work covers life science. Nature journaling after chores is language arts and art combined. The key is to let the living do the teaching — you don’t need to formally ‘assign’ it as school for it to count as learning.

    What are good homestead chores for elementary-age kids specifically?

    For elementary kids (roughly K–5th grade), great homestead chores include collecting and logging eggs, refilling chicken waterers, weeding garden beds, planting seedlings, composting kitchen scraps, observing and journaling about the flock or garden, and helping with basic coop cleaning. Older elementary kids (8–10) can handle most of the daily routine independently and even start learning about food preservation, pest management, and flock health.

  • Family Rhythm vs Routine: What Actually Works (and Why the Difference Matters More Than You Think)

    Family Rhythm vs Routine: What Actually Works (and Why the Difference Matters More Than You Think)

    Family Rhythm vs Routine: What Actually Works (and Why the Difference Matters More Than You Think)

    🌿 The Short Version: A routine tells you what time things happen. A rhythm tells you what happens next — and for most families, especially homeschool families, rhythm wins. Here’s how we found ours and how you can too.

    This post contains affiliate links. I may earn a small commission at no extra cost to you.

    If you’ve ever made a beautiful color-coded schedule for your homeschool day — you know, the one you laminated and everything — and then watched it fall apart by 9:15 a.m. because someone let the chickens out early and now there’s a dog covered in mud and a kid crying over math… you’re in good company.

    That was us. More than once.

    For the longest time I thought the answer was a better routine. A tighter one. More specific. More structure. But every time I tried to force our days into a rigid timetable, I ended up frustrated, the kids ended up resentful, and nobody was actually learning anything meaningful.

    Then I stumbled onto this idea — mostly through Charlotte Mason reading and a whole lot of trial and error — that what we actually needed wasn’t a routine at all. We needed a rhythm.

    And y’all, it changed everything.

    So What’s the Actual Difference?

    A routine is clock-based. Math at 9:00. Read-aloud at 10:30. Lunch at noon. It sounds organized, and honestly, for some families it works great. But when you’re homeschooling elementary kids in Florida where the weather shifts in twenty minutes, you have backyard animals that don’t care about your schedule, and your kids have wildly different attention spans depending on the day? Rigid routines tend to create more stress than they solve.

    A rhythm is sequence-based. Instead of math at 9:00, it’s we do morning chores, then we do lessons, then we go outside. Instead of a time on a clock telling you what comes next, it’s the natural flow of the day. You move through it together, and the kids start to internalize what comes next without being told — because they’ve lived it enough times that it feels natural.

    Charlotte Mason talked about this. The idea that children thrive when life has a gentle, predictable cadence — not because every minute is accounted for, but because the day has a shape they can feel.

    That’s the difference. Routines are imposed. Rhythms are lived.

    Why Rhythm Works Better for Homeschool Families

    Here’s what I notice when our days have a good rhythm going: my kids wake up and already know what we’re doing. They’re not asking “what are we doing today?” every five minutes. They’re not anxious. They just… move into the day.

    We start with morning chores — feeding the chickens, collecting eggs, letting the dog out, making beds. That physical movement first thing in the morning grounds everybody. Then we come in for breakfast and our morning basket time. Then lessons. Then outside time, which honestly in the Pensacola heat means either early morning or late afternoon depending on the season.

    Nobody’s watching a clock. But everybody knows what comes next.

    That sense of what comes next is actually what kids are craving when they seem clingy or whiny or dysregulated. They’re not always asking for more screen time or less school — sometimes they’re just asking for predictability. Rhythm gives them that without locking you into something that breaks down the moment life happens.

    Building a Rhythm That’s Actually Yours

    Here’s the thing — I can’t hand you our rhythm and tell you to copy it. Your family’s rhythm has to fit your actual life. But I can tell you how we built ours.

    Start with anchors, not a full schedule

    Instead of planning every hour, pick 3-4 anchor points that stay consistent every day:

    • Morning (wake up, chores, breakfast)
    • Learning time (whatever that looks like for your curriculum)
    • Outdoor/free time
    • Evening wind-down

    Everything else flows between those anchors. You’re not scheduling every minute — you’re just making sure the big beats of the day are reliable.

    Let the outdoors shape your rhythm

    If you’re in Northwest Florida, you already know — you do NOT go outside at 2:00 p.m. in July unless someone’s getting paid for it. We plan our nature study, garden time, and chicken chores for early morning or around 5 p.m. when things cool down. Let the Florida seasons actually shape when you go outside instead of fighting it.

    This is also where nature journaling becomes part of the rhythm rather than a scheduled subject. We bring our nature journals outside during those cooler windows and just… sit and observe. Some days that’s ten minutes. Some days it turns into an hour. A good rhythm holds space for that.

    Tie learning to natural transitions

    Read-aloud works great right after lunch when everyone’s a little sleepy and nobody wants to do math. Nature study works after outdoor time because they’re already keyed in. Handwriting and focused work — we use Handwriting Without Tears — happens in the morning when brains are fresh.

    You’re not forcing learning into arbitrary time slots. You’re finding where it fits naturally in your family’s energy flow.

    📌 Love this? Save it to Pinterest so you can find it later!

    What About Actual Curriculum and Accountability?

    If you’re on the Florida PEP scholarship like we are, you still have to get things done and document them. A rhythm doesn’t mean unschooling or winging it — it means the structure serves you instead of the other way around.

    We still use real curriculum. Math-U-See is a great example of something that fits naturally into a rhythm because it’s mastery-based — you work on a concept until it clicks, not until Tuesday at 10:00 says you’re done. Same with All About Reading — it’s sequential and self-pacing, which means it meets your kid where they are instead of where the clock says they should be.

    If you’re still sorting out your homeschool structure in Florida, I wrote about Florida Homeschool Umbrella School Options Explained — worth a read if you’re newer to navigating PEP.

    The 1990s Secret We Keep Forgetting

    Here’s something I think about a lot. Kids who grew up in the 80s and 90s? They didn’t have scheduled playdates and enrichment activities every afternoon. They went outside. They came home when the streetlights came on. They were bored — and they figured out what to do with it.

    That boredom, that unstructured time? It wasn’t wasted. It was doing something really important. It was teaching kids to regulate themselves, to be creative, to make their own fun.

    A good family rhythm builds that in. When kids know that free time comes after the work is done, and that free time is genuinely free — no screens, go find something to do — they start to fill it in ways that surprise you. My kids have built elaborate stick forts, started a worm farm, named every chicken individually, and turned the bug catcher kit into a whole scientific study involving a hand-drawn field guide.

    None of that was scheduled. All of it was made possible because the rhythm of our day created space for it.

    For more on building this kind of intentional daily life, I really loved writing Intentional Parenting: What It Actually Looks Like Day to Day — it goes hand in hand with everything we’re talking about here.

    When the Rhythm Breaks (And It Will)

    Chickens get sick. Storms roll in off the Gulf. Kids have bad days. Someone needs a slow morning. The rhythm will break — and that’s okay. The beauty of rhythm over routine is that it’s resilient. You don’t have to restart a whole color-coded schedule. You just find your way back to the next anchor point and keep going.

    We also do a loose seasonal rhythm adjustment. Summer in Florida looks different than fall. We lean into Charlotte Mason Nature Study Journal Prompts by Season to help us shift what we’re paying attention to outdoors as the year moves. It keeps things feeling fresh without blowing up the whole structure.

    You Don’t Need a Perfect System

    You need one that fits your people. That’s it.

    If you’ve been white-knuckling a routine that isn’t working, give yourself permission to let it go. Try anchors. Try sequence. Try asking your kids what part of the day feels the most like home to them — you might be surprised what they say.

    Our rhythm isn’t pretty. It involves muddy boots and missed lessons and some days where school happens in the car on the way to pick up chicken feed. But it’s ours. And most days, it works — not because it’s perfect, but because it’s predictable enough that everyone feels safe and free enough that everyone feels like themselves.

    That’s the goal, mama. Not a perfect schedule. A rhythm your family can actually live.


    📖 You Might Also Like:

    Frequently Asked Questions

    What is the difference between a family rhythm and a family routine?

    A routine is clock-based — specific activities are tied to specific times. A rhythm is sequence-based — you move through the day in a predictable order, but not on a strict timetable. Rhythms tend to be more flexible and sustainable, especially for homeschool families with young children.

    How do I create a daily rhythm for homeschooling?

    Start by identifying 3-4 anchor points in your day — morning chores, learning time, outdoor time, and evening wind-down. Let everything else flow naturally between those anchors. Over time, your kids will internalize the sequence and move through the day without needing constant reminders or a strict clock.

    Can a Charlotte Mason homeschool have a structured schedule?

    Absolutely — Charlotte Mason actually emphasized the importance of regular habits and a gentle structure to the day. The key is that structure serves the child rather than stressing them. A Charlotte Mason rhythm often includes morning basket time, nature study, living books, and plenty of unstructured outdoor play woven together naturally.

    What if our daily rhythm keeps falling apart?

    That’s normal, especially at first. The advantage of rhythm over strict routine is that it’s more resilient — when things go sideways, you just return to the next anchor point and keep going. You don’t have to restart a whole schedule. Give yourself grace and remember that building a rhythm takes several weeks of consistent repetition before it feels natural.

    Is a daily rhythm enough structure for Florida PEP scholarship requirements?

    Yes — a rhythm absolutely supports meeting Florida PEP homeschool requirements. You still use real curriculum and document learning; the rhythm just determines how and when your day flows rather than locking you into rigid time blocks. Many Florida PEP families use mastery-based curriculum like Math-U-See or All About Reading specifically because it fits naturally into a flexible rhythm-based day.

  • Non-Toxic Play Mat for Babies: What to Actually Look For (and What to Skip)

    Non-Toxic Play Mat for Babies: What to Actually Look For (and What to Skip)

    Non-Toxic Play Mat for Babies: What to Actually Look For (and What to Skip)

    🌿 The Short Version: Most foam play mats contain chemicals you really don’t want your baby chewing on — and babies always chew on them. This post breaks down exactly which materials to avoid, what certifications actually matter, and what we use in our own home.

    This post contains affiliate links. I may earn a small commission at no extra cost to you.

    When my youngest was still at the rolling-around-on-the-floor stage, I did what any well-meaning mama does: I went online, searched “baby play mat,” and promptly fell into a rabbit hole of brightly colored foam squares, pastel padded rugs, and approximately 4,000 conflicting Amazon reviews. What I didn’t realize at the time was that the cute foam mat I almost ordered was made with materials I’d spend the next year trying to get out of our house.

    Here’s the thing — when you’re already being intentional about what you feed your baby, what sunscreen goes on their skin (non-toxic sunscreen matters, y’all), and what cleaning products live under your sink, it makes zero sense to park them face-down on a mat full of questionable chemicals for hours a day. Babies mouth everything. They press their faces into the floor. They breathe in whatever’s off-gassing right at nose level.

    So let’s actually talk about what makes a play mat safe — and what you’re really looking at when you’re shopping.


    Why Most Conventional Play Mats Are a Problem

    The majority of budget foam play mats — especially those interlocking puzzle-piece ones — are made from EVA foam (ethylene-vinyl acetate). EVA itself isn’t the villain, but the manufacturing process often introduces formamide, a chemical that can off-gas from the foam and has been flagged in European safety studies as a concern for young children.

    Beyond that, a lot of mats contain:

    • PVC (polyvinyl chloride) — which can leach phthalates, especially when warm
    • BPA and other bisphenols — sometimes found in plastic-based foam blends
    • Flame retardants — added to meet flammability standards, but linked to endocrine disruption
    • Heavy metals — occasionally found in the dyes used for bright colors and prints

    And here in Florida, this matters extra. Our homes are warm. Warm surfaces off-gas more. A mat sitting in a sunny living room in July in Pensacola is a different situation than one in a cool, temperate climate. That’s not fear-mongering — it’s just chemistry.


    What to Look For Instead

    Certifications That Actually Mean Something

    Not every “non-toxic” claim on a product label has teeth behind it. These certifications are worth looking for:

    • OEKO-TEX Standard 100 — tests for harmful substances in textiles; one of the most reliable
    • GOTS (Global Organic Textile Standard) — applies to organic fiber mats and covers the full supply chain
    • GREENGUARD Gold — focuses on chemical emissions and indoor air quality
    • formamide-free certification — specifically for EVA foam; a legit claim when third-party verified

    If a brand can’t tell you which third party tested their product, that’s your answer.

    Materials Worth Considering

    Natural rubber is one of the safest options out there. It’s durable, naturally antimicrobial, and doesn’t require the same chemical load that synthetic foams do. The trade-off is cost — natural rubber mats tend to run higher.

    Organic cotton or wool play mats with a natural rubber backing are another solid option. They’re washable, soft, and if they’re GOTS certified, you know the fiber was grown and processed without a laundry list of pesticides.

    Cork has also made a comeback — naturally antimicrobial, sustainably harvested, and a good firm surface for tummy time.

    If you do go with foam, look specifically for formamide-free, phthalate-free, BPA-free EVA with a GREENGUARD Gold certification. It still exists in the foam category — you just have to look harder.


    📌 Love this? Save it to Pinterest so you can find it later!


    Size, Thickness, and Practicality

    Beyond materials, here’s what I’d actually think through before buying:

    Thickness matters for tummy time. A too-thin mat doesn’t cushion little elbows during those early months. Aim for at least half an inch for newborn through rolling stage, and thicker if you have hard tile floors (hello, Florida homes).

    Waterproofing vs. washability. A mat with a wipeable surface is practical but can mean more synthetic coatings. A fabric mat that’s fully machine washable is often the cleaner option — just check that the backing isn’t coated in something questionable.

    Size for older babies. Once your baby becomes a toddler tearing through the house on a labradoodle’s heels (ask me how I know), a bigger mat keeps them cushioned through the cruising and falling stage. Our mini labradoodle also claimed our play mat as her personal napping spot, so.

    Neutral over loud prints. I know this sounds like an aesthetic preference, and it partly is — but heavily dyed, bright foam is more likely to use synthetic colorants that haven’t always been tested for safety. A neutral, minimal print tends to correlate with simpler manufacturing.


    What We Use and Why

    We’ve gone through a few iterations in our house. We eventually landed on a natural rubber mat with an organic cotton top layer — it’s held up through multiple kids, wipes down reasonably well, and I don’t stress about it.

    For cleaning, we skip anything with fragrance or harsh disinfectants. A little castile soap and water does the job. If you’re looking for safe cleaning products that won’t leave a residue on surfaces your baby touches, Grove Collaborative is where we order most of our household staples — it’s made restocking genuinely easy.

    This same thinking applies across our whole home, honestly. It’s the same reason we use Wondercide in our chicken coop and yard instead of conventional pesticides — I don’t want my kids crawling around in chemical residue any more than I want them on a mat full of off-gassing foam. It’s all connected.

    If you’re working on the bigger picture of a non-toxic home with littles, this pairs well with what I wrote in Intentional Parenting: What It Actually Looks Like Day to Day — because it really does come down to small, consistent choices over time, not overhauling everything at once.


    A Word About Budget

    I’m not going to pretend safe play mats are cheap. Natural rubber and GOTS-certified textiles cost more than a $25 foam puzzle mat from a big box store. That’s real.

    A few thoughts on this:

    First, buy once, buy right when you can. A quality mat that lasts through multiple kids (or gets passed to a friend) is a better value long-term than replacing cheap ones.

    Second, check the secondhand market. Facebook Marketplace and local buy-nothing groups often have gently used mats from families who invested in quality. Wipe it down well and it’s fine.

    Third, prioritize. If the budget is tight, focus your non-toxic dollars on the things with highest exposure — mat included, since babies spend so much time on them. This is one area I’d genuinely prioritize over, say, whether your dish soap is perfectly clean (though that matters too — see Non-Toxic Dish Soap That Actually Cuts Grease).


    A Few More Things Worth Keeping Non-Toxic Near Baby

    While we’re here — if you’re thinking through your baby’s immediate environment, these are worth checking too:

    And if you want to go deeper on the baby product side of things, I’ve got a full breakdown in Non-Toxic Baby Products: What to Actually Buy (and What’s Just Marketing Hype).


    The Bottom Line

    You don’t have to be perfect at this. None of us are. But if there’s one surface in your home worth being picky about, it’s the one your baby’s face is pressed into for tummy time at 10 a.m. Look for third-party certifications, prioritize natural materials when you can, and don’t let the marketing language on the package do your thinking for you.

    Your baby is worth the extra fifteen minutes of research. And honestly? So is your peace of mind as a mama. We’ve got enough to worry about — the play mat doesn’t have to be one of them.


    📖 You Might Also Like:

    Frequently Asked Questions

    What materials should I avoid in a baby play mat?

    Avoid mats made with PVC, which can leach phthalates, and EVA foam that hasn’t been certified formamide-free. Also watch out for mats with undisclosed flame retardants, BPA, and synthetic dyes with heavy metal components. If a brand can’t point you to third-party testing results, that’s a red flag.

    What is the safest material for a baby play mat?

    Natural rubber and organic cotton or wool are generally considered the safest options. Natural rubber is durable, naturally antimicrobial, and free from the chemical processing required for synthetic foams. Look for OEKO-TEX Standard 100 or GOTS certification on textile mats to verify the claims.

    Are EVA foam play mats safe for babies?

    EVA foam isn’t automatically unsafe, but many EVA mats are manufactured with formamide, which can off-gas and is a concern for infants who spend a lot of time on the floor. If you choose EVA foam, look specifically for mats that are certified formamide-free, phthalate-free, and have GREENGUARD Gold certification.

    What certifications should I look for on a non-toxic baby play mat?

    The most meaningful certifications are OEKO-TEX Standard 100 (tests textiles for harmful substances), GOTS (Global Organic Textile Standard for organic fiber products), GREENGUARD Gold (focuses on indoor air quality and chemical emissions), and formamide-free verification from a named third-party lab for foam mats.

    How thick should a baby play mat be?

    For newborns through the rolling stage, aim for at least half an inch of thickness to cushion elbows and knees during tummy time. If you have hard tile or wood floors — which is common in Florida homes — going a bit thicker (around three-quarters of an inch) provides better protection as babies start sitting and toppling over.

  • How to Preserve Eggs Long Term Without Refrigeration (Methods That Actually Work)

    How to Preserve Eggs Long Term Without Refrigeration (Methods That Actually Work)

    How to Preserve Eggs Long Term Without Refrigeration (Methods That Actually Work)

    🌿 The Short Version: You can preserve fresh, unwashed eggs for weeks or even months without a refrigerator using a few simple, time-tested methods. Water glassing with pickling lime is the most effective long-term option, and we’ll walk you through exactly how to do it safely at home.

    This post contains affiliate links. I may earn a small commission at no extra cost to you.

    If you have backyard chickens, you already know the feast-or-famine reality of egg production. In spring and early summer, our girls are laying like it’s their full-time job — and honestly, it is. We’re pulling 8 to 10 eggs a day out of the coop, and there’s only so much quiche a family can eat. Then comes the Florida summer heat, or a molt, or shorter days in fall, and suddenly the egg basket is looking pretty sparse.

    That’s what got me serious about learning how to preserve eggs long term without refrigeration. Not because I’m prepping for the apocalypse (though I’m not mad at self-sufficiency), but because I wanted to use the abundance when we had it and stop scrambling — pun intended — when we didn’t.

    And here’s the thing: before refrigerators existed, people preserved eggs all the time. This isn’t some fringe homesteading trick. It’s just old knowledge that got lost somewhere between TV dinners and the invention of the frost-free freezer. Let’s bring it back.


    First, the Most Important Rule: Start With Unwashed Eggs

    This is the non-negotiable foundation of egg preservation without refrigeration. Fresh eggs laid by your backyard hens have a natural coating called the bloom (or cuticle) that seals the pores of the shell and keeps bacteria out. Once you wash that off, the egg becomes vulnerable — and far harder to preserve.

    If you’re buying eggs from the grocery store, those have already been washed and coated with a food-grade mineral oil (standard commercial practice in the US), which is why they require refrigeration. Homegrown eggs, collected promptly and kept clean and dry, are a different story entirely.

    So: collect your eggs daily, wipe off any visible debris with a dry cloth, and don’t wash them until right before you use them. That’s it. That’s the foundation.


    Method 1: Water Glassing (The Best Long-Term Option)

    Water glassing is the method I keep coming back to because it genuinely works, it’s affordable, and it stores a lot of eggs in one container. We’re talking eggs preserved for 12 to 18 months — some people report even longer — without any refrigeration.

    What You Need

    • Pickling lime (calcium hydroxide — find it in the canning section of most stores or online)
    • Water (filtered or distilled is best)
    • A clean wide-mouth canning jar — gallon size works great
    • Fresh, unwashed, uncracked eggs straight from your hens

    How to Do It

    1. Mix 1 ounce of pickling lime per quart of water. For a gallon jar, that’s 4 ounces of lime to a gallon of water. Stir well until dissolved.
    2. Pour the solution into your jar first.
    3. Gently lower your unwashed eggs in, pointy side down. Pack them in carefully — you can fit a lot in a gallon jar.
    4. Make sure eggs are fully submerged. If they float, weigh them down with a small zip-lock bag filled with the lime solution.
    5. Cover loosely (don’t seal airtight), label with the date, and store in a cool, dark place.

    That’s genuinely it. When you’re ready to use an egg, pull it out, rinse it off, and use it just like normal. The whites may be slightly more liquid and the shells can feel a little chalky, but for baking, scrambling, and cooking, they work perfectly.

    We do this in a corner of our pantry and it’s become one of those simple homestead rhythms I love — a little like putting up summer preserves, but easier.


    Method 2: Mineral Oil Coating

    This one is almost embarrassingly simple. You warm up a small amount of food-grade mineral oil (just barely warm — not hot), rub a thin coat over each egg with your hands, and store them pointy-side down in a cool, dark spot. The oil mimics the bloom and seals the shell.

    Mineral oil-coated eggs can last up to 9 months at room temperature if stored in a cool pantry or cellar. In Florida, “room temperature” can be a challenge in summer, so a basement or interior pantry away from heat is ideal. A stainless steel water bottle full of cold water next to your storage spot won’t help (ha), but keeping them in the coolest part of your home makes a real difference.


    Method 3: Freeze-Drying and Dehydrating (For Longer Shelf Life)

    If you have a freeze dryer, you can preserve whole beaten eggs for up to 25 years. That’s beyond most home setups, but it’s worth mentioning. A more accessible option is dehydrating scrambled eggs using a regular food dehydrator — the result lasts 5 to 10 years stored properly and reconstitutes well in baking or cooked dishes.

    This isn’t our primary method, but if you have a large flock and a big egg surplus, it’s worth exploring.


    What About Freezing Eggs?

    Yes, you can freeze eggs — just not in the shell (they’ll crack). Crack them into a muffin tin or ice cube tray, freeze solid, then transfer to a freezer bag. They’ll keep for up to a year in the freezer. This is our go-to for egg surplus that we want to use within the year without dealing with the lime solution.


    📌 Love this? Save it to Pinterest so you can find it later!

    Making It a Learning Moment (Because of Course We Do)

    One of the things I love about homesteading with kids is how naturally it folds into our Charlotte Mason approach. The chickens aren’t just a chore or a cute backyard feature — they’re a living science curriculum.

    When we set up a water glassing jar, my kids are right there with me. We talk about why the bloom matters, what calcium hydroxide does, why the eggs float or sink. They’re learning chemistry, biology, food science, and history all at once — while standing in the kitchen in their bare feet. That’s the kind of learning that actually sticks.

    If you want to deepen the chicken connection in your homeschool, Storey’s Guide to Raising Chickens is one of our most-used reference books, and there’s a wonderful kid-friendly chicken guide that my younger ones flip through constantly. We’ve also done nature journal entries about egg anatomy — the nature journal paired with Faber-Castell watercolors makes for a beautiful afternoon project.

    If your kids are into the chicken science side of things, you might also love our post on Best Chicken Breeds for Egg Color Variety (And Which Ones Actually Thrive in Florida) — because the kind of egg matters when you’re choosing what to preserve.


    A Few Things to Watch For

    • Cracks disqualify an egg. Never water glass a cracked egg — bacteria can sneak in and spoil your whole batch.
    • Float test before you use them. A preserved egg that floats in plain water when you pull it out has gone bad. Toss it.
    • Label everything with dates. This is just good pantry hygiene. I use a piece of masking tape and a Sharpie on the jar.
    • Keep them away from strong-smelling foods. Eggs can absorb odors through the shell, even when preserved.

    For the big-picture chicken keeping questions — including how we keep our coop healthy and low-maintenance here in the Florida humidity — check out our post on Best Natural Bug Spray for Chicken Coops (What Actually Works and Won’t Harm Your Flock). A healthy flock means better eggs, and better eggs means better preservation.


    The Bigger Picture: Preserving Food, Preserving Skills

    There’s something that feels deeply right about learning to preserve food the old way. It connects us to every generation of women before us who figured out how to feed their families through winters and droughts and long stretches when the store wasn’t just a ten-minute drive away.

    I think about that a lot when I’m loading eggs into a lime solution with my kids beside me. We’re not doing it because we have to. We’re doing it because it’s good to know how. Because self-sufficiency is a form of freedom. Because the 1990s kid in me still believes that knowing how to do things with your hands is worth more than any app.

    If you’re just starting to think about building a more intentional, self-sufficient home, I’d also point you toward Simple Living with Kids: Practical Tips That Actually Work for Real Families — it’s a good place to start when all of this feels like a lot.

    You don’t have to do everything at once. Start with one jar of water-glassed eggs. See how it feels. I think you’ll love it.


    📖 You Might Also Like:

    Frequently Asked Questions

    How long can you preserve eggs without refrigeration using water glassing?

    Water-glassed eggs stored in a pickling lime solution can last 12 to 18 months at room temperature when kept in a cool, dark place. Some homesteaders report even longer shelf life. The key is starting with fresh, unwashed, uncracked eggs that still have their natural bloom intact.

    Do you have to use unwashed eggs to preserve them long term?

    Yes — this is essential. The natural bloom (or cuticle) on a freshly laid egg seals the shell’s pores and protects it from bacteria. Once you wash an egg, that protective coating is gone and the egg becomes much harder to preserve safely without refrigeration. Store-bought eggs have already been washed and are not suitable for water glassing.

    Is water glassing eggs safe?

    Yes, water glassing has been used safely for generations and is well-documented in homesteading literature. The pickling lime (calcium hydroxide) creates an alkaline environment that prevents bacterial growth. Always use fresh, uncracked, unwashed eggs, and do a float test before using any preserved egg — if it floats in plain water, discard it.

    Can you water glass store-bought eggs?

    No. Commercial eggs sold in the US are washed and sanitized before sale, which removes the bloom. Without the bloom, the shell is porous and the lime solution cannot properly preserve them. Water glassing only works reliably with fresh, unwashed, farm-fresh eggs — ideally from your own backyard flock or a local farmer who doesn’t wash their eggs.

    What is the ratio of pickling lime to water for water glassing eggs?

    The standard ratio is 1 ounce of pickling lime (calcium hydroxide) per quart of water, or 4 ounces per gallon. Stir the solution thoroughly until the lime is fully dissolved, then gently add your unwashed eggs pointy-side down, making sure they stay fully submerged. Store in a wide-mouth jar in a cool, dark pantry.

  • Florida Homeschool Umbrella School Options Explained (So You Can Pick the Right One and Move On)

    Florida Homeschool Umbrella School Options Explained (So You Can Pick the Right One and Move On)

    Florida Homeschool Umbrella School Options Explained (So You Can Pick the Right One and Move On)

    🌿 The Short Version: Florida law gives homeschool families several ways to stay legally compliant, and umbrella schools are one of the most popular options. This post breaks down how they work, what they actually cover, and how to find one that fits your family — including if you’re using the Florida PEP scholarship.

    This post contains affiliate links. I may earn a small commission at no extra cost to you.

    When we first started homeschooling here in the Pensacola area, I remember sitting at the kitchen table after bedtime, laptop open, kids’ nature journals and half-finished watercolor paintings still scattered across the table, trying to make sense of Florida homeschool law. The terminology alone felt like a foreign language. Umbrella school? Cover school? Home education program? Portfolio review?

    I just wanted to teach my kids at home without accidentally doing it wrong. I didn’t need a law degree — I needed somebody to just explain it plainly.

    So that’s what this is. A plain-English breakdown of your Florida homeschool umbrella school options, what they actually mean, and how to figure out which one makes sense for your family.


    First, Let’s Talk About Florida Homeschool Law Basics

    Florida is actually a pretty homeschool-friendly state, which is one of the many reasons we love raising our kids here. But you do have to follow one of the legal pathways laid out in Florida Statute 1002.41.

    The three main options are:

    1. File a Notice of Intent (NOI) with your county school district
    2. Enroll under a Florida-registered umbrella school (also called a cover school)
    3. Enroll in a private school that offers a homeschool option

    Most families I know in the Northwest Florida area use either the NOI route or an umbrella school. Both are totally valid — it really just comes down to what fits your style and what kind of oversight you’re comfortable with.


    What Is a Florida Homeschool Umbrella School?

    An umbrella school (sometimes called a cover school) is a private school that enrolls your homeschooled child under their umbrella. When you join one, your child is technically a student of that private school — which means you’re no longer operating as a home education program under the district. Instead, you follow the private school’s requirements.

    This matters for a few reasons:

    • You don’t have to file a Notice of Intent with your county school district
    • Portfolio reviews and annual evaluations are handled by the umbrella school, not the district
    • Transcripts and diplomas can be issued by the umbrella school (which is huge for older kids)
    • Record-keeping flexibility is often greater, though each school has its own requirements

    For families using the Florida PEP scholarship (formerly the Gardiner or Family Empowerment Scholarship), the umbrella school route is one of the accepted ways to satisfy the scholarship’s compliance requirements. Just make sure whatever umbrella you choose is a registered Florida private school — your scholarship coordinator can help you verify this.


    What Does an Umbrella School Actually Do?

    It varies, but most Florida umbrella schools will:

    • Enroll your student and maintain their official records
    • Issue report cards and transcripts if you need them
    • Conduct or facilitate annual evaluations (sometimes just a portfolio review, sometimes a standardized test)
    • Issue a high school diploma for graduating seniors
    • Provide some level of accountability or support — ranging from nearly hands-off to quite involved, depending on the school

    Some umbrella schools are faith-based and include a statement of faith. Others are completely secular. Some have online portals where you log grades. Others just want a portfolio at the end of the year. There’s a wide range, so it’s worth doing a little research before you commit.


    Popular Florida Umbrella School Options to Know About

    I’m not going to tell you which one to pick — every family is different. But here are some well-known options that Florida homeschool families use:

    Sevcik School (Florida-based)

    A long-standing Florida umbrella school that’s been around for decades. Very straightforward process, minimal requirements, and a solid reputation in the homeschool community.

    Florida Unschoolers (FUN)

    A great fit for families doing more interest-led or Charlotte Mason-style learning. They tend to be low-key and supportive of non-traditional approaches.

    Covenant Home Curriculum

    A Christian umbrella option with more structured support. Good fit if you want curriculum guidance alongside the umbrella coverage.

    Private School Satellite Programs (PSPs)

    Some private schools in Florida offer satellite programs where homeschoolers can enroll part-time or full-time for specific classes while remaining home-based for the rest. This can be a nice middle ground.

    Your Local Church or Co-op School

    Here in Northwest Florida, there are several church-based schools that offer umbrella coverage as part of their homeschool co-op structure. If you’re already plugged into a co-op community, ask around — you might already have access to this.

    📌 Love this? Save it to Pinterest so you can find it later!


    Umbrella School vs. Filing a Notice of Intent: Which Is Better?

    Honestly? Neither is objectively better. Here’s how to think through it:

    Filing an NOI with your county might be a better fit if:

    • You want to keep things simple and free
    • You’re comfortable with the annual evaluation or portfolio review process through the district
    • You prefer not to pay umbrella school fees
    • You’re newer to homeschooling and want the structure of Florida’s home education program guidelines

    An umbrella school might be a better fit if:

    • You want your child’s records, transcripts, and diploma to come from a private school
    • You prefer not to interact with the school district at all
    • You’re homeschooling a high schooler and need credentialed transcripts
    • Your umbrella school offers community, support, or curriculum resources you value
    • You’re on the PEP scholarship and prefer the private school pathway

    For our family, the important thing was having flexibility in how we document our days — because honestly, a Charlotte Mason nature walk through Blackwater River State Forest is school, even if it doesn’t look like a worksheet. Our nature journals count. The hour we spent watching the chickens and talking about their behavior counts. The Sibley Birds guide we pull out at the bird feeder counts. We wanted a pathway that understood that, and our umbrella school does.


    What to Look for When Choosing a Florida Umbrella School

    Here are the questions I’d ask before signing up:

    • Is it a registered Florida private school? (You can verify this through the Florida Department of Education’s private school database)
    • What are the annual fees? Most range from $50–$200/year
    • What records do they require you to keep?
    • How do they handle annual evaluations?
    • Do they issue transcripts and diplomas?
    • Are they faith-based, secular, or neutral?
    • Are they PEP scholarship compatible? (If applicable)
    • What support do they offer, if any?

    Don’t be afraid to email them directly and ask. Most umbrella school administrators are homeschool parents themselves and are genuinely happy to answer questions.


    A Quick Word About Record-Keeping

    Whichever path you choose, keeping organized records is just part of the deal in Florida. But I promise it’s not as daunting as it sounds.

    For Charlotte Mason families, your records might look like:

    • A homeschool planner with daily notes
    • Nature study observations and sketches from your nature journals
    • Book lists from read-alouds
    • Samples of copywork and narrations
    • Photos of projects, experiments, and yes — chicken chores

    For more on how we approach nature study and documenting it in a way that works with Charlotte Mason, check out our post on Charlotte Mason Nature Study Journal Prompts by Season.


    The Bottom Line

    Florida gives homeschool families real options, and umbrella schools are one of the most flexible and well-loved pathways — especially for families doing creative, nature-based, or Charlotte Mason-style learning. You don’t have to be a legal expert to navigate this. You just need to understand the basics, ask the right questions, and pick the path that gives your family the most freedom to actually do the good work of raising and educating your kids.

    If you’re still sorting out the bigger picture of what homeschooling looks like day to day — the rhythms, the freedom, the intentional choices behind it — you might love our post on Intentional Parenting: What It Actually Looks Like Day to Day. And if you’re looking for curriculum resources once you’ve got your legal path sorted, Rainbow Resource and Timberdoodle are two of our most-used places to shop.

    You’ve got this, mama. Go do the thing.


    📖 You Might Also Like:

    Frequently Asked Questions

    What is a homeschool umbrella school in Florida?

    A Florida homeschool umbrella school (also called a cover school) is a registered private school that enrolls homeschooled students under its umbrella. When you join one, your child is legally a student of that private school, which means you don’t need to file a Notice of Intent with your county school district. The umbrella school handles record-keeping, evaluations, transcripts, and diplomas according to their own requirements rather than the district’s.

    Do I have to use an umbrella school to homeschool in Florida?

    No, umbrella schools are just one of three legal options in Florida. You can also file a Notice of Intent (NOI) directly with your county school district and operate as a home education program, or enroll in a private school that offers a homeschool option. All three pathways are legal and valid under Florida Statute 1002.41.

    Are Florida umbrella schools compatible with the PEP scholarship?

    Yes, many Florida umbrella schools are compatible with the Florida Family Empowerment Scholarship (PEP). However, it’s important to verify that any umbrella school you’re considering is a registered Florida private school, as this is a requirement for scholarship compliance. Check with your scholarship’s managing organization to confirm compatibility before enrolling.

    How much does a Florida homeschool umbrella school cost?

    Most Florida umbrella schools charge annual enrollment fees ranging from about $50 to $200 per year, though pricing varies by school and what services are included. Some offer basic enrollment only, while others include transcript services, access to co-op resources, or curriculum support at higher price points.

    What records do I need to keep if I use a Florida umbrella school?

    Record-keeping requirements vary by umbrella school, but most require you to maintain a log of educational activities, samples of student work, and a reading list. Unlike the Florida home education program route, you follow your umbrella school’s requirements rather than the district’s. For Charlotte Mason families, this typically includes nature journals, copywork samples, book logs, and narration notes. Always confirm your specific umbrella school’s documentation expectations when you enroll.

  • Best Natural Bug Spray for Chicken Coops (What Actually Works and Won’t Harm Your Flock)

    Best Natural Bug Spray for Chicken Coops (What Actually Works and Won’t Harm Your Flock)

    Best Natural Bug Spray for Chicken Coops (What Actually Works and Won’t Harm Your Flock)

    🌿 The Short Version: Natural bug sprays using essential oils, diatomaceous earth, and non-toxic sprays like Wondercide really do work for keeping mites, lice, and flies out of your chicken coop — without chemicals that can harm your birds or your family. This post breaks down exactly what we use, how we apply it, and why it matters if you’re trying to run a clean, non-toxic backyard flock.

    This post contains affiliate links. I may earn a small commission at no extra cost to you.

    If you’ve ever walked out to your chicken coop on a sticky Florida morning, lifted the nest box lid, and watched a hundred tiny things scatter — you know the feeling. Your stomach drops. You do a full-body shudder. And then you start Googling at 6 a.m. in your pajamas.

    That was me, about a year into keeping chickens. We had a mite situation. Not a catastrophic one, thankfully, but enough to make me realize I needed a real plan — one that didn’t involve dousing my birds or my kids’ backyard in permethrin and synthetic pesticides.

    Because here’s the thing: my kids are out in that coop every single day. They’re collecting eggs, refilling water, holding hens, doing their Charlotte Mason nature observations in the same space. I’m not willing to spray something on those roost bars that I’d be nervous about them touching an hour later.

    So I did the research, I did the experimenting, and I’m sharing what actually works for keeping bugs out of the coop — naturally.

    Why Bugs in the Coop Are a Real Problem (Especially in Florida)

    Here in Northwest Florida, the heat and humidity are basically a five-star resort for parasites. Mites, chicken lice, darkling beetles, flies — they love a warm, moist environment packed with organic material. Which is, unfortunately, exactly what a chicken coop is.

    Mites in particular are sneaky. They’re mostly active at night, hiding in cracks and crevices during the day, and they feed on your chickens while they sleep. A heavy infestation can cause anemia, feather loss, and serious stress on your flock. And lice — while they don’t bite humans — spread fast once they’re established.

    Flies are more of a nuisance issue, but in Florida summer they can get overwhelming fast if you’re not staying on top of moisture and cleaning.

    The good news? You don’t need a single synthetic chemical to manage any of this.

    The Best Natural Bug Sprays and Treatments for Chicken Coops

    1. Wondercide (Our Go-To Spray)

    This is honestly the product I recommend first to any backyard chicken keeper trying to go non-toxic. Wondercide is a cedar oil-based pest control spray that’s safe to use around kids, pets, and — yes — chickens. We spray it along the roost bars, in the corners of the coop, under the nest boxes, and around the perimeter of the run.

    It smells like a cedar closet (which I personally love), it breaks down naturally, and it actually works. We’ve used it consistently for over a year now and our mite situation has stayed totally under control. They make formulas specifically for outdoor and yard use, and that’s the one we reach for.

    2. Food-Grade Diatomaceous Earth

    If Wondercide is our spray solution, food-grade diatomaceous earth is our powder solution — and they work really well together.

    DE is a fine, chalky powder made from fossilized algae. It works mechanically, not chemically — it scratches the exoskeleton of insects and causes them to dehydrate and die. That means bugs can’t build resistance to it the way they can to chemical pesticides.

    We dust it into the nest boxes, along the roost bars, in the corners and cracks of the coop, and we mix a little into the dust bath area so the chickens can treat themselves. Just be careful not to inhale it when you’re applying — wear a simple dust mask. It’s food-grade and safe, but the fine particles aren’t great for lungs.

    3. DIY Essential Oil Spray

    This is a simple one you can mix up at home and keep in a spray bottle in the coop. Here’s what we use:

    • 2 cups water
    • 1 tablespoon liquid castile soap
    • 15 drops peppermint essential oil
    • 10 drops eucalyptus essential oil
    • 10 drops lavender essential oil
    • 10 drops tea tree essential oil

    Shake well before each use and spray on roost bars, walls, and around entry points. The strong scents repel mites, lice, and flies. It’s not a cure if you have a full infestation, but as a regular maintenance spray between deep cleans, it’s great. And it makes the coop smell amazing.

    4. Herbs in the Nest Boxes

    This one sounds like something your grandma would do — and that’s exactly why I love it. Laying fresh or dried herbs in the nest boxes serves double duty: it smells lovely and naturally repels insects. We use whatever we have growing — lavender, mint, rosemary, and thyme are all excellent choices.

    This is also a sweet little nature lesson for the kids. Ours have learned which herbs repel which pests, and they help gather cuttings from our herb garden. If you want to grow your own, an herb garden starter kit is an easy way to get a variety going.

    📌 Love this? Save it to Pinterest so you can find it later!

    Keeping Flies Under Control Naturally

    Flies are a separate battle from mites and lice, and in a Florida summer they can genuinely get out of hand if you’re not managing moisture.

    The biggest thing you can do is keep the coop dry. Wet bedding is fly heaven. We clean the droppings board daily (our kids have a chore chart and this is on it — character building, y’all) and do a full bedding change weekly in summer.

    Beyond that:

    • Apple cider vinegar in the water — a tablespoon per gallon helps keep flies from being attracted to the water source. Our chicken waterer makes it easy to manage clean, fresh water without a lot of spillage that creates moisture issues.
    • Fly traps — the old-fashioned sticky kind hung outside the coop. Not pretty, but effective.
    • Fresh herbs hanging in the coop — bundles of basil and mint near the door help deter flies at the entry.

    Good Coop Management Is the Real Bug Prevention

    I want to be honest with you: no spray in the world — natural or chemical — will fix a bug problem if the underlying coop conditions aren’t right. Bug prevention is 80% management, 20% treatment.

    That means:

    • Cleaning regularly and not letting bedding get damp
    • Making sure the coop has good ventilation (crucial in Florida heat)
    • Doing monthly inspections — lift the roost bars, check under nest boxes, part feathers on your birds and look at the skin near the vent
    • Quarantining new birds for at least 2-3 weeks before integrating them with your flock

    If you’re newer to keeping chickens and want a really solid reference, Storey’s Guide to Raising Chickens has a thorough section on pest management that’s worth reading through. And if your kids are the ones most interested in the flock, the Kid’s Guide to Keeping Chickens covers this in age-appropriate language — mine love it.

    You might also want to check out my post on Best Chicken Breeds for Egg Color Variety (And Which Ones Actually Thrive in Florida) — because some breeds are also more resistant to mite issues than others.

    What We DON’T Use

    Just to be clear about where we land: we skip permethrin, Sevin dust, and other synthetic pesticide treatments, even though they’re commonly recommended in backyard chicken circles. They work, yes — but I’m not comfortable with them in a space where my kids spend time daily, and I’m not convinced we need them when the natural options are doing the job.

    If you’re trying to figure out how all these choices fit into a bigger non-toxic home picture, Intentional Parenting: What It Actually Looks Like Day to Day is a good read — it’s where a lot of this thinking starts for our family.

    Our Monthly Coop Treatment Routine

    Here’s the quick version of what we actually do:

    Weekly: Remove droppings board, refresh nest box herbs, spray DIY essential oil spray on roost bars.

    Monthly: Full bedding change, dust entire coop interior with food-grade diatomaceous earth, spray Wondercide on walls and under nest boxes, inspect birds.

    Seasonally: Deep clean with hot water and white vinegar before reapplying treatments. This is especially important going into Florida summer.

    And I’ll say it again — the automatic coop door has been a game changer for us in terms of coop hygiene, simply because it means the door closes at dusk and opens at dawn without us having to handle it, which keeps overnight moisture and critters more controlled.


    Look, none of this has to be complicated. Once you get a rhythm going, coop bug prevention becomes just a normal part of your weekly routine — something the kids can help with, something that keeps your flock healthy, and something you can feel genuinely good about doing without a single synthetic chemical. That’s the goal around here.

    If you’ve found something that works for your flock that I didn’t mention, drop it in the comments — I love hearing what other backyard chicken families are doing, especially those of you dealing with our fun Florida climate. We’re all figuring this out together.


    📖 You Might Also Like:

    Frequently Asked Questions

    What is the best natural bug spray for a chicken coop?

    Wondercide (a cedar oil-based spray) is one of the best ready-made natural options for chicken coops. It’s safe around birds, kids, and pets, and works well on mites, lice, and flies when applied regularly to roost bars, nest boxes, and coop walls. Pairing it with food-grade diatomaceous earth gives you both a spray and a powder treatment for comprehensive coverage.

    Is diatomaceous earth safe to use in a chicken coop?

    Yes — food-grade diatomaceous earth is safe to use in chicken coops and is one of the most popular natural pest control methods for backyard flocks. It works by physically damaging the exoskeleton of mites, lice, and other insects. Apply it in nest boxes, along roost bars, and in dust bath areas. Just wear a dust mask when applying, as the fine powder isn’t great to inhale in large quantities.

    How do I get rid of mites in my chicken coop naturally?

    Start with a thorough deep clean — remove all bedding, scrub the coop with a white vinegar and water solution, and let it dry completely. Then apply food-grade diatomaceous earth to all surfaces, especially cracks and crevices where mites hide. Spray Wondercide or a DIY essential oil spray (peppermint, eucalyptus, tea tree, lavender) on roost bars and walls. Repeat monthly and do weekly spot checks to stay ahead of any reinfestation.

    What essential oils are safe to use around chickens for pest control?

    Peppermint, lavender, eucalyptus, tea tree, and rosemary essential oils are commonly used in DIY chicken coop sprays and are generally considered safe when diluted properly with water and a carrier like castile soap. Avoid using undiluted essential oils directly on birds. These oils work best as a deterrent and maintenance spray rather than a treatment for an active heavy infestation.

    How often should I treat my chicken coop for bugs?

    For natural treatments, a monthly full treatment (clean bedding, diatomaceous earth dusting, and a good spray of your chosen natural pest spray) is a solid baseline. In hot, humid climates like Florida, you may want to spray roost bars weekly and refresh nest box herbs every 1-2 weeks. Do a thorough inspection of your birds — parting feathers near the vent and under wings — at least once a month to catch any issues early.

  • How to Raise Grateful Kids in a Consumer Culture (Without the Lectures)

    How to Raise Grateful Kids in a Consumer Culture (Without the Lectures)

    How to Raise Grateful Kids in a Consumer Culture (Without the Lectures)

    🌿 The Short Version: Raising grateful kids isn’t about giving less — it’s about building a life where they notice more. This post shares the real, everyday habits our family uses to grow genuine gratitude, even when the world is constantly telling our kids they need more stuff.

    This post contains affiliate links. I may earn a small commission at no extra cost to you.

    You know that moment when your kid opens a gift, barely looks at it, and immediately asks what else they’re getting?

    Yeah. That moment will humble you real fast.

    It happened to us a couple of years ago and honestly, it was a wake-up call. Not because my kids are bad kids — they’re wonderful, curious, hilarious little people — but because consumer culture is relentless, and it doesn’t take long before even the most intentional family starts drifting. Amazon boxes on the porch, ads sneaking in everywhere, birthday parties where the gift pile is taller than the birthday child. It adds up.

    We’re not a perfect family. We still buy things. We still celebrate big. But we’ve been really deliberate about building gratitude into the everyday fabric of our life, and I want to share what’s actually working for us — not the stuff that sounds good in theory but the stuff that holds up on a random Tuesday in Pensacola when everyone’s hot and tired and your rooster is screaming at 5 a.m.

    Why Gratitude Is Harder to Grow Now Than It Used to Be

    I think a lot about how I grew up in the ’90s. We didn’t have much. My mom didn’t either. When something broke, you fixed it. When you wanted something, you saved for it. You played outside because that’s just what you did — not because someone read an article about the benefits of outdoor play.

    Our kids are growing up in a world that is specifically engineered to make them feel like they’re missing something. That’s not an accident. The entire advertising machine runs on manufactured longing. And as much as we try to limit screens in our house, that message still creeps in.

    So instead of fighting it with lectures (trust me, that doesn’t work), we try to replace it — with real things, real work, and real experiences that actually satisfy.

    What Actually Works: Building a Grateful Life, Not Just Grateful Kids

    1. Give Them Real Responsibility That Matters

    Nobody taught me more about gratitude than the morning I realized we were out of eggs because I forgot to check on the hens. When kids are responsible for something living — something that depends on them — it shifts everything.

    Our kids help with the chickens every single day. They fill the chicken waterer, they collect eggs, they notice when a hen seems off. They understand that food doesn’t just appear. Breakfast feels different when your kid is the one who gathered the eggs.

    If you don’t have chickens yet and you’re curious, I wrote a whole breakdown on best chicken breeds for egg color variety and which ones actually thrive in Florida — it’s a great starting point.

    Real responsibility builds real gratitude. Kids who do nothing tend to want everything.

    2. Slow Down Enough to Notice

    This is the one that’s hardest for me personally because I’m a doer. But when we rush, my kids stop seeing. And gratitude is fundamentally about seeing — noticing what’s already good.

    Charlotte Mason called this “living education,” and I think it applies way beyond academics. We try to take at least one slow walk a week where the goal isn’t exercise — it’s just noticing. What birds are in the yard? What’s blooming? What did the clouds do today?

    My kids each keep a nature journal and we do seasonal nature sketches with Faber-Castell watercolors — nothing fancy, just observing and recording. Something about putting pencil to paper and really looking at a mockingbird or a live oak changes how they see the world. If you want prompts to get started, I have a whole post on Charlotte Mason nature study journal prompts by season that our family actually uses.

    3. Let Them Be Bored

    I know. Bear with me.

    Boredom is where creativity and contentment are born. When my kids are bored, they eventually — after complaining for approximately 45 minutes — build something, dig something, invent something, or find something beautiful in the backyard. They come back satisfied in a way that no toy ever produces.

    Our mini labradoodle, Biscuit, has become their default boredom companion. They’ll spend an hour making obstacle courses for that dog in the backyard. No screen, no purchase, no scheduled activity. Just a dog and some patio furniture and a couple of wild kids.

    That kind of play is a gift. Let them find it.

    📌 Love this? Save it to Pinterest so you can find it later!

    4. Work Alongside Them in the Garden

    Growing food is one of the most grounding things a child can do. There is something deeply right about a kid who understands that a tomato takes weeks of watering and waiting before you get to eat it.

    We garden year-round here in Northwest Florida — the growing season is long and forgiving if you know what you’re doing — and our kids are involved in all of it. They have their own garden gloves, they help with planting, weeding, watering, and harvesting. We use a seed starting kit to start seeds indoors when we need to get a jump on the season.

    When your child eats something they grew, they appreciate food differently. That’s not an exaggeration — I’ve watched picky eaters eat vegetables they grew with genuine pride.

    5. Practice Gratitude Out Loud, Not as a Checklist

    We tried the gratitude journal thing. My kids hated it. It felt like homework.

    What actually works for us is just talking. Around the dinner table, in the car, at bedtime — we ask each other what was good today. Not “what are you grateful for” in that formal way, just… what was good? Sometimes it’s the chickens doing something funny. Sometimes it’s a really good lunch. Sometimes it’s something surprisingly deep from one of my kids.

    You don’t need a program. You just need to keep the conversation going.

    6. Curate What Comes Into Your Home

    I’m not anti-stuff. We have stuff. But we try to be intentional about what we bring in and why. For our homeschool, that means choosing resources with real purpose — things that will genuinely be used and loved, not just accumulated.

    Sites like Rainbow Resource and Timberdoodle are my go-tos for curriculum because I can find things that actually align with how we learn, rather than grabbing whatever’s trending.

    For the home in general, we try to follow a loose one-in-one-out policy. Before a birthday or Christmas, we do a toy cleanout together. The kids are part of the decision. It takes the entitlement edge off when they’re actively choosing what to release.

    7. Talk Honestly About Money and Wants vs. Needs

    My kids know we have a budget. They know we make choices. When one of them wants something at the store, I don’t just say no — I explain. “That’s not in our budget right now” or “we’re saving for something else” or “let’s think about whether you’ll still want it in a week.”

    That last one is powerful. Half the time, they forget about it entirely. The other half, they still want it — and then we talk about earning or saving toward it. Either way, they’re learning that wanting something doesn’t mean getting it, and that’s one of the most important things I can teach them.

    If you’re thinking about how this connects to the bigger picture of intentional family life, I wrote more about that in my post on intentional parenting — what it actually looks like day to day. It’s one of my favorites.

    The Long Game

    Here’s what I keep coming back to: gratitude isn’t a trait you install. It’s something that grows in the right conditions — slowly, with repetition, in a life that has enough slowness and realness and noticing built into it.

    Consumer culture is going to keep doing what it does. But if our kids are out in the yard catching bugs with their bug collection kit, or sitting with the chickens in the afternoon light, or growing something from seed and waiting on it with patience — they’re building a different kind of foundation.

    One that doesn’t crumble the second someone shows them something shiny.

    That’s the work. It’s slow and it’s ordinary and most days it doesn’t look like anything special. But I really believe it’s adding up. And maybe on a morning when your kid holds a warm egg in their hand and says “thank you, hen” without being prompted — you’ll believe it too.

    You’re doing good, mama. Keep going.


    📖 You Might Also Like:

    Frequently Asked Questions

    How do I teach my child to be grateful without it feeling forced or preachy?

    The most natural way is to build gratitude into everyday life rather than making it a formal lesson. Talk around the dinner table about what was good today, involve kids in real work like gardening or animal care, and model noticing the small good things yourself. Kids absorb more from what they see you do than from anything you tell them.

    What are some practical ways to raise grateful kids in a materialistic world?

    Give kids real responsibilities that matter — like caring for animals or growing food — so they understand that good things take effort. Limit impulse buying by introducing a ‘think about it for a week’ rule. Do regular toy or item cleanouts together before birthdays and holidays. And slow down enough to notice and name what’s already good in your daily life.

    At what age can kids start learning about gratitude?

    Even toddlers can start with simple practices — saying thank you, noticing something beautiful outside, helping water a plant. Gratitude is less about age and more about consistent, low-pressure habits built over time. Elementary-age kids can handle deeper conversations about wants vs. needs, budgeting, and the work behind the things they enjoy.

    Does limiting screen time really help raise more grateful kids?

    It can make a significant difference because so much screen content — including ads, social media, and even kids’ YouTube — is designed to manufacture longing and dissatisfaction. When kids have more time for unstructured outdoor play, creative boredom, and hands-on work, they tend to find satisfaction in simpler things and complain less about what they don’t have.

    How do backyard chickens or a garden help kids develop gratitude?

    Both connect kids directly to where food comes from and teach them that good things require consistent care and patience. A child who gathers eggs every morning or waits weeks for a tomato to ripen develops a real relationship with effort and reward — which is one of the deepest foundations of genuine gratitude. It’s hard to take breakfast for granted when you’re the one who kept the hens watered.