Author: pmorris1620@gmail.com

  • DIY Natural Cleaning Products for Every Room (That Actually Work and Cost Almost Nothing)

    DIY Natural Cleaning Products for Every Room (That Actually Work and Cost Almost Nothing)

    DIY Natural Cleaning Products for Every Room (That Actually Work and Cost Almost Nothing)

    🌿 The Short Version: You can clean your entire home — kitchen, bathrooms, floors, and more — with just a handful of simple, non-toxic ingredients you probably already have. This post walks you through real recipes our family actually uses, room by room, so you can ditch the harsh chemicals without making it complicated.

    This post contains affiliate links. I may earn a small commission at no extra cost to you.

    I remember the first time I really read the label on a bottle of conventional bathroom cleaner. I was standing there in the cleaning aisle at Walmart, kids in the cart, and something made me flip it over. I couldn’t pronounce half of it. The warnings alone — keep away from children, avoid skin contact, do not inhale — made me set it back on the shelf and walk away.

    That was a few years ago now. We haven’t bought a single bottle of conventional cleaner since.

    Here’s the thing: switching to DIY natural cleaning products sounds like a big lifestyle overhaul. It’s really not. You need maybe five ingredients, some glass spray bottles, and fifteen minutes. And once you make the switch, you’ll wonder why you ever paid $4.99 for something that required ventilation.

    This is especially important to me because our kids are in this house all day. We homeschool. They’re crawling on the floors, eating at the table I just wiped down, sticking their faces in everything. I want clean — I just want clean without a side of mystery chemicals.

    Let me walk you through what we actually use, room by room.

    The Basics You’ll Need First

    Before we get into the recipes, let me give you the short shopping list. Almost everything stems from these:

    • White distilled vinegar — degreaser, disinfectant, deodorizer
    • Baking soda — gentle abrasive, odor absorber
    • Castile soap (Dr. Bronner’s is our go-to) — all-purpose cleaning base
    • Hydrogen peroxide (3%) — natural disinfectant
    • Essential oils — tea tree, lavender, lemon for antimicrobial properties and actual good smells
    • Distilled water — extends shelf life of sprays

    You’ll also want a few glass spray bottles. I pick mine up from Grove Collaborative — they have great non-toxic starter kits that come with everything you need.

    That’s honestly it. Everything below comes from those six things.

    Kitchen: The Room That Needs It Most

    All-Purpose Counter Spray

    This is the one I make most often because we go through it fast.

    • 1 cup distilled water
    • 1 cup white vinegar
    • 15 drops lemon essential oil
    • 10 drops tea tree oil

    Shake and spray. Wipe with a clean cloth. Done.

    Note: Skip vinegar on natural stone countertops — it can etch the surface. Use just castile soap and water instead.

    Dish Soap Boost

    We use castile soap as our dish soap base, but when things get greasy (hello, cast iron cleanup night), I add a few drops of lemon oil. Speaking of cast iron — if you’re still using non-stick pans with their questionable coatings, our family made the switch to a Lodge cast iron skillet and never looked back. Genuinely non-toxic, lasts forever, and you clean it with barely anything.

    Refrigerator and Appliance Wipe-Down

    Equal parts water and white vinegar in a spray bottle. That’s it. Wipe down the fridge shelves, the microwave interior, the stovetop. It cuts through grime without leaving any residue or smell once it dries.

    Drain Freshener

    Pour 1/2 cup baking soda down the drain, followed by 1/2 cup vinegar. Let it fizz for 5-10 minutes, then flush with hot water. The kids think this is basically a science experiment, which, honestly, it is — and we talk about it that way.

    Bathrooms: Where the Worst Products Usually Live

    Toilet Bowl Cleaner

    • 1/2 cup baking soda
    • 1/4 cup castile soap
    • 10 drops tea tree oil

    Stir it into a paste. Spread it around the bowl with the brush, let it sit for 5 minutes, scrub, flush. That’s a clean toilet with nothing scary in it.

    Tile and Tub Scrub

    Sprinkle baking soda directly onto the wet surface, add a few drops of castile soap, scrub with a brush or cloth. Rinse well. This works so well on grout — I was genuinely shocked the first time I tried it.

    Mirror and Glass Spray

    • 1 cup distilled water
    • 1 cup white vinegar
    • Optional: a tiny drop of dish soap if there’s toothpaste splatter

    Spray and wipe with a microfiber cloth for streak-free mirrors. My daughter does the bathroom mirrors now as part of her morning chores. At seven years old, I feel completely fine with her handling this.

    📌 Love this? Save it to Pinterest so you can find it later!

    Living Areas and Floors

    All-Purpose Floor Cleaner

    For our tile and wood floors (we have mostly tile here in the Florida heat because, same, every Florida home):

    • 1 gallon warm water
    • 1/2 cup white vinegar
    • 5 drops lavender or lemon essential oil

    Mop as usual. It dries clean, no residue, and smells like a spa for about ten minutes, which I fully enjoy.

    Skip vinegar on hardwood — use just a few drops of castile soap in warm water instead.

    Fabric and Upholstery Freshener

    • 1 cup distilled water
    • 1 tablespoon baking soda (shake to dissolve)
    • 10 drops lavender oil

    Spray lightly on couches, curtains, rugs. Especially helpful with a labradoodle who thinks the couch is her couch. (Looking at you, Biscuit.)

    Dusting Spray

    A tiny amount of olive oil mixed with a few drops of lemon essential oil on a microfiber cloth works beautifully on wood surfaces. It cleans, conditions, and leaves a gentle shine.

    Laundry Room

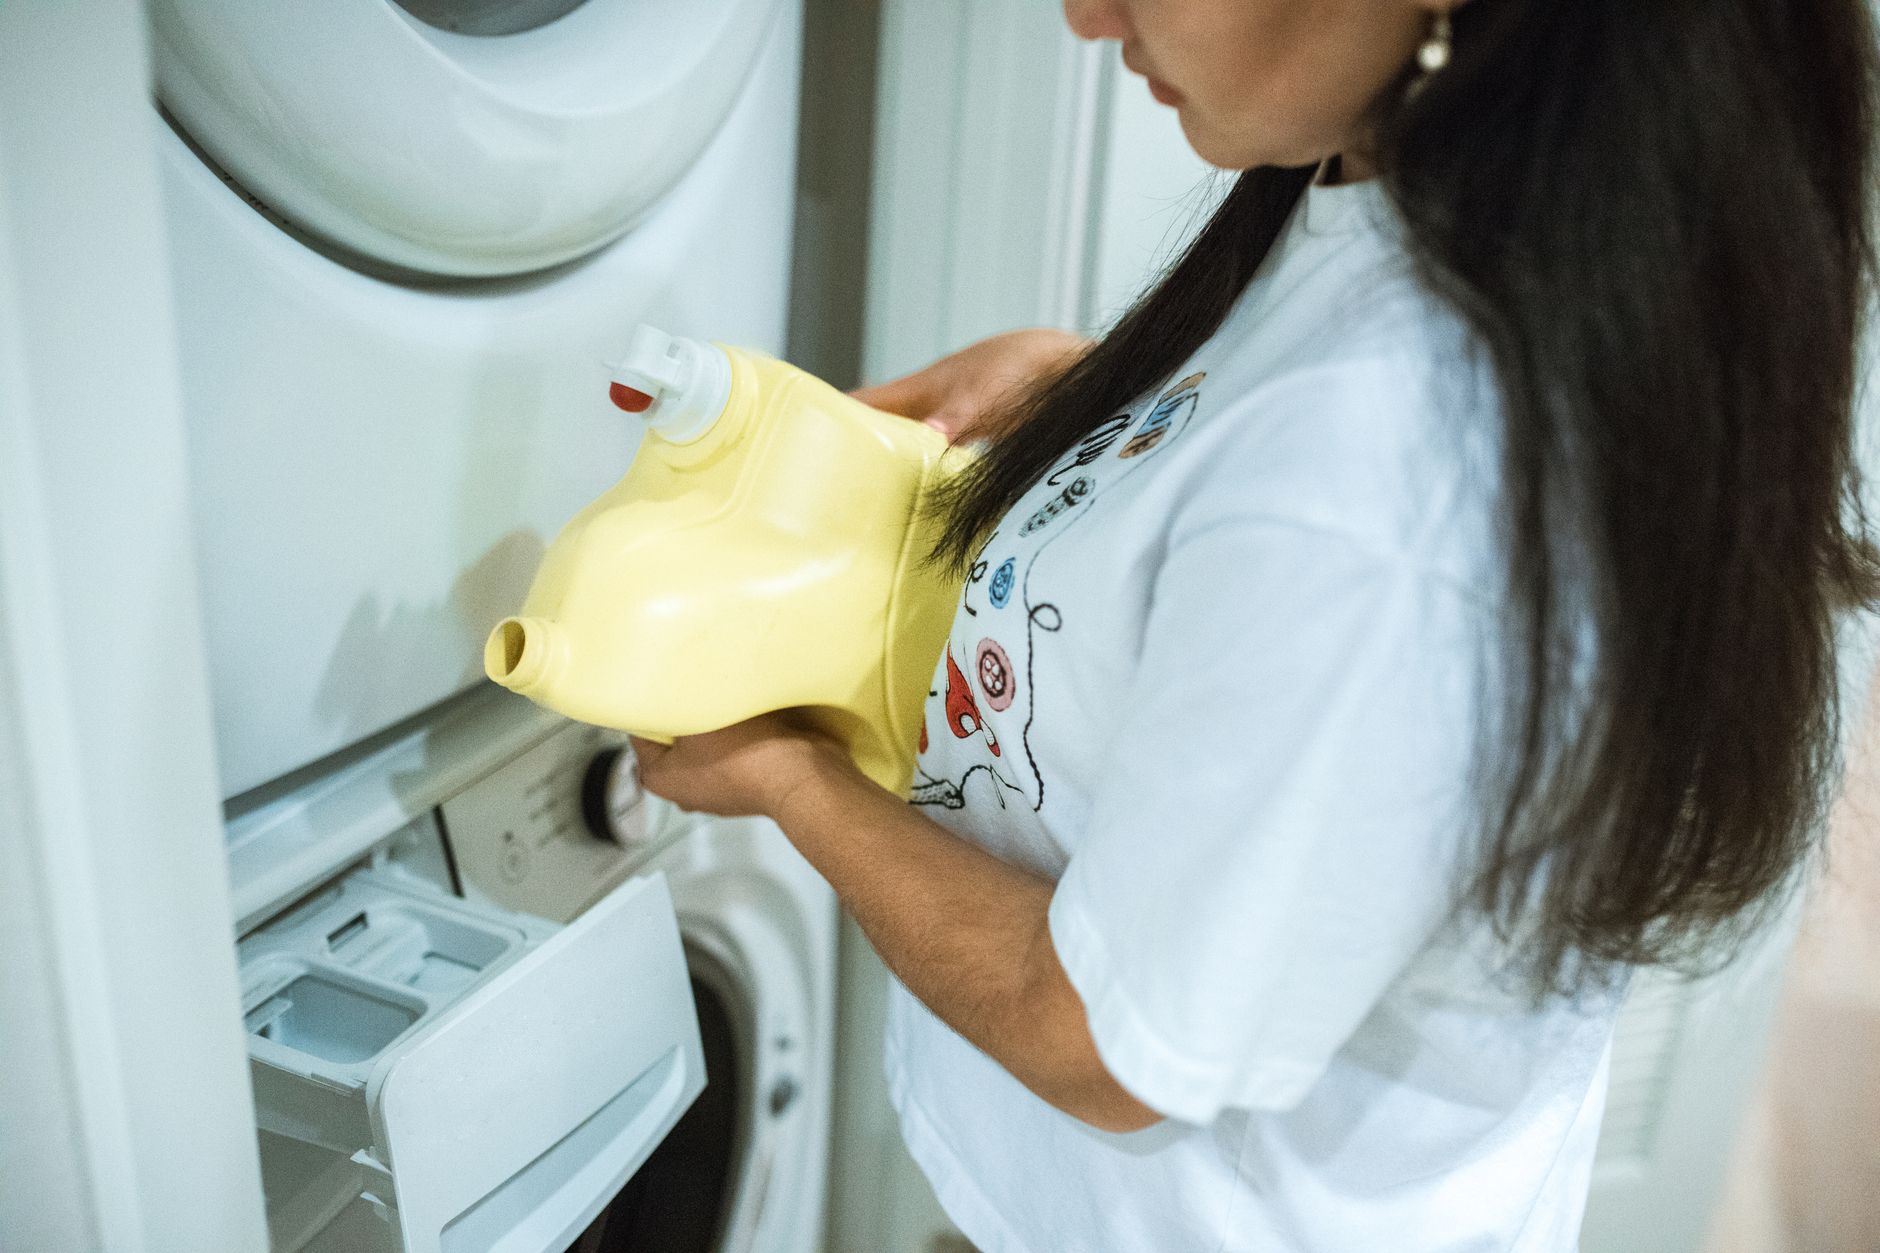
    If you haven’t already made the switch to homemade laundry detergent, I’ve already written all about it over here — How to Make Homemade Laundry Detergent (Non-Toxic, Actually Works, and Costs Almost Nothing). It is genuinely the best switch we ever made.

    We also use wool dryer balls instead of dryer sheets — no synthetic fragrance, no fabric softener chemicals, and they cut dry time down too.

    For tough stains on kids’ clothes (and it is always muddy kids’ clothes here in Northwest Florida), I spray hydrogen peroxide directly on the stain, let it sit 10 minutes, then wash. Works on grass, food, and chicken coop adventure aftermath.

    The Chicken Coop (Because Yes, That Counts)

    Okay, this one is specific to those of us with backyard flocks — but it matters. Conventional coop cleaning products can be harsh on chickens’ sensitive respiratory systems.

    We use:

    • White vinegar diluted 50/50 with water as a general coop spray between deep cleans
    • Diatomaceous earth (food-grade only!) dusted in nest boxes and along roost bars for mites
    • Wondercide for pest control around the coop perimeter

    I’ve got a whole detailed post on our routine — Natural Chicken Coop Deodorizer and Cleaning Routine (What Actually Works for a Backyard Flock) — if you want to go deeper on that.

    Making It a Learning Moment (Because Charlotte Mason Said So)

    One thing I love about making our own cleaners is how naturally it turns into a real lesson. My kids have learned fractions measuring out ingredients. They’ve learned chemistry watching the vinegar and baking soda react. They understand why tea tree oil works — we’ve talked about plant compounds and antimicrobial properties in the most basic, kid-friendly way.

    This is exactly the kind of living, hands-on education that Charlotte Mason was talking about. It’s not a worksheet. It’s real life. They help me make a batch of counter spray, they label the bottle, and they use it. That’s science, handwriting, and home economics wrapped into one afternoon.

    If you want more of this kind of nature-and-life-integrated learning, check out my Charlotte Mason Nature Study Journal Prompts by Season — it’s the same spirit, just outside.

    A Note on Making This Sustainable

    The goal here isn’t perfection. It’s just better. We didn’t switch everything overnight, and honestly, there are still a couple of things we haven’t fully replaced yet. That’s okay. Start with one room, one spray bottle. See how it goes.

    And if you want to simplify your non-toxic shopping even more, Grove Collaborative delivers clean, simple household products and refills on a schedule — so you’re not running out of castile soap mid-mopping session on a Tuesday.

    Sweet friend, your home doesn’t have to be a chemistry lab of warnings and fumes to be clean. A few simple ingredients, some glass bottles, and a little intention goes a long way. Your kids are watching everything — how you clean, what you choose, what you decide matters. And this? This is one of those small, quiet things that adds up to something really good over time.


    📖 You Might Also Like:

    Frequently Asked Questions

    What are the best natural ingredients for DIY cleaning products?

    The five you really need are white distilled vinegar, baking soda, castile soap, hydrogen peroxide (3%), and essential oils like tea tree and lemon. From just those ingredients, you can make effective cleaners for every room in your home.

    Are DIY natural cleaners actually effective, or do I still need commercial products?

    For everyday cleaning — counters, toilets, floors, glass, laundry, and more — DIY natural cleaners work extremely well. Vinegar disinfects, baking soda scrubs, tea tree oil has real antimicrobial properties, and castile soap cuts grease. They may take an extra minute of dwell time compared to harsh chemical formulas, but they genuinely get the job done.

    Is it safe to mix vinegar and baking soda in a cleaning recipe?

    You can use them together (like for a drain cleanse where the fizzing action is the point), but you generally shouldn’t pre-mix them in a spray bottle as a cleaner. They neutralize each other, reducing the effectiveness of both. Use them separately for best results.

    Can I use vinegar to clean all surfaces?

    Vinegar is great for most surfaces — tile, glass, laminate counters, appliances, and floors — but you should avoid using it on natural stone (like marble or granite) because the acidity can etch and damage the surface. Also avoid it on hardwood floors and cast iron. Use plain castile soap and water for those instead.

    How long do homemade natural cleaning products last?

    Most DIY spray cleaners made with vinegar, water, and essential oils will last 2–4 weeks when stored in a cool, dark spot in glass bottles. Avoid direct sunlight, which can break down the essential oils faster. Recipes that include fresh citrus (like citrus peels infused in vinegar) should be used within a few weeks as well.

  • Free Florida Homeschool Transcript Template (And How to Actually Fill It Out)

    Free Florida Homeschool Transcript Template (And How to Actually Fill It Out)

    Free Florida Homeschool Transcript Template (And How to Actually Fill It Out)

    🌿 The Short Version: Creating a homeschool transcript in Florida doesn’t have to be complicated or expensive — you can make a clean, professional one yourself for free. This post walks you through exactly what to include, how to calculate GPA, and gives you a simple template you can copy and customize today.

    This post contains affiliate links. I may earn a small commission at no extra cost to you.

    So your kid is getting older and suddenly the word “transcript” is showing up in every homeschool conversation you’re in. Maybe you’re just starting high school years and want to get organized now. Maybe someone in your co-op mentioned it and now you’re low-key panicking. Either way — I’ve been there, and I want to tell you: it’s genuinely not as scary as it sounds.

    We homeschool on the Florida PEP scholarship with a Charlotte Mason approach, which means a lot of what we do doesn’t look like a traditional school day. Nature journals, living books, time outside, hands-on projects with the chickens — it all counts. And one of the biggest mental hurdles I had to get over was learning how to translate that rich, real education into a document that colleges, dual enrollment programs, and scholarship committees can actually read.

    A transcript is just a record. It’s your version of what your student learned, presented in a standardized way. And yes, you can make one yourself, for free, that looks completely professional.

    Let’s walk through it.


    What Is a Homeschool Transcript and Do You Actually Need One?

    A homeschool transcript is an official academic record that lists the courses your student completed, the grades they earned, and their cumulative GPA. It’s used for:

    • College applications
    • Dual enrollment (Florida Virtual School, community colleges, etc.)
    • Scholarship applications
    • Certain job or military applications

    In Florida, homeschool families operate under their own authority — whether through a cover school, a church school umbrella, or as a private school themselves. That means you are the issuing institution for your child’s transcript. Which sounds intimidating until you realize it just means you get to do it your way.

    If your student is still in elementary or middle school, you don’t need a formal transcript yet — but keeping good records now will make high school so much easier. (And if you’re curious about Florida’s evaluation and portfolio requirements at the K-12 level, I broke that down in Florida Homeschool Testing Requirements: Evaluation vs Portfolio (What You Actually Need to Know).)


    What to Include in a Florida Homeschool Transcript

    Here’s the basic structure. You don’t need fancy software. A clean Google Doc or Word document works perfectly.

    Header / School Information

    • School name (yes, name your homeschool — ours is something simple and meaningful to our family)
    • Your city and state (Pensacola, FL in our case)
    • Phone or email for contact
    • Student’s full legal name
    • Date of birth
    • Graduation date or expected graduation date

    Academic Record by Year

    Organize by grade level (9th, 10th, 11th, 12th). For each year, list:

    • Course name
    • Credit hours earned (typically 1.0 for a full-year course, 0.5 for a semester)
    • Grade earned (letter grade or percentage)
    • GPA points

    Cumulative GPA

    Calculate this at the bottom. I’ll show you how in a minute.

    Graduation Requirements Met

    Florida has a standard diploma track. Even as homeschoolers, it’s helpful to note that your student completed equivalent coursework in core areas: English, Math, Science, Social Studies, Electives, PE, etc.

    Signature Line

    Sign and date it as the “school administrator” — that’s you, mama.


    Free Florida Homeschool Transcript Template (Copy This)

    Here’s a plain-text version you can copy into a Google Doc and format however you like. Clean, simple, professional.


    [Your Homeschool Name]

    [City, State, ZIP] | [Email or Phone]

    OFFICIAL ACADEMIC TRANSCRIPT

    Student Name: _______________________

    Date of Birth: _______________________

    Graduation Date: ____________________


    9th Grade — [School Year]

    | Course | Credits | Grade | GPA Points |

    |—|—|—|—|

    | English I | 1.0 | A | 4.0 |

    | Algebra I | 1.0 | B | 3.0 |

    | Biology | 1.0 | A | 4.0 |

    | World History | 1.0 | A | 4.0 |

    | Physical Education | 0.5 | Pass | — |

    | Elective (e.g., Art) | 0.5 | A | 4.0 |

    Grade-Level GPA: [calculate here]

    (Repeat this table for 10th, 11th, and 12th grade)


    Cumulative GPA: ______

    Total Credits Earned: ______

    I hereby certify that this transcript is a true and accurate record of the academic work completed by the above-named student.

    Administrator Signature: _______________________ Date: ____________


    Save it as a PDF before you send it anywhere. It just looks more official that way.

    📌 Love this? Save it to Pinterest so you can find it later!


    How to Calculate Homeschool GPA

    This trips people up, but it’s honestly just math.

    Standard GPA scale:

    • A (90–100%) = 4.0
    • B (80–89%) = 3.0
    • C (70–79%) = 2.0
    • D (60–69%) = 1.0
    • F = 0

    For weighted courses (AP, dual enrollment, honors), add 0.5 or 1.0 point depending on your policy — just note your grading scale on the transcript.

    To calculate GPA:

    1. Multiply each course’s GPA value by its credit hours
    2. Add all those numbers together
    3. Divide by total credit hours

    So if your student took 4 one-credit courses and earned 4.0, 3.0, 4.0, and 3.0:

    (4.0 + 3.0 + 4.0 + 3.0) ÷ 4 = 3.5 GPA

    Do this for each year, then recalculate across all four years for the cumulative GPA.


    How Charlotte Mason Courses Translate to Transcript Credits

    This is the part I really want to talk about because it’s where CM homeschool mamas get nervous.

    Your nature study? That’s science. Keep a simple log of topics covered — bird identification, botany, local ecosystems — and it absolutely counts. We use a nature journal year-round and I’ve started keeping a separate teacher copy where I note what we observed and studied each week. Over a full year, that becomes a legitimate science elective.

    Living books and narration? English and Literature. Document the books read, the written narrations, the oral narrations, copywork from a copywork notebook — all of it.

    Hands-on projects — like caring for our backyard chickens, tracking feed costs, managing the flock — can count toward agriculture, life skills, or even math depending on how you document it. We use Storey’s Guide to Raising Chickens as a reference text, and that 100% lives on our bookshelf as a legitimate resource.

    For structured subjects, we use things like Math-U-See which makes it easy to assign a course name and level to a transcript.

    The key is documentation. You don’t need a textbook for everything. You need a record.

    If you want ideas for documenting your nature study in a way that also builds that record, check out our Charlotte Mason Nature Study Journal Prompts by Season — it’s one of my favorite resources on this site.


    A Few Florida-Specific Things to Know

    If your student wants to dual enroll at a Florida community college or state college, most schools require a transcript from your homeschool. Pensacola State College, Northwest Florida State — they all have their own requirements, so call the admissions office and ask directly what format they want. Most just need a clean document like the one above.

    For the Florida Bright Futures Scholarship, homeschool students are absolutely eligible but there are additional requirements (volunteer hours, test scores, etc.) that go alongside the academic record. The Florida Department of Education website has the current requirements — always go straight to the source on that one since it changes.

    If you want more context on how Florida homeschool laws and record-keeping work at the K-12 level, start with Florida Homeschool Testing Requirements: Evaluation vs Portfolio — I cover the whole framework there.


    Tools and Resources That Help

    You don’t need to buy anything to make a transcript. But if you want to stay organized throughout high school so making the transcript is easy, a good homeschool planner is worth every penny. I use mine to log books, topics, and hours as we go so I’m not trying to reconstruct everything at the end of the year.

    Rainbow Resource (rainbowresource.com) also has a good selection of transcript and record-keeping tools if you want something more structured.


    You’ve Got This

    Here’s what I want you to walk away knowing: you are completely capable of creating a professional, legitimate homeschool transcript for your child. You don’t need a cover school to do it for you (though that’s an option if you want it). You don’t need expensive software. You need a document that clearly shows what your student learned, that you sign as the administrator of your homeschool.

    The education you’re giving your kids — the real books, the outdoor time, the hands-on projects, the unhurried mornings — all of that translates. It just needs to be recorded and presented in a way that the world outside your front door can understand.

    And when in doubt, keep more records than you think you need. Future you will be so grateful.


    📖 You Might Also Like:

    Frequently Asked Questions

    Do Florida homeschool students need an official transcript?

    Yes, if your student plans to apply to college, dual enroll at a Florida college or university, or apply for the Bright Futures Scholarship, they will need a transcript. As a homeschool parent operating under Florida law, you are the issuing administrator and can create one yourself — no cover school required.

    What should be included in a homeschool transcript in Florida?

    A Florida homeschool transcript should include your homeschool name and contact information, your student’s full name and date of birth, a list of courses taken each year with credit hours and grades, cumulative GPA, total credits earned, and your signature as the school administrator.

    How do I calculate GPA for a homeschool transcript?

    Use a standard 4.0 scale: A=4.0, B=3.0, C=2.0, D=1.0. Multiply each course’s GPA value by its credit hours, add all results together, then divide by the total number of credit hours. Do this for each year and again across all years to get the cumulative GPA.

    Can Charlotte Mason or nature-based learning count as high school credit in Florida?

    Absolutely. In Florida, homeschool parents have wide latitude in how they educate and what counts as credit. Nature study can be documented as science, living books and narration as English and literature, and hands-on projects as electives or life skills. The key is keeping thorough documentation of what was studied, how many hours were spent, and what the student produced.

    Is a homeschool transcript accepted for Florida dual enrollment?

    Yes, most Florida state colleges and community colleges accept homeschool transcripts for dual enrollment consideration. Requirements vary by institution, so it’s best to contact the admissions or dual enrollment office directly at the school your student plans to attend. Bring a clean, signed transcript and be prepared to also submit standardized test scores in some cases.

  • Best Chicken Breeds for Egg Color Variety (And Which Ones Actually Thrive in Florida)

    Best Chicken Breeds for Egg Color Variety (And Which Ones Actually Thrive in Florida)

    Best Chicken Breeds for Egg Color Variety (And Which Ones Actually Thrive in Florida)

    🌿 The Short Version: If you want a beautiful rainbow egg basket, you need a mix of breeds — not just one. This post breaks down the best chicken breeds for egg color variety, which ones lay blue, green, chocolate brown, and white eggs, and which breeds actually hold up in Florida’s heat so your colorful flock is also a practical one.

    This post contains affiliate links. I may earn a small commission at no extra cost to you.

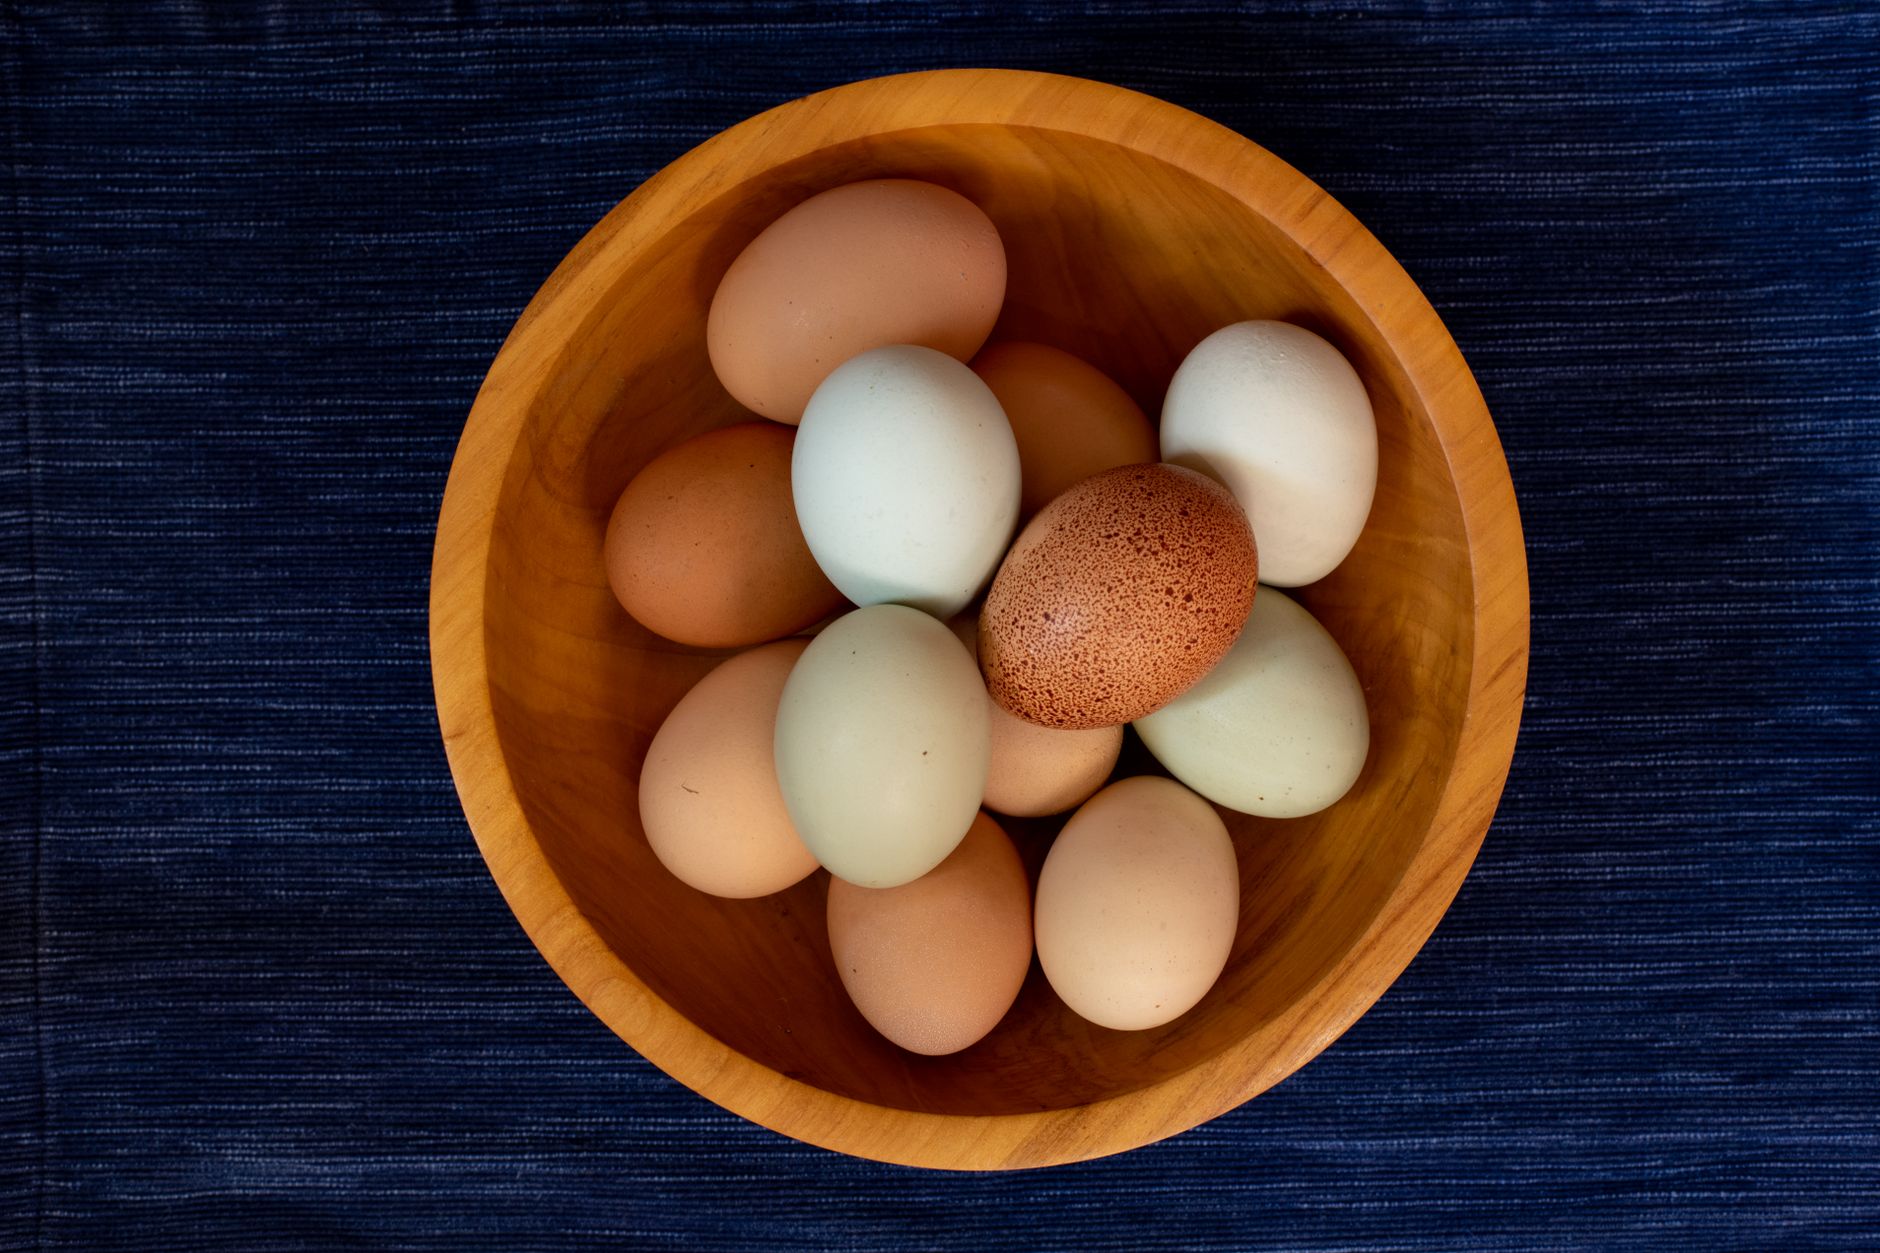
    The morning my oldest carried in a basket with a blue egg, a deep chocolate brown one, and two pale pinks all nestled together, she stopped in the kitchen doorway and just stared at it. “Mama, it looks like Easter.” And honestly? She wasn’t wrong.

    That’s the magic of a mixed flock. You’re not just raising chickens — you’re raising a little daily wonder. For our Charlotte Mason homeschool, it’s become one of the best nature study tools we didn’t plan for. The kids sketch the eggs in their nature journals, we talk about why egg shells have color (spoiler: it’s all about pigment deposits in the shell gland — hello, real science), and some mornings the egg basket alone is enough to spark a whole conversation.

    If you’re building a backyard flock and want that rainbow basket effect, here’s what you actually need to know about chicken breeds and egg color — including which ones won’t wilt in our Northwest Florida summers.


    Why Egg Color Varies (Quick Science for the Homeschool Win)

    All eggs start white. The color comes from pigments applied as the egg moves through the hen’s reproductive tract. Brown eggs get their color from a pigment called protoporphyrin. Blue eggs come from a pigment called oocyanin, which actually penetrates the shell all the way through (crack one open — it’s blue inside too). Green eggs? That’s blue shell genetics plus a brown overlay. Pretty cool, right?

    This is such a great conversation to have with elementary-age kids. We’ve used it to tie into our science readings, and my kids could tell you the basics of it now like it’s nothing. Real learning, no worksheet required.


    The Best Chicken Breeds for a Rainbow Egg Basket

    Blue and Green Eggs

    Easter Eggers are probably the most popular choice for colorful egg baskets, and for good reason. They’re not a true breed — they’re mixed birds with Araucana or Ameraucana genetics — which means you don’t always know exactly what color egg you’ll get until that first lay. Some are blue, some are green, some are even pink or olive. The surprise is half the fun. They’re also friendly, cold-hardy and heat-tolerant, which matters a lot down here.

    Ameraucanas lay reliably blue eggs and are a true breed. They’re a little more reserved than Easter Eggers but dependable layers. If you want to know for sure you’re getting blue, these are your bird.

    Cream Legbars are a newer favorite in backyard flocks. They auto-sex at hatch (meaning you can tell males from females as chicks), and the hens lay a lovely sky blue egg. They can be a bit flighty but they do fine in Florida if they have good shade and airflow.

    Chocolate Brown and Dark Brown Eggs

    Marans — especially Black Copper Marans — are the superstar of the dark egg world. Their eggs are a deep, rich chocolate brown that looks almost painted. They’re beautiful in the basket and beautiful on the table. Marans can handle heat reasonably well but do best with good shade, access to fresh water, and smart coop ventilation. A good chicken waterer is non-negotiable in our Florida summers.

    Welsummers lay a gorgeous terracotta-brown egg, often speckled. They’re active foragers — our kind of chicken — and do well in warm climates. My kids love the speckled eggs especially.

    Barnevelders are another dark-brown layer that doesn’t get talked about enough. Double-laced feather pattern, calm temperament, good layer. A solid pick.

    White and Cream Eggs

    If you want that full contrast in your basket, you need a white or cream egg layer too. Leghorns are the classic choice — they’re heat-tolerant, productive, and lay bright white eggs consistently. A little skittish but incredibly hardy in our climate. Andalusians and Anconas are also great white-egg options that tend to do well in heat.

    For a softer cream egg, Faverolles are a gentle, fluffy, sweet-natured breed that kids absolutely adore. Ours follow my daughter around the yard like puppies.

    Olive Eggs

    Olive Eggers are a hybrid — usually a cross between a dark brown egg layer (like a Marans or Welsummer) and a blue egg layer (like an Ameraucana). The result is a deep, mossy olive green egg that is genuinely stunning in the basket. You can buy true Olive Egger chicks from reputable hatcheries, and they’re well worth adding if you want that earthy green tone.


    📌 Love this? Save it to Pinterest so you can find it later!

    Building Your Florida-Friendly Rainbow Flock

    Here’s the honest truth: not every beautiful egg layer is going to thrive in Pensacola heat. We’ve learned this the hard way. Some breeds that do great in backyard flocks up north really struggle once July hits and the humidity feels like a wet blanket.

    For a heat-tolerant rainbow flock in the Florida panhandle, here’s a starter lineup that’s worked well for us and other local flock keepers:

    • Easter Eggers — blue/green eggs, heat tolerant, friendly
    • Black Copper Marans — dark chocolate eggs, manageable in heat with good setup
    • Welsummers — speckled brown eggs, active foragers, good in warmth
    • Leghorns — white eggs, excellent heat tolerance, productive
    • Olive Eggers — olive green eggs, generally hardy

    For more on which breeds specifically hold up in our Southern summers, I’ve got a whole post on the best egg laying chickens for Florida heat that goes deeper on heat management and flock setup.


    What to Do With All Those Colorful Eggs (Besides Stare at Them)

    Beyond the obvious — eating them, selling extras, giving them to neighbors — the rainbow basket has become a genuine homeschool resource for us.

    We sketch and paint the eggs using Faber-Castell watercolors, which are our go-to for nature study art. The kids label each egg by breed, note the color, and sometimes measure the size. It’s Charlotte Mason nature study, chicken keeping, and art all in one basket.

    We also use the egg collection as a jumping-off point for discussing genetics, animal husbandry, and even some basic history of heritage breeds. If your kids are ready to dive deeper, Storey’s Guide to Raising Chickens is the reference book I reach for when we want real, solid information, and a kid’s guide to chickens is great for the younger ones who want their own copy to flip through.

    And if you want to tie in your Charlotte Mason nature study journaling more intentionally, sketching eggs by season is actually a sweet ongoing project — egg color and shell quality can shift with diet and season, and noticing that is real observational science.


    A Few Practical Notes Before You Order Chicks

    Order from a reputable hatchery whenever possible — Meyer Hatchery and Cackle Hatchery both ship to Florida and have good reputations for breed accuracy. If you order Easter Eggers or Olive Eggers, know that egg color isn’t guaranteed until first lay, and that’s okay. The mystery is part of the fun.

    Make sure your coop setup supports your birds in the summer heat. Good airflow, shade, fresh water always available — these matter more than almost anything else. We also use diatomaceous earth for pest management in the coop and it’s been a game-changer for keeping things clean and non-toxic. Our full coop cleaning routine is over in this post on natural chicken coop deodorizer if you want to see what we actually do week to week.


    The Real Reason We Love a Mixed Flock

    You could just get all one breed. You’d still have eggs. You’d still have happy kids. But there’s something about opening that nesting box and pulling out a little chocolate egg next to a pale blue one and a speckled brown one that makes the whole thing feel like a gift. My kids don’t take it for granted. They still get excited about it, even now.

    That’s the 1990s-style childhood we’re chasing — the everyday magic of real things, animals that depend on you, and mornings that start with dirt under your fingernails and something beautiful in your hands. The rainbow egg basket is just one piece of it, but it’s one of my favorites.

    If you’re just starting out or thinking about expanding your flock, I hope this helps you pick a lineup that gives you that color variety and actually works in the Florida heat. You deserve both.


    📖 You Might Also Like:

    Frequently Asked Questions

    What chicken breed lays the darkest brown eggs?

    Black Copper Marans are known for laying the darkest chocolate brown eggs of any breed. The depth of color can vary by individual hen and by diet, but Marans consistently produce the richest, deepest brown eggs you’ll find in a backyard flock.

    What chicken lays blue eggs?

    Ameraucanas and Araucanas lay true blue eggs. Easter Eggers — which carry Ameraucana or Araucana genetics — often lay blue or blue-green eggs, though their color isn’t guaranteed until first lay. Cream Legbars are another reliable blue egg layer.

    Can you get a rainbow egg basket from just one breed?

    Not really — different colors come from different breeds. To get a true variety of blue, green, brown, white, and olive eggs, you need a mixed flock with breeds specifically selected for those colors. Easter Eggers alone can give you some variety, but for a full rainbow you’ll want at least 3-4 different breeds.

    Do egg colors taste different?

    Nope! Egg shell color has no effect on flavor. What does affect flavor is the hen’s diet, access to forage, and freshness. A pasture-raised hen eating bugs and grass will lay a better-tasting egg regardless of shell color.

    What are the best chicken breeds for Florida heat that also lay colorful eggs?

    Easter Eggers, Leghorns, and Welsummers are all solid choices for Florida’s heat while also contributing color to your egg basket. Black Copper Marans can do well too with proper shade, ventilation, and fresh water access. Avoid heavier, heavily feathered breeds in extreme Southern heat without extra support.

  • How to Make Homemade Laundry Detergent (Non-Toxic, Actually Works, and Costs Almost Nothing)

    How to Make Homemade Laundry Detergent (Non-Toxic, Actually Works, and Costs Almost Nothing)

    How to Make Homemade Laundry Detergent (Non-Toxic, Actually Works, and Costs Almost Nothing)

    🌿 The Short Version: You only need three basic ingredients to make a non-toxic laundry detergent that actually cleans — even sweaty Florida kid clothes and muddy chicken-chasing outfits. This post walks you through exactly what we use, how we make it, and why we switched for good.

    This post contains affiliate links. I may earn a small commission at no extra cost to you.

    Okay, real talk. If you have kids who spend any amount of time outside — which, if you’re here, yours probably do — laundry is not a small thing. We’re talking grass-stained knees, red Florida dirt ground into white socks, and whatever mystery substance ends up on a shirt after an afternoon in the backyard with the chickens. Our laundry pile is basically a nature journal in fabric form.

    For a long time I just bought whatever detergent was on sale, told myself it was fine, and moved on. But the more I started paying attention to what we were bringing into our home — the cleaners, the food, the personal care stuff — the harder it was to ignore what was in that giant plastic jug sitting on my laundry shelf. Synthetic fragrances, optical brighteners, stabilizers with names I can’t pronounce. All going into our kids’ clothes. All sitting against their skin all day.

    So I started making our own, and honestly? I wish I’d done it years ago. It’s cheaper, it’s simple, and it works. Let me show you exactly what we do.


    Why We Switched to Homemade Non-Toxic Laundry Detergent

    I’m not here to scare you. But I do think it’s worth knowing that a lot of conventional laundry detergents contain ingredients that aren’t fully disclosed (thanks to fragrance loophole laws), and some of those ingredients are linked to skin irritation, hormone disruption, and respiratory issues. For kids who are outside in the heat all day — which is basically nine months of the year down here in the Pensacola area — their skin is sweating and absorbing things constantly.

    Making your own detergent means you know exactly what’s in it. Three ingredients. That’s it.

    And the cost? I spend maybe $15-20 a year on laundry detergent now. For our whole family. It’s almost embarrassing how much I used to spend.


    What You Need to Make Non-Toxic Laundry Detergent

    Here’s the base recipe we’ve used for over two years now:

    The Ingredients

    • Washing soda (sodium carbonate — not baking soda, different thing)
    • Borax (naturally occurring mineral, not the same as boric acid)
    • Pure castile soap bar, grated — Dr. Bronner’s unscented is our go-to

    That’s genuinely it.

    Optional add-ins that we love:

    • A few drops of essential oil (lavender or tea tree work well)
    • Food grade diatomaceous earth — yes, the same stuff we use in the chicken coop! A small amount can boost cleaning power and works as a natural deodorizer
    • Wool dryer balls in the dryer instead of dryer sheets (this isn’t in the detergent but it completes the whole non-toxic laundry routine beautifully)

    Basic Supplies

    • Box grater or food processor
    • Large mixing bowl
    • Airtight container for storage
    • Measuring scoop

    The Recipe (Step by Step)

    Step 1: Grate Your Soap

    Grate one bar of castile soap using a fine cheese grater. This is honestly the most annoying step and it takes about five minutes. My kids fight over who gets to do it now — same kids who fought over who got to hold the baby chicks, so you know the bar for excitement is different around here. You can also pulse it in a food processor until it’s fine crumbles.

    Step 2: Mix Your Dry Ingredients

    Combine:

    • 1 cup washing soda
    • 1 cup borax
    • 1 cup grated castile soap

    Stir it all together until it’s evenly mixed. Add essential oils now if you’re using them — just drizzle them in and stir.

    Step 3: Store It

    Pour into an airtight container. A mason jar works great. A repurposed glass jar works great. Whatever you’ve got.

    How Much to Use

    • Standard load: 1–2 tablespoons
    • Heavily soiled (hi, farm kids): 2–3 tablespoons
    • HE machines: 1 tablespoon is usually plenty — less suds is actually better for HE washers

    This recipe makes about 3 cups of detergent, which lasts our family of four roughly 2–3 months depending on the season. (Summer in Florida = more laundry. Always.)


    📌 Love this? Save it to Pinterest so you can find it later!


    Tips for Florida Families Specifically

    A few things I’ve learned making this down here in the humidity and heat:

    The clumping issue is real. Humidity can cause powdered detergent to clump in storage. Keep your container in a cool, dry spot — a cabinet away from your washer (which generates steam) works best. Tossing a food-safe silica packet in the container helps too. Give it a quick stir before each use and you’re good.

    Hard water matters. Parts of Northwest Florida have pretty hard water, and that can affect how well soap rinses out. If you’re noticing residue, bump up your washing soda slightly — it’s a water softener and helps with that.

    Sun is your friend. Line drying in the Florida sun is a free, chemical-free stain fighter. Sun naturally bleaches and deodorizes. We hang everything we can outside, and I’m convinced sunlight does more for our whites than anything in a bottle ever did.


    What About Tough Stains?

    I’ll be honest — this detergent handles everyday dirt, sweat, and general kid grime really well. For tougher stains (chicken coop adventures, berry picking, that one time someone sat in the mulch pile), I pre-treat with a paste of washing soda and water, or I use a small spray of Grove Collaborative’s stain remover, which fits right into our non-toxic routine.

    For our natural coop cleaning routine (which absolutely generates its own laundry situation), I’ve written more over at Natural Chicken Coop Deodorizer and Cleaning Routine (What Actually Works for a Backyard Flock) — same philosophy, different space.


    Making This a Homeschool Moment (Because Of Course We Do)

    This is one of those practical life skills that fits right into our Charlotte Mason approach — learning by doing, learning things that matter. When we make a batch of detergent, we talk about what each ingredient does. Washing soda cuts through grease. Borax is a naturally occurring mineral found in the earth. Soap molecules surround dirt and lift it away from fabric.

    That’s chemistry. That’s practical science. And it sticks way better than a worksheet.

    If your kids are into nature journaling, this kind of observation — watching how things clean, what works and what doesn’t — fits beautifully into the kind of real-world learning we talk about in Charlotte Mason Nature Study Journal Prompts by Season (For Real Kids Who’d Rather Be Outside). Same curious, hands-on spirit.

    This is also just the kind of thing kids in the 1990s watched their parents do without thinking twice — making do, using simple things, not everything coming from a plastic bottle with a cartoon character on it. I love giving my kids that same experience. There’s something grounding about knowing how to make the things you use.


    The Full Non-Toxic Laundry Routine (What We Actually Do)

    In case you want the whole picture:

    • Detergent: Homemade powder (recipe above)
    • Fabric softener: White vinegar in the rinse cycle (about ½ cup — no, your clothes don’t smell like vinegar, I promise)
    • Dryer: Wool dryer balls with a drop of lavender essential oil if I’m feeling fancy
    • Stain treatment: Washing soda paste or Grove Collaborative spray
    • Sunlight: Whenever possible — free, effective, zero packaging

    Simple. Cheap. Clean.


    One More Thing on the Non-Toxic Front

    If you’re in the process of cleaning up your home products overall, laundry is a great place to start because it touches everything your family wears. But it doesn’t have to happen all at once. We’ve slowly swapped things out over a couple of years — cleaning supplies, personal care, food storage. If you’re looking for a good next step after laundry, Grove Collaborative is where I order a lot of our refillable cleaning stuff and it’s been a game changer for reducing plastic and keeping things simple.


    You’ve Got This

    If you’d told me five years ago I’d be grating soap bars and mixing up laundry detergent in my kitchen, I’d have laughed. But here we are, and honestly it’s one of those small changes that just makes me feel good every time I do it. It’s not about being perfect. It’s about making intentional choices where you can, one batch at a time.

    Your kids’ clothes are going to get dirty. That’s a feature, not a bug. Let them play. Let them dig. Let them chase the chickens and come in smelling like Florida sunshine and adventure. We’ll handle the laundry.


    📖 You Might Also Like:

    Frequently Asked Questions

    Is homemade laundry detergent actually effective on heavily soiled clothes?

    Yes — especially with this three-ingredient recipe. Washing soda is a powerful cleaning booster, borax softens water and lifts grime, and castile soap does the actual scrubbing work. For extra-dirty loads (think: kids who spend real time outside), use 2–3 tablespoons and consider pre-treating stains with a washing soda paste. Sun-drying after washing also helps lift any remaining residue and naturally deodorizes fabric.

    Is borax safe to use in laundry detergent for kids?

    Borax is a naturally occurring mineral that has been used in household cleaning for over 100 years. When used in laundry (not ingested or applied directly to skin), it is widely considered safe. That said, if you have concerns, you can simply omit it and double your washing soda — the detergent will still work well. As with all cleaning products, store it out of reach of young children.

    Can I use homemade powdered laundry detergent in an HE (high-efficiency) washing machine?

    Yes! HE machines actually do better with low-suds detergents, and homemade powder creates far less sudsing than commercial detergents. Use just 1 tablespoon per load in an HE machine. If you notice any residue over time, you can run an occasional empty hot water cycle to rinse the drum.

    How do I keep homemade powdered laundry detergent from clumping in humid climates like Florida?

    Humidity is the main enemy of powdered detergent — especially in Florida! Store your detergent in an airtight container away from the steam your washer generates. A cabinet across the room or in a closet works well. You can also toss a food-safe silica gel packet into the container to absorb moisture, and just give the powder a quick stir before scooping. It’s a minor inconvenience for a product that costs almost nothing and works great.

    How much does it cost to make homemade laundry detergent compared to buying it?

    Significantly less. A box of washing soda, a box of borax, and a bar of castile soap together cost roughly $10–14 and will make multiple batches of detergent — enough to last a family of four several months. Compared to $15–25 for a name-brand detergent that lasts just a few weeks, the savings add up fast. Many families report spending $15–25 per year total on laundry once they switch to making their own.

  • Charlotte Mason Nature Study Journal Prompts by Season (For Real Kids Who’d Rather Be Outside)

    Charlotte Mason Nature Study Journal Prompts by Season (For Real Kids Who’d Rather Be Outside)

    Charlotte Mason Nature Study Journal Prompts by Season (For Real Kids Who’d Rather Be Outside)

    🌿 The Short Version: Charlotte Mason nature journaling doesn’t have to be complicated or Pinterest-perfect — it just has to get your kids noticing the world around them. This post gives you seasonal prompts that work for real kids in real life, including down here in Florida where “seasons” look a little different than the rest of the country.

    This post contains affiliate links. I may earn a small commission at no extra cost to you.

    Here’s what nature journaling looked like in our house about a year ago: I handed my kids a blank notebook, said “draw something from outside,” and got two blank stares and one meltdown.

    Turns out, “go observe nature” is a little too open-ended when you’re seven. Who knew.

    What actually worked? Giving them a specific thing to look for. A question to answer. A tiny mission. That’s when the pages started filling up — and honestly, that’s when I started looking forward to it too.

    If you’re doing a Charlotte Mason or nature-based homeschool and you’ve been wondering how to make nature journaling feel less like pulling teeth and more like something your kids actually ask to do, this is for you. I’m sharing the prompts we rotate through by season — adapted for Florida, because yes, we do have seasons down here. They’re just… subtle.


    First, a Word About Supplies (Keep It Simple)

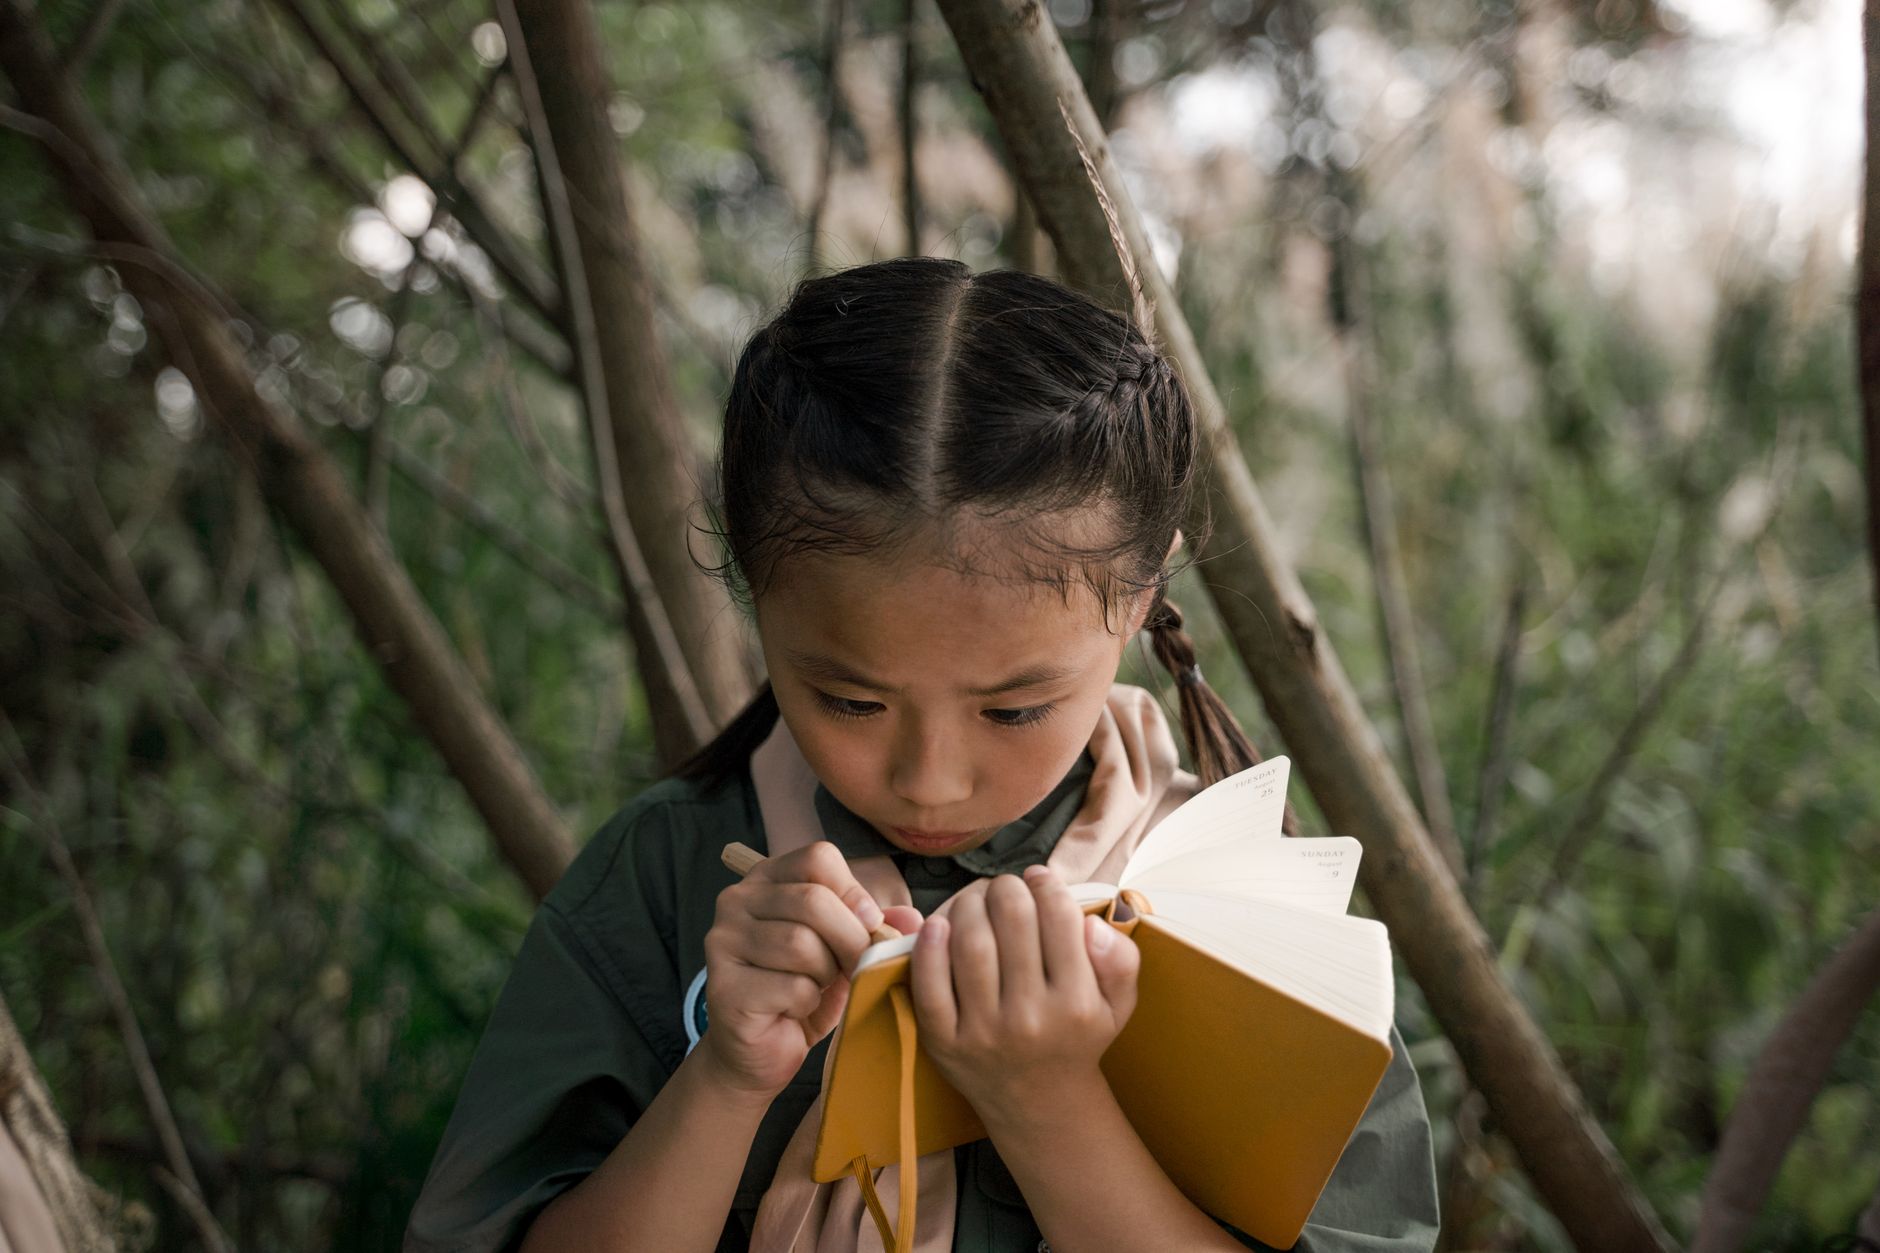
    You don’t need anything fancy to start. Truly. We use a dedicated nature journal for each kid — it has blank pages which works way better than lined for sketching — and a set of Faber-Castell watercolors that have held up for years. A pencil, an eraser, and a magnifying glass or pocket microscope round it out nicely.

    For bird ID (because birds come up in every season), we keep the Sibley Birds guide on the shelf and grab it constantly. My older kids have started using it independently, which is one of those small homeschool wins that feels enormous.

    Okay. Prompts. Let’s go.


    Fall Nature Journal Prompts (October–November in Florida)

    Fall in Northwest Florida is glorious — the humidity finally breaks, the light turns golden, and the kids practically live outside again after surviving August. This is prime nature journaling season for us.

    Prompts to try:

    • Draw and label one tree you can see from the backyard. Is it losing leaves or staying green?
    • Find a seed pod or acorn. Sketch it from two angles — top and side.
    • Watch the bird feeder for 10 minutes. List every bird you see. Can you identify any using a field guide?
    • What does the air smell like today compared to summer? Write three describing words.
    • Find something that’s decomposing (a leaf, a stick, a piece of fruit). Draw it and describe what you think is happening to it.
    • Where do you think the butterflies go when it gets cold? Write your best guess.

    Fall is also when we start seeing more bird migration activity in our yard and down at the bay. If your kids have caught the bird bug, check out our post on Charlotte Mason Picture Study — the same slow-looking skills transfer beautifully to bird observation.


    Winter Nature Journal Prompts (December–February)

    Winter here is mild and genuinely lovely. We get maybe a handful of cold snaps, some frost if we’re lucky (or unlucky, depending on the garden situation), and the kids are outside most days in a light jacket. The garden slows, but there’s actually so much to observe.

    Prompts to try:

    • Sketch the bare branches of a tree. How do the branches get smaller as they go out?
    • Find evidence that an animal was here — tracks, chewed bark, a feather, droppings. Draw what you found.
    • Check on the chickens. How are they behaving differently in the cold? (Ours huddle more and slow down on laying.)
    • Measure and record the temperature at 8am, noon, and 4pm for three days. Do you notice a pattern?
    • Draw a cloud. Look up what type it is and label it.
    • Find something that’s still alive and green. Why do you think it survived the cold when other plants didn’t?

    Winter is honestly one of the best seasons for quiet, slow observation — the frantic growing and buzzing of summer calms way down and kids can actually focus on one thing at a time.

    📌 Love this? Save it to Pinterest so you can find it later!


    Spring Nature Journal Prompts (March–April)

    Spring in Florida hits fast and it hits hard. One week the yard looks dormant and then suddenly everything is exploding — new growth, insects, baby birds, the whole show. This is the busiest journaling season at our house.

    Prompts to try:

    • Find a flower and draw every part you can see. Look up the parts (petal, stamen, pistil) and label them.
    • Catch an insect (carefully!) and observe it for two minutes before releasing. Draw it and describe how it moves. A bug collection kit makes this so much easier and more humane.
    • Watch an ant trail for five minutes. Where are they going? What are they carrying?
    • Find a spider web — sketch it and try to figure out what kind of spider made it.
    • Plant one seed today. Sketch the seed before planting, then check and draw it every 3 days as it sprouts.
    • What new sounds do you hear outside today that you didn’t hear in January?

    Spring is also when our chickens ramp back up on egg production and the kids get really interested in the whole cycle of life again. We use those moments — a hen sitting on eggs, a chick hatching — as living science. If you want a great resource your kids can read themselves, the kid’s guide to chickens is wonderful for this age.


    Summer Nature Journal Prompts (May–September in Florida)

    Okay, real talk: summer in Pensacola is no joke. By 10am it’s brutal, and by July we’re doing nature journaling in 15-minute bursts at 7:30am before the heat wins. But there is SO much to observe if you get out early.

    Prompts to try:

    • Sketch the sky at sunrise. What colors do you see? What shapes are the clouds?
    • Find something that’s adapted to survive the heat. How do you think it does it?
    • Collect three different types of leaves from the yard. Press them and trace their shapes. Notice the veins — are they the same?
    • Watch a puddle after a summer rainstorm. What comes to drink from it? What insects appear?
    • Lie in the grass (early morning only — fire ants!) and look up. Draw exactly what you see from that angle.
    • Track a thunderstorm: what time did it start? How long did it last? Which direction did it move?

    Summer is also prime time for the kind of 1990s-style unstructured outdoor time that our family is really intentional about protecting. We write about that in detail over at Raising Kids Without Screens: What We Actually Do Every Day — the nature journal is honestly one of our biggest tools for making that happen without kids complaining of boredom five minutes in.


    Tips for Making Nature Journaling Stick

    Keep it short. Fifteen focused minutes beats an hour of resistance every single time. We do nature time before our morning lessons, and the journal comes with us — it’s not optional, but it’s also not a production.

    Don’t correct the art. A seven-year-old’s caterpillar looks like a lumpy snake. That’s fine. The goal is observation, not illustration. Charlotte Mason was clear on this — we’re training the eye, not the hand.

    Let them pick the subject sometimes. The prompts are a starting point. If your kid is obsessed with the garden spider that moved into the tomato cage, let them journal that spider for two weeks straight. Deep noticing of one thing is more valuable than shallow skimming of many.

    Make it cozy. A clipboard, their journal, their own set of watercolors, and a stainless steel water bottle they actually like carrying — small things make it feel like theirs.


    One Last Thing

    Nature journaling isn’t about producing beautiful pages. It’s about teaching your kids to slow down and actually see the world they’re standing in. In a time when everything is fast and loud and digital, sitting outside with a pencil and paying attention to a beetle for ten minutes is genuinely countercultural.

    And that’s exactly why we do it.

    I hope these prompts give your family a jumping-off point — and I’d love to hear what your kids end up noticing. Some of my favorite moments from the past year have come from my kids pointing out something I walked past a hundred times without seeing. That’s the whole point, really.

    Happy journaling, friends. Go get some dirt on your hands.


    📖 You Might Also Like:

    Frequently Asked Questions

    What should a Charlotte Mason nature journal include?

    A Charlotte Mason nature journal typically includes hand-drawn sketches of plants, animals, insects, and other natural objects, along with written observations, dates, weather notes, and sometimes watercolor illustrations. The focus is on careful, firsthand observation rather than copying from books or producing perfect artwork. Blank or lightly lined pages work best so kids have freedom to sketch and write however feels natural.

    How often should we do nature journaling with a Charlotte Mason approach?

    Charlotte Mason recommended getting outside daily, but formal nature journaling a few times a week is very realistic for most homeschool families. Even 15–20 minutes of intentional outdoor observation with sketching and writing is enough to build the habit and skills over time. Consistency matters more than duration — short and regular beats long and occasional.

    What age can kids start a nature journal?

    Kids can start nature journaling as young as 4–5 years old, though at that age it looks more like dictating observations to a parent who writes them down, or making simple scribble drawings. By around age 6–7 most kids can independently sketch and write a sentence or two. The prompts in this post are geared toward elementary-age kids, roughly K–5th grade.

    How do you do Charlotte Mason nature study in Florida when the seasons aren’t obvious?

    Florida definitely has seasons — they’re just defined by rainfall, humidity, temperature swings, and the creatures and plants that respond to those changes rather than dramatic leaf color or snow. Fall and winter in North Florida especially offer noticeably different light, temperatures, and bird activity. The key is tuning kids into *local* seasonal cues: when do the oak catkins drop? When do the monarchs pass through? When does the garden go dormant? Florida nature journaling can be incredibly rich once you stop waiting for fall leaves and start observing what’s actually changing.

    Do nature journal pages count toward Florida homeschool portfolio requirements?

    Yes — nature journal pages can absolutely be included in a Florida homeschool portfolio. They demonstrate science observation skills, writing, illustration, and critical thinking across multiple subjects. If you’re using the Florida PEP scholarship or maintaining a portfolio for your umbrella school or evaluator, nature journals are a great way to document hands-on learning in a tangible, meaningful way. Always check with your specific evaluator or umbrella school for their preferences on how portfolio materials should be presented.

  • How to Make Your Own Sourdough Starter from Scratch (Even If You’ve Never Done It Before)

    How to Make Your Own Sourdough Starter from Scratch (Even If You’ve Never Done It Before)

    How to Make Your Own Sourdough Starter from Scratch (Even If You’ve Never Done It Before)

    🌿 The Short Version: Making a sourdough starter from scratch takes about 7 days, a little flour, some water, and a whole lot of patience — and it’s way more forgiving than people make it sound. This post walks you through exactly what we do, day by day, so you can grow your own wild yeast culture and start baking real sourdough bread at home.

    This post contains affiliate links. I may earn a small commission at no extra cost to you.

    I want to be honest with you — I put off making a sourdough starter for almost two years because it sounded intimidating. Ratios, hydration percentages, discard schedules… people on the internet make it sound like you need a chemistry degree just to keep the thing alive.

    But here’s what I finally figured out: it’s just flour and water. That’s it. Wild yeast is literally in the air around you right now, floating through your kitchen, landing on your countertops. You’re not creating something from nothing — you’re just giving it a good home.

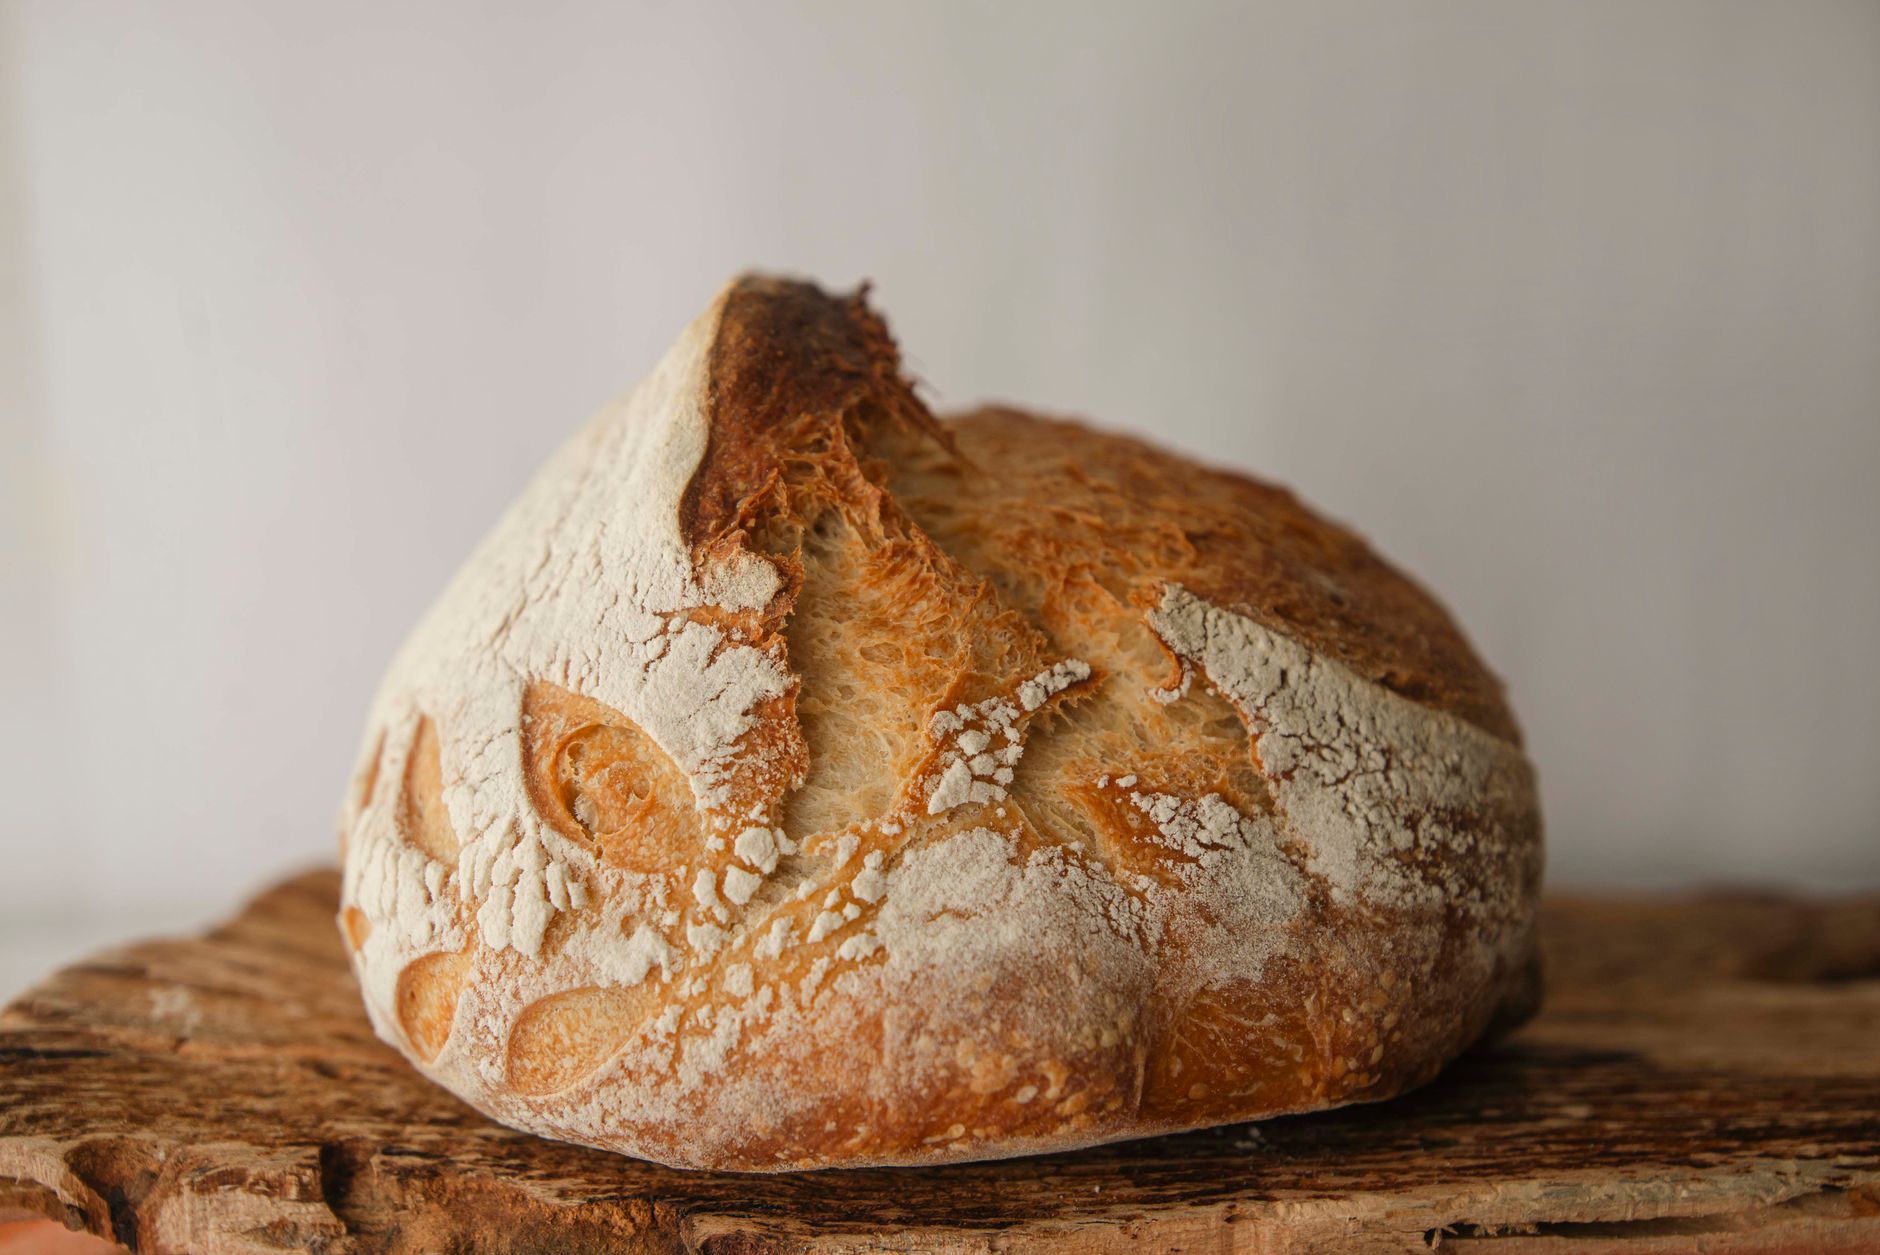
    We started our first starter on a slow Tuesday morning with the kids at the table, a jar we pulled from the cabinet, and a bag of whole wheat flour. Now we bake every week, and it’s become one of those quiet rhythms our family runs on — like feeding the chickens in the morning or reading aloud before bed.

    Let me walk you through exactly how to do it.


    What You’ll Need Before You Start

    The good news is you probably already have most of this.

    • A clean glass jar (a wide-mouth quart jar works great — we use canning jars and they’re perfect)
    • Unbleached all-purpose flour or whole wheat flour
    • Filtered or room-temperature tap water (chlorine in tap water can slow things down)
    • A kitchen scale — I really do recommend weighing instead of measuring cups. A kitchen scale takes the guesswork out of it completely and costs less than a bag of good flour.
    • A rubber band or piece of tape to mark the rise
    • A loose lid, cloth, or paper towel to cover it — not airtight

    You don’t need a fancy sourdough starter kit, but if you want a little set that makes a nice gift or a clean way to get started, those exist too.


    Why Whole Wheat Flour Works Better at First

    Whole wheat flour has more wild yeast and bacteria naturally present in it than white flour does. That means your starter tends to get active faster in the beginning. Once it’s established — usually after day 5 or 6 — you can switch to all-purpose if you prefer a milder flavor.

    We’ve made starters both ways and honestly, starting with whole wheat has been more reliable every single time.


    Day-by-Day Sourdough Starter Instructions

    Day 1 — Mix It Up

    In your clean jar, combine:

    • 50g whole wheat flour
    • 50g room-temperature water

    Stir well until no dry flour remains. It’ll look like a thick paste. Cover loosely and set it somewhere warm — we keep ours on top of the refrigerator where it stays around 75-78°F. In a Florida summer, your countertop might be warm enough on its own!

    Mark the level with a rubber band.

    Day 2 — Just Watch

    You might not see much yet. Maybe a bubble or two. That’s normal. Don’t feed it again today — just let it sit. Resist the urge to mess with it.

    This is a good time to talk to your kids about what’s happening if you’re doing this as a homeschool activity. The idea that invisible wild yeast is floating through the air and colonizing your jar? That’s genuinely fascinating science. My kids were riveted.

    Day 3 — First Feeding

    Pour out (discard) all but about 50g of your starter. Then add:

    • 50g flour
    • 50g water

    Stir, cover, mark the jar again, and leave it at room temperature. By today you’ll likely see more bubbles and maybe a slightly sour smell. That’s good.

    Day 4 — Things Should Be Happening

    Feed again (discard, then add 50g flour + 50g water). Your starter might be visibly bubbling and rising now. Mark the jar and watch it over the next several hours — you’re looking for it to rise and then fall back down. That peak moment is when it’s most active.

    Day 5 — Feed Twice

    If your starter is showing good activity — rising at least 50% above the mark, full of bubbles, smelling pleasantly sour — you can start feeding it twice a day. Morning and evening, same process: discard most, keep 50g, add 50g flour and 50g water.

    In our Florida heat, things tend to move faster. What takes people up north 7 days sometimes happens for us in 5.

    Day 6 — The Float Test

    Drop a small spoonful of starter into a glass of water. If it floats, it’s ready to bake with. If it sinks, keep feeding for another day or two. Don’t be discouraged if it takes a little longer — it’s alive and it’s working, just on its own schedule.

    Day 7 — You’re Ready

    Congratulations. You made something alive from scratch. That is genuinely cool.


    📌 Love this? Save it to Pinterest so you can find it later!

    How to Know If Something Went Wrong

    Here are the most common things that freak people out (and whether you actually need to worry):

    It smells really bad — like acetone or nail polish remover. This usually means it’s hungry. Feed it and the smell will mellow out. A ripe sourdough starter should smell tangy and yeasty, almost like beer or plain yogurt.

    There’s a gray or dark liquid on top. That’s called “hooch” — it’s just alcohol produced by hungry yeast. It means you need to feed it more often. Pour it off or stir it back in, then feed.

    It’s not rising at all by day 4 or 5. Try a warmer spot. Our kitchen in winter (if Florida even has a real winter) sometimes slows things down. Also try using filtered water if you haven’t been.

    It has pink, orange, or fuzzy mold. This is the one time you do need to throw it out and start over. Pink or orange streaks are a sign of contamination — usually from a dirty jar or utensil. Start fresh with a clean jar.


    How to Maintain Your Starter Long-Term

    Once your starter is active, you have two options:

    Bake regularly (2-3 times a week): Keep it on the counter and feed it every 12-24 hours.

    Bake occasionally: Stick it in the fridge with a loose lid. Feed it once a week. Pull it out the night before you want to bake, let it come to room temperature, give it a feeding, and it’ll wake right back up.

    We do the fridge method during busy weeks. It’s incredibly low maintenance once you get the hang of it.

    This kind of slow, rhythmic kitchen work is something I really do think kids benefit from watching — and participating in. It’s the same philosophy behind nature journaling, tending the chickens, growing a garden. There’s a patience and attentiveness that gets built when you have something living to care for. It’s a little like what Charlotte Mason meant when she talked about giving children real things to be responsible for.

    If you want to layer in more of that kitchen-as-classroom energy, check out our post on how to make homemade yogurt from scratch — it’s a similar vibe and the kids love it.


    Making Sourdough a Homeschool Moment

    We’ve used our starter as a genuine homeschool unit. Honestly, it covers more ground than you’d expect:

    • Science: Fermentation, wild yeast, bacteria, CO2 production, the rise and fall cycle
    • Math: Weighing ingredients, ratios, tracking how much the starter rises each day
    • Nature study: Talking about wild yeast in the environment, how humans have used fermentation for thousands of years
    • Life skills: Feeding something daily, reading a recipe, learning what “discard” means and why we do it

    My kids now remind me to feed the starter. That kind of ownership is exactly what I’m going for.

    If you’re into this kind of hands-on learning layered into your days, our post on composting at home for beginners has the same energy — another living system the kids can watch and tend.


    What to Do with Sourdough Discard

    Don’t throw it away! Discard can be used in:

    • Pancakes and waffles (our family favorite)
    • Crackers
    • Banana bread
    • Pizza dough
    • Muffins

    Search “sourdough discard recipes” and you’ll have more options than you’ll know what to do with. Nothing in this kitchen gets wasted — not scraps, not discard, not whey from the yogurt. That’s just how we roll.


    You’ve Got This

    I promise you don’t need to be a baker or a homesteader or someone who grew up making bread to do this. You just need a jar, some flour, and the willingness to pay attention for a week.

    Our starter is over two years old now. We’ve named it (yes, we did), neglected it for a month in the back of the fridge, revived it, and baked hundreds of loaves. It’s one of those things our family will probably keep going for a long time — the kind of quiet, nourishing rhythm that I really believe makes a home feel like a home.

    If you try it, I’d love to hear how it goes. Drop a comment below and tell me what day you are — and whether your kids are as obsessed with watching the bubbles as mine were.


    📖 You Might Also Like:

    Frequently Asked Questions

    How long does it take to make a sourdough starter from scratch?

    Most starters are ready to bake with in 5 to 7 days. In warmer climates like Florida, things can move a little faster because wild yeast is more active in the heat. You’ll know it’s ready when it reliably doubles in size within 4-8 hours of feeding and passes the float test.

    What kind of flour is best for making a sourdough starter?

    Whole wheat flour is best for getting started because it contains more natural wild yeast and bacteria than white flour. Once your starter is active and established, you can switch to unbleached all-purpose flour or use a mix of both. Avoid bleached flour, which can inhibit yeast activity.

    Why does my sourdough starter smell like alcohol or nail polish remover?

    That sharp acetone smell means your starter is hungry — it’s run out of food and is producing excess alcohol. Just discard most of it and feed it with fresh flour and water. The smell should mellow to a pleasant tangy-sour scent within a few hours of feeding.

    Do I have to feed my sourdough starter every day?

    If you keep it at room temperature, yes — you should feed it every 12 to 24 hours to keep it active. But if you only bake occasionally, you can store your starter in the refrigerator and feed it just once a week. Take it out the night before you want to bake, give it a feeding, and it’ll be ready to use the next morning.

    Can kids help make a sourdough starter?

    Absolutely — it’s one of the best hands-on kitchen projects for kids. Even young children can help stir, weigh ingredients on a kitchen scale, and mark the jar to track the rise. Older kids can learn the science of fermentation and wild yeast. It naturally builds math skills, scientific observation habits, and real-life responsibility — all without a worksheet in sight.

  • Best Worm Composting Bin for Beginners (What Actually Works and Why We Love It)

    Best Worm Composting Bin for Beginners (What Actually Works and Why We Love It)

    Best Worm Composting Bin for Beginners (What Actually Works and Why We Love It)

    🌿 The Short Version: Worm composting is one of the easiest, least-smelly ways to turn kitchen scraps into garden gold — and it’s a genuinely great hands-on project for kids. We’ll walk you through the best bins for beginners, what to look for, and how we actually make it work in a Florida home.

    This post contains affiliate links. I may earn a small commission at no extra cost to you.

    I’ll be honest — when I first heard “worm bin,” I pictured a soggy, stinky bucket under the sink that nobody wanted to deal with. I almost skipped it entirely. But then my kids found a nightcrawler in the garden, put it in a jar, and named it Gerald. And suddenly worm composting felt a lot more like our kind of thing.

    We’ve been doing it for a couple of years now, and I want to tell you — it is so much simpler than I made it in my head. It fits perfectly into our nature-based, Charlotte Mason homeschool life. The kids help feed the worms, we talk about decomposition and soil science, and the chickens go absolutely wild on any worms that escape during harvest time. It’s the circle of life happening right in our backyard, and honestly? I love it.

    If you’ve been curious about vermicomposting but don’t know where to start, let’s talk about the best worm composting bins for beginners — and what actually matters when you’re choosing one.


    Why Worm Composting Is Worth It (Especially in Florida)

    Here in Northwest Florida, our summers are brutal. A traditional outdoor compost pile can dry out, overheat, or turn into a gnat festival faster than you can say “Pensacola humidity.” A worm bin is actually better suited to our climate in a lot of ways — you can keep it in a shaded spot, a garage, or even inside if you want to.

    The finished product — called worm castings — is some of the richest, most bioavailable fertilizer you can put in a garden. We use it in our raised beds, mix it into our seed starting trays, and work it around our herb containers. Our tomatoes and sweet potatoes have genuinely never done better. (If you’re growing in Florida, check out How to Grow Sweet Potatoes in Your Florida Backyard (What Actually Works Down Here) — castings are a game changer for that crop.)

    And if you’re already doing any kind of composting with your kids, a worm bin is the natural next step. We have a whole rhythm around it. It ties into our nature journaling, our garden work, and our general approach of letting kids get their hands dirty and figure things out. Very 1990s. Very us.


    What to Look for in a Beginner Worm Bin

    Before I get into specific recommendations, here’s what actually matters:

    Airflow. Worms need oxygen. A bin with good ventilation keeps things aerobic (not stinky) and keeps your worms healthy.

    Drainage. Worm bins can get wet. You want somewhere for that liquid to go — either through drainage holes or a collection tray. That liquid, by the way, is called “worm tea” and it’s a fantastic liquid fertilizer.

    Size. For a family of four to six, you want at least a medium-sized bin. Too small and you’ll be harvesting constantly; too large and it takes forever to process.

    Stackable trays vs. single bin. This is the big decision. Single bins are cheaper and simpler. Stacking tray systems make harvesting WAY easier. For beginners, I lean toward a stacking tray system because you don’t have to dig through a pile of castings trying to separate worms — they just migrate up on their own.

    Material. Look for food-grade plastic or untreated wood. We try to avoid anything that’s going to off-gas into our soil or our kids’ hands.


    Our Top Picks for Beginner Worm Composting Bins

    Best Overall: A Stacking Tray Worm Bin

    This is the style I’d recommend to almost every beginner. The way it works: you start in the bottom tray, and once it’s full, you add a new tray on top with fresh bedding and food. The worms migrate up toward the food source, and the bottom tray is left full of beautiful, worm-free castings ready to harvest. No digging, no sorting, no mess.

    A good worm composting bin in this style typically comes with 3-4 trays, a collection tray at the bottom, and a spigot for draining worm tea. We keep ours in the shaded side of our backyard near the garden — it stays cool enough even through our Florida summers as long as it’s out of direct sun.

    Budget-Friendly Option: A Simple DIY Bin

    If you want to start small and cheap, two nested plastic bins (one with holes drilled in the bottom and sides for airflow) work just fine. It’s what I started with. The downside is harvesting is messier, but honestly? The kids think that part is the coolest. They love doing the “worm migration trick” where you put a light over the castings and the worms burrow down so you can scoop the top layer off.

    You can also go the route of a dedicated kitchen compost bin to collect your scraps before taking them out to the worm bin — it keeps the counter cleaner and makes the whole system feel more organized.


    What to Feed Your Worms (And What NOT To)

    This is where most beginners get tripped up, so let’s just cover it.

    Great worm food:

    • Fruit and vegetable scraps
    • Coffee grounds and paper filters
    • Crushed eggshells (we have plenty from our flock)
    • Shredded cardboard and paper
    • Tea bags (remove staples)

    Avoid:

    • Meat, dairy, or oily foods
    • Citrus in large amounts
    • Onions and garlic (in excess)
    • Anything treated with pesticides

    Our kids have this list memorized. It became part of our morning rhythm — they scrape breakfast plates and sort what goes to the worms, what goes to the chickens, and what goes in the trash. It’s practical life skills wrapped in an ecology lesson, which is very Charlotte Mason of us.

    📌 Love this? Save it to Pinterest so you can find it later!


    Making Worm Composting a Homeschool Moment

    If you’re a Charlotte Mason homeschool family, worm composting is basically a living nature study unit in a bin. We’ve used it to cover:

    • Biology — worm anatomy, life cycles, decomposers and their role in ecosystems
    • Soil science — what makes healthy soil, why castings are so nutrient-rich
    • Observation skills — the kids sketch worms in their nature journals and note changes over time
    • Math — weighing food scraps, tracking how much the bin processes in a week

    We’ve also used a pocket microscope to look at a pinch of castings up close. The kids were genuinely amazed at the microorganism activity. It turned into a whole rabbit trail on soil food webs, which is exactly the kind of learning I love.

    If you’re also doing outdoor composting alongside your worm bin, we have a whole post on Composting at Home for Beginners: How to Start with Kids (and Actually Keep It Going) that walks through our full setup.


    A Few Tips We Learned the Hard Way

    Don’t overfeed in the beginning. New worms take time to settle in and ramp up. Start slow — a handful of scraps every few days — and increase as they get established.

    Keep the bedding moist but not wet. Think “wrung-out sponge.” Too dry and the worms struggle. Too wet and things get anaerobic and smelly fast.

    Florida heat is the real enemy. Keep your bin in a shaded, ventilated spot. If it gets above 85°F inside the bin consistently, your worms will try to escape or die. Ours lives on the north side of our fence line in summer.

    Don’t ignore the worm tea. Drain it regularly through the spigot, dilute it about 10:1 with water, and use it on your garden plants. It is genuinely incredible stuff.


    The Bottom Line

    Worm composting is one of those things that sounds more complicated than it is. Once you get your bin set up and your worms settled in, it basically runs itself. Five minutes a week, maybe. And the payoff — for your garden, for your kids’ education, for reducing kitchen waste — is so worth it.

    We’ve folded it into our everyday life the same way we’ve folded in the chickens, the garden, and all the other small intentional things that make our home feel more connected to how food and life actually work. It’s not a project we maintain — it’s just part of how we live now.

    If you’re on the fence, just start. Get a simple worm composting bin, order some red wigglers (not regular earthworms — red wigglers are the composting variety), and let your kids name one Gerald. You’ll be hooked.


    📖 You Might Also Like:

    Frequently Asked Questions

    What is the best worm composting bin for beginners?

    For most beginners, a stackable tray worm bin is the easiest to manage. The worms migrate upward toward fresh food, leaving finished castings behind in the lower tray — no digging or sorting required. Look for a bin with good airflow, a drainage spigot for worm tea, and food-grade materials.

    Can I keep a worm bin outside in Florida?

    Yes, but placement matters a lot. Florida heat can kill worms if the bin gets above 85°F inside. Keep your bin in a shaded, well-ventilated spot — a north-facing fence line, a covered porch, or even a garage works well. Avoid full sun, especially in summer months.

    What kind of worms do I need for a worm bin?

    You want red wigglers (Eisenia fetida), not regular garden earthworms. Red wigglers are composting specialists — they thrive in the top layers of organic matter, reproduce quickly, and process kitchen scraps much faster than common earthworms. You can order them online or find them at local bait shops.

    How long does it take for worm castings to be ready?

    Typically 2 to 3 months for the first harvest, depending on how many worms you have and how much you’re feeding them. With a stacking tray system, the bottom tray is usually ready to harvest once the worms have migrated up to the next tray. The castings should look dark, crumbly, and earthy — like really rich soil.

    Is worm composting okay to do with kids?

    It’s honestly one of the best hands-on science activities you can do with elementary-age kids. They can help feed the worms, observe changes over time, learn about decomposers and soil health, and even sketch worms in a nature journal. Just have them wash their hands afterward — but that’s true of any good outdoor activity.

  • Florida Homeschool Graduation Ceremony Ideas (That Actually Feel Special)

    Florida Homeschool Graduation Ceremony Ideas (That Actually Feel Special)

    Florida Homeschool Graduation Ceremony Ideas (That Actually Feel Special)

    🌿 The Short Version: Homeschool graduations don’t have to look like public school ceremonies — and honestly, the best ones don’t. This post walks you through meaningful, doable graduation ideas for Florida homeschool families, whether you’re celebrating a kindergarten milestone or a full high school graduation.

    This post contains affiliate links. I may earn a small commission at no extra cost to you.

    There’s a moment that sneaks up on you when you’re a homeschool mama. You’re somewhere in the middle of a regular Tuesday — maybe your kid is narrating back a chapter from a living book, or sketching a caterpillar they found in the garden — and it hits you: we have done something real here. Something worth celebrating.

    Homeschool graduation ceremonies don’t get talked about enough. Most of what you find online is geared toward co-ops with dozens of families or high school seniors with formal diplomas. But what about the rest of us? The ones marking the end of kindergarten with muddy boots and a nature journal full of crayon drawings? Or finishing up fifth grade with a kid who can now identify Gulf Coast birds by their call?

    Down here in Northwest Florida, we have the gift of doing things our own way — and that includes how we celebrate milestones. Here’s what’s worked for our family and families we know, across every grade level.


    Why Homeschool Graduation Ceremonies Matter

    Kids need markers. They need to feel the weight of what they’ve accomplished — not just for motivation, but because it’s true. A year of learning happened. That deserves acknowledgment.

    Charlotte Mason herself believed deeply in the dignity of children and the real work of education. A graduation ceremony, even a small one, is a way of saying: you did something meaningful, and we see it.

    It also gives the whole family a natural rhythm and a sense of forward movement. Even if your homeschool looks gloriously different every year (ours sure does), a simple ceremony anchors each chapter.


    Ideas for Elementary Milestone Celebrations (K–5)

    End-of-Year Nature Walk Ceremony

    This is our personal favorite for elementary years. We pick a trail or nature area we love — Blackwater River State Forest is stunning if you’re in our area — and make it a special morning. Each child shares one thing they learned or discovered that year. We bring the nature journal they’ve kept all year and flip through it together. It sounds simple because it is, and it is genuinely one of the sweetest things we do.

    If your kids have been doing nature study with the Sibley Birds guide or a pocket microscope for notebooking, this is a beautiful moment to let them show off what they know in the field.

    Kindergarten “Stepping Up” Ceremony

    Kindergarten is huge. Don’t skip it. We did a tiny backyard ceremony — just our family and grandparents — where our oldest read a page from her first reader aloud. We used All About Reading that year, and hearing her read confidently after starting from zero was emotional in the best way.

    You can do a simple “Stepping Up” ritual: the child steps from one side of a small bridge (we used a wooden garden arch) to the other while you speak a blessing or read a poem over them. Flowers, a special meal, a small gift. That’s it. That’s enough.

    Portfolio Presentation Evening

    For older elementary kids (3rd–5th grade), consider hosting a portfolio presentation night. Invite grandparents, a close friend or two from your co-op, or your homeschool evaluator if you have one. The child presents three to five things they’re proud of from the year — artwork, a narration they wrote, a math milestone, a nature study page painted with Faber-Castell watercolors.

    This works especially well if you’re already keeping portfolios for Florida’s evaluation requirements. (If you’re newer to that process, check out my post on Florida Homeschool Testing Requirements: Evaluation vs Portfolio — it breaks down exactly what you need.)


    📌 Love this? Save it to Pinterest so you can find it later!


    Ideas for a Homeschool Co-op Group Ceremony

    If you’re part of a co-op — or even a small group of homeschool families — a shared ceremony is really special. We’ve done this with our local group and it’s become something the kids genuinely look forward to.

    Backyard or Park Ceremony

    Rent a pavilion at a local park (Gulf Islands National Seashore has stunning options), or host it in someone’s backyard. Each family brings a dish, there’s music (live if anyone plays!), and each graduating child gets a moment in front of the group.

    For the ceremony itself:

    • A parent or mentor reads a few words about the child’s character, not just their academics
    • The child shares a favorite memory or something they’re proud of
    • A small certificate or handmade keepsake is presented
    • Everyone cheers

    It has a 1990s neighborhood-cookout kind of energy that I absolutely love. Low-key, genuine, and memorable.

    Homeschool “Graduation Walk” with Mission Statements

    For middle-grade or older kids, have each child write a one-paragraph “mission statement” for the year ahead. They read it aloud before walking through an arch or across a decorated stage area. It’s simple public speaking practice that feels meaningful rather than performative.


    High School Homeschool Graduation in Florida

    For high school seniors, the stakes feel a little higher — and they should. This is a real graduation, and it deserves real ceremony.

    What You’ll Need Logistically

    • A homeschool diploma (you, as the parent-educator, can issue one in Florida)
    • A transcript (keep detailed records through high school)
    • Optional: Cap and gown (many families order these — Etsy has great options)

    If you’re on the Florida PEP scholarship, make sure you’ve wrapped up your scholarship year cleanly and have documentation in order before your senior year closes out.

    Ceremony Venue Ideas in Northwest Florida

    • A church fellowship hall (many are free to members)
    • A local botanical garden or nature center
    • A rented pavilion at a state park
    • A family friend’s large property

    Personal Touches That Make It Memorable

    • A “This Is Your Life” slideshow or photo display
    • A memory jar where guests write notes to the graduate
    • A candle-lighting ceremony where parents speak
    • A special meal featuring the graduate’s favorite foods (our family would 100% do a big cast iron skillet dinner — something like this one has fed our crew through every celebration)
    • A reading of Proverbs or a meaningful poem
    • Planting something together — a tree, an herb garden — as a symbol of growth

    For a meaningful gift, consider a homeschool planner if they’re heading into a gap year of self-directed learning, or a stack of read-aloud books to carry into their next chapter.


    A Few More Ideas Worth Mentioning

    Chicken Coop Dedication: Okay, this one is just for us crazy chicken people — but if your kids have been involved in raising your flock, a “poultry graduation” where they’re officially put in charge of coop duties is genuinely a rite of passage. We reference Storey’s Guide to Raising Chickens and have done mini “chicken keeper certifications” for our kids. It sounds silly until you see the pride on their faces.

    Nature Study Year-End Showcase: Pull out every nature journal page, every watercolor painting, every pressed leaf. Hang them up. Invite your people. Let the kids narrate the year in their own words. This is Charlotte Mason at its best — and it doubles beautifully as a graduation celebration.

    If you’re newer to this approach, I wrote about Charlotte Mason Picture Study and how we do it without overthinking — same gentle philosophy applies here.


    You Don’t Have to Make It Big to Make It Real

    Here’s the thing I want you to hear, mama: the ceremony doesn’t have to be elaborate. It doesn’t have to look like anything you’ve seen on Instagram. It just has to be intentional. It has to say, out loud, in some tangible way — you grew this year, and that matters.

    We’re raising kids who know what it feels like to be truly seen. That’s the whole point of everything we do — the nature walks, the chickens, the slow mornings with books, the PEP scholarship that lets us do it all our way. Graduation is just one more chance to do that.

    However you celebrate, make it yours. Make it warm. Make it worth remembering.


    📖 You Might Also Like:

    Frequently Asked Questions

    Can Florida homeschool parents issue their own graduation diploma?

    Yes! In Florida, homeschool parents who are operating under a home education statute (not a private school or umbrella) can issue their own diploma. You’ll want to create a transcript documenting courses and credits, especially for high school. It’s a good idea to keep thorough records throughout the high school years so the diploma carries real weight.

    Do you need a co-op to have a homeschool graduation ceremony?

    Not at all. Some of the most meaningful homeschool graduation ceremonies are small family affairs — backyard gatherings with grandparents, close friends, and maybe a mentor or two. A co-op ceremony can be wonderful for community, but it’s absolutely not required to make the moment feel real and significant.

    What are some good homeschool graduation gifts for elementary-age kids?

    For younger kids, think about gifts that honor the way they learn — a beautiful nature journal, a new field guide for the next year’s nature study, a set of quality watercolor paints, or a special book. The goal is something that says ‘I see who you are as a learner,’ not just a generic toy.

    How do Florida PEP scholarship families handle graduation?

    The Florida PEP (Personal Education Pathway) scholarship covers K–12 education expenses. Families using PEP still operate under their chosen homeschool statute and can graduate their children the same way other homeschool families do. Make sure you’re familiar with Florida’s annual evaluation requirements throughout the high school years and keep solid records leading up to graduation.

    What’s a good Charlotte Mason-style way to mark the end of a homeschool year?

    Charlotte Mason-inspired families often celebrate with a portfolio showcase, a nature walk with narration, or a living books reading celebration. The idea is to honor real knowledge and real growth — not a test score. Letting your child present their own work, in their own words, to people who love them is deeply in the spirit of a Charlotte Mason education.

  • Rainwater Harvesting in Florida: What’s Actually Legal and How to Set It Up

    Rainwater Harvesting in Florida: What’s Actually Legal and How to Set It Up

    Rainwater Harvesting in Florida: What’s Actually Legal and How to Set It Up

    🌿 The Short Version: Rainwater harvesting is completely legal in Florida — and actually encouraged by the state. This guide covers the current laws, the simplest way to set up a rain barrel or cistern system, and how we use ours for the garden and chicken yard without overcomplicating it.

    This post contains affiliate links. I may earn a small commission at no extra cost to you.

    If you’ve ever stood on your back porch watching a Florida summer storm drop what feels like a thousand gallons of water in twenty minutes — while simultaneously dragging a hose to your garden beds and chicken waterers — you’ve probably thought: there has to be a better way.

    There is. And it’s called rainwater harvesting. It sounds fancier than it is, honestly. At its core, it’s just collecting the rain that falls on your roof and putting it to use instead of letting it run off into the storm drain. We’ve been doing it at our place here in the Pensacola area for a couple of years now, and it’s become one of those homestead wins I genuinely wish we’d started sooner.

    But before I get into the how, let me answer the question I get asked most often: is this even legal in Florida?

    Is Rainwater Harvesting Legal in Florida?

    Yes — and not just legal, but actually encouraged. Florida is one of the more progressive states when it comes to rainwater collection. The Florida Legislature passed laws (specifically under Florida Statute 373.185) that require water management districts to promote rainwater harvesting as a water conservation strategy. Some districts even offer rebates for installing rain barrel systems.

    You do not need a permit to collect rainwater off your own roof for non-potable uses (that means irrigation, flushing toilets, watering animals, etc.). If you want to drink it or run it through your home plumbing, that gets more complicated and requires filtration systems and, in some cases, permits — but for garden and livestock use? You’re good to go.

    A few Florida-specific things to know:

    • Your HOA might have rules. Florida law actually limits HOAs from outright banning rain barrels, but they can regulate placement and aesthetics. If your barrel is visible from the street, check your HOA docs just to be safe.
    • Your county may have resources. Many Florida counties — including Escambia County — have partnered with local water management districts to offer low-cost or subsidized rain barrels. It’s worth a quick Google search for your county name + “rain barrel rebate.”
    • Non-potable use is the key phrase. Everything I’m covering here falls under non-potable: watering gardens, rinsing boots, topping off the chicken waterers, washing the dog (our labradoodle Biscuit is a frequent recipient).

    For a deeper dive into setting up a complete barrel system step by step, I wrote a whole post on the Best Rain Barrel Setup for Florida Homes (What Actually Works Down Here) that goes into the hardware side in more detail.

    What You Actually Need to Get Started

    The beauty of a basic rain barrel setup is that it doesn’t have to be complicated or expensive. Here’s what we use and what I’d recommend for most backyard homesteads.

    The Barrel Itself

    You can buy a dedicated rain barrel with a spigot and overflow port already built in, or you can DIY one from a food-grade 55-gallon drum. Both work. I’ve seen people get really cute decorative barrels that look like urns or wooden planters — totally valid if curb appeal matters to you. We went the utilitarian route because ours is behind the coop and nobody’s judging.

    What matters most:

    • A tight-fitting lid or screen to keep out mosquitoes (this is non-negotiable in Florida, y’all)
    • An overflow port that directs excess water away from your foundation
    • A spigot near the bottom for easy access

    Positioning and Downspout Diversion

    You’ll connect your barrel to an existing downspout using a diverter kit — these are inexpensive and easy to install without any plumbing experience. We placed ours at the corner of our coop overhang, which means every big storm fills it right up. During our rainy season (roughly June through September), we rarely have to run a hose to the garden at all.

    Scaling Up: Cisterns and Larger Systems

    If you’ve got more garden space, a bigger flock, or just want to go deeper into water independence, you can chain multiple barrels together or invest in a larger cistern (250–500 gallons). This gets into more territory, but the principles are the same. The Best Rain Barrel Setup for Florida Homes post breaks down those options too.

    📌 Love this? Save it to Pinterest so you can find it later!

    How We Use Harvested Rainwater

    Okay, here’s the practical day-to-day. Our rainwater goes toward three main things:

    1. The garden. We run a simple gravity-fed drip line from our barrel to the raised beds during dry stretches. Our summer garden especially benefits — if you’ve been following along, you know we’re big on growing through the heat, and I’ve written about Best Cover Crops for a Florida Garden in Summer which pairs beautifully with a rainwater setup because those crops need consistent moisture without running up your water bill.

    2. The chickens. We top off our chicken waterer with harvested water regularly. Chickens are not picky, and clean collected rainwater is perfectly fine for them. If you’re new to keeping a flock and wondering what else goes into coop care, our Natural Chicken Coop Deodorizer and Cleaning Routine is a good starting point.

    3. General outdoor rinsing. Muddy boots, dirty garden tools, rinsing out the compost bin — harvested water handles all of that. We try to be intentional about not letting clean drinking water do jobs that collected rainwater can handle just as well.

    Rainwater Harvesting as a Nature Study Lesson

    This is one of those homestead practices that doubles beautifully as a Charlotte Mason-style living lesson. Our kids helped us set up the barrel, and now they check the water level after every rain and record it in their nature journals. We’ve turned it into an ongoing study of the water cycle — not from a workbook, but from watching it actually happen in our own backyard.

    We’ve talked about where rain comes from, how it moves through a watershed, what happens when impervious surfaces (like roofs and driveways) change where water goes, and why that matters for local streams and wetlands. For kids who are growing up in the Florida panhandle where water is such a defining part of the landscape — the bays, the creeks, the aquifer — this stuff isn’t abstract. It’s alive.

    A pocket microscope is a fun add-on here too — we’ve looked at collected rainwater up close to see what’s in it (spoiler: before filtering, quite a bit). Great conversation starter.

    A Few Common Questions I Get

    Can I use harvested rainwater to water vegetables? Generally yes, though if you’re harvesting off an older roof with heavy metal flashing or treated shingles, there can be some runoff concerns. For most standard asphalt shingle roofs, using it on garden soil (rather than directly on edible leaves) is the common-sense approach. Many people do it without issue.

    Won’t standing water attract mosquitoes? Only if your barrel isn’t sealed properly. That’s why a tight mesh screen or solid lid is essential. Florida mosquitoes are not playing around and neither are we.

    What about hurricane season? Great question. If a big storm is coming, you’ll want your overflow routes to be clear and functional. Some folks empty their barrels before a major storm to reduce pressure on the system — worth considering.

    Starting Small Is Still Starting

    You don’t have to have a whole homestead operation going to benefit from rainwater harvesting. Even one 55-gallon barrel under a downspout makes a difference — in your water bill, in your garden’s health, and honestly in how connected you feel to the land you’re living on.

    There’s something quietly satisfying about using what falls from the sky instead of pulling from the tap for every single thing. It’s the same instinct that drives us toward raising our own food, keeping chickens, and teaching our kids to notice the world around them. Less dependency. More intention. A little more like how things used to be done before we outsourced everything.

    If you’re thinking about expanding your water resilience beyond rain barrels, composting at home is another piece of that same puzzle — and one the kids can get just as involved in.

    We’re all figuring this out one small step at a time over here. But step by step, it adds up to something really good.


    📖 You Might Also Like:

    Frequently Asked Questions

    Is rainwater harvesting legal in Florida?

    Yes, rainwater harvesting is not only legal in Florida but actively encouraged by state law. Florida Statute 373.185 requires water management districts to promote rainwater collection as a conservation strategy. You do not need a permit to collect rainwater for non-potable uses like irrigation, garden watering, or livestock use. Some counties even offer rebates on rain barrel systems.

    Can you drink harvested rainwater in Florida?

    Technically rainwater can be made potable with the right filtration and treatment systems, but that process is more complex and may require permits depending on how it’s integrated into your home plumbing. For most homeowners, harvested rainwater is best used for non-potable purposes like watering gardens, filling chicken waterers, and outdoor rinsing. Always filter and test before considering any drinking use.

    How much rainwater can you collect in Florida?

    Florida averages 50–60 inches of rainfall per year depending on the region, with the heaviest rain falling during the June–September rainy season. A standard 1,000 square foot roof can yield roughly 600 gallons of water per inch of rain. A basic 55-gallon barrel will fill quickly during a typical summer storm — many homesteaders daisy-chain multiple barrels or use cisterns to capture more.

    Do I need a permit for a rain barrel in Florida?

    No permit is required to install a rain barrel for non-potable outdoor use in Florida. If your neighborhood has an HOA, Florida law prevents them from outright banning rain barrels, though they may regulate placement and appearance. Larger cistern systems over a certain size may have different requirements depending on your county, so it’s worth checking locally if you’re going beyond a basic barrel setup.

    How do I keep mosquitoes out of my rain barrel in Florida?

    This is critical in Florida. Every rain barrel should have a tight-fitting lid or fine mesh screen that covers any openings, including the inlet where water enters from the downspout diverter. Make sure your overflow port is also screened. Mosquitoes only need a small amount of standing water to breed, so a properly sealed barrel eliminates the risk entirely. Never leave a barrel open or partially covered.

  • Non-Toxic Baby Bottles: What to Actually Buy (and What to Skip)

    Non-Toxic Baby Bottles: What to Actually Buy (and What to Skip)

    Non-Toxic Baby Bottles: What to Actually Buy (and What to Skip)

    🌿 The Short Version: Not all baby bottles marketed as “safe” actually are — the material matters more than the label. This post breaks down exactly what to look for, what to avoid, and which bottles are genuinely worth buying for a non-toxic home.

    This post contains affiliate links. I may earn a small commission at no extra cost to you.

    When my first baby arrived, I did what most new mamas do — I stood in the baby aisle completely overwhelmed, grabbed something that looked official, and went home. It wasn’t until a few months in, deep in my non-toxic rabbit hole (you know the one), that I realized I hadn’t even thought about what those bottles were made of. I was so focused on organic onesies and non-toxic sunscreen that I completely overlooked the thing going directly into my baby’s mouth multiple times a day.

    If you’re here, you’re already a step ahead of where I was. Let’s make this simple, because it doesn’t have to be complicated.

    Why Baby Bottle Material Actually Matters

    Here’s the thing — babies drink from bottles constantly. If there are chemicals leaching from the plastic into that milk or formula, your baby is getting a steady dose of them all day long. That’s not fearmongering, that’s just math.

    The biggest offenders to know about:

    BPA (Bisphenol-A) — Most people have heard of this one. It’s an endocrine disruptor found in older polycarbonate plastics. Most bottles are now labeled “BPA-free,” which sounds great until you realize…

    BPS and BPF — These are the chemicals manufacturers swapped BPA out for, and early research suggests they may cause similar hormonal disruption. “BPA-free” does not automatically mean safe. This is the part that trips a lot of parents up.

    Phthalates — Another class of plasticizers that can show up in soft plastics. Again, linked to hormonal disruption in studies.

    Microplastics — A 2020 study found that standard plastic baby bottles release millions of microplastic particles when formula is prepared in them at recommended temperatures. Millions. Per liter. That’s the one that made me throw out every plastic bottle we had left.

    The bottom line: if it’s plastic, even “safe” plastic, I personally don’t want it near my baby’s milk. And that’s the approach I’d recommend for any family trying to keep their home genuinely non-toxic — not just label-non-toxic.

    What to Actually Look For in a Non-Toxic Baby Bottle

    Glass Bottles

    Glass is my top recommendation, full stop. It doesn’t leach, it doesn’t degrade, and it’s easy to tell when it’s actually clean. The downsides are weight and breakability, but for a newborn stage when you’re mostly stationary anyway, it’s very manageable. Once babies start throwing things, you can transition to silicone sleeves over the glass or switch materials.

    Look for: borosilicate glass (more heat-resistant and durable than standard glass), wide-neck designs for easy cleaning, and silicone sleeves for grip and drop protection.

    Favorite brands to look for: Lifefactory, Philips Avent Natural glass, and Dr. Brown’s glass options all check the boxes.

    Stainless Steel Bottles

    Food-grade stainless steel (look for 18/8 or 304 stainless) is another excellent option. It’s lightweight, incredibly durable, and truly inert — nothing leaches out. The downside is you can’t see the fill level, which matters when you’re measuring formula. But for breastfed babies or older infants moving to sippy cups, stainless is wonderful.

    We use stainless steel water bottles for our bigger kids now and have for years — it’s just a habit we carried right on through from babyhood.

    Silicone (When Plastic is Unavoidable)

    If you need something lighter or more flexible — traveling, older baby who’s mobile, or just personal preference — food-grade silicone is the safest plastic-adjacent option. It’s free of BPA, BPS, phthalates, and PVC. It doesn’t leach, it’s soft, and babies tend to like the feel of it.

    Just make sure you’re buying from a reputable brand that specifies food-grade silicone, not just “silicone.” Cheaper options can have fillers.

    What to Avoid

    • Standard plastic, even BPA-free
    • Bottles with unclear material labeling
    • Anything with “PC” in the recycling code (that’s polycarbonate — old-school BPA city)
    • Cheap imported bottles with no certifiable testing

    📌 Love this? Save it to Pinterest so you can find it later!

    Nipples Matter Too — Don’t Forget This Part

    Even if you get a perfect glass bottle, a cheap latex or PVC nipple undoes a lot of your work. Look for:

    • 100% food-grade silicone nipples — these are clear/translucent, durable, and don’t degrade as fast as latex
    • Natural rubber latex — a more natural option, but be aware of latex sensitivities
    • Avoid anything that smells strongly chemical out of the package, or any nipples with unclear material labeling

    Replacing nipples regularly (every 4-8 weeks for heavy users) also matters, because even safe materials degrade with repeated heat sterilization over time.

    Our Actual Approach in a Non-Toxic Home

    We are a glass-and-stainless household at this point. It started with bottles and carried through to our stainless steel water bottles for the big kids, our cast iron skillet in the kitchen, and our beeswax wraps instead of plastic wrap. Once you start thinking in terms of materials — what is this actually made of? — it becomes second nature.

    For cleaning, we skip the harsh dish soaps and use cleaner options I stock through Grove Collaborative. Bottle brushes, simple dish soap, and a good rinse is all you really need. You don’t have to sterilize after every single use once your baby is a few months old and healthy — that’s a myth that stresses a lot of mamas out unnecessarily.

    This same intentional-materials mindset is what drives how we homeschool too, honestly. We’re not outsourcing the decisions to whoever makes the prettiest packaging. That applies to our All About Reading curriculum choices, our chicken coop setup (we keep things low-chemical there too — check out our natural coop cleaning routine), and how we approach our kids’ health generally.

    A Quick Word on Budget

    Glass and stainless bottles do cost more upfront. A 4-pack of glass bottles might run you $35-$45 versus $15 for plastic. But here’s the perspective shift that helped me: babies go through a finite number of bottles before they’re done with them. It’s not a lifetime purchase. And if you take care of glass bottles, they last — some people pass them on to the next baby or even donate them. The cost per use ends up being very reasonable.

    Also, if you’re using a Florida PEP scholarship for homeschool, you’re already making intentional investments in your kids — thinking the same way about baby gear just makes sense. (And if you want to dig into how we approach intentional, low-screen living with our kids, Raising Kids Without Screens: What We Actually Do Every Day is a good starting point.)

    A Simple Non-Toxic Bottle Shopping Checklist

    Before you buy, run through this:

    • ✅ Is it glass (borosilicate), food-grade stainless, or certified food-grade silicone?
    • ✅ Is the nipple 100% silicone or natural rubber?
    • ✅ Does the brand provide clear material sourcing — not just a “BPA-free” label?
    • ✅ Is it easy to clean thoroughly? (No excessive crevices or complicated parts)
    • ✅ Does it have good reviews from parents who’ve used it long-term — not just influencer promotion?

    If it checks those boxes, you’re in good shape.

    You Don’t Have to Be Perfect — Just Be Intentional

    Here’s my final thought, mama to mama: you are not going to do this perfectly, and that is genuinely okay. We live in Florida, our kids run barefoot in the backyard with the chickens, they catch lizards, they eat food off the floor occasionally, and the world has not ended. The goal isn’t a sterile bubble. The goal is reducing the unnecessary chemical load where it’s easy and worthwhile to do so.

    Baby bottles? Easy win. Swap to glass or stainless, get silicone nipples, and move on. You’ve got bigger things to think about — like whether the eggs are in yet and what chapter you’re reading aloud tonight.

    You’ve got this. And you’re already doing better than you think.


    📖 You Might Also Like:

    Frequently Asked Questions

    Are BPA-free plastic baby bottles actually safe?

    Not necessarily. When manufacturers removed BPA from plastics, they often replaced it with BPS or BPF — chemicals that early research suggests may have similar hormone-disrupting effects. Additionally, a 2020 study found that plastic baby bottles release millions of microplastic particles when used at normal feeding temperatures. For a truly non-toxic option, glass, food-grade stainless steel, or certified food-grade silicone are much better choices than any plastic, even BPA-free plastic.

    What is the safest material for baby bottles?

    Borosilicate glass is widely considered the gold standard for non-toxic baby bottles — it’s completely inert, doesn’t leach anything into milk or formula, and is easy to verify when it’s truly clean. Food-grade stainless steel (18/8 or 304 grade) is a close second and is more durable for active babies. Food-grade silicone is the safest option if you need flexibility or lighter weight. All three are significantly safer than any form of plastic.

    Do glass baby bottles break easily?

    Borosilicate glass bottles are more durable than regular glass, but they can still break if dropped on a hard surface. Most glass baby bottles come with a silicone sleeve that provides grip and cushioning and significantly reduces breakage. Many parents use glass bottles through the newborn and early infant stage when they’re mostly stationary, then transition to stainless or silicone as babies become more mobile and start throwing things.

    How often should you replace baby bottle nipples?

    Even high-quality silicone or natural rubber nipples degrade over time with repeated heat sterilization and use. A general guideline is to replace nipples every 4 to 8 weeks for frequent users, or sooner if you notice any stickiness, thinning, cloudiness, or changes in texture. Always replace a nipple immediately if you see any cracking or tearing, as that creates a place for bacteria to hide and means the material is breaking down.

    Are silicone baby bottles non-toxic?

    Food-grade silicone is considered a non-toxic, safe material for baby bottles. It’s free of BPA, BPS, phthalates, and PVC, and it doesn’t leach chemicals into food or liquids. The key is to buy from reputable brands that specifically state “food-grade silicone” — cheaper options may contain fillers or lower-quality materials that aren’t as stable. Look for brands that provide third-party testing or clear material certification.