Blog

  • Best Unit Study Curriculum for Homeschool Families in 2026 (What’s Actually Worth Your Time and Money)

    Best Unit Study Curriculum for Homeschool Families in 2026 (What’s Actually Worth Your Time and Money)

    Best Unit Study Curriculum for Homeschool Families in 2026 (What’s Actually Worth Your Time and Money)

    🌿 The Short Version: Unit studies let you teach multiple subjects through one rich topic — and for nature-based, Charlotte Mason families, they’re a game-changer. This post breaks down the best unit study curricula for 2026 so you can stop second-guessing and start learning together.

    This post contains affiliate links. I may earn a small commission at no extra cost to you.

    If you’ve ever sat down in August to plan your homeschool year and felt completely overwhelmed by the sheer number of options out there, friend — same. We’ve been doing this long enough now that I’ve tried a whole lot of approaches, and I can tell you with confidence that unit studies have been one of the best decisions we’ve made for our family.

    The idea is simple: pick a topic your kids are genuinely curious about, and fold your language arts, history, science, art, and math around it. Instead of bouncing between six different workbooks, you go deep into one thing. And when you’re already living a nature-based, Charlotte Mason-style life where the world outside your back door is the classroom — unit studies just click.

    So whether you’re new to homeschooling, switching things up for 2026, or just trying to figure out if unit studies are even worth it — let me share what we’ve found actually works.


    Why Unit Studies Work So Well for Charlotte Mason Families

    Charlotte Mason believed kids learn best through living books, real experiences, and narration — not busywork. Unit studies, done well, are basically that philosophy in action. You pick a topic that lights your kids up, you read great books about it, you go outside and observe it, you draw it in your nature journal, and then you narrate it back. That’s it. That’s school.

    For us here in the Florida Panhandle, a unit study on birds naturally becomes a whole season of going outside with the Sibley Birds guide and sketching what we see in the yard. A unit on bugs becomes an excuse to haul out the pocket microscope and actually look at what’s living in the leaf litter under the oaks. Real learning. Messy, slow, wonderful learning.

    And if you’ve got multiple kids at different grade levels? Unit studies are one of the sanest ways to teach them together. My K and 3rd grader can both engage with the same topic — they just go different depths.


    The Best Unit Study Curricula for 2026

    1. Timberdoodle Unit Studies

    Timberdoodle is hands-down one of my favorite homeschool resources in general, and their curated unit study bundles are fantastic for families who want something thoughtfully put together without doing all the research themselves. They lean toward hands-on, think-outside-the-box learning — which fits perfectly with the way we do things around here.

    If you’re using the Florida PEP scholarship, Timberdoodle is an approved vendor, which makes purchasing so much easier.

    2. Konos Curriculum

    Konos is one of the original unit study programs and has been around since the 1980s — which honestly makes me trust it more, not less. It’s organized around character traits and weaves history, science, language arts, and fine arts together in a way that feels natural and unhurried. It’s also heavily activity-based, which is perfect if your kids are the kind who learn by doing (mine absolutely are).

    It takes a little more parent prep than some programs, but once you’re in it, it’s genuinely enjoyable to teach.

    3. Amanda Bennett Unit Studies

    Amanda Bennett’s digital unit studies are affordable, easy to use, and cover a huge range of topics — everything from horses to the U.S. Constitution to gardening. They’re not Charlotte Mason in name, but the spirit is similar: real books, real experiences, real learning.

    I especially love these for rabbit-trail seasons when my kids are obsessed with something specific. We did a backyard chickens study a couple of years ago and paired it with Storey’s Guide to Raising Chickens and the Kid’s Guide to Chickens — the kids thought they were just reading about our flock, but they were doing science and life skills and animal husbandry all at once.

    4. Five in a Row (FIAR)

    If you have younger kids (PreK through about 2nd grade), Five in a Row is a gem. You read a beautiful picture book five days in a row and then explore geography, art, science, and character through that one story. It’s gentle, slow, and lovely — very much in line with Charlotte Mason. And the books they choose are genuinely wonderful literature, not just vehicles for a lesson.

    We used FIAR with our youngest and it set such a good foundation for how we approach learning together.

    5. Build Your Own Unit Studies (the Charlotte Mason Way)

    Okay, this isn’t a packaged curriculum — but honestly, sometimes the best unit study is the one you build yourself around what your kids are already interested in. This is where Charlotte Mason really shines.

    Our family has done self-built unit studies on Florida wetlands, the American Revolution, backyard gardening, and native birds. You start with a living book or two, add some nature observation, some narration, some art — maybe some watercolor painting of what you’re studying — and fold in math where it makes sense. Check out Rainbow Resource for sourcing living books and supplemental materials without losing your mind.

    If you want inspiration for building your own nature-focused studies, our post on Charlotte Mason Nature Journal Ideas for Kids (What We Actually Do Year-Round in Florida) has a lot of practical ideas.


    📌 Love this? Save it to Pinterest so you can find it later!


    What to Look for in a Unit Study Curriculum

    Before you spend a single dollar, here’s what I’d ask:

    Does it work for multiple ages? If you have more than one kid, you need something that scales. The best unit studies let a kindergartner and a 4th grader learn the same topic at their own level.

    Does it get you outside? For our family, any curriculum that keeps us stuck at a table all day isn’t going to last. I want something that sends us into the yard with a bug collection kit or out to the garden or down to the bayou.

    Is it PEP-compatible? If you’re on the Florida PEP scholarship (formerly the Gardiner), make sure your purchases are through approved vendors or that you’re keeping proper documentation. Most of the options above work — just double-check before you buy.

    Does it feel like learning or like checking boxes? If it feels like drudgery, it won’t stick. The 1990s-childhood philosophy we’re raising our kids with is rooted in the idea that learning is supposed to be alive and interesting — not a grind.


    What We’re Actually Using in 2026

    This year, we’re blending a few things. We use Math-U-See as our dedicated math spine because it’s hands-on and visual and my kids actually retain it. For reading, All About Reading has been solid for my early reader. And for the heart of our days — the living, breathing, beautiful part — we’re building unit studies around Florida history, native ecosystems, and the garden.

    Some of our best school moments this year have happened in the chicken run, watching our hens and talking about animal behavior, or out in the raised beds checking on the tomatoes. That’s not separate from school — that is school.

    If you want to see how we tie nature into our art time too, check out our post on Florida Homeschool Art Curriculum Charlotte Mason Style — it goes hand in hand with what I’m describing here.


    A Note for New Homeschoolers

    If you’re just starting out and feeling like you need to do all the things — please hear me when I say: you don’t. Pick one topic your kids love right now. Get two or three living books about it. Go outside and observe it. Draw it. Talk about it at dinner. That’s a unit study. You’re already doing it.

    And if you want more structure, Timberdoodle or Amanda Bennett are great starting places without overwhelming you.


    Unit studies have given our homeschool something I didn’t even know I was looking for — they’ve made learning feel the way learning should feel. Like discovery. Like play with purpose. Like the way all of us learned best as kids, back before everything got so scheduled and screened and separated into little subject boxes.

    We’re raising kids who know how to go deep, stay curious, and find the lesson in real life. That’s the whole goal. And honestly? These curricula — paired with a backyard, some chickens, a nature journal, and a family that slows down enough to notice things — will get you there.


    📖 You Might Also Like:

    Frequently Asked Questions

    What is a unit study curriculum and how does it work?

    A unit study curriculum teaches multiple subjects — science, language arts, history, art, and sometimes math — through one central topic. Instead of using separate workbooks for each subject, your whole school day revolves around a single theme. For example, a unit study on birds might include reading living books about ornithology, sketching birds in a nature journal, writing narrations, and doing math with bird data. It’s especially well-suited to Charlotte Mason and nature-based homeschool approaches.

    Are unit studies good for multiple ages at once?

    Yes — this is actually one of the biggest advantages of unit studies. The core topic stays the same for all your kids, but the depth and assignments can be adjusted by age and grade level. A kindergartner might draw and narrate verbally while a 4th grader writes a longer narration and reads more complex source material. It makes teaching a mixed-age family much more manageable.

    Can I use unit study curriculum with the Florida PEP (Personalized Education Program) scholarship?

    Many unit study curricula and vendors are compatible with the Florida PEP scholarship, formerly known as the Gardiner scholarship. Vendors like Timberdoodle and Rainbow Resource are commonly used by PEP families. Always verify current approved vendor lists through your scholarship funding organization, as these can change from year to year.

    What’s the difference between unit studies and traditional homeschool curriculum?

    Traditional homeschool curriculum typically uses separate programs for each subject — a math textbook, a grammar workbook, a separate history spine, and so on. Unit studies integrate those subjects into one cohesive topic, which tends to feel more natural and connected. Many families find unit studies more engaging for kids and easier to teach across multiple grade levels, though some families also use a hybrid approach — a dedicated math program alongside unit studies for everything else.

    How do I know if unit studies are right for my homeschool family?

    Unit studies tend to be a great fit if your kids are curious and hands-on, if you have multiple children at different grade levels, if you value real-life and nature-based learning, or if you find that your kids disengage with workbook-heavy approaches. They do require more parent involvement and planning than some boxed curricula, but programs like Timberdoodle, Konos, and Amanda Bennett Unit Studies do a lot of the prep work for you. If you love Charlotte Mason principles — living books, narration, nature study, and unhurried learning — unit studies are a very natural fit.
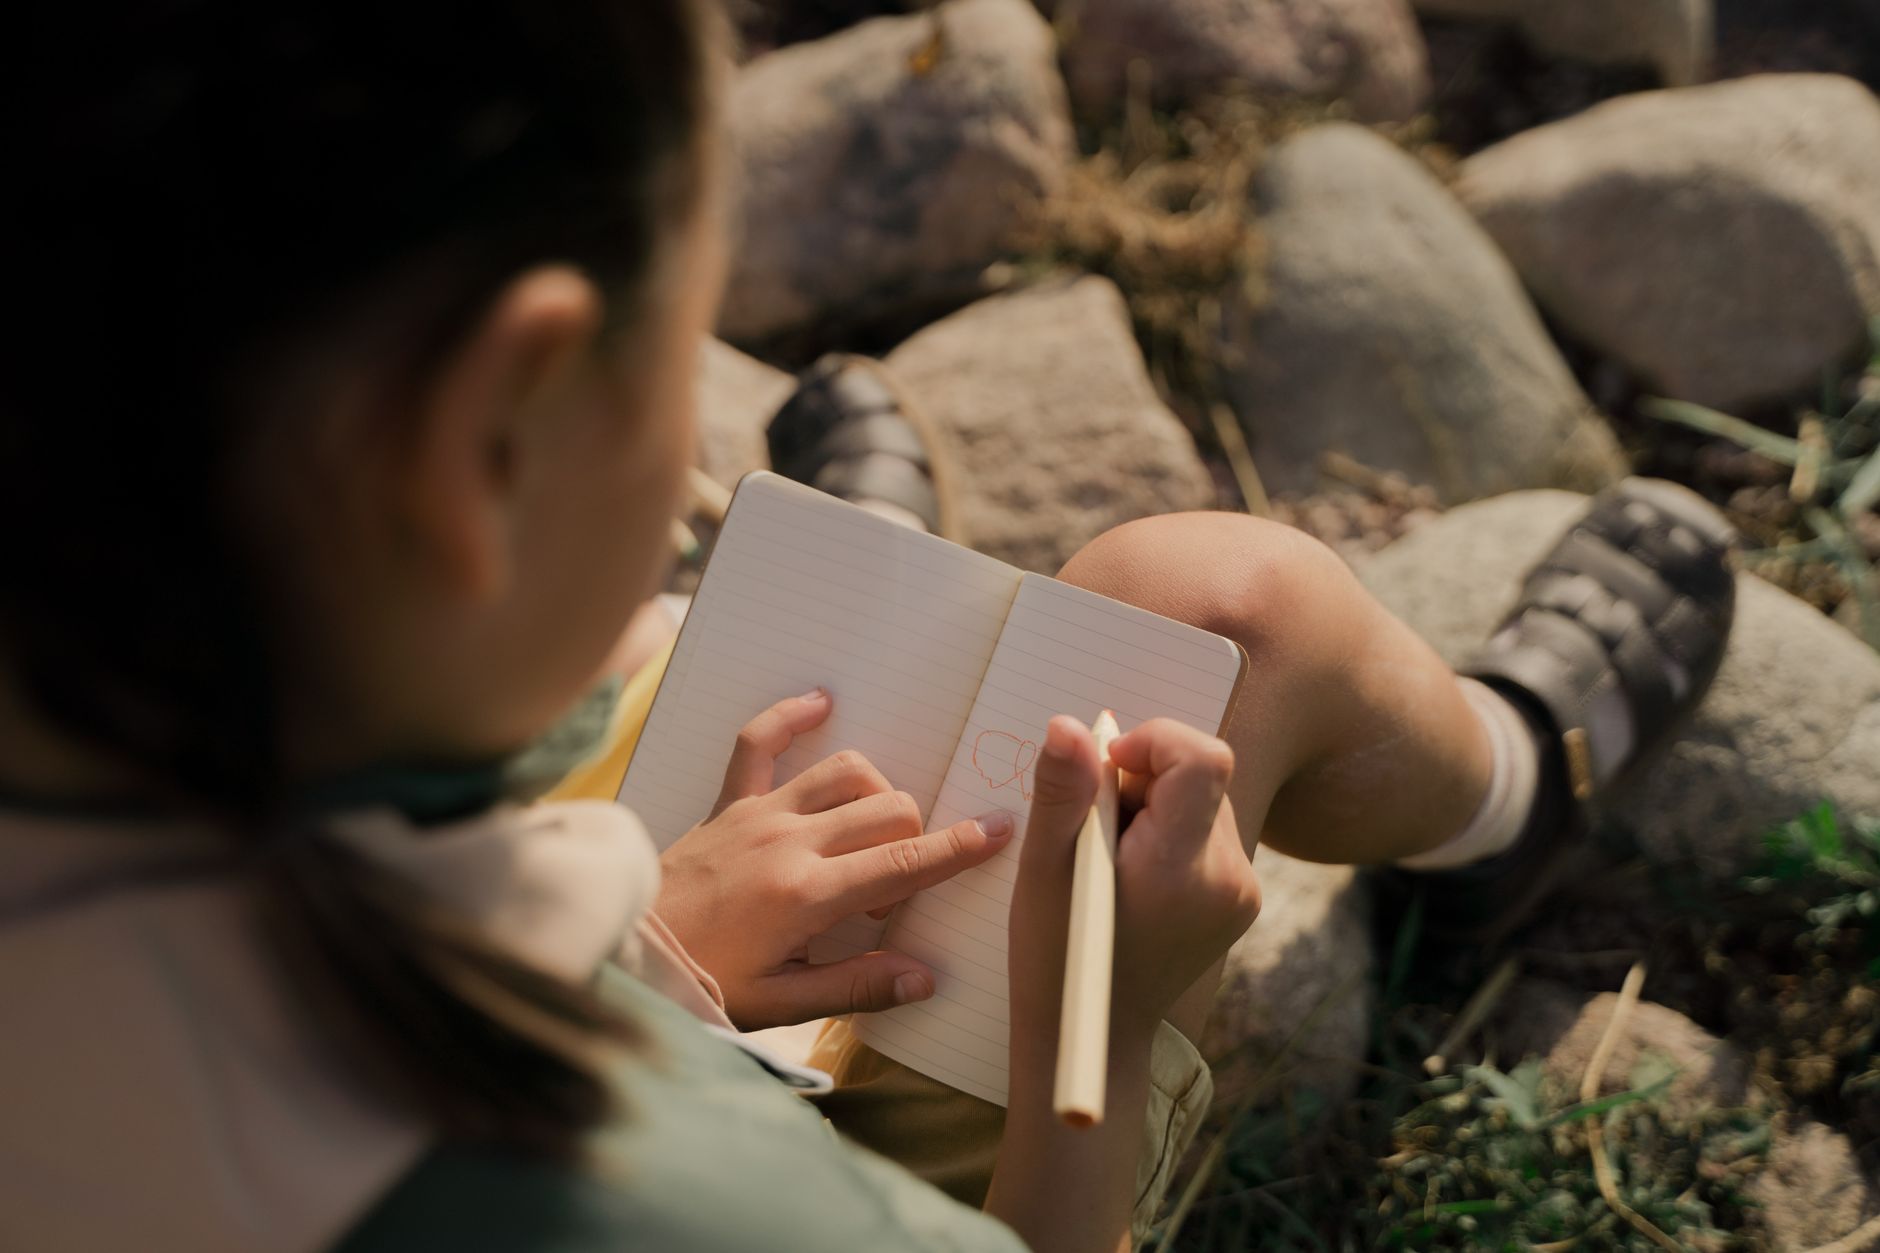
  • Charlotte Mason Nature Journal Ideas for Kids (What We Actually Do Year-Round in Florida)

    Charlotte Mason Nature Journal Ideas for Kids (What We Actually Do Year-Round in Florida)

    Charlotte Mason Nature Journal Ideas for Kids (What We Actually Do Year-Round in Florida)

    🌿 The Short Version: Nature journaling is one of the simplest, most powerful things you can add to a Charlotte Mason homeschool — and it doesn’t require fancy supplies or a perfect plan. In this post I’m sharing exactly how our family does it, what supplies we love, and how to make it stick even on the hard days.

    This post contains affiliate links. I may earn a small commission at no extra cost to you.

    If you’ve been in the Charlotte Mason world for more than five minutes, you’ve heard about nature journals. And maybe — like me — your first attempt looked something like this: a beautiful blank notebook, one enthusiastic afternoon, and then… nothing. It sat on the shelf for three months next to the colored pencils you bought with the best intentions.

    Same, friend. Same.

    But I want to tell you that we figured it out, and it wasn’t by getting more organized or more Pinterest-perfect. It was by getting simpler and getting outside more. Now nature journaling is genuinely one of our favorite parts of our homeschool week. My kids ask for it. We do it in the backyard, on beach mornings, at the creek, and sometimes just sitting next to the chicken coop watching the girls scratch around in the dirt.

    Here’s what actually works for us.


    Why Charlotte Mason Nature Journaling Is Worth the Effort

    Charlotte Mason believed that children need to form real relationships with the natural world — not just read about it, but observe it, sit with it, draw it. The nature journal is the record of that relationship. It’s not a science worksheet. It’s not a craft project. It’s a child noticing something and being given the space and tools to respond to it.

    That philosophy clicks with how we were raised, honestly. We grew up outside — catching bugs, poking around in creeks, flipping over rocks to see what lived underneath. We just didn’t write it down. The nature journal is kind of like giving that 1990s outdoor childhood a little more intention without sucking the fun out of it.

    And here in Northwest Florida? We have so much to work with. The biodiversity down here is genuinely wild. From the longleaf pine flatwoods to the Gulf Coast shore, from the sandhill cranes in our neighborhood to the anoles darting across the fence — there is never a shortage of things worth noticing.


    What Supplies We Actually Use

    Let’s keep this simple, because I’ve seen nature journal supply lists that would make your head spin.

    Here’s what we actually reach for:

    • A good blank journal — We love this nature journal because it has both blank and lined pages. The kids can draw on one side and write observations on the other.
    • Watercolors — Faber-Castell watercolor pencils are our go-to. They travel well and the kids can use them dry for drawing and then add water to blend. No mess, beautiful results.
    • A field guide — We use the Sibley Birds guide constantly. Even my kindergartener loves flipping through it to find what she spotted that morning.
    • A pocket microscope — This little microscope has been one of the best homeschool purchases we’ve made. Feathers, leaves, insect wings — everything looks different up close.
    • A bug collection kit — We keep a bug collection kit in our outside basket so the kids can observe before they draw.

    That’s genuinely it. A journal, some watercolors, a field guide, and a way to look closer. You don’t need more than that to get started.


    Charlotte Mason Nature Journal Ideas We Come Back to Again and Again

    1. Backyard Chicken Observations

    This one is a favorite and it makes so much sense for us — we already spend time out with the flock every morning. My kids have pages dedicated to sketching individual hens, noting egg colors, drawing feather details, and writing about behaviors they noticed. When our Buff Orpington went broody last spring, they journaled the whole thing. It turned into a genuine science study.

    If you’re new to backyard chickens, Storey’s Guide to Raising Chickens is a great reference to keep alongside your nature journals — the kids can cross-reference what they’re seeing with what the book describes. There’s also a wonderful kid’s guide to chickens written specifically for younger readers that my elementary kids have loved.

    2. Seasonal Sky and Weather Tracking

    We keep a simple weather page each week — cloud types, wind direction, temperature ranges, any storms that rolled through. Florida weather is dramatic enough to make this genuinely interesting. My son drew a thunderstorm one afternoon last summer that is honestly one of my favorite pieces of kid art we own.

    3. Plant Pressed Pages

    We press leaves, wildflowers, and small ferns right into the journal (or tape pressed ones in after drying). Then we sketch them and try to identify them. This pairs beautifully with Florida Foraging Guide: Safe Plants for Beginners — we cross-reference what we’re pressing with what might be edible or useful.

    4. Bug and Insect Studies

    Florida insects are a whole world. We’ve journaled fireflies, lubber grasshoppers, walking sticks, dragonflies, and about forty-seven types of spiders (some of which I would have preferred we not look at so closely, but here we are). The kids catch, observe, sketch, and release. It’s the kind of thing that would have happened naturally in a 1990s backyard afternoon, and the journal just makes it last a little longer.

    5. Bird Window Watching

    On slower mornings — or during Florida’s merciless July heat — we do bird window watching. Binoculars, the Sibley guide, and the journal. Whoever spots something new gets to draw it first. It’s low-key and peaceful and honestly sometimes I journal right alongside them.

    📌 Love this? Save it to Pinterest so you can find it later!

    6. Moon Phase Pages

    This is a simple one that even my kindergartener can do independently. Each night before bed, she checks the moon, draws its shape in her journal, and we write the date. Over a month, she watches the full cycle. It takes two minutes and she is so proud of that page.

    7. Seasonal Nature Tables + Sketches

    We keep a nature table in our schoolroom — rotating with shells, feathers, seed pods, interesting rocks, and whatever the kids dragged in that week. The rule is: if it comes inside, it gets sketched. That one little habit has produced some genuinely beautiful journal pages with almost zero planning on my part.


    How to Make Nature Journaling Actually Stick

    Here’s the honest truth: it doesn’t have to happen every day. In our house, we aim for two or three times a week and we count it toward our Charlotte Mason nature study. The Florida PEP scholarship framework gives us flexibility in how we document learning, and a nature journal is a beautiful portfolio piece — it shows observation, science, writing, and art all in one place.

    A few things that have helped us stay consistent:

    • Keep the supplies accessible. Our nature journal basket lives by the back door, not in a cabinet. If they have to ask me to get it out, it won’t happen.
    • Don’t correct the art. A five-year-old’s caterpillar doesn’t need to look like a caterpillar. It needs to be hers.
    • Journal with them sometimes. I keep my own. My kids think it’s the coolest thing. It signals that this isn’t just school — it’s something worth doing.
    • Use what’s in front of you. You don’t need a field trip to nature journal. The backyard, the front porch, the drive home — it all counts.

    For more on how we approach nature-based art in our homeschool, check out Florida Homeschool Art Curriculum Charlotte Mason Style — it goes hand in hand with what we do in our nature journals.


    A Few Last Thoughts

    Nature journaling is one of those things that sounds complicated until you just… start. Get a notebook, go outside, and draw what you see. That’s it. That’s the whole method.

    Charlotte Mason wasn’t trying to create perfect naturalists. She was trying to create children who knew how to pay attention — to the world around them, to the living things sharing their space, to the slow and beautiful rhythms of the seasons. A nature journal is just the record of that attention.

    And honestly? That’s the same thing we’re trying to do over here. Less screen time, more dirt. More watching, more wondering, more drawing wobbly chickens in a blank notebook while the labradoodle tries to eat the watercolor brush.

    That’s the good stuff. I hope you find your version of it.


    📖 You Might Also Like:

    Frequently Asked Questions

    What age can kids start a Charlotte Mason nature journal?

    Kids can start as young as 3-4 years old with very simple drawings and a parent writing their dictated observations. By kindergarten, most children can begin copying simple labels or writing one-word descriptions themselves. The journal grows with the child — there’s no wrong starting age.

    How often should kids nature journal in a Charlotte Mason homeschool?

    Charlotte Mason recommended nature study at least once a week, ideally more. For most families, two to three nature journal sessions per week is very realistic and enough to build the habit and accumulate a meaningful record over time. Consistency matters more than frequency.

    What should a Charlotte Mason nature journal include?

    A nature journal typically includes hand-drawn sketches or watercolor illustrations of things observed in nature — plants, birds, insects, weather, animals — along with written notes, dates, and locations. It’s meant to be a personal observation record, not a copy of a textbook illustration.

    Do nature journals count for homeschool records or the Florida PEP scholarship?

    Yes! Nature journals make excellent portfolio documentation for Charlotte Mason homeschoolers. They demonstrate science observation, writing, and visual art skills all in one place. For Florida PEP scholarship families, they can be included in portfolio reviews as evidence of science and art learning.

    What are the best supplies for a beginner Charlotte Mason nature journal?

    You really don’t need much to start. A blank or mixed-page journal, a set of watercolor pencils or simple paints, a pencil, and a basic field guide for your region are plenty. A pocket magnifier or small microscope is a wonderful addition for close observation. Keep it simple and accessible so kids can reach for it on their own.

  • How to Detox Your Home from Toxins Room by Room (A Real Family’s Guide to Getting Started)

    How to Detox Your Home from Toxins Room by Room (A Real Family’s Guide to Getting Started)

    How to Detox Your Home from Toxins Room by Room (A Real Family’s Guide to Getting Started)

    🌿 The Short Version: Detoxing your home doesn’t have to happen overnight or cost a fortune. This room-by-room guide walks you through the most impactful swaps a real Florida family can make to reduce everyday toxin exposure — starting with the spots that matter most.

    This post contains affiliate links. I may earn a small commission at no extra cost to you.

    I remember standing in my laundry room a few years back, staring at a shelf full of brightly labeled bottles, and thinking — why does it take a chemistry degree to read the back of a fabric softener? That was kind of the turning point for me. Not a dramatic moment, not some scary diagnosis. Just a quiet, growing sense that our home environment deserved the same intentionality we were putting into our food, our schooling, and our time outdoors.

    If you’re here, you probably feel some version of that too. Maybe you’ve started questioning what’s in your cleaning products or your kids’ shampoo. Maybe someone in your family has sensitivities you can’t quite explain. Or maybe you’re just the kind of mama who wants to be thoughtful — not paranoid, not perfect, just intentional.

    This isn’t about fear. It’s about information. And it’s absolutely something you can do gradually, one room at a time, without losing your mind or your budget.

    Start With a Mindset Shift: Progress Over Perfection

    Here’s what I want you to hear before we get into the nitty gritty: you do not have to throw everything out today. The most sustainable approach is to replace things as they run out, make the biggest-impact swaps first, and give yourself grace in the process.

    We live in Florida, which adds a few extra layers — the humidity, the bugs, the mold pressure. Some of those things mean we genuinely need effective solutions, and that’s okay. The goal is reducing the toxic load over time, not achieving some impossible standard.

    The Kitchen: Where to Start

    The kitchen is where I’d tell any family to begin. You’re preparing food here every single day, and a lot of hidden toxins sneak in through cookware, storage, and cleaning products.

    Cookware: Non-stick pans with Teflon-based coatings release chemicals when overheated, and with kids underfoot, high heat happens. We switched to cast iron years ago and haven’t looked back. A good Lodge cast iron skillet will literally last generations — we’ve got one we use almost daily. (I wrote more about this in Cast Iron Cookware for Beginners: How to Get Started and Actually Keep It if you need a starting point.)

    Food Storage: Plastic containers, especially when heated, can leach chemicals into food. We’ve been slowly swapping to glass storage and using beeswax wrap for things like cheese and cut produce. It’s one of those swaps that feels fancy but isn’t.

    Cleaning Products: This is a big one. Conventional dish soap, spray cleaners, and scrubs are often loaded with synthetic fragrances, preservatives, and surfactants you don’t want near your food prep surfaces. We order our refillable cleaning products through Grove Collaborative — it’s made the whole swap easy and affordable.

    Composting: One bonus of a non-toxic kitchen? You’re probably cooking more whole foods, which means more scraps. A simple kitchen compost bin on the counter makes it easy to collect those for the garden or the chickens.

    The Bathroom: Small Room, Big Impact

    The bathroom is where we absorb a surprising amount of what goes on our bodies — shampoo, lotion, toothpaste, soap. Kids’ skin is especially permeable, so this room matters a lot.

    Personal Care Products: Look for products without parabens, synthetic fragrance, and phthalates. The Environmental Working Group’s Skin Deep database is a free resource I use constantly. For sunscreen especially — we spend so much time outdoors here in the Panhandle — I’m particular about what we use. A cleaner non-toxic kids sunscreen is worth the switch.

    Air Fresheners: Those plug-in air fresheners and scented candles in conventional bathrooms are some of the worst offenders for indoor air quality. We use essential oils instead — just make sure you’re using ones that are actually safe around little ones. I covered exactly that in Best Essential Oils for a Family Home That Are Actually Safe for Kids.

    📌 Love this? Save it to Pinterest so you can find it later!

    The Laundry Room: The Sneaky One

    This is the room that started my whole detox journey, and honestly it’s where some of the most impactful swaps are hiding.

    Conventional dryer sheets and fabric softeners coat your clothes in synthetic fragrance and chemical residue — which then sits against your kids’ skin all day. The swap here is so easy: wool dryer balls. They reduce static, cut drying time, and you can add a drop of essential oil if you want a light scent. We’ve been using ours for years.

    For detergent, look for fragrance-free formulas with simple ingredient lists. Grove has good options, or you can find them through your local co-op.

    The Living Room and Bedrooms: The Long Game

    Big furniture and flooring are harder to swap quickly, and that’s okay — this is the long game. But there are things you can do right now.

    Dust regularly — and not just surface dust. Dust in older homes can contain lead and flame retardants from older furniture and electronics. Open your windows when the Florida weather cooperates (okay, so roughly October through April, let’s be honest).

    Swap synthetic candles for beeswax or soy-based ones, or just use your diffuser.

    When it’s time to replace bedding or rugs, look for natural fibers like organic cotton or wool over synthetics. Your kids spend a third of their lives in their beds — it matters.

    The Yard and Garage: Don’t Forget Out Here

    For us, the yard is basically an extension of our home. Our kids are outside constantly — bare feet in the grass, hands in the dirt, chasing bugs. Our chickens are back there. Our mini labradoodle is rolling around in everything.

    Conventional pesticides and weed killers are a hard no for us. For pest control — and Florida bugs are no joke — we use Wondercide. It’s plant-based, safe around kids and pets, and actually works on the mosquitoes and fleas we deal with here.

    For the chicken coop specifically, food-grade diatomaceous earth is our go-to for pest control in the bedding and around the run. It handles mites and other crawlies without chemicals. If you’re newer to backyard chickens, Storey’s Guide to Raising Chickens has a great section on keeping a healthy, low-tox flock naturally.

    Hydration: What Are They Drinking It Out Of?

    This one’s simple but important, especially for active kids who are outside and sweating in the Florida heat all morning. Plastic water bottles — especially older ones — can leach chemicals, particularly when left in a hot car. We switched to stainless steel kids water bottles a while back and it’s been one of the easiest, most lasting swaps we’ve made.

    A Note on the Overwhelm

    If you’re looking at this list and feeling like it’s a lot — I hear you. It is a lot, when you look at it all at once. But remember: we didn’t get here overnight, and we won’t fix it overnight either. Pick one room. Pick one swap. Do that thing.

    This is the same way we approach homesteading, homeschooling, and most things in our life. Small, consistent steps. A little more intentional every season. That’s it.

    The 1990s childhood we’re trying to give our kids — the mud and the freedom and the real-food dinners — it’s all connected to this. A less toxic home is just part of raising kids who are genuinely rooted in something real.

    You’ve got this, mama. Start with one drawer, one product, one room. And then keep going.


    📖 You Might Also Like:

    Frequently Asked Questions

    What is the best room to start detoxing first in your home?

    Most experts and real families agree that the kitchen is the highest-impact place to start. You’re preparing food there daily, so cookware, food storage containers, and cleaning products are all worth swapping early on. After that, the laundry room and bathroom are close seconds.

    How do I detox my home without spending a lot of money?

    The key is to replace things as they run out rather than throwing everything away at once. Start with the lowest-cost swaps — like wool dryer balls instead of dryer sheets, beeswax wrap instead of plastic wrap, and DIY or concentrated cleaners instead of conventional sprays. Over time, these swaps often save money.

    What are the most toxic things commonly found in a family home?

    Some of the most common culprits include synthetic fragrance (in candles, air fresheners, and laundry products), conventional non-stick cookware, plastic food storage, chemical pesticides and lawn sprays, and conventional personal care products with parabens or phthalates. None of these require a full renovation to address — most can be swapped out gradually.

    Are natural cleaning products as effective as conventional ones?

    Yes — for most household cleaning tasks, plant-based and natural cleaners work just as well. There is a learning curve with things like switching to castile soap or concentrated formulas, but brands like Grove Collaborative have made it much easier to find effective, non-toxic cleaners that actually get the job done, even in humid climates like Florida.

    How do I reduce pesticide exposure for my kids and pets in the yard?

    Swap conventional yard sprays for plant-based pest control options like Wondercide, which is effective against mosquitoes, fleas, and ticks and is safe around children and pets. You can also use food-grade diatomaceous earth in areas where pests are a problem, especially around chicken coops or garden beds. Keeping grass trimmed and eliminating standing water also go a long way, especially in Florida.

  • Best Essential Oils for a Family Home That Are Actually Safe for Kids

    Best Essential Oils for a Family Home That Are Actually Safe for Kids

    Best Essential Oils for a Family Home That Are Actually Safe for Kids

    🌿 The Short Version: Not all essential oils are safe for kids — and some popular ones can actually cause harm. This post breaks down the best family-safe essential oils, how we actually use them in our home, and what to skip when little ones are around.

    This post contains affiliate links. I may earn a small commission at no extra cost to you.

    If you’ve ever stood in a store staring at a wall of little brown bottles wondering which ones are actually safe to diffuse around your kids — same, friend. I was that mama a few years ago, equal parts curious and overwhelmed. Essential oils feel so natural, so surely they’re all fine, right?

    Not exactly. That was the thing nobody told me upfront.

    Once I started digging into it — really digging, not just reading the back of a box — I realized there’s a lot of nuance here. Some oils that are perfectly lovely for adults can be genuinely harsh on little lungs and nervous systems. And some of the oils I’d written off as boring are actually the workhorses of a safe, non-toxic family home.

    We use essential oils pretty regularly around here — for cleaning, for seasonal support, for sleep, for keeping the bugs at bay (this is Florida, y’all, the mosquitoes are not playing). So I wanted to share what’s actually in our rotation, what we avoid, and how we think about all of it with elementary-age kids in the house.

    Why Kid-Safe Matters More Than You Think

    Kids’ bodies are not just small adult bodies. Their livers process things differently, their skin absorbs more, and their airways are more sensitive. What’s fine diffused in a house with adults can be genuinely irritating — or worse — for babies and toddlers.

    The good news: once you know which oils to lean on and how to use them safely, it’s actually pretty simple. You don’t need a cabinet full of 50 oils. You need maybe five or six really solid ones.

    A Few Ground Rules We Follow

    • Always dilute before applying to skin. For kids, that usually means 1% or less (about 1 drop per teaspoon of carrier oil).
    • Diffuse in a ventilated space — not a small closed room — and take breaks. Thirty to sixty minutes on, then off.
    • Keep oils away from eyes, mouth, and ears. Obvious, but worth saying.
    • Store everything out of reach. Essential oils are potent and some are toxic if ingested.
    • When in doubt, skip it. There are plenty of gentle options.

    And if you’re ever unsure, the Robert Tisserand Institute and KidSafe certifications are good references to bookmark.

    The Oils We Actually Use (and Love)

    Lavender — The One You Probably Already Have

    Lavender is the OG of family-safe essential oils, and for good reason. It’s gentle, well-researched, and incredibly versatile. We use it in our bedtime diffuser blend, diluted in a roller for minor scrapes and bug bites, and occasionally in our homemade linen spray.

    Lavender is also one of the few oils generally considered safe even around younger kids (always check age-specific guidance for babies under 2). For our elementary crew, it’s become almost a sleep cue — they smell it and their bodies start to wind down. That’s the power of consistent routine, honestly.

    Frankincense — Slow, Steady, Grounding

    Frankincense is one I didn’t expect to love as much as I do. It’s deeply calming — like the scent equivalent of a slow exhale. We diffuse it during morning homeschool time, especially during nature journaling or quiet reading. There’s something about it that just settles the energy in the room.

    It blends beautifully with lavender and is generally well-tolerated by kids when used appropriately. It’s become a staple in our Charlotte Mason rhythm — quiet, grounding, intentional.

    Tea Tree — The Non-Toxic Cleaner’s Best Friend

    We use tea tree (also called melaleuca) primarily for cleaning. It goes into our DIY all-purpose spray along with water and a little castile soap. Great for wiping down the chicken coop supply area, the mudroom, the bathroom — anywhere that needs a germ-fighting boost without the toxic chemical smell.

    One important note: tea tree should NOT be used on or around cats, and it needs to be well diluted before any skin contact with kids. Diffusing it occasionally in a ventilated space is generally fine for kids over 2, but I wouldn’t overdo it. We mostly keep it to cleaning applications.

    For our non-toxic cleaning routine overall, Grove Collaborative has been a great source for clean-ingredient products that pair perfectly with our DIY stuff.

    Cedarwood — The Sleepiest Oil in Our Cabinet

    Honestly? Cedarwood might be my secret weapon. It’s a natural sedative (in the gentlest sense), incredibly safe for kids, and smells like a walk through the woods — which, in a Charlotte Mason home, feels very right. We diffuse it at bedtime alongside lavender and the whole house calms down.

    It’s also a gentle bug repellent, which around here in the Florida panhandle is basically a year-round concern. We sometimes add a drop or two to our outdoor spray (always diluted in a carrier) before the kids head outside to play.

    Speaking of outdoor play — if you want to build a backyard that actually invites that kind of free-range, 1990s-style childhood, check out our post on How to Create a Nature Play Yard in Your Backyard (That Kids Actually Use).

    Sweet Orange — Happy, Bright, and Just Plain Fun

    Citrus oils get a bad rap because some of them are photosensitive (meaning if you put them on skin and go in the sun, you can burn — which, living in Florida, matters). But sweet orange diffused is just joyful. It lifts the mood, smells like a creamsicle, and is one of the gentler citrus oils for family use.

    We diffuse it on Monday mornings to kick off our homeschool week on a bright note. It’s become a little tradition the kids actually look forward to. Simple stuff, y’all.

    Roman Chamomile — Gentle Support for Big Feelings

    Roman chamomile is gentle enough for young kids and is one of our go-to options when someone’s having a hard day emotionally. Diluted in a roller and applied to the wrists or bottoms of feet, it takes the edge off a meltdown in a way that feels supportive rather than chemical. It’s one of the most widely recommended oils for children’s emotional wellness.

    📌 Love this? Save it to Pinterest so you can find it later!

    What We Avoid Around Kids

    This list matters just as much as the good stuff:

    • Eucalyptus and Peppermint — These are probably the most important ones to know about. Both contain high levels of 1,8-cineole, which can cause breathing issues in young children. Most sources say to avoid eucalyptus and peppermint entirely for kids under 6, and use with caution up to 10. I know peppermint smells amazing. I know. But I keep it in my personal stash, not in the family diffuser.
    • Clove and Cinnamon Bark — Hot oils that can cause serious skin irritation. Not in our family blends.
    • Rosemary — Generally not recommended for young children or anyone with seizure history.
    • Wintergreen — Contains methyl salicylate, which is similar to aspirin. Keep it away from kids entirely.

    For outdoor pest control in a kid-safe way, we’ve had really good luck with Wondercide — it’s plant-based, smells great, and we’ve used it on the kids, the dog, and even around the chicken run.

    How We Store and Diffuse Safely

    All our oils live in a small wooden box on a high shelf — the kids know they are not toys. We use a basic ultrasonic diffuser and run it for 30-60 minute cycles in a room with a door or window cracked. I don’t diffuse 24/7, even the gentle ones. Less is more with essential oils, I’ve come to believe.

    For our non-toxic cleaning supplies and home products more broadly, Grove Collaborative has been a go-to — they’ve got a really solid curation of clean products that align with the way we try to keep our home.

    And if you’re curious about what we use when the kids are under the weather, I’ve got a whole post on Natural Remedies for Kids’ Cough and Cold This Florida Winter (What We Actually Use) — essential oils are part of that conversation too.

    A Note on Brands and Quality

    This is a whole topic unto itself, but the short version: quality matters a lot with essential oils. Look for companies that publish GC/MS testing (gas chromatography/mass spectrometry — basically a purity test), source transparently, and don’t make wild medical claims. You don’t have to buy the priciest MLM brand on the market, but you do want to skip the $3 bottle at the checkout lane.

    The Simple Takeaway

    You don’t need a complex system or a huge collection to make essential oils work safely in your family home. A handful of well-chosen, quality oils — lavender, frankincense, cedarwood, sweet orange, Roman chamomile — used thoughtfully in a ventilated space, can genuinely support your home’s atmosphere and wellness without any of the synthetic fragrance stuff we’re trying to move away from.

    Start simple. Learn as you go. And don’t let anyone pressure you into buying 40 oils when five will do just fine.

    That’s kind of our whole philosophy around here, honestly — intentional, not overwhelming. Simple living doesn’t mean doing without. It means doing with purpose.

    If you’re building a more natural home and want to explore what that looks like with kids who are outside in the dirt, learning at home, and growing things — you’re in the right place. Welcome.


    📖 You Might Also Like:

    Frequently Asked Questions

    Which essential oils are safest to diffuse around young children?

    Lavender, frankincense, cedarwood, sweet orange, and Roman chamomile are among the most widely recommended essential oils for use around children. Always diffuse in a ventilated room for limited time periods (30–60 minutes), and avoid using eucalyptus or peppermint around children under 6 years old.

    Is it safe to diffuse essential oils around kids all day?

    No — more is not better with essential oils. Even the gentlest oils can be irritating with prolonged exposure. A good rule of thumb is to diffuse for 30–60 minutes at a time, then take a break, and always make sure the room has good ventilation. Constant diffusion can cause headaches, irritability, or respiratory irritation even with safe oils.

    Can I apply essential oils directly to my child’s skin?

    Essential oils should always be diluted in a carrier oil (like fractionated coconut oil or jojoba oil) before applying to a child’s skin. For children, a 1% dilution is recommended — that’s about 1 drop of essential oil per teaspoon of carrier oil. Never apply undiluted oils to children’s skin, and keep oils away from the eyes, ears, and mouth.

    What essential oils should I avoid around kids?

    Avoid eucalyptus, peppermint, rosemary, wintergreen, clove, and cinnamon bark around young children. Eucalyptus and peppermint in particular contain compounds that can cause breathing difficulties in children under 6. Wintergreen contains methyl salicylate (similar to aspirin) and is not safe for children at all.

    Do essential oil brands really make a difference in safety?

    Yes, quality matters significantly. Look for brands that publish third-party GC/MS (gas chromatography/mass spectrometry) testing to verify purity and potency. Avoid very cheap oils with no sourcing transparency, as they may be adulterated or diluted with synthetic compounds. You don’t have to buy the most expensive brand on the market — you just want one that’s transparent about what’s in the bottle.

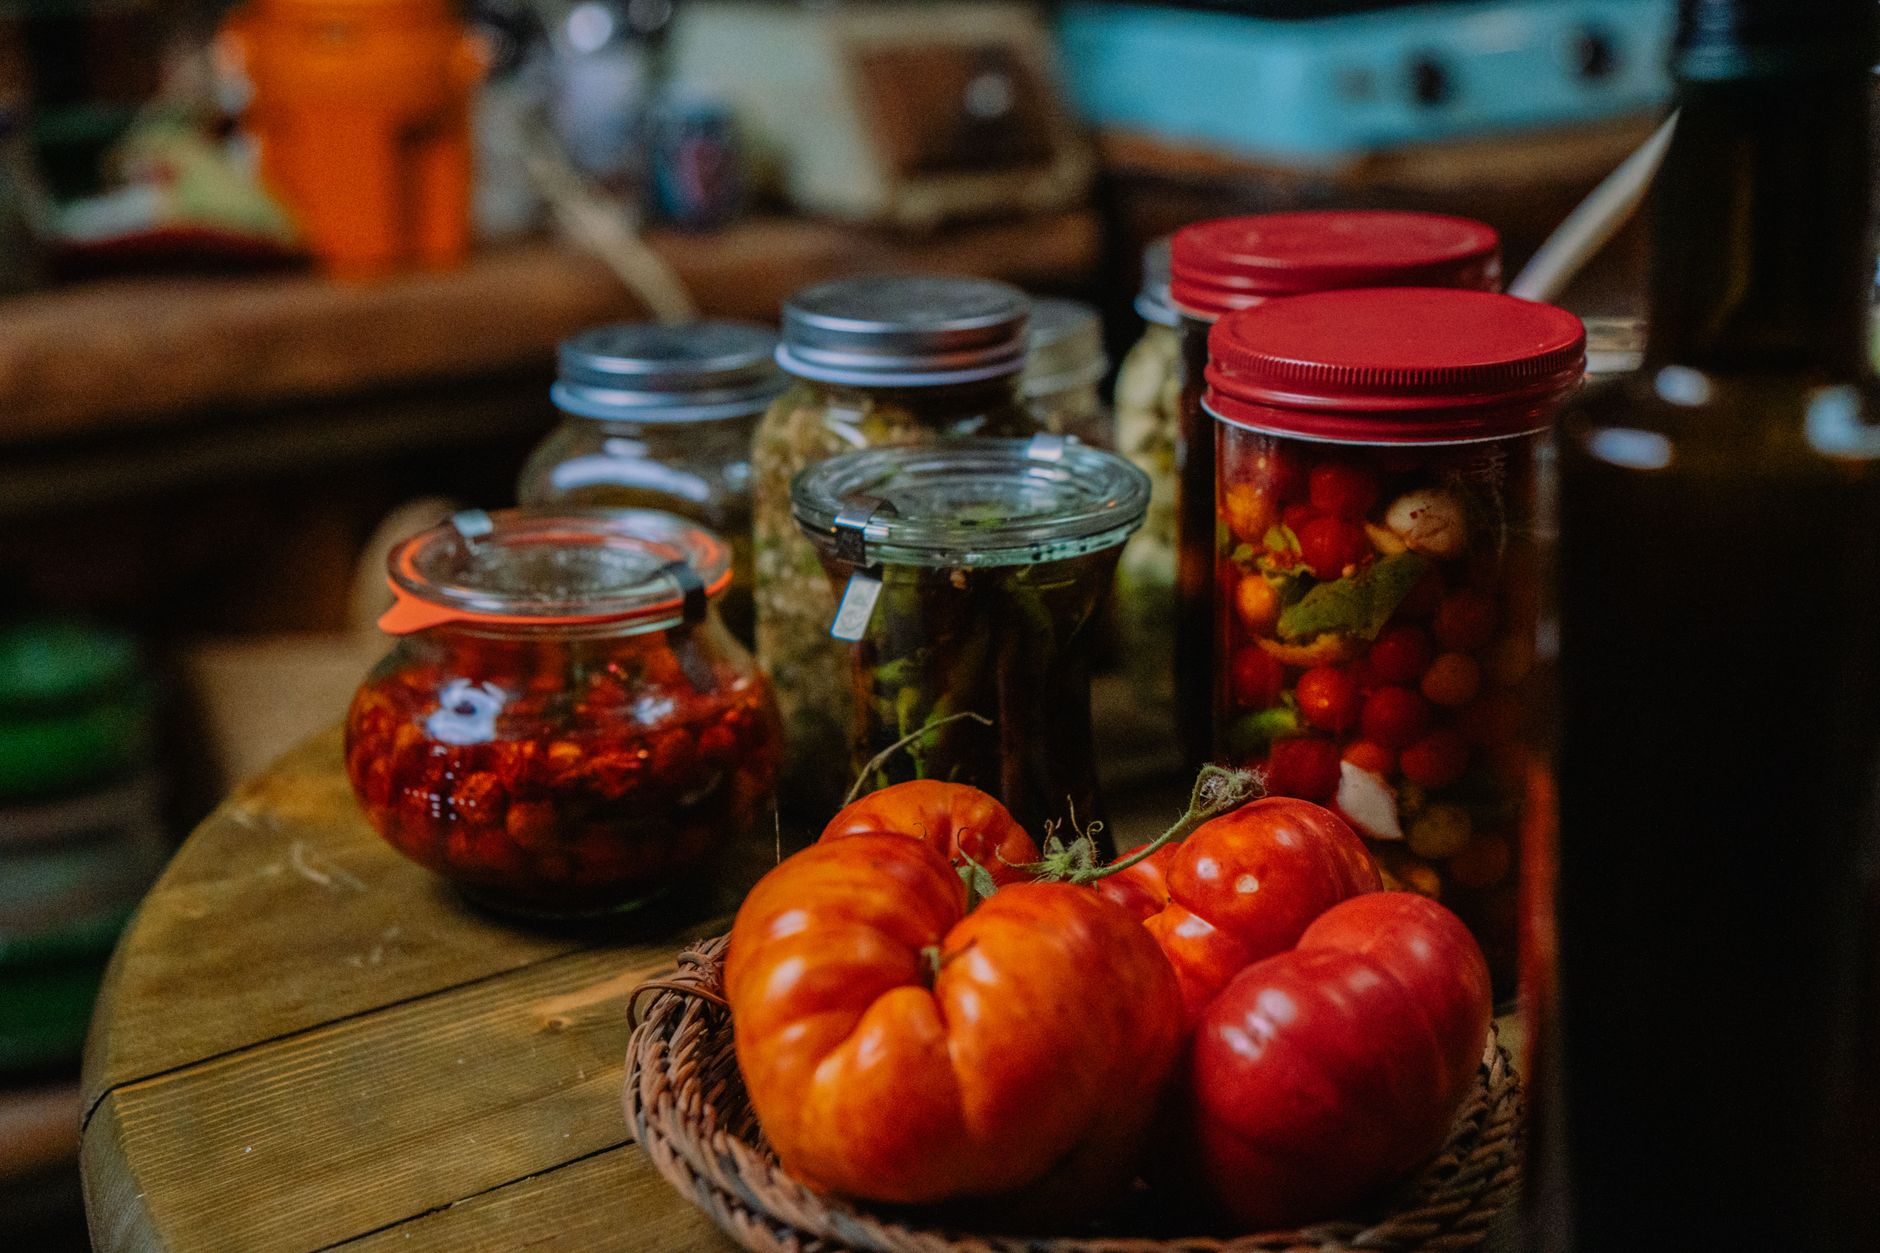
  • How to Can Tomatoes at Home: A Beginner’s Guide to Getting It Right the First Time

    How to Can Tomatoes at Home: A Beginner’s Guide to Getting It Right the First Time

    How to Can Tomatoes at Home: A Beginner’s Guide to Getting It Right the First Time

    🌿 The Short Version: Canning tomatoes at home is genuinely doable for beginners — even if you’ve never touched a water bath canner in your life. This guide walks you through everything you need to know, from the right tomatoes to pick, to the exact steps to process them safely, so you can stock your pantry with something real.

    This post contains affiliate links. I may earn a small commission at no extra cost to you.

    Okay, so here’s how it started for me. We had a bumper crop of tomatoes from our raised beds last fall — more than we could possibly eat fresh — and I was standing in my kitchen looking at a colander overflowing with them thinking, I did not grow all of this just to watch it rot. I’d been wanting to learn to can for years. I had the romanticized version in my head: rows of beautiful red jars lined up on the pantry shelf, my kids thinking I was some kind of pioneer woman. But I was also a little intimidated, if I’m being honest.

    So I did what I always do. I read everything I could find, I called my mama, and then I just did it. And y’all — it wasn’t nearly as complicated as I’d made it out to be in my head. If you’ve been sitting on the fence about canning tomatoes, this post is for you.

    Why Tomatoes Are the Best Place to Start

    Tomatoes are basically the perfect beginner canning project. They’re one of the most forgiving foods to preserve because their natural acidity puts them right at the safe edge for water bath canning (which is the simpler method — no pressure canner required). You don’t need a ton of fancy equipment, the process is pretty straightforward, and the payoff is huge. A pantry full of home-canned tomatoes gets you through soups, sauces, and chilis all winter long without reaching for a can of mystery-ingredient store stuff.

    If you’ve already been gardening and you’re trying to figure out what to do with your harvest, check out How to Preserve Your Summer Harvest: Canning, Freezing, and Fermenting for Real Families — it’s a great companion to this post.

    What You’ll Need Before You Start

    You don’t need a ton of stuff, but you do need the right stuff. Here’s your basic list:

    • Water bath canner (a large stockpot with a rack works too)
    • Mason jars — quarts or pints, your choice
    • New lids every time (bands can be reused, lids cannot)
    • Jar lifter — please don’t skip this, boiling water is no joke
    • Wide-mouth funnel
    • Ladle
    • Large pot for blanching
    • Lots of tomatoes — about 21 pounds fills a canner load of 7 quarts

    For the tomatoes themselves, you want a paste variety like Roma or San Marzano if you can get them. They have less water and more flesh, which means better flavor and faster processing. But honestly, any ripe, meaty tomato will work. Just avoid anything bruised or overripe.

    Step-by-Step: How to Can Whole or Crushed Tomatoes

    Step 1: Wash and Sterilize Your Jars

    Run your jars through the dishwasher on a hot cycle or wash them well in hot soapy water and keep them in hot water until you’re ready to fill them. You want hot jars for hot food — putting boiling-hot tomatoes into a cold jar is how you get cracks.

    Step 2: Blanch and Peel the Tomatoes

    Score a small X on the bottom of each tomato, drop them into boiling water for about 30-60 seconds, then immediately plunge them into an ice bath. The skins will slip right off. It’s actually a satisfying little job for kids to help with — mine love peeling them.

    Step 3: Add Acid — This Step Is Non-Negotiable

    Even though tomatoes are naturally acidic, their pH can vary. To keep things safely in the water bath canning range, you need to add acid to every jar:

    • Quart jars: 2 tablespoons bottled lemon juice (bottled, not fresh — the acidity is standardized)
    • Pint jars: 1 tablespoon bottled lemon juice

    You can also use citric acid if you prefer — ¼ teaspoon per quart. Add this to the jar before you put the tomatoes in.

    Step 4: Fill Your Jars

    For whole or crushed tomatoes, pack them in tightly, pressing down so the tomatoes release their juice and fill the gaps. Leave ½ inch of headspace at the top. Add a pinch of canning salt if you like (totally optional — it’s for flavor only, not preservation).

    Wipe the rims of your jars with a clean damp cloth — any residue on the rim can prevent a good seal. Put your lids on finger-tight. Not gorilla-tight, just snug.

    Step 5: Process in the Water Bath Canner

    Lower your jars into the canner, making sure they’re covered by at least 1-2 inches of water. Bring to a full boil, then start your timer:

    • Pints: 40 minutes
    • Quarts: 45 minutes

    (Adjust for altitude if you’re not near sea level — here in the Florida Panhandle, we’re basically at sea level so no adjustment needed.)

    When time’s up, turn off the heat and let the jars sit in the water for 5 minutes before removing them. Set them on a towel on the counter and don’t touch them for 12-24 hours.

    📌 Love this? Save it to Pinterest so you can find it later!

    Step 6: Check Your Seals

    After 12 hours, press down on the center of each lid. If it doesn’t flex up and down, you’ve got a good seal. If a lid pops, just put that jar in the fridge and use it within a week. Properly sealed jars will last 12-18 months in a cool, dark pantry.

    The Stuff Nobody Tells Beginners

    Don’t panic if a jar doesn’t seal. It happens. Just refrigerate it and move on. This is not a sign that you failed — it’s just canning.

    Your kitchen is going to get steamy. This is a great Florida winter project, not a July one. We do most of our canning in October and November when it’s finally cooled off enough that running the stove for two hours doesn’t turn our house into a sauna.

    Involve the kids. Peeling tomatoes, handing you lids, labeling jars with the date — these are all real jobs little hands can do. It’s practical life skills, it’s math (how many jars did we fill?), it’s science (why do we add the lemon juice?). This is Charlotte Mason home education happening in real life, not from a textbook.

    Your pantry will feel different after this. I know that sounds dramatic, but walking past a shelf of jars you filled yourself — with tomatoes you grew yourself — hits different. My kids are proud of those jars. They show them to people. That’s something.

    If you’re also growing your own tomatoes and want to make the most of your garden setup, How to Start a Homestead Garden in Florida for Beginners is worth a read, especially if you’re still figuring out our quirky Florida soil situation.

    A Few Products That Have Made This Easier for Us

    I’m not a gear person by nature, but a few things genuinely make canning more enjoyable. A good cast iron skillet isn’t canning equipment exactly, but it’s what I use to cook down tomatoes before canning sauce, and it’s earned its spot on my stovetop. A kitchen compost bin right on the counter makes quick work of all those tomato skins and cores — especially when you’re doing a big batch. And beeswax wrap is great for covering cut tomatoes or bowls in the fridge while you’re working in stages.

    For cleaning products to wipe down your canning area without bringing harsh chemicals into a food-prep space, we love Grove Collaborative for all of that. Keeping things non-toxic in the kitchen matters to me, especially when we’re doing something like canning where cleanliness is actually part of the safety process.

    You Can Do This

    I want to close with this: canning tomatoes is one of those skills that feels intimidating from the outside and completely manageable once you’re in it. The first time is the hardest — mostly because you’re just not sure what to expect. But once those jars are on your shelf and you open your first one in December to make a big pot of soup, you’ll understand why generations of families have done this.

    This is the kind of thing I want my kids to grow up seeing as normal. Not exotic, not extreme — just regular homemaking. The way most families lived before everything came in a package. We’re not perfect at it, but we’re learning, and every jar we put up feels like a small victory.

    If you’re curious about other ways we preserve and use what we grow, check out How to Teach Kids to Cook Basic Skills by Age — because what’s the point of filling the pantry if the kids don’t know how to use what’s in it?

    You’ve got this, friend. Go can some tomatoes.


    📖 You Might Also Like:

    Frequently Asked Questions

    Do I need a pressure canner to can tomatoes at home?

    No — tomatoes can be safely processed using a water bath canner, which is much simpler and more beginner-friendly. The key is that you must add bottled lemon juice or citric acid to every jar to ensure safe acidity levels. As long as you do that, a water bath canner is all you need.

    How long do home-canned tomatoes last on the shelf?

    Properly sealed home-canned tomatoes stored in a cool, dark place will last 12–18 months. After that they’re still likely safe to eat, but quality and flavor start to decline. Always check the seal before using — if the lid flexes or the jar smells off, throw it out.

    Why do I have to use bottled lemon juice instead of fresh?

    The acidity of fresh lemons varies from fruit to fruit, which means you can’t guarantee a consistent pH in your jars. Bottled lemon juice has a standardized, tested acidity level that makes it safe for water bath canning. It’s one of those spots where you don’t want to wing it.

    Can I can tomatoes without salt?

    Yes, absolutely. Salt is purely optional in canned tomatoes — it’s added for flavor only and plays no role in preservation or safety. If you’re watching sodium intake or just prefer to leave it out, go right ahead. You can always season when you open the jar.

    What are the best tomato varieties to use for canning?

    Paste tomatoes like Roma or San Marzano are the go-to for canning because they have thick flesh, fewer seeds, and lower water content, which means better texture and richer flavor in the jar. That said, any ripe, meaty tomato works. Just avoid watery varieties like beefsteak if you can, and always skip anything bruised or overripe.

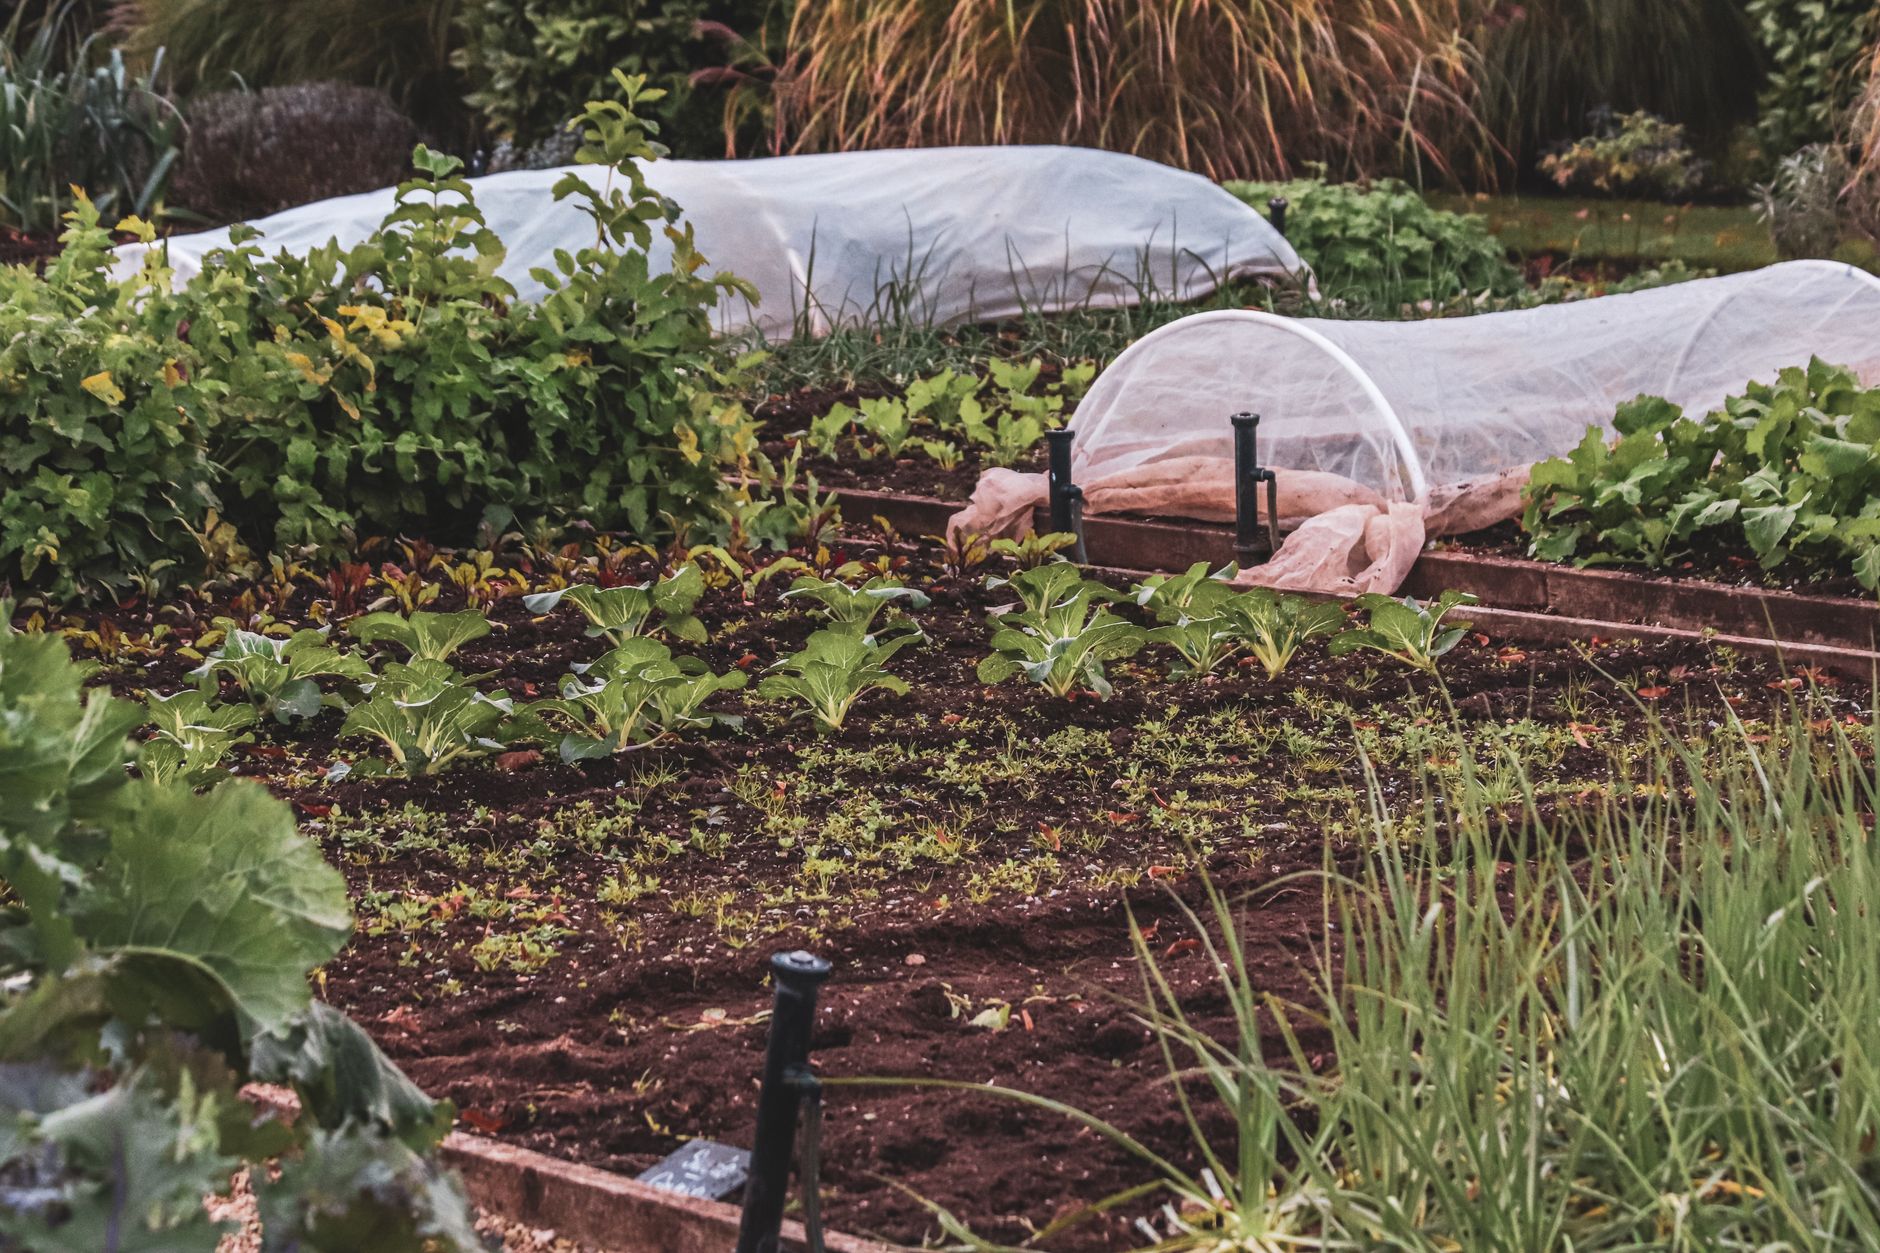
  • Best Raised Bed Soil Mix for Florida Gardens (What Actually Works in Our Sandy Southern Soil)

    Best Raised Bed Soil Mix for Florida Gardens (What Actually Works in Our Sandy Southern Soil)

    Best Raised Bed Soil Mix for Florida Gardens (What Actually Works in Our Sandy Southern Soil)

    🌿 The Short Version: Florida’s sandy, nutrient-poor soil makes raised beds a game-changer — but only if you fill them right. This post breaks down exactly what goes into our raised bed soil mix here in Northwest Florida so your garden actually grows instead of just surviving.

    This post contains affiliate links. I may earn a small commission at no extra cost to you.

    If you’ve ever dumped a bag of garden soil into a raised bed, planted your seedlings with all the hope in the world, and then watched them just… sit there looking sad in the Florida heat — you are not alone. I have been there. More than once.

    Gardening in Florida is its own thing. We’ve got sandy soil that drains faster than you can water it, summers that feel like standing inside an oven, and a humidity level that makes everything feel swampy. Regular gardening advice from the internet (usually written by folks gardening in the Midwest or Pacific Northwest) does not always translate down here. And when it comes to raised beds specifically, what you fill them with makes or breaks the whole operation.

    We’ve been doing raised bed gardening at our place outside Pensacola for a few years now, and I’ve learned a lot through trial, error, dead tomato plants, and a whole lot of reading. So let me share what we’ve landed on — and why it works for our Florida conditions.

    Why Raised Beds Are the Right Move for Florida in the First Place

    Our native soil here in Northwest Florida is basically glorified sand. It’s low in organic matter, drains extremely fast, and has very little natural nutrient content. You can amend in-ground beds over time, and we do work on that too (our chickens help a lot with that — more on that in a second), but raised beds give you total control over your growing environment from day one.

    Raised beds also warm up faster in late winter, which matters when you’re trying to get an early spring start before the heat shuts everything down in May. And they drain well enough to avoid the waterlogging that can happen during our summer monsoon season — while also holding moisture better than pure Florida sand ever would on its own. It’s a balance, and a good soil mix is how you find it.

    If you’re just getting started with your Florida homestead garden, I wrote a whole post on How to Start a Homestead Garden in Florida for Beginners (What Actually Works Down Here) that might be a helpful starting point before you even dig into soil mixes.

    The Basic Raised Bed Soil Formula We Use

    The classic starting point for raised bed soil — made famous by Mel Bartholomew’s Square Foot Gardening method — is equal thirds:

    • 1/3 compost
    • 1/3 peat moss or coconut coir
    • 1/3 coarse vermiculite

    This is a solid formula and we’ve used it. But Florida adds some nuances. Here’s how we tweak it.

    Go Heavy on the Compost

    In Florida’s heat, organic matter breaks down fast. Like, really fast. What that means practically is that your raised bed mix is going to settle and lose volume over each growing season. The solution is to start with more compost than you think you need and plan to top-dress every season.

    We use a mix of purchased compost and our own homemade stuff. Our backyard chickens are genuinely the best composting partners I’ve ever had — their manure mixed into our compost pile breaks down beautifully and adds serious nutrients. If you have chickens or are thinking about it, composting with them is one of the most practical homestead habits you can build. (We also keep a kitchen compost bin on the counter to collect scraps before they go out to the pile.)

    Aim for 40-50% compost in your Florida raised bed mix, rather than the standard 33%.

    Choose Coconut Coir Over Peat Moss

    Traditional mix recipes call for peat moss, and it works fine — but coconut coir is a better fit for Florida for a couple of reasons. First, it’s more sustainable (coir is a byproduct of coconut processing). Second, and more practically, coir actually rehydrates more easily than peat moss, which can get hydrophobic in dry conditions. Given how fast our Florida soil dries between waterings, that matters. Coir also has a more neutral pH, which is helpful since peat tends to be quite acidic.

    Aim for about 25-30% coir in your mix.

    Don’t Skip the Vermiculite

    Vermiculite is what keeps your mix from compacting into a brick over time. It’s light, it holds moisture and nutrients without waterlogging, and it keeps good air pockets in the soil for root growth. In Florida’s heat, roots need room to breathe. Keep this at around 20-25% of your mix.

    Add Perlite for Extra Drainage

    This is our Florida-specific add. During summer rainy season in Pensacola, we can get several inches of rain in a single afternoon storm. Adding 10-15% perlite to your mix gives you a little extra insurance against waterlogging while still holding nutrients. Think of it as your raised bed’s drainage valve.

    📌 Love this? Save it to Pinterest so you can find it later!

    What to Add Each Season

    Because Florida heat burns through organic matter so quickly, you’ll want to refresh your beds before each new growing season. Here’s what we do:

    Before fall planting (our most productive season here):

    • Top-dress with 2-3 inches of finished compost
    • Mix in a scoop of aged chicken manure if we have it
    • Add a light dusting of food grade diatomaceous earth around the bed edges — it’s our non-toxic first defense against pest pressure

    Before spring planting:

    • Another compost top-dress
    • Check and refill any settled areas with fresh mix

    We use our Storey’s Guide to Raising Chickens as a general homestead reference, and it has great information on how to use chicken manure effectively in the garden without burning your plants. The key is making sure it’s well-composted first — fresh manure is too hot and will damage roots.

    Getting the Kids Involved (This Is School, After All)

    One of my favorite things about garden work is how naturally it fits into our homeschool days. Mixing raised bed soil is basically a hands-on science lesson in decomposition, soil biology, drainage, and plant nutrition. My kids don’t even realize how much they’re learning when they’re helping scoop compost and mix layers.

    We keep a nature journal going throughout the growing season — the kids sketch what they plant, note when seeds sprout, draw the bugs they find, and record what thrived or flopped. It’s pure Charlotte Mason in action, and it builds a real record of our garden over time that we actually love looking back on.

    For the younger ones, a bug collection kit turns every garden session into a nature study. Florida raised beds are surprisingly alive — earthworms, pill bugs, beetles, the occasional frog — and my kids have learned more about soil health and ecosystems from just watching our garden beds than from any worksheet ever could have taught them.

    If you want more ideas for weaving the natural world into your homeschool, check out our post on Florida Homeschool Art Curriculum Charlotte Mason Style (What We Actually Do and Why It Works) — a lot of those same principles apply right out in the garden.

    A Word on Buying Bagged Soil

    If you’re filling a large number of beds and mixing your own isn’t realistic, bagged mixes can work — but read the labels carefully. A lot of big-box store garden soils are mostly wood chips or bark with very little actual nutrition. Look for mixes that list compost, aged bark fines, and perlite or vermiculite. Avoid anything that smells sour (anaerobic decomposition — not good) or feels heavy and wet in the bag.

    We still supplement any bagged mix with additional compost and perlite before we consider it ready to plant in Florida.

    For more on what grows well once your beds are ready, our post on Best Container Vegetable Garden for Florida Summer Heat (What Actually Grows When It’s 95 Degrees Outside) covers the variety selection side of things, which is honestly just as important as the soil.

    The Simple Version to Remember

    If I had to distill everything into a quick formula for a Florida raised bed:

    • 40-50% compost (the more the better)
    • 25% coconut coir
    • 15% vermiculite
    • 10-15% perlite
    • Top-dress every season, no exceptions

    That’s it. It doesn’t have to be complicated. Gardening in Florida requires a little more intention than in other climates, but once you get your beds filled right, you will be genuinely amazed at what grows here — especially in the fall and winter, when the rest of the country is buried in snow and we’re out here harvesting kale in January in flip flops.

    This is one of those things I wish someone had just told me plainly when I started. Hopefully this saves you at least one season of guessing. Now go fill those beds — and let the kids help. There’s no better dirt to get your hands into than the kind that grows your own food.


    📖 You Might Also Like:

    Frequently Asked Questions

    What is the best soil mix for raised beds in Florida?

    In Florida, the best raised bed soil mix is heavier on compost than standard recipes suggest — aim for 40-50% compost, 25% coconut coir, 15% vermiculite, and 10-15% perlite. Florida’s heat breaks down organic matter quickly, so more compost upfront and regular top-dressing each season is key to keeping your beds productive.

    Can I use bagged garden soil in Florida raised beds?

    You can, but most bagged garden soils from big-box stores are too low in nutrients and too high in wood filler to perform well on their own in Florida. Always supplement bagged mixes with extra compost and perlite before planting, and check that the bag lists compost and vermiculite or perlite among its main ingredients.

    How often should I add compost to raised beds in Florida?

    At minimum, top-dress your Florida raised beds with 2-3 inches of finished compost before each growing season — which typically means before your fall planting and again before spring. Florida’s heat and humidity accelerate organic matter breakdown, so beds need refreshing more often than in cooler climates.

    Is peat moss or coconut coir better for Florida raised beds?

    Coconut coir is generally the better choice for Florida. It rehydrates more easily than peat moss (which can become water-repellent when dry), has a more neutral pH, and is a more sustainable material. Both will work in a pinch, but coir performs better in Florida’s drying heat between waterings.

    How do I improve my Florida garden soil naturally?

    The best natural ways to improve Florida garden soil are to add large amounts of finished compost, use cover crops like cowpeas or buckwheat in the off-season, mulch heavily to retain moisture and build organic matter as it breaks down, and if you have backyard chickens, compost their manure to use as a rich soil amendment. Raised beds also give you control over your growing medium so you’re not fighting native sand at all.

  • Florida Homeschool Art Curriculum Charlotte Mason Style (What We Actually Do and Why It Works)

    Florida Homeschool Art Curriculum Charlotte Mason Style (What We Actually Do and Why It Works)

    Florida Homeschool Art Curriculum Charlotte Mason Style (What We Actually Do and Why It Works)

    🌿 The Short Version: You don’t need a boxed art curriculum to give your kids a rich, beautiful art education — especially if you’re homeschooling Charlotte Mason style. This post walks through exactly how we approach art in our Florida homeschool, from nature journaling in the backyard to picture study at the kitchen table, with real supply recommendations that won’t break the bank.

    This post contains affiliate links. I may earn a small commission at no extra cost to you.

    Can I be honest with you for a second? When I first started planning our Charlotte Mason homeschool, art was the thing that stressed me out the most. I am not an artist. I can barely draw a stick figure. And the idea of teaching art felt like this big, intimidating thing I needed a formal curriculum to tackle.

    But here’s what I’ve learned after a few years of doing this: Charlotte Mason art isn’t really about teaching kids to draw. It’s about teaching kids to see. And that? That I can absolutely do. Especially here in Northwest Florida, where there is genuinely so much to look at — herons standing still in the marsh, zebra longwing butterflies in the yard, the way afternoon light hits the live oaks just before a thunderstorm rolls in off the Gulf.

    So let me share what our Charlotte Mason art approach actually looks like, what supplies we use, and how it all weaves together into something that feels more like a way of life than a lesson plan.


    What Charlotte Mason Art Actually Looks Like (Hint: It’s Not a Workbook)

    Charlotte Mason believed that art education had two main components: picture study (looking at and narrating great works of art) and nature journaling (drawing and painting what you observe in the natural world). That’s it. No formal drawing curriculum required, at least not in the early years.

    What she didn’t believe in was drilling techniques or grading artwork. The goal was cultivating a habit of observation and an appreciation for beauty — two things that fit perfectly into our 1990s-style, less-screen-more-dirt kind of childhood.

    I think about how we grew up. We looked at things. We got bored and noticed stuff. That’s exactly what Charlotte Mason art is trying to preserve in kids who are growing up in a very different world.


    Picture Study: Our Simple Approach

    Picture study is probably the easiest place to start. Each term, we focus on one artist — usually six to eight weeks. We pull up a print or find a quality art book, look at it together for a few minutes without talking, then close it and narrate what we remember. That’s the whole thing.

    We’ve done Monet, Winslow Homer (his coastal paintings resonate SO much here in the Panhandle), and Mary Cassatt. The kids retain way more than you’d expect. My youngest can still describe Monet’s garden from a study we did over a year ago.

    For prints and resources, Rainbow Resource has a great selection of artist study materials, and Timberdoodle often includes picture study cards in their curriculum packages if you want something ready-to-go.


    Nature Journaling: The Heart of Our Art Time

    This is where the real magic happens for us, y’all.

    Nature journaling is exactly what it sounds like — going outside, observing something, and drawing or painting what you see. It’s not about making a perfect picture. It’s about slowing down and really looking. My kids have drawn our chickens, the Gulf Coast wildflowers that pop up in the spring, the spiders that build webs in our garden fence, and the anole lizards that turn up literally everywhere.

    We use a dedicated nature journal for each child — blank pages are key so they can write, draw, or paint however they want. I also keep one myself, which has been honestly one of the most grounding habits I’ve picked up as a homeschool mama.

    For painting, we love Faber-Castell watercolors. They blend beautifully, the colors are true, and they hold up to kids who are a little heavy-handed with water. (Spoiler: all kids are heavy-handed with water.)

    📌 Love this? Save it to Pinterest so you can find it later!


    How Nature Study and Art Overlap (in the Best Way)

    One of my favorite things about the Charlotte Mason approach is how everything connects. Nature journaling isn’t just art — it’s science too. When my kids sit down to draw a bird they spotted in the yard, they’re observing details they never would have noticed otherwise. Feather patterns, beak shape, how the feet grip the branch.

    We keep a Sibley Birds field guide nearby during journal time so we can identify what we’re looking at and add real names and notes. It turns a simple drawing session into a full nature study lesson without anyone feeling like it’s a lesson.

    Same thing happens in the garden and with our backyard flock. The kids have filled pages with chicken sketches — and honestly, if you want a willing art subject that holds still just long enough to be sketched, a chicken pecking at the ground is perfect. (If you’re just getting into backyard chickens, Storey’s Guide to Raising Chickens is our go-to reference, and the Kids’ Guide to Keeping Chickens is great for getting your littles involved too.)

    Check out our post on How to Involve Kids in Homestead Chores by Age for more on weaving real-life learning into your days — it pairs really naturally with nature journaling.


    Do You Need a Formal Art Curriculum?

    Honest answer: for K-5, probably not. The Charlotte Mason method leans heavily on living experience over packaged curriculum, and art is one of the places where that really shines.

    That said, if you want a bit more structure — especially for older elementary kids who are asking how to draw certain things — there are some gentle options that don’t feel like art class in the traditional sense. Evan-Moor, Draw Write Now, and Mona Brooks’ Drawing with Children are all popular in Charlotte Mason circles. None of them are drill-heavy or grade-focused.

    If you’re a PEP scholarship family like us, art supplies are absolutely a qualifying purchase. Stock up on good watercolors, a quality journal, and some colored pencils — your scholarship funds can cover it all.


    Our Weekly Art Rhythm (Simple and Sustainable)

    Here’s what our week actually looks like, because I know we all want the real picture:

    • 2x per week: Nature journal time — usually 20-30 minutes outside in the morning before it gets too hot. In Florida, this means we’re out there early, y’all. By 9am in July it’s already brutal.
    • 1x per week: Picture study — we look at the current artist’s work, narrate, and sometimes try to recreate a piece in our own style using watercolors.
    • As it comes up: Seasonal crafts, watercolor painting at the table, or drawing animals from our pocket microscope observations.

    That’s it. It’s not complicated. It’s consistent, it’s low-pressure, and the kids genuinely look forward to it.

    If you’re building out your broader homeschool approach and want more inspiration, our post on Seasonal Living Ideas for Families talks about how we let the rhythms of the year shape our learning — and art fits right into that.


    A Few Supplies Worth Having on Hand

    Keep it simple. You don’t need a craft store’s worth of supplies. Here’s what we actually reach for:

    That’s genuinely all you need to have a rich, Charlotte Mason-style art education for the elementary years.


    The Real Goal: Kids Who Notice Things

    At the end of the day, I’m not trying to raise little Monets. I’m trying to raise kids who pay attention — who slow down long enough to notice the way a dragonfly’s wings catch the light, or how the sunset over Escambia Bay turns three different shades of pink before it’s gone.

    That’s what Charlotte Mason art does. It builds observation habits that serve your kids in every subject and, more importantly, in the kind of childhood we’re trying to give them. The kind where they’re present. Where they put the tablet down and pick up a pencil. Where they come inside with mud on their knees and something worth drawing in their heads.

    If you’re just getting started, don’t overthink it. Grab a journal, grab some watercolors, and go outside. Florida is your curriculum.


    📖 You Might Also Like:

    Frequently Asked Questions

    What is Charlotte Mason art education and how does it work for homeschoolers?

    Charlotte Mason art education focuses on two main practices: picture study (looking at and narrating great works of art by one artist per term) and nature journaling (sketching and painting what children observe outdoors). The emphasis is on developing observation skills and a love of beauty rather than drilling technical drawing techniques. It works especially well for homeschoolers because it’s flexible, low-cost, and integrates naturally with nature study and other subjects.

    Do I need a formal art curriculum for a Charlotte Mason homeschool?

    For most elementary-age kids, a formal art curriculum isn’t necessary with the Charlotte Mason approach. A blank nature journal, quality watercolors, a field guide, and regular time outdoors will give your children a rich art education. If you want more drawing structure as kids get older, gentle options like Draw Write Now or Drawing with Children fit the CM philosophy well without feeling overly academic.

    Can Florida PEP scholarship funds be used to purchase art supplies for homeschooling?

    Yes! Florida’s PEP (previously Gardiner/Family Empowerment Scholarship) can be used for instructional materials, which includes art supplies used for educational purposes in your homeschool. This covers items like watercolor sets, nature journals, field guides, and other hands-on learning tools. Always check the current scholarship guidelines at Step Up for Students for the most up-to-date approved expense categories.

    How do I start nature journaling with elementary-age kids?

    Start simple — grab a blank journal and some basic watercolors or colored pencils and head outside. Choose one thing to observe together (a bird, a plant, a bug, a cloud formation) and spend 10-20 minutes drawing and writing about it. Don’t worry about perfect pictures. The goal is slowing down and really looking. A field guide nearby helps kids add labels and facts. Aim for 2-3 sessions per week and let it become a relaxed habit rather than a formal lesson.

    What art supplies do Charlotte Mason homeschoolers actually need?

    You don’t need much to get started with Charlotte Mason art. The essentials are: a blank nature journal for each child, a set of quality watercolor paints (Faber-Castell is a great mid-range option), a few watercolor brushes in different sizes, colored pencils for detail work, and a local field guide for nature study reference. A pocket microscope or bug kit can also add a fun science-meets-art dimension for observational drawing. Keep it simple and add as you go.

  • Natural Remedies for Kids’ Cough and Cold This Florida Winter (What We Actually Use)

    Natural Remedies for Kids’ Cough and Cold This Florida Winter (What We Actually Use)

    Natural Remedies for Kids’ Cough and Cold This Florida Winter (What We Actually Use)

    🌿 The Short Version: Florida winters are mild but sneaky — and the coughs and colds still come. Here’s what our family actually reaches for when the sniffles hit, from pantry staples to herbal allies, without a drop of artificial dye or unnecessary ingredients.

    This post contains affiliate links. I may earn a small commission at no extra cost to you.

    You know how it goes. It’s January in Pensacola, it’s 68 degrees and gorgeous one day, then 42 and drizzly the next, and somehow that is exactly when somebody in the house starts with the sniffles. We’re not talking blizzard weather. But Florida winters are sneaky. The temperature swings, the dry indoor air from running the heat for two weeks out of the year, kids playing outside in wet grass — it all adds up.

    And when you’re a homeschool mama who’s made a real effort to clean up your home and your medicine cabinet, you don’t just want to grab the bright red syrup off the shelf anymore. I’ve been down that road of reading ingredient labels and feeling like I needed a chemistry degree, and no thank you.

    So over the years, I’ve put together a little rhythm of what we actually do when coughs and colds roll through our house — things that are simple, real, and genuinely help. This isn’t a substitute for your pediatrician (always call your doctor if something seems serious), but these are the natural remedies that live in our pantry and actually get used.


    First: Florida Winter Colds Are a Real Thing (Even if Northerners Laugh at Us)

    I know. I know. We complain about being cold when it’s 55 degrees and our neighbors up north are shoveling snow. But the truth is, our kids’ immune systems still have to navigate seasonal changes, shared germs, and the weird humidity fluctuations that come with Gulf Coast winters.

    Our kids spend a lot of time outside — that’s kind of the whole point of how we school. They’re in the garden, checking on the chickens, catching bugs, climbing things. Outdoor kids are healthy kids, mostly. But they’re also outside in the wet and the wind, and sometimes a bug finds its way in.

    When it does, here’s what we reach for.


    What We Keep On Hand All Winter

    Raw Honey

    This is our number one. Raw local honey — and if you can find it from a Florida beekeeper, even better — is genuinely one of the most well-researched natural remedies for kids’ coughs. Studies actually back this one up. A small spoonful before bed can calm a nighttime cough better than some OTC products, and kids actually want to take it.

    We do honey in warm water with a squeeze of lemon, honey stirred into chamomile tea, or just straight off the spoon. Note: Never give honey to babies under 12 months.

    Bone Broth

    This one sounds old-fashioned because it is — and it works. When someone is under the weather, a warm mug of homemade bone broth is the first thing I make. It’s nourishing, easy to get down even when nobody feels like eating, and it’s genuinely supportive for the immune system. If you haven’t started making your own yet, I wrote a whole post about it: Making Bone Broth at Home: Why Our Family Does It and the Easiest Recipe You’ll Ever Try.

    We use broth from our own chickens when we have it. Knowing exactly where that food came from and what went into it is a whole different feeling.

    Elderberry Syrup (Homemade or Store-Bought)

    Elderberry has become pretty trendy, but it’s been used for centuries for good reason. We make our own during cold season — it’s easier than it sounds and way cheaper. The kids take it daily as a preventive and we increase the dose if someone actually gets sick. Look for a recipe that includes raw honey, cloves, ginger, and cinnamon for extra immune support.

    Ginger and Turmeric

    Fresh ginger tea with honey is soothing for sore throats and helps with congestion. I’ll also add fresh ginger to broth or make a simple golden milk with turmeric, ginger, and coconut milk for the kids before bed. My youngest calls it “yellow milk” and asks for it even when he’s healthy, so that’s a win.

    Steam and Humidity

    Florida humidity is legendary in summer, but once we’re running heat in January, the air inside gets dry fast. A cool-mist humidifier in the bedroom makes a real difference for nighttime congestion and coughs. We also do old-fashioned steam — sit in a warm bathroom with the shower running for a few minutes, sometimes with a few drops of eucalyptus oil on a washcloth near (not in) the water.


    📌 Love this? Save it to Pinterest so you can find it later!


    Non-Toxic Products We Actually Trust

    Sometimes you need something beyond the pantry, and that’s okay. Here’s what we reach for when we want a little extra support without the artificial stuff.

    Wondercide is our go-to for so many things around the house and yard, and they have wellness products I trust for the same reason — they’re transparent about ingredients. You can browse their line at Wondercide.

    For cleaning products that don’t add to our indoor air problem when someone is already congested and struggling to breathe, we order through Grove Collaborative. Real ingredients, nothing sketchy, and they deliver — which is great when you don’t want to drag a sick kid to the store.


    Rest, Slowness, and the 1990s Approach

    Here’s something I really believe: we have way over-complicated sick days.

    When I was a kid, being sick meant you stayed home, you watched a little daytime TV (the low-bar kind), you ate soup, and you slept. Nobody was trying to push through. Nobody was optimizing. You just rested.

    That’s still the best medicine, honestly. When someone is sick in our house, we slow everything down. School pauses. We read aloud more, do quiet puzzles, maybe watch something simple together. Our daily rhythm shifts to accommodate rest, and that matters.

    If you’re thinking about how rhythm and routine play into family health and homeschool life, I wrote about that here: Family Rhythm vs. Routine: What Actually Works for Real Homeschool Life.


    What About Herbal Support?

    A few herbal allies we’ve added over the years:

    • Mullein leaf tea — wonderful for chest congestion and coughs. You can find dried mullein at most health food stores.
    • Echinacea — we use this at the first sign of illness, not throughout. Short-term use seems to be where it shines.
    • Thyme tea with honey — thyme is genuinely antimicrobial and has been studied specifically for coughs. It tastes fine with honey.
    • Garlic — I know, I know. But a tiny bit of raw garlic in broth or on food when someone is sick is something our grandmothers knew and modern research is starting to validate.

    We also love spending time in our Florida yard and garden even in winter — fresh air still matters. And interestingly, nature study walks are a gentle way to keep kids from being totally stir-crazy during a mild sick day. Something about watching the chickens or spotting birds in the yard feels restorative for everybody.

    If you love connecting nature to your homeschool days (even sick days), a nature journal and some Faber-Castell watercolors for gentle, quiet nature drawing from the window can be a sweet way to spend a slow day without screens.


    A Note on When to Call the Doctor

    All of this assumes we’re dealing with a run-of-the-mill cold or cough — the kind that comes, lingers for a week, and passes. If your child has a high fever that’s not coming down, trouble breathing, seems to be getting significantly worse after a few days, or anything feels off to your gut as a mama — call your pediatrician. Always. Natural remedies are supportive, not a replacement for medical care when it’s genuinely needed.


    Keeping Immunity Strong Year-Round

    The best cold remedy is the one you never need. We’ve found that kids who spend real time outside, eat whole foods, get enough sleep, and aren’t over-scheduled tend to get sick less often and bounce back faster.

    Things that have made a real difference for us beyond the sick-day remedies:

    • Consistent outdoor time, even in Florida’s chilly weeks
    • Whole food diet with minimal processed food (meal planning on a whole food budget has helped us make this sustainable)
    • Limiting sugar, especially during cold season
    • Fresh air and unstructured outside time every single day

    That’s the 1990s childhood approach, and it still holds up.


    I hope this gives you some real, practical options to reach for this winter — without the overwhelm or the mystery ingredients. You don’t need a fully stocked apothecary to take good care of your family. Just some honest staples, a slow-down mentality, and the confidence that you know your kids best.

    Here’s to a healthy, low-key Florida winter, y’all. 🍋


    📖 You Might Also Like:

    Frequently Asked Questions

    What natural remedies actually help kids’ coughs?

    Raw local honey is one of the most research-backed natural options for children’s coughs — a small spoonful before bed can calm nighttime coughing effectively. Other supportive remedies include thyme tea with honey, steam inhalation, mullein leaf tea for chest congestion, and homemade bone broth for overall immune support. Always make sure your child is getting plenty of rest and fluids, and consult your pediatrician if symptoms worsen or a high fever develops.

    Can I give honey to my toddler for a cough?

    Honey is safe and effective for children over 12 months old, but should never be given to babies under one year due to the risk of infant botulism. For kids over one, a half to one teaspoon of raw honey — especially local raw honey — before bedtime can help soothe a cough naturally.

    Do kids in Florida still get colds in winter?

    Yes! Even though Florida winters are mild compared to northern states, the temperature swings — especially in Northwest Florida — combined with dry indoor air from heating systems and close contact with other kids can absolutely lead to colds and coughs. Florida kids are not immune to winter bugs just because it doesn’t snow.

    Is elderberry syrup safe for kids?

    Elderberry syrup is generally considered safe for children when properly prepared (raw elderberries must be cooked) and used in age-appropriate amounts. Many families use it both as a daily preventive during cold season and at higher doses at the first sign of illness. Check with your child’s pediatrician if you have specific health concerns, and avoid giving it to very young infants without guidance.

    What can I do to help prevent colds in my kids naturally?

    The best natural prevention is a lifestyle approach: daily outdoor time in fresh air, a whole-food diet low in sugar, adequate sleep, and minimizing unnecessary stress and over-scheduling. Immune-supportive foods like garlic, ginger, turmeric, and fermented foods all contribute to resilience over time. Daily elderberry syrup, vitamin D (especially in winter when kids are indoors more), and reducing exposure to toxic cleaning chemicals in the home can also make a meaningful difference.

  • How to Introduce Goats to a Small Florida Homestead (Without Losing Your Mind or Your Garden)

    How to Introduce Goats to a Small Florida Homestead (Without Losing Your Mind or Your Garden)

    How to Introduce Goats to a Small Florida Homestead (Without Losing Your Mind or Your Garden)

    🌿 The Short Version: Adding goats to a small Florida homestead is totally doable — even on a suburban-ish lot — if you go in with realistic expectations and the right setup. This post walks you through choosing the right breed, fencing, feeding, health basics, and how to make it a whole family (and homeschool!) experience.

    This post contains affiliate links. I may earn a small commission at no extra cost to you.

    I’m going to be honest with you — the goat conversation in our house started the same way a lot of things do around here. One kid saw a YouTube video, another one heard about a friend’s goat, and suddenly everyone was in agreement that we absolutely needed goats and life would be incomplete without them.

    So I did what I always do. I slowed way down, researched way too much, and then eventually said yes — but on our terms, with a real plan.

    If you’re somewhere in that same middle space — curious, maybe a little nervous, wondering if a small Florida yard can actually handle goats — this one’s for you. We’re in the Pensacola area, and what works in the Pacific Northwest or even Central Florida sometimes looks real different up here in the Panhandle. So I’m going to share what I’ve actually learned, not just what sounds nice on paper.

    Are Goats Actually Realistic for a Small Florida Homestead?

    Short answer: yes, with the right breed and setup.

    Long answer: goats are not low-maintenance. They are clever, social, escape-prone, and they will absolutely eat your blueberry bushes if you give them half a chance. (Ask me how I know.) But they are also endlessly entertaining, genuinely useful, and honestly one of the best things we’ve ever added to our backyard homestead.

    For small properties — we’re talking under an acre — the key is choosing the right breed from the start.

    Best Goat Breeds for Small Florida Homesteads

    Nigerian Dwarfs

    This is where most small homesteaders should start, and for good reason. Nigerian Dwarfs are compact, friendly, and honestly great with kids. They produce a surprising amount of rich, high-butterfat milk for their size, which is wonderful if you’re interested in raw milk, cheese, or soap-making. They also handle Florida’s heat and humidity reasonably well as long as they have shade and fresh water.

    Pygmy Goats

    If milk isn’t your goal and you mostly want personality and a backyard companion (and a nature-study animal your kids will be obsessed with), Pygmy goats are a solid pick. They’re stocky, playful, and easy to manage for beginners.

    Kinder or Mini-Nubian

    If you want a little more milk production but still need a manageable size, Mini-Nubians are worth looking into. They’re a cross between Nigerian Dwarf and Nubian, so you get a mid-sized goat with good milk and those adorable floppy ears.

    Whatever breed you choose, get at least two. Goats are herd animals and a single goat will be miserable — and loud about it.

    Fencing: The Non-Negotiable

    I cannot stress this enough: your fencing will make or break your goat experience. Goats will test every weak spot. They’ll climb on things, lean on things, and figure out latches faster than you’d expect.

    For small homesteads in Florida, we recommend:

    • 4-foot welded wire or cattle panel — strong and visible enough to actually contain them
    • T-posts every 6-8 feet at minimum
    • A real latch on every gate — the kind that requires two steps to open
    • No climbable objects near the fence line — they will use that old pallet as a launching pad

    Also? Check your local ordinances. Some Florida counties and municipalities have specific rules about goats on residential properties, especially does vs. bucks. Bucks (intact males) can be smelly and loud, so most small homesteaders stick with does or a wether (castrated male) for companionship.

    Shelter and Setup in the Florida Climate

    Goats actually don’t love rain — which is a little funny given how much it rains here in Northwest Florida from May through September. They need a dry, well-ventilated shelter they can retreat to. It doesn’t have to be fancy. A three-sided structure with a roof is enough for most of the year.

    What matters most in our climate:

    • Shade, shade, shade — afternoon shade is essential in summer
    • Airflow — a closed-up stuffy shelter is worse than a simple open one
    • Dry bedding — pine shavings work well; just refresh it regularly to avoid moisture buildup and hoof issues
    • Elevated sleeping area — goats love to be off the ground

    For pest control around the shelter area (we deal with the same with our chickens), Wondercide has been our go-to for keeping flies and mosquitoes down without bringing harsh chemicals onto our property.

    Feeding Your Goats: Keeping It Simple

    Goats need:

    • Quality grass hay (coastal bermuda or orchard grass works well here) — this should be the foundation of their diet
    • Fresh water always — seriously, they drink more than you’d think
    • Loose minerals specifically formulated for goats (not sheep minerals — copper levels differ)
    • Limited grain — mostly for lactating does or growing kids

    They’ll also browse on whatever you let them near, which is why our garden is firmly off-limits. If you’re growing a food forest or working on a homestead garden, you’ll want to make sure goat grazing areas are clearly separate. If you’re curious about what we’re growing, I share more in our Florida Food Forest Beginner Guide.

    📌 Love this? Save it to Pinterest so you can find it later!

    Basic Goat Health: What You Need to Know Before You Bring Them Home

    Goats are hardier than their dramatic personalities suggest, but they do have some specific health needs:

    • CDT vaccine — this is the one core vaccine all goats need, given annually
    • Hoof trimming every 6-8 weeks (more in wet Florida seasons)
    • FAMACHA scoring — a simple way to monitor for barber pole worm, which is a real issue in our warm, humid climate
    • Find a large animal vet before you need one — not every vet sees goats, so have that contact ready

    For natural pest and parasite management around the animals, we use food grade diatomaceous earth in the bedding and around the shelter perimeter. It’s the same thing we use with our chickens — if you’re curious how we manage a backyard flock alongside other animals, our post on Raising Meat Chickens at Home covers a lot of that overlap.

    Bringing Kids Into It: Goats as a Homeschool Experience

    This is honestly one of my favorite parts. Goats fit so naturally into a Charlotte Mason, nature-based homeschool rhythm. There’s real, living science happening every single day.

    Our kids have learned:

    • Animal behavior and herd dynamics (social studies meets biology)
    • Basic anatomy and health observation
    • Responsibility and consistency — animals don’t care if it’s Saturday or if you’d rather read a book
    • Record-keeping — we track feed, health notes, and milk production in a simple notebook

    A good nature journal is perfect for sketching the goats, recording observations, and even pressing the occasional plant they like to browse. My kids have filled pages just watching and drawing. It’s the kind of slow, attentive observation that Charlotte Mason was talking about — and it costs nothing once you’re already out there doing morning chores.

    For younger kids who want to understand more about what they’re caring for, Storey’s Guide to Raising Dairy Goats is the reference book I reach for, and there’s also a Kid’s Guide to Keeping Chickens that — while chicken-focused — covers a lot of the same animal husbandry concepts in language that works for elementary-age kids.

    And honestly? Watching my kids do morning chores barefoot, talking to the goats, filling water buckets, and just being outside before we even open a book — that’s the 1990s childhood I’m trying to give them. No screens, no schedule pressure. Just kids and animals and a Florida morning.

    For more on building that kind of daily rhythm into your homeschool life, I share a lot in our post on How to Involve Kids in Homestead Chores by Age — it’s one of the most-read things on this whole site.

    One Last Thing Before You Bring Goats Home

    Start small. Two does. A solid fence. A simple shelter. Give yourself a full season to learn their rhythms before you expand.

    Goats will surprise you — sometimes with how much joy they bring, and sometimes with how they’ve dismantled the thing you built last weekend. But if you go in with realistic expectations and a real plan, they will absolutely become one of the best parts of your homestead.

    We’re still learning over here, and that’s okay. That’s kind of the whole point, isn’t it?

    If you’re adding goats alongside chickens or thinking about expanding your backyard flock at the same time, you might also enjoy our post on Best Duck Breeds for a Florida Backyard Flock — because apparently we can’t stop adding animals around here, and maybe you can’t either.

    Welcome to the goat side. It’s wonderfully chaotic.


    📖 You Might Also Like:

    Frequently Asked Questions

    Can you have goats on a small lot in Florida?

    Yes, in many parts of Florida you can keep goats on a small property, but it depends on your county and municipality. Always check local ordinances first — some areas allow does and wethers but not intact bucks. Nigerian Dwarf goats are ideal for smaller lots because of their compact size and manageable needs.

    How many goats do I need to start?

    Always start with at least two. Goats are herd animals and a single goat will be stressed, vocal, and generally unhappy. Two does or a doe and a wether (castrated male) is a great beginner setup for a small homestead.

    What do goats eat in Florida?

    Goats in Florida do well on quality grass hay (coastal bermuda or orchard grass), fresh water, and loose goat-specific minerals. They’ll also browse on brush and weeds, which can be helpful — just make sure your garden is fenced off separately. Limit grain unless you have a lactating doe or young kids.

    Are goats hard to keep in the Florida heat and humidity?

    Goats can handle Florida’s climate reasonably well as long as they have access to shade, fresh water, and good airflow in their shelter. The bigger concern in humid climates is internal parasites like barber pole worm — learning FAMACHA scoring and working with a vet familiar with goats will help you stay ahead of that.

    What’s the best goat breed for a first-time homesteader?

    Nigerian Dwarf goats are widely considered the best starter breed for small homesteads. They’re small, friendly, good with children, and produce rich milk despite their size. Pygmy goats are another great option if milk production isn’t a priority and you’re mainly looking for a backyard companion animal.

  • Best Duck Breeds for a Florida Backyard Flock (What Actually Thrives Down Here)

    Best Duck Breeds for a Florida Backyard Flock (What Actually Thrives Down Here)

    Best Duck Breeds for a Florida Backyard Flock (What Actually Thrives Down Here)

    🌿 The Short Version: Not all duck breeds handle Florida’s heat and humidity equally well. This guide breaks down the best duck breeds for a Florida backyard flock — covering egg production, temperament, heat tolerance, and which ones our kids actually love spending time with.

    This post contains affiliate links. I may earn a small commission at no extra cost to you.

    So you’ve got chickens. Maybe a little garden going. And now someone in your house (possibly someone under four feet tall) has decided that ducks need to happen.

    Same.

    We’ve been raising backyard chickens for a few years now, and adding ducks to our little Northwest Florida homestead was honestly one of the best decisions we made. But I’ll be upfront — ducks are different. They’re messier, louder (depending on the breed), and they have very strong opinions about water. And when you’re living in Pensacola where it’s 90 degrees and sticky by 9am from May through October, breed selection actually matters a lot.

    I did a ton of research before we brought our first ducklings home, and I want to save you some of the legwork. Here’s what we’ve learned about the best duck breeds for a Florida backyard flock — from heat tolerance to personality to how well they work for a homeschool family that wants kids genuinely involved in the process.

    Why Ducks Work So Well in Florida

    Here’s the thing about Florida — it’s wet. Like, persistently, enthusiastically wet. We get afternoon thunderstorms half the year, standing puddles in the yard, and humidity that would make a duck feel right at home. And honestly? Ducks are right at home here.

    They’re also surprisingly good for pest control. Our girls go absolutely wild over slugs, mosquito larvae, and all the creepy-crawlies that thrive in a Florida yard. If you’re already doing nature study with your kids — keeping a nature journal and watching backyard wildlife — ducks add a whole new layer of observation and wonder. My kids have learned more about animal behavior from watching our ducks figure out a puddle than from any curriculum page.

    If you’re also raising chickens, check out our post on Raising Meat Chickens at Home — a lot of the same beginner mindset applies to ducks.

    What to Look for in a Florida Duck Breed

    Before we get into specific breeds, here’s what I was evaluating:

    • Heat tolerance — This is non-negotiable. If a breed struggles above 85°F, it’s not the right fit for us.
    • Temperament — We have kids K through 5th grade helping with chores. We need calm, handleable birds.
    • Egg production — We’re not running a farm, but we do want eggs. Duck eggs are incredible for baking.
    • Noise level — We’re in a neighborhood. Enough said.
    • Water needs — All ducks need water, but some are far more demanding than others.

    The Best Duck Breeds for Florida Backyards

    1. Khaki Campbell

    If you want eggs — and I mean a lot of eggs — Khaki Campbells are your bird. They can out-lay most chickens, regularly producing 250-340 eggs per year. They’re medium-sized, active, and handle Florida heat reasonably well as long as they have shade and fresh water.

    The one thing I’ll warn you about: Khaki Campbell females can be loud. Not aggressive, just vocal. If you’ve got close neighbors, that’s worth knowing upfront. That said, they are wonderful for kids who want to observe genuinely busy, interesting birds.

    2. Pekin

    Pekins are the classic white fluffy duck that most kids picture when they think “duck.” They’re big, friendly, calm, and surprisingly good-natured with children. Our kids can sit near them without the ducks running off in a panic, which matters when you’re trying to make morning chores feel like a pleasure instead of a battle.

    Pekins aren’t the highest egg producers, but they’re solid — and they’re excellent meat birds if that’s part of your homestead plan. They do need extra attention to shade and cool water in peak Florida summer heat because of their size, but nothing a good setup can’t handle. A reliable chicken waterer works great for ducks too, especially the nipple-style ones that stay cleaner.

    3. Muscovy

    Okay, Muscovies are a little polarizing because of the red caruncles on their face — they’re not the prettiest bird at first glance. But hear me out: Muscovies are made for Florida. They are one of the most heat-tolerant domestic ducks you can find, they’re actually native to South and Central America, and they’re genuinely quiet. The females make a soft hissing sound instead of a quack. Neighbors will never know.

    They’re also excellent foragers, great mothers if you want to hatch eggs, and their meat is considered the best of any domestic duck — leaner and more flavorful than Pekin. We have a soft spot for our Muscovies. They’re a little wild, a little independent, and very Florida.

    📌 Love this? Save it to Pinterest so you can find it later!

    4. Welsh Harlequin

    This is my personal favorite for a family-focused flock. Welsh Harlequins are calm, beautiful (they have this lovely mottled brown and cream coloring), excellent layers, and genuinely friendly. They’re not as common as Pekins or Khaki Campbells, but they’re worth seeking out.

    They handle heat well, they’re not overly loud, and because they’re lighter-weight than Pekins, they stay a little more comfortable in humidity. For a Charlotte Mason-style nature study approach, Welsh Harlequins are stunning to sketch and observe — my daughter has filled half her nature journal with duck drawings this year alone.

    5. Swedish (Blue or Black)

    Swedish ducks are calm, sturdy, good layers, and wonderfully docile. They’re considered a heritage breed, which I appreciate from a small-homestead perspective. They do fine in Florida heat with proper shade and water, and they’re a good middle ground if you want a dual-purpose bird that’s also just genuinely pleasant to be around.

    Kids love Swedish ducks because they’re not flighty or aggressive. My kindergartner has sat next to ours during quiet reading time without the ducks batting an eye.

    Setting Up Your Florida Duck Space

    A few quick notes on setup, because Florida throws some curveballs:

    Predators are real. We’ve got raccoons, possums, hawks, and the occasional coyote in our area. An automatic coop door has been a game-changer for us — it locks up at dusk without us having to remember every night.

    Mites and lice love the humidity. We use food-grade diatomaceous earth in our coop bedding, and Wondercide for yard pest control around the perimeter. Keeping it non-toxic matters to us, especially with kids and a dog out there daily.

    Water management is the big one. Ducks will make a mud pit out of anything. We keep their water station in a designated area with gravel or pavers underneath, and we change it out daily. In our Florida heat, standing water gets nasty fast and can become a mosquito situation quickly.

    For more reading on managing a backyard flock, Storey’s Guide to Raising Chickens has a solid duck chapter, and the Kid’s Guide to Keeping Chickens is great for getting your children bought in and understanding animal care at their level.

    Ducks as Living Nature Study

    One of the things I love most about raising ducks in a homeschool context is how much natural learning happens without any planning on my part. My kids have watched clutches of eggs, observed preening behavior, tracked molting seasons, and noticed how ducks respond to barometric pressure changes before a storm rolls in (they go absolutely bonkers — it’s like a free weather forecast).

    Pair duck keeping with a good field guide like Sibley Birds and a pocket microscope for examining feathers and eggs up close, and you’ve got weeks of Charlotte Mason nature study without cracking a single textbook. That’s the kind of 1990s-style outdoor education I grew up with and want for my own kids.

    Also — How to Involve Kids in Homestead Chores by Age is a post I come back to constantly when I’m figuring out what my kids can realistically take ownership of. Duck chores fit right in.

    Our Honest Recommendation

    If I had to pick just one breed to recommend for a Florida family just getting started? Muscovy for heat tolerance and quiet, Welsh Harlequin for beauty and temperament, Khaki Campbell if eggs are your priority. We have a mix, and honestly, I wouldn’t change it.

    Ducks have added so much to our backyard — the sounds, the silliness, the way they make even the most ordinary Tuesday morning feel like something worth paying attention to. In a world that’s constantly pulling our kids toward screens, there is nothing quite like a flock of ducks to make a child stop, crouch down, and just watch.

    That’s the whole point, isn’t it?


    📖 You Might Also Like:

    Frequently Asked Questions

    What is the best duck breed for Florida’s heat and humidity?

    Muscovy ducks are widely considered the best duck breed for Florida because they are native to tropical climates, incredibly heat-tolerant, quiet, and excellent foragers. Khaki Campbells and Welsh Harlequins are also solid choices that handle Florida’s heat well with proper shade and fresh water.

    Can ducks and chickens live together in the same backyard?

    Yes, ducks and chickens can share a yard and even a coop, but there are a few things to watch. Ducks make a mess of water sources, which can create muddy, unsanitary conditions for chickens. It’s best to keep their water stations separate and ensure the coop has good ventilation. Most backyard keepers find the two get along fine with minimal management.

    How many eggs do backyard ducks lay?

    It depends on the breed. Khaki Campbells are egg-laying powerhouses, producing up to 300+ eggs per year. Welsh Harlequins and Swedish ducks lay a respectable 150-200+ eggs annually. Muscovies lay fewer eggs (around 60-120 per year) but are excellent mothers and valued more for meat. Duck eggs are larger than chicken eggs and prized by bakers for their rich yolks.

    Do ducks need a pond or pool in Florida?

    Ducks don’t require a full pond, but they do need access to enough water to submerge their heads and splash around — it’s essential for their eye and nostril health. A large rubber tub or small kiddie pool works perfectly for a backyard flock. In Florida’s heat, you’ll want to change the water daily since it gets warm and can become a mosquito breeding ground quickly.

    Are ducks good for kids and family homesteads?

    Absolutely. Ducks — especially calm breeds like Pekins, Welsh Harlequins, and Swedish ducks — are wonderful with children. They’re entertaining, curious, and relatively easy to care for once their setup is established. For homeschool families, ducks offer incredible hands-on nature study opportunities: observing behavior, tracking egg production, learning animal husbandry, and simply spending time outdoors in meaningful, screen-free ways.