Blog

  • How to Preserve Herbs from Your Garden (Simple Methods That Actually Work)

    How to Preserve Herbs from Your Garden (Simple Methods That Actually Work)

    How to Preserve Herbs from Your Garden (Simple Methods That Actually Work)

    🌿 The Short Version: Preserving herbs from your garden doesn’t have to be complicated — drying, freezing, and making infused oils or salts are all beginner-friendly methods that actually hold flavor. This post walks you through what works best for common herbs, especially in a Florida climate where your growing season looks a little different than everywhere else.

    This post contains affiliate links. I may earn a small commission at no extra cost to you.

    If you’ve ever gone out to your herb garden in the middle of summer, snipped a huge handful of basil or rosemary, and then stood in your kitchen wondering what on earth to do with all of it — you’re in good company. That used to be me every single year. I’d grow beautiful herbs, let them bolt in the Florida heat, and then scramble to use them before they went to mush.

    Now? I actually look forward to that moment. Because I know exactly what to do with a big harvest, and it doesn’t involve hours of complicated canning or anything that requires me to buy a bunch of fancy equipment.

    Whether you’ve got a full raised bed situation going on, a few pots on the back porch, or herbs tucked into the corners of your chicken run (yes, some herbs do great near the flock — more on that in a sec), this is the guide I wish someone had handed me three years ago.


    Why Herb Preservation Is Worth Your Time

    Here’s the honest truth: fresh herbs from the store are expensive, usually stored in plastic, and taste like a pale imitation of what you can grow yourself. When you preserve your own, you’re saving money, reducing waste, and keeping something genuinely nourishing on your shelf.

    For our Charlotte Mason-style homeschool, herb preservation has also become one of those beautiful, living lessons that doesn’t feel like school at all. The kids help harvest, we talk about what the plant does — culinary uses, old folk remedies, what pollinators love it — and then they’re part of the preserving process too. It’s botany, home economics, and practical life skills all wrapped into one afternoon. My kids know what rosemary smells like when it crumbles between their fingers. That’s the kind of learning I’m here for.

    If you want to dig into more nature-based learning like this, check out our post on Charlotte Mason Nature Journal Ideas for Kids (What We Actually Do Year-Round in Florida) — herb study fits right in.


    When to Harvest Herbs for Best Flavor

    Timing matters more than most people realize. The best time to harvest is in the morning, right after the dew has dried but before the heat of the day sets in. That’s when the essential oils — the stuff that actually carries the flavor and fragrance — are most concentrated in the leaves.

    Harvest before the plant bolts or flowers if you can, especially for leafy herbs like basil and cilantro. Once they go to flower, the leaves start to taste more bitter. In Florida, this can happen fast — our heat doesn’t mess around.


    Method 1: Air Drying (The Old-Fashioned Way)

    This is the method your grandmother probably used, and honestly? It still works beautifully for woody herbs like rosemary, thyme, oregano, sage, and lavender.

    How to do it:

    • Bundle 5-10 stems together with a rubber band or piece of twine
    • Hang them upside down in a warm, dry spot with good airflow — out of direct sunlight
    • Let them dry for 1-2 weeks until the leaves crumble easily off the stems

    In Florida, humidity is your enemy here. If you’re in the thick of summer and your house stays on the humid side, you might have better luck with the oven method (below) or a dehydrator. I’ve lost more than one batch to mold because I forgot about that.

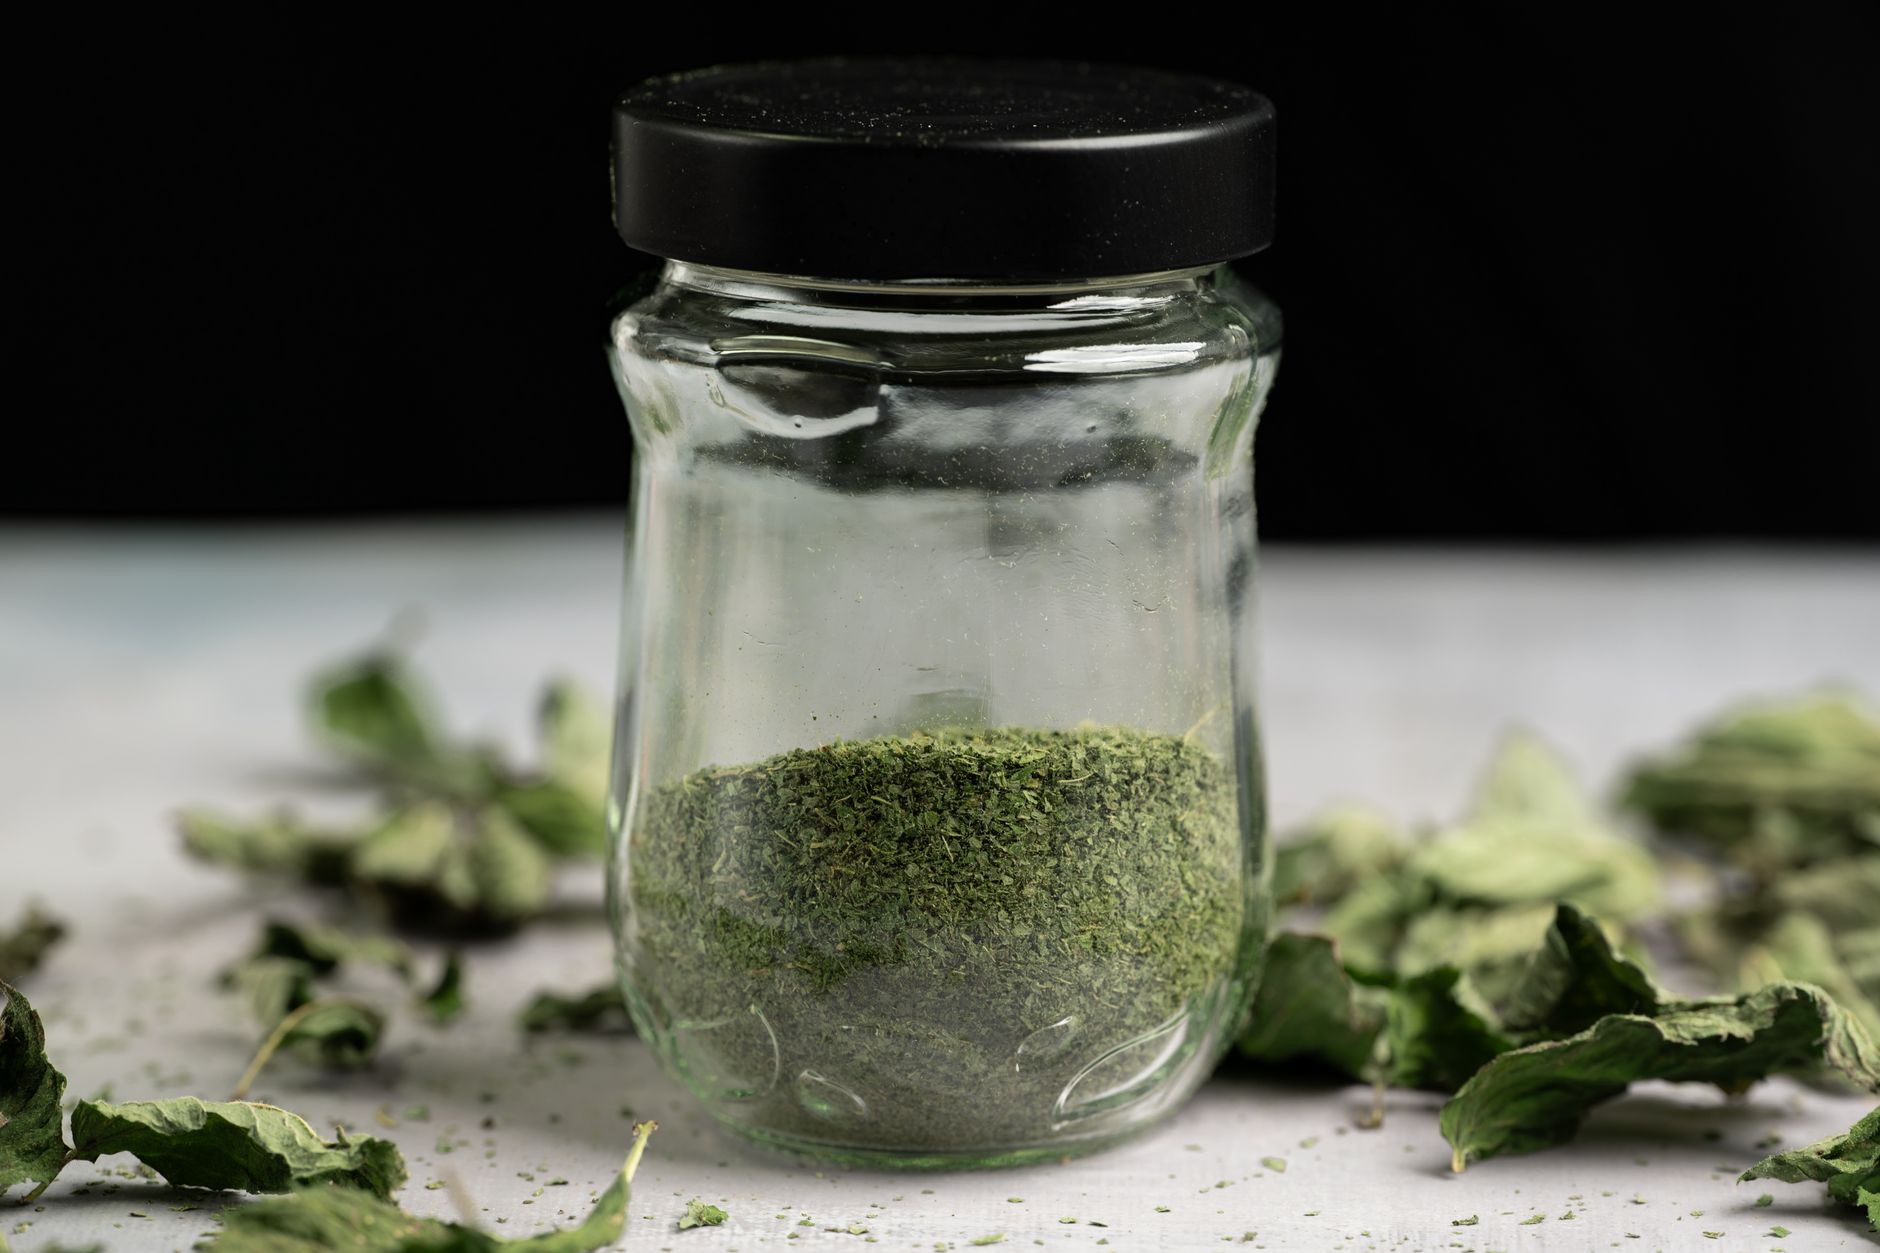
    Once dry, crumble the leaves off the stems and store in airtight containers — canning jars work perfectly for this. Keep them away from heat and light.


    Method 2: Oven Drying (Faster and More Reliable in Humid Climates)

    Spread clean, dry herb leaves in a single layer on a baking sheet. Set your oven to its lowest temperature — ideally 95–115°F. If yours only goes to 170°F, prop the door open slightly with a wooden spoon.

    Check every 30 minutes. Most herbs are done in 1-4 hours. You want them dry and crumbly, not brown or toasted.

    This method works especially well for basil, mint, and lemon balm — the softer-leafed herbs that don’t do as well hanging.


    Method 3: Freezing Herbs (Best for Basil, Cilantro, and Parsley)

    Freezing is my personal favorite for tender herbs because it’s genuinely the easiest thing in the world and the flavor holds up remarkably well.

    The ice cube method:

    • Chop herbs roughly and pack them into an ice cube tray
    • Cover with water or olive oil and freeze solid
    • Pop the cubes out and store in a labeled freezer bag

    When you’re making soup, sauces, or sautéed vegetables, just drop a cube right in. It’s like having summer in your freezer.

    For herbs you use in larger quantities — like basil for pesto — you can also blend a big batch with olive oil and freeze it flat in a zip bag. Break off pieces as needed.

    📌 Love this? Save it to Pinterest so you can find it later!


    Method 4: Herb-Infused Oils and Salts

    Okay, these feel fancy but they are so simple, and they make the most beautiful homemade gifts too.

    Herb salt:

    Blend fresh or dried herbs with coarse sea salt in a food processor until combined. Spread on a baking sheet to dry for a day or two, then jar it up. Rosemary salt on roasted vegetables is life-changing.

    Infused oil:

    Use dried herbs only for oil infusions (fresh herbs can introduce moisture and lead to botulism — please don’t skip this step). Pack dried herbs into a clean jar, cover completely with a neutral oil like olive or avocado, and let it infuse for 1-2 weeks in a cool, dark place. Strain and store.

    We use our infused oils for cooking and also in homemade salves and skin care. If you’re into making more of your own home products, our post on How to Detox Your Home from Toxins Room by Room is a good next read.


    Method 5: Making Herbal Syrups and Tinctures

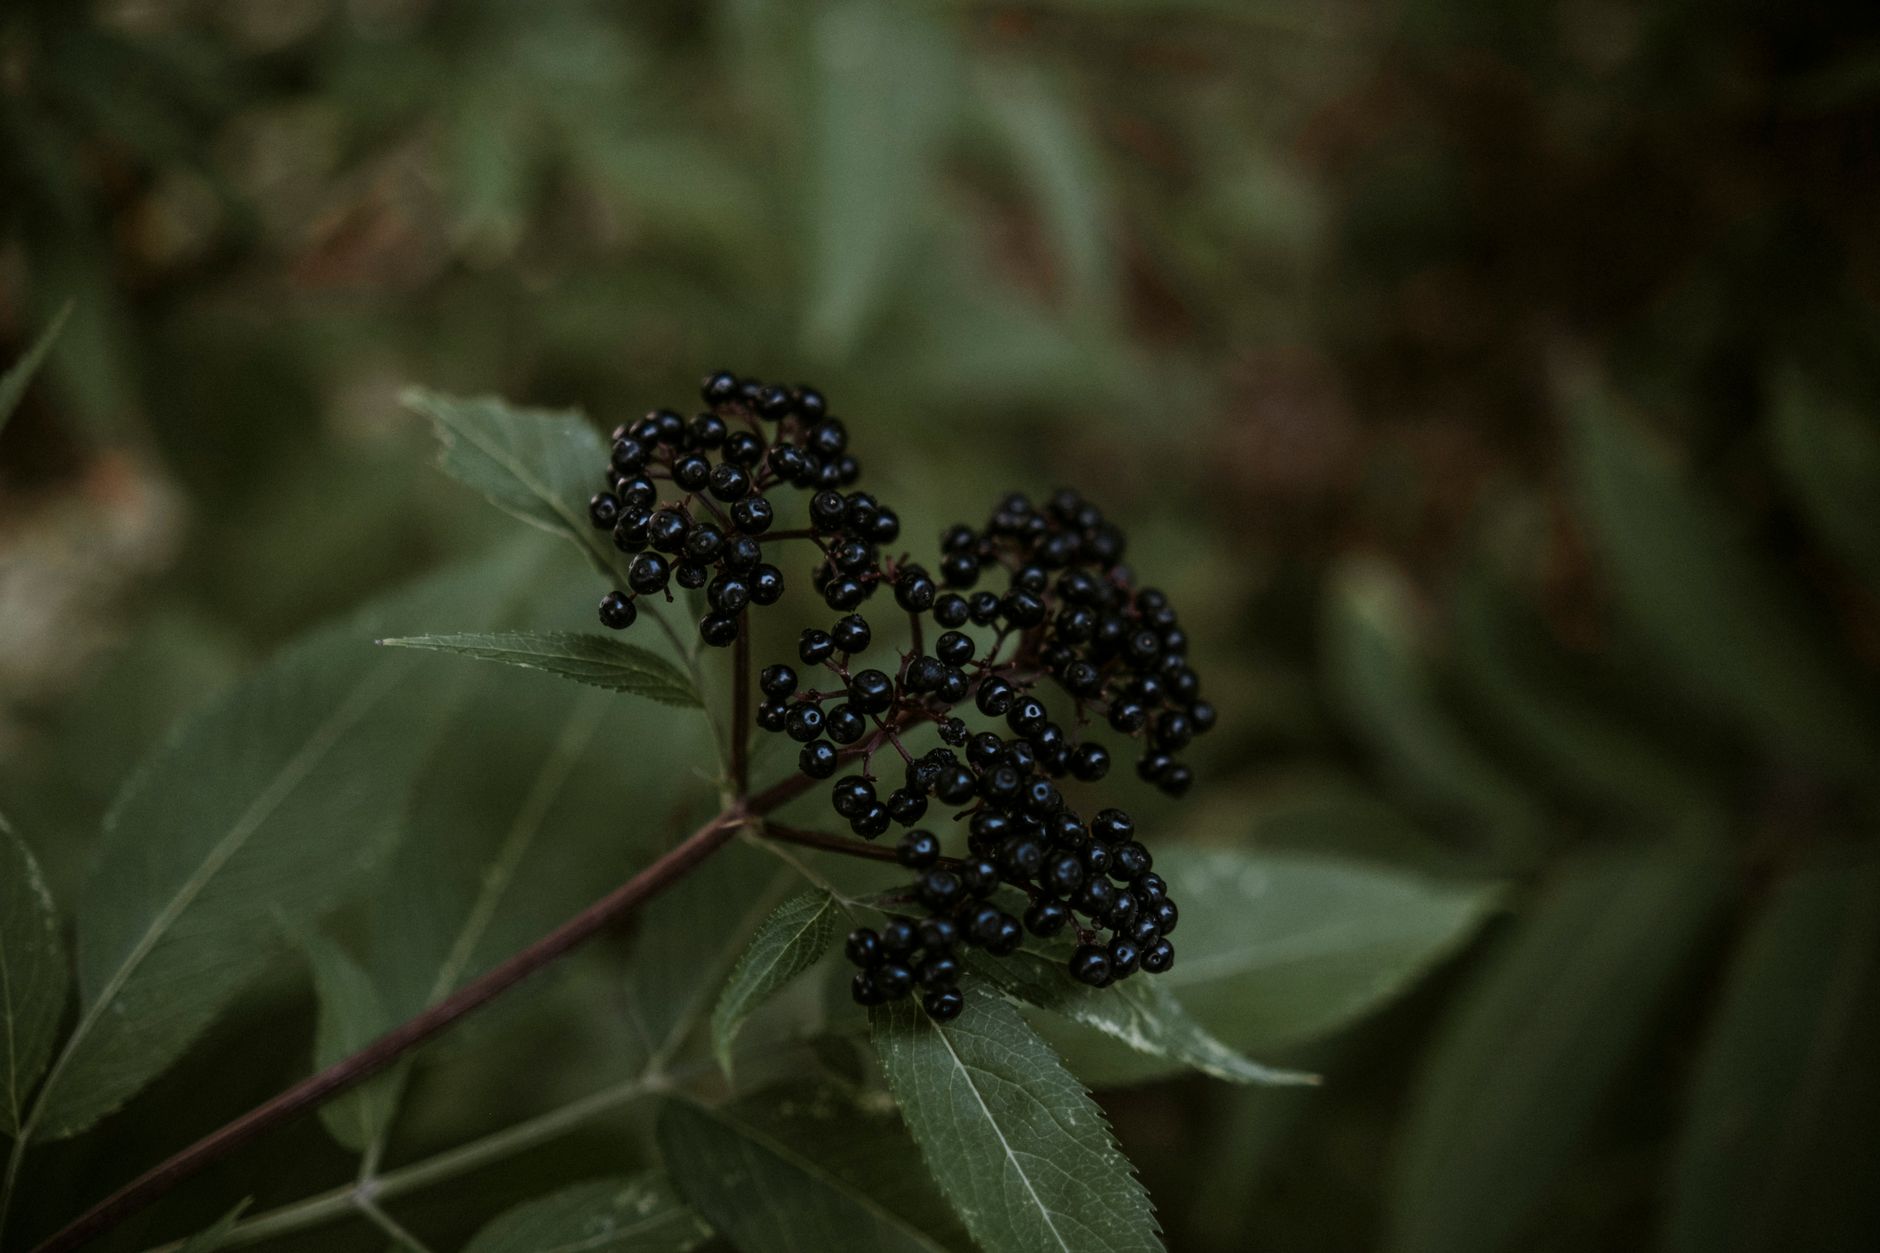
    For medicinal herbs like elderberry, lemon balm, echinacea, or holy basil, you might want to go a step further than just culinary preservation. Simple syrups and honey infusions are a great place to start.

    We make elderberry syrup every fall — it’s become a whole family ritual. If you haven’t tried making your own yet, I wrote a full guide on it: How to Make Elderberry Syrup at Home (The Simple Way Our Family Actually Does It). An elderberry syrup kit makes it even simpler if you’re just getting started.


    Herbs That Do Well in a Florida Garden (and Preserve Beautifully)

    Not all herbs are created equal down here. These are the ones I actually grow and preserve successfully in Northwest Florida:

    • Rosemary — thrives in our heat, dries perfectly
    • Basil — grows like crazy in summer, freeze it fast before it bolts
    • Lemon balm — spreads enthusiastically (fair warning), great dried for tea
    • Mint — keep it in a pot or it will take over your yard
    • Oregano — tough, heat-tolerant, dries beautifully
    • Chives — easy, freeze well
    • Thyme — loves the sandy soil, wonderful for air drying

    For getting a new herb garden started, an herb garden kit or a seed starting kit gives you a solid foundation without having to figure it all out from scratch.


    Getting the Kids Involved

    This is honestly one of the best low-key school days we have. My kids each have their own kids’ garden gloves, and they know they’re allowed to harvest anything that’s ready. We smell everything, talk about what each plant is used for, and they help strip leaves off stems and load ice cube trays.

    My oldest has started sketching the herb plants in her nature journal — noting what stage of growth they’re in, whether they’ve flowered, what insects are visiting. It’s gentle, natural, 1990s-style learning at its best. No worksheet required.

    And as a side note — several herbs like oregano, thyme, and lavender are actually beneficial near your chicken coop. They act as natural pest deterrents and some have mild antimicrobial properties. We tuck dried bundles into nesting boxes sometimes. For more on keeping a healthy flock the natural way, check out Best Chicken Coop Predator-Proof Latches (What Actually Keeps Your Flock Safe at Night) — and we also use diatomaceous earth in the coop for pest control, which is as natural as it gets.


    A Few Quick Tips Before You Go

    • Label everything. Dried herbs look surprisingly similar in a jar. Date it too — most dried herbs are best within a year.
    • Less is more when storing. Don’t crumble your dried herbs until you’re ready to use them — whole leaves hold flavor longer.
    • Start small. You don’t need a huge harvest to make this worth it. Even one big bunch of rosemary will give you months of seasoning.
    • Grow what you actually cook with. Sounds obvious, but I grew lemon verbena for two years before admitting I had no idea what to do with it.

    There is something genuinely satisfying about opening your cabinet in January and reaching for a jar of rosemary you dried yourself back in October. It’s one of those small, quiet wins that makes you feel like you’re actually living intentionally — not just talking about it. If you’ve been growing herbs and letting them go to waste, I hope this gives you the push to start preserving this season. It doesn’t have to be perfect. It just has to be started.


    📖 You Might Also Like:

    Frequently Asked Questions

    What is the best way to preserve fresh herbs from the garden?

    It depends on the herb. Woody herbs like rosemary, thyme, and oregano preserve best by air drying or oven drying. Tender herbs like basil, cilantro, and parsley hold their flavor better when frozen — either chopped into ice cube trays with water or olive oil, or blended and frozen flat. Both methods are simple and don’t require any special equipment.

    How do you dry herbs in a humid climate like Florida?

    Humidity is the biggest challenge for drying herbs in Florida. Air drying works best during drier months, but in summer, it’s safer to use your oven on its lowest setting (around 95–115°F) or a food dehydrator. This prevents mold from developing on the herbs before they can fully dry. Always make sure herbs are completely dry and crumbly before storing them in jars.

    How long do dried herbs last?

    Most dried herbs are best used within 6 to 12 months. After that, they don’t go bad, but they lose potency and flavor. Store them in airtight containers — mason jars work great — away from heat, light, and moisture. Label and date your jars so you know what you’re working with.

    Can kids help preserve herbs from the garden?

    Absolutely, and it’s a wonderful hands-on activity. Kids can help harvest, strip leaves from stems, load ice cube trays, and label jars. It’s a natural fit for nature study, botany, and practical life skills — especially in a Charlotte Mason or nature-based homeschool. Even young elementary kids can participate meaningfully with simple supervision.

    Which herbs are easiest to preserve for beginners?

    Rosemary, thyme, and oregano are the most forgiving for beginners because they dry easily and hold their flavor well. Basil is easy to freeze but doesn’t dry as beautifully — it tends to turn black. Mint and lemon balm are also beginner-friendly and make wonderful dried teas. Start with whichever herbs you already cook with most.
  • Best Composting Toilets for Off-Grid Florida Homesteads (What Actually Works Down Here)

    Best Composting Toilets for Off-Grid Florida Homesteads (What Actually Works Down Here)

    Best Composting Toilets for Off-Grid Florida Homesteads (What Actually Works Down Here)

    🌿 The Short Version: Composting toilets can absolutely work on a Florida homestead — but Florida’s heat, humidity, and soil regulations mean you need to pick the right unit and set it up correctly. This post breaks down the best options for real families trying to live with less waste and more intention down here in the Sunshine State.

    This post contains affiliate links. I may earn a small commission at no extra cost to you.

    If you’ve been dreaming about going more off-grid — or you’re already deep in the rabbit hole of backyard chickens, rain barrels, and sourdough starters — composting toilets have probably crossed your mind at least once. Maybe more than once while you were standing in the chicken yard at dusk, watching your flock put themselves to bed, thinking about how differently you want your family to live.

    That was me a couple years ago. And honestly, the composting toilet conversation is one of the most practical — and weirdly taboo — topics in the homesteading world. Nobody wants to bring it up at the co-op meeting, but everyone’s quietly Googling it at 10pm.

    So let’s just talk about it like adults who also happen to be trying to raise kids with dirt under their fingernails and a genuine respect for where things come from and where they go.

    Why a Composting Toilet Makes Sense on a Florida Homestead

    Florida has some unique challenges for off-grid living. Our water table is high, our soil is sandy, and traditional septic systems can be expensive to install and maintain — especially if you’re on raw land or in a rural county without sewer hookup. A composting toilet sidesteps a lot of that infrastructure.

    Beyond the practical side, there’s something deeply aligned about closing the loop on waste when you’re already composting kitchen scraps, keeping a kitchen compost bin on the counter, and talking to your kids about how nature wastes nothing. It fits the whole philosophy, you know?

    We’ve also found that these conversations fold beautifully into our nature study time. The same kids who are sketching birds in their nature journal and learning about decomposers and soil food webs — those kids get genuinely excited about how a composting toilet works. It’s real science happening in real life.

    What Makes Florida Different (And Why It Matters for Your Choice)

    Before I get into specific units, I want to flag a few Florida-specific things that matter a lot here:

    Humidity is your biggest enemy. Unlike dry Western states where composting toilets are practically foolproof, our Gulf Coast humidity (especially here in the Pensacola area) means you need a unit with excellent ventilation and ideally a heating element to keep things drying properly. Without that, you’ll have odor and composition problems fast.

    Florida has regulations. This is important — Florida does regulate composting toilets, and they’re not universally approved as a sole sanitation system in all counties. You’ll want to check with your specific county’s health department before installation. Many families use composting toilets as a secondary or supplemental system alongside a small conventional setup, which is often the path of least resistance legally.

    Heat actually helps — in the right unit. Florida summers are brutal, but if your composting toilet is indoors or in a climate-controlled space, you can actually use the ambient warmth to your advantage. The composting process thrives with heat.

    If you’re also navigating the bigger picture of homestead life here in Florida, my post on how to start a homestead garden in Florida for beginners covers a lot of the mindset and practical groundwork that applies across your whole setup.

    The Best Composting Toilet Options for Florida Families

    Nature’s Head Self-Contained Composting Toilet

    This is the one you’ll see recommended most in the van life and tiny house communities, and for good reason — it’s genuinely well-built. The Nature’s Head uses a urine-diverting system, which is the key to making composting toilets work without odor. Liquids and solids are separated at the source, which dramatically speeds up the composting process and eliminates the smell issue most people worry about.

    For Florida families, the urine-diverting design is especially important given our humidity. The solid compartment can be mixed with coconut coir (which is a sustainable, easy-to-source amendment) and empties every 4-6 weeks for a family of four. The liquid side needs to be emptied more frequently — every few days — but it can be diluted and used as a nitrogen-rich fertilizer on non-edible plants.

    This is probably our top pick for a family homestead situation.

    Separett Villa 9215

    This is a more premium option with a sleek Scandinavian design — it actually looks like a regular toilet, which matters if you have guests or older kids who might balk at something that looks too “off-grid.” The Separett also uses urine diversion and has a built-in fan that runs on a small amount of electricity (it can be wired to solar easily).

    For Florida, the constant airflow from that fan is a real asset. It keeps moisture moving and odor essentially nonexistent when the unit is maintained properly. The composting chamber uses biodegradable bags, which some families find easier for handling.

    Sun-Mar Excel Non-Electric

    If you’re truly off-grid without reliable solar power, the Sun-Mar Excel is worth a look. It uses a drum-style composting system and relies on natural ventilation rather than an electric fan. The tradeoff is that in high-humidity environments like ours, you’ll need to be more diligent about monitoring and may need to add a supplemental small fan.

    This works best in an outbuilding or cabin situation where airflow is good and you’re not dealing with Florida’s typical enclosed humid air.

    📌 Love this? Save it to Pinterest so you can find it later!

    What to Look For No Matter Which Brand You Choose

    Urine diversion — Non-negotiable in Florida. Get a unit that separates liquids and solids.

    Ventilation fan — In our climate, passive ventilation alone usually isn’t enough. A small 12V fan that can run on solar is ideal.

    Capacity for your family size — Most manufacturers list capacity by number of people and whether it’s full-time or part-time use. Be honest about your usage.

    Ease of emptying — Because you will have to empty it, and it’s better to think about that now than in the middle of a Florida August.

    Pairing Your Composting Toilet With the Bigger Homestead Picture

    A composting toilet fits naturally into a whole-systems approach to homesteading. If you’re already thinking about closing nutrient loops — composting food scraps, feeding scraps to your chickens, using diatomaceous earth in the coop for pest control without chemicals, collecting rainwater with a rain barrel — then a composting toilet is just the next logical step.

    We also love bringing our kids into these conversations. Our kids know where their food comes from because they collect eggs every morning. They know what decomposition looks like because we have a worm composting bin that they help manage. Teaching them that human waste is also part of a natural cycle — when done age-appropriately — is just good science. Charlotte Mason herself was big on nature as the great teacher, and honestly, there’s nothing more “nature as teacher” than a kid who understands soil food webs from the ground up.

    If you’re working on detoxing your whole home and property setup, my post on how to detox your home from toxins room by room covers a lot of the indoor piece of that puzzle.

    And if you’re raising backyard chickens alongside all of this — which, same — you’ll want to read up on best chicken coop predator-proof latches while you’re building out your setup. The homestead life is all connected.

    A Few Practical Tips Before You Buy

    • Call your county health department first. Seriously. Know your local regs before you spend a dime.
    • Plan your ventilation stack carefully. Most units need a vent pipe that exits through the roof or an exterior wall — factor this into your installation plan.
    • Stock up on bulking agent. Coconut coir, peat moss, or wood shavings are your best friends. Keep a supply on hand.
    • Read the manual all the way through before first use. I know, I know. But with composting toilets, startup really matters for long-term success.

    The Bottom Line

    Going off-grid with your sanitation isn’t for every family, and it comes with real considerations here in Florida. But if you’re the kind of family that’s already trading chemical cleaners for Grove Collaborative products and choosing non-toxic everything — this is just the next extension of that same intentional living. Less dependence on broken systems, more responsibility for your own footprint, and honestly, a really cool thing to teach your kids about how the natural world works.

    We don’t have to do everything perfectly or all at once. But asking the question — really sitting with it and researching — is always the right first step. And if you’re already out there in the Florida heat, tending your garden, gathering eggs, and trying to raise kids who understand where things come from, you’re already most of the way there.


    📖 You Might Also Like:

    Frequently Asked Questions

    Are composting toilets legal in Florida?

    Florida does regulate composting toilets, and rules vary by county. They are generally not approved as a standalone primary sanitation system in most Florida counties, but many families use them as a secondary or supplemental toilet. Always check with your county health department before purchasing and installing any composting toilet system.

    Do composting toilets smell in Florida’s heat and humidity?

    They can if you don’t have the right setup. The key in Florida’s climate is choosing a urine-diverting model and making sure you have a powered ventilation fan — passive ventilation alone often isn’t enough in our humid Gulf Coast air. With proper setup and maintenance, a quality composting toilet should have virtually no odor.

    How often do you have to empty a composting toilet?

    It depends on the model and your household size. For a family of four using the toilet full-time, the solid composting chamber typically needs emptying every 4-6 weeks. The liquid (urine) diverter needs to be emptied much more frequently — often every few days. The liquid can be diluted with water and used as fertilizer on non-edible plants.

    What is the best composting toilet for a full-time family home in Florida?

    For full-time family use in Florida’s climate, urine-diverting models like the Nature’s Head or Separett Villa are top picks. Both have excellent ventilation systems and are designed for frequent use. The urine-diverting design is especially important in Florida because separating liquids from solids is what eliminates odor and speeds up proper composting in humid conditions.

    Can you use a composting toilet output in your garden?

    The liquid output (diluted urine) can generally be used as a nitrogen-rich fertilizer on ornamental plants or around fruit trees — most people avoid using it directly on edible crops. The solid compost, once fully processed (which takes longer than the unit itself provides), can eventually be used in non-edible garden areas. Always research your specific situation and local guidelines before applying any humanure to garden soil.

  • Florida Homeschool Music Curriculum: A Living Books Approach That Actually Works

    Florida Homeschool Music Curriculum: A Living Books Approach That Actually Works

    Florida Homeschool Music Curriculum: A Living Books Approach That Actually Works

    🌿 The Short Version: You don’t need a fancy music curriculum or a piano teacher on speed dial to give your homeschool kids a rich musical education. This post walks through how we use living books, composer study, folk songs, and everyday listening to bring music into our Charlotte Mason homeschool — Florida humidity and all.

    This post contains affiliate links. I may earn a small commission at no extra cost to you.

    Honestly, music was the subject I felt the most lost about when we started homeschooling. Math? We found our groove. Reading? We figured it out. But music felt like this big intimidating thing that required lessons and instruments and a piano in the living room — none of which we had when we were just starting out.

    What I eventually realized is that Charlotte Mason didn’t treat music like a performance subject. She treated it like a living thing. Something you absorb. Something you experience. Something kids grow into naturally when it’s woven into the fabric of daily life — just like nature study or poetry or picture study.

    And you know what? That clicked for me. Because that’s exactly how I grew up in the ’90s. I didn’t have formal music theory lessons. But we sang in the car. My grandmother played hymns on her upright piano every Sunday. Music was around us constantly. And it stuck.

    So here’s how we’ve built a music education for our kids that feels natural, rich, and honestly — really fun.

    What “Living Books” Even Means for Music

    If you’ve been in the Charlotte Mason world for more than five minutes, you know the phrase “living books.” Books that feel like they were written by a real person who loves their subject — not a dry textbook. Books that spark something in your kid instead of putting them to sleep.

    The same concept applies to music. A “living books approach” to music means:

    • Listening to real composers — full pieces, not 30-second samples
    • Reading stories about musicians’ lives — not just memorizing dates and facts
    • Singing folk songs and hymns together — as a family, badly and beautifully
    • Letting kids respond — through narration, art, movement, or just sitting and listening

    That’s it. No worksheets. No music theory workbooks in first grade. Just exposure, experience, and time.

    If you want to support this with actual books, we love pulling biographical picture books about composers from the library. There are wonderful ones about Beethoven, Vivaldi, Mozart, and even more modern musicians that read like stories — because they are stories.

    We also keep a nature journal nearby during composer study, and my kids will sometimes sketch what the music “looks like” to them while they listen. It sounds a little woo-woo but honestly it’s one of my favorite things we do.

    Composer Study: The Heart of Our Music Curriculum

    Composer study is one of the core habits in a Charlotte Mason education, and it’s probably the easiest piece to implement — even in a busy season.

    Here’s our simple rotation:

    One composer per term (roughly 6-12 weeks). We pick one composer, read a biography or two, listen to a few of their major works, and just… let it sink in. We talk about it at breakfast. We play it in the car. We let it be background music while the kids color or play outside on the back porch.

    Some of our favorites so far:

    • Vivaldi (Four Seasons is a natural fit — my kids especially love “Summer” because Florida kids understand weather drama)
    • Beethoven
    • Bach
    • Ella Fitzgerald (yes, jazz absolutely counts and she’s extraordinary)
    • John Philip Sousa — the Florida connection is fun here, since Sousa actually performed in Pensacola during his touring years

    You don’t need a formal curriculum for this. YouTube, Spotify, and your library card will carry you most of the way.

    Folk Songs and Singing Together

    This one is so simple it feels almost too easy. But Charlotte Mason was very clear: children should sing. A lot. Together.

    We sing folk songs at morning time. We sing hymns because that’s part of our faith. We sing silly camp songs because kids need to laugh. If you want a peek at how we structure our mornings, I walk through all of it in our post on Morning Basket Ideas for Charlotte Mason Homeschool Families (What We Actually Do Each Day).

    Some folk songs we come back to again and again:

    • “Simple Gifts”
    • “Red River Valley”
    • “She’ll Be Coming Round the Mountain”
    • “This Land Is Your Land”
    • “Down in the Valley”

    None of this requires a teacher or a curriculum. It just requires you to be willing to sing, even if you don’t think you’re a good singer. (Spoiler: your kids don’t care.)

    📌 Love this? Save it to Pinterest so you can find it later!

    Instrument Exploration Without the Pressure

    Here’s my honest take: I don’t think every child needs formal instrument lessons in the elementary years. Charlotte Mason actually agreed — she emphasized a wide exposure to music before formal training, not instead of it.

    That said, if your child is begging for piano lessons or falls in love with the violin — go for it. Follow the child.

    What we do in our home:

    • We have a small keyboard that anyone can noodle on freely
    • We have a few simple rhythm instruments (a hand drum, some maracas, a xylophone for the littles)
    • My older one has started recorder this year because it’s accessible and affordable
    • We talk about instruments when we hear them in the composer pieces we study — “Did you hear that? That’s a cello.”

    The goal in the early years is familiarity and love. The technical skills can come later, when they’re developmentally ready and personally motivated.

    Tying Music Into the Rest of Your Homeschool

    One of the things I love about the Charlotte Mason approach is how naturally everything connects. Music doesn’t have to be its own isolated subject.

    Nature study + music: We’ve done composer study alongside nature study when the themes overlap. Vivaldi’s Four Seasons pairs beautifully with seasonal nature journaling. Debussy’s La Mer goes perfectly with a unit on the Gulf Coast and ocean science. My kids lit up making those connections.

    For our Florida homeschool art curriculum, we pair music with picture study — both feeding the same part of the brain that learns to observe, feel, and respond. I wrote more about that in our post on Florida Homeschool Art Curriculum Charlotte Mason Style (What We Actually Do and Why It Works). We love using Faber-Castell watercolors for response art after a listening session — something about watercolor feels right for music.

    Read-alouds + music: Some of our favorite read-aloud books naturally lend themselves to musical exploration. When we read The Story of Ferdinand, we played Spanish classical guitar in the background. When we read through stories about the American West, we pulled up folk songs from that era.

    Outdoor time + music: My kids have started a habit of humming or singing while they do chores or play outside. They’ll head out to check on the chickens in the morning singing whatever folk song we’ve been working on. That’s the goal right there. Music becoming part of who they are, not just something they do during school hours.

    Does This Count for PEP Scholarship Purposes?

    If you’re a Florida homeschool family using the Florida PEP scholarship (formerly FES-UA), you know you have to track and document your purchases and learning activities. Music curriculum can absolutely be a covered expense — we’ve used it for purchasing instruments, sheet music, and yes, books about composers.

    If you’re newer to the scholarship and want to understand more about how Florida homeschool law works in general, I’d point you toward our post on Florida Unschooling Laws: What Families Actually Need to Know Before You Start — it covers a lot of the legal ground that’s helpful for any Florida homeschool family.

    Resources We Actually Use

    A few things worth having on hand:

    • A good nature journal for musical response drawing
    • Faber-Castell watercolors for art response during listening time
    • Read-aloud books that connect to music history and composers
    • A copywork notebook — we sometimes copy out song lyrics as handwriting practice, which my kids actually enjoy more than regular copywork
    • Spotify (free) or YouTube for streaming full composer works
    • Your local library — genuinely your best friend for this

    The Bottom Line

    You do not need a boxed music curriculum. You do not need a music teacher in your home three days a week. You need songs, stories, time to listen, and a family willing to be a little silly and a little reverent about beautiful music.

    My kids know who Vivaldi is. They can hum Bach’s Jesu, Joy of Man’s Desiring. They make up songs about our chickens and sing them at the top of their lungs in the backyard. That is a music education. That is exactly what I wanted for them — the same kind of music-soaked childhood I had in the ’90s, before screens swallowed up all the quiet.

    If you’re just starting out and feeling overwhelmed, pick one composer this term. Listen to one piece a week. Sing one folk song at breakfast. That’s enough. More than enough, actually. You’ll be surprised how much sticks.


    📖 You Might Also Like:

    Frequently Asked Questions

    Do I need a formal music curriculum for my Charlotte Mason homeschool?

    No — Charlotte Mason’s approach to music was rooted in experience and exposure, not formal instruction in the early years. Composer study, folk song singing, and regular listening to great music are considered a complete and rich music education for elementary-age children. A boxed curriculum is entirely optional.

    How do I do composer study with young kids at home?

    Choose one composer per term and make their music part of your daily background — play it during meals, car rides, and quiet time. Read a biographical picture book or two about their life, and let your kids respond through drawing, narration, or simply talking about what they heard. Keep it simple and consistent rather than formal and structured.

    Can music curriculum expenses be covered by the Florida PEP scholarship?

    Yes, music curriculum and related educational materials — including instruments, books about composers, sheet music, and approved music programs — can generally be covered by the Florida PEP (formerly FES-UA) scholarship. Always check the current approved vendor and expense list through your scholarship managing organization for the most up-to-date guidance.

    What are good living books about composers for kids?

    Your local library is the best starting point. Look for picture book biographies about Beethoven, Mozart, Bach, Vivaldi, and Ella Fitzgerald — many are written in a story format that young kids genuinely enjoy. The Opal Wheeler composer biography series is a beloved classic in the Charlotte Mason community, and Diane Stanley has written excellent musical biographies for older elementary kids.

    How do I teach music theory in a Charlotte Mason homeschool?

    In the early elementary years, most Charlotte Mason educators delay formal music theory in favor of rich exposure and musical experience. If you want to introduce theory gently, singing solfege (do-re-mi) with folk songs is a natural on-ramp. Formal theory can be introduced more intentionally in the middle school years once a child has a strong foundation of musical love and listening experience.

  • How to Make Elderberry Syrup at Home (The Simple Way Our Family Actually Does It)

    How to Make Elderberry Syrup at Home (The Simple Way Our Family Actually Does It)

    How to Make Elderberry Syrup at Home (The Simple Way Our Family Actually Does It)

    🌿 The Short Version: Making elderberry syrup at home is way easier than you’d think — just dried elderberries, water, honey, and a handful of spices simmered on the stove. This post walks you through the whole process, including exactly what we use and how we make it last all season long.

    This post contains affiliate links. I may earn a small commission at no extra cost to you.

    Every fall — or what passes for fall here in Northwest Florida, which is basically just slightly-less-swampy August — I start getting that familiar urge to stock the medicine cabinet. Not with a cart full of drugstore bottles, but with real, whole-food things I can make myself and actually recognize the ingredients of.

    Elderberry syrup was one of the first things I learned to make when we started simplifying our home, and honestly? It’s become one of those non-negotiable staples I keep on hand from October through spring. The kids take it daily during cold and flu season without complaint (it tastes like a slightly tart berry jam situation), and I love that I know exactly what’s in it.

    If you’ve been buying the bottled stuff at the health food store and wincing at the price tag, good news: you can make a big batch at home for a fraction of the cost, and it genuinely doesn’t take long.

    What You’ll Need to Make Elderberry Syrup at Home

    The ingredient list is short and humble. That’s one of the things I love most about this recipe — nothing weird, nothing requiring a specialty store run.

    The basics:

    • 1 cup dried black elderberries
    • 3 cups water
    • 1 cup raw local honey (added after cooking — heat kills the good stuff)
    • 1 cinnamon stick
    • 4-5 whole cloves
    • 1 tablespoon fresh or dried ginger

    That’s really it. You can find dried elderberries on Amazon or at most natural health stores. I order mine with the elderberry syrup making kit that comes with everything measured out — it’s genuinely convenient when you’re making a batch with kids underfoot.

    For storing, I use wide-mouth canning jars — the pint size is perfect. It keeps in the fridge for two to three months, though ours never lasts that long.

    The Step-by-Step Process

    This is a stovetop recipe. No pressure canner needed, no fancy equipment. (If you’re into canning and want to preserve things longer-term, check out How to Can Tomatoes at Home — same kind of approachable, beginner-friendly energy.)

    Step 1: Simmer the berries

    Combine your dried elderberries, water, cinnamon stick, cloves, and ginger in a medium saucepan. Bring it to a boil, then reduce heat and let it simmer uncovered for 45 minutes to an hour. You want the liquid to reduce by about half.

    Step 2: Mash and strain

    Take the pot off the heat and let it cool a bit. Use a potato masher or the back of a spoon to mash the berries and get all that good juice out. Then strain the whole thing through a fine mesh strainer or cheesecloth into a bowl. Squeeze those berries — don’t waste a drop.

    Step 3: Add the honey

    Once the liquid has cooled to warm (not hot — you want to preserve the enzymes and benefits in raw honey), stir in your cup of honey until fully dissolved. This is the step where it goes from “medicinal herb water” to “my kids are asking for more.”

    Step 4: Bottle it

    Pour into your clean jar, cap it, and refrigerate. Done.

    📌 Love this? Save it to Pinterest so you can find it later!

    How Much to Take and When

    We use this as a daily preventive during cold and flu season, not just when someone’s already sniffly.

    • Kids: 1 teaspoon daily for maintenance; 1 teaspoon 3x a day if someone’s coming down with something
    • Adults: 1 tablespoon daily; up to 1 tablespoon 3x a day when sick

    A quick note: elderberries should always be cooked before consuming — raw or underripe berries can cause stomach upset. This recipe takes care of that with the simmering step.

    Also — if you have little ones under one year old, skip the honey or use a different sweetener like maple syrup. You already know this, but worth saying.

    Why We Make It Instead of Buy It

    The bottles you find at the store — even the good ones — often run $20-30 for a small amount that lasts maybe two weeks for a family our size. A big bag of dried elderberries plus honey runs me maybe $15 and makes enough syrup to last us through December. That math makes sense.

    But beyond the money, there’s something about making it yourself that feels right. We involve the kids in the whole process — they help measure, they watch it simmer, they get to taste-test. My oldest has started asking why each ingredient is in there, which has turned into some genuinely great impromptu lessons about herbs, immune function, and why we choose honey over refined sugar.

    It fits naturally into our Morning Basket rhythm on the days we make it — a little living science, a little practical life skill, all wrapped up in a kitchen afternoon. Very Charlotte Mason of us, truly.

    Making It a Learning Moment

    If your kids are anything like mine, they are infinitely more interested in something they helped make. Here’s how we turn elderberry syrup day into a mini nature study:

    • Talk about what elderberries are, where they grow, and what part of the plant we’re using
    • Look up the elderberry bush in a field guide or nature reference
    • Have them sketch the berries and write a sentence about what the syrup is for in their nature journal
    • Talk about bees and honey — where it comes from, why raw honey is different, why we keep it local when we can

    This is the kind of stuff that sticks. Way more than a worksheet about the immune system, I promise.

    If you’re looking for more ways to weave natural health and herbal knowledge into your homeschool days, we have a whole post on Natural Remedies for Kids’ Cough and Cold This Florida Winter that you might love.

    A Few Tips From Our Kitchen

    Use a slow cooker if you want hands-off. You can throw everything in a slow cooker on low for 8 hours instead of simmering on the stove. I do this sometimes when mornings are chaotic — start it when we sit down for school, strain and finish it after lunch.

    Double the batch. Seriously. If you’re going to the trouble, make two jars. Give one to your neighbor, your sister, whoever. It’s a genuinely thoughtful gift and people are always surprised you made it.

    A kitchen scale helps with consistency. If you make this regularly, weighing your elderberries instead of volume-measuring gives you a more reliable result batch to batch.

    Florida humidity is real. Our jars sometimes get a little condensation on the outside in the fridge. That’s fine. Just keep the lid tight and don’t let it sit out at room temperature.

    Storing and Shelf Life

    Refrigerated, this syrup keeps for 2-3 months. You can also freeze it in ice cube trays and pop the cubes into a freezer bag — each cube is roughly one dose and it keeps for up to a year that way. I started doing this last winter and it was a game-changer for keeping a consistent supply without making a new batch every month.

    You’ve Got This

    I know it can feel like there’s a lot to learn when you’re trying to do things more intentionally — the homeschool, the garden, the chickens, the non-toxic everything. It can get overwhelming fast. But elderberry syrup is genuinely one of the simplest, most satisfying things you can add to your routine. It takes less than an hour of active time, the ingredients are inexpensive and shelf-stable, and there is something quietly wonderful about spooning something into your kids’ mouths each morning that you made yourself from actual plants.

    We’re not trying to be perfect over here. We’re just trying to be a little more rooted. This is one small way we do that, and I hope it becomes one of yours too.


    📖 You Might Also Like:

    Frequently Asked Questions

    How long does homemade elderberry syrup last in the fridge?

    Homemade elderberry syrup typically keeps for 2 to 3 months when stored in a sealed glass jar in the refrigerator. If you want to extend the shelf life, freeze it in ice cube trays — frozen elderberry syrup will keep for up to a year. Always check for any off smell or appearance before using.

    Can I give elderberry syrup to toddlers?

    Yes, elderberry syrup is generally considered safe for toddlers over the age of one. For children under one year old, omit the honey and use maple syrup instead, as honey carries a risk of botulism for infants. Always check with your pediatrician if you have concerns, especially for very young children or kids with immune conditions.

    Do I have to use raw elderberries or can I use dried?

    Dried black elderberries are actually what most people use for syrup — they’re shelf-stable, easy to order online, and available year-round. Raw elderberries can be used when in season, but they must always be cooked first. Never eat raw or underripe elderberries, as they can cause nausea and stomach upset.

    Is homemade elderberry syrup really cheaper than store-bought?

    Yes, significantly. A quality bottle of elderberry syrup at a health food store can cost $20–$30 for a small amount. Making it at home with dried elderberries and raw honey typically costs $12–$18 for a batch that produces two to three times as much syrup. The savings add up quickly for a family taking it daily through cold and flu season.

    Can I make elderberry syrup in a slow cooker instead of on the stove?

    Absolutely — a slow cooker works great for elderberry syrup. Add the elderberries, water, and spices and cook on low for 8 hours or high for 4 hours. Let it cool, mash and strain the berries, then stir in your honey once the liquid is warm but not hot. It’s a wonderful hands-off option on busy homeschool mornings.

  • How to Teach Reading Naturally Without Curriculum (What Actually Works for Real Kids)

    How to Teach Reading Naturally Without Curriculum (What Actually Works for Real Kids)

    How to Teach Reading Naturally Without Curriculum (What Actually Works for Real Kids)

    🌿 The Short Version: You don’t need a boxed curriculum to teach a child to read — real books, intentional conversation, phonics woven into daily life, and a low-pressure environment go a long way. This post walks through exactly how we approach reading naturally in our Charlotte Mason homeschool, with practical ideas you can start using today.

    This post contains affiliate links. I may earn a small commission at no extra cost to you.

    If you’ve ever watched your kid sound out the word on a cereal box at breakfast, or trace letters in the dirt out back by the chicken coop, you already know something important: kids are wired to learn. They don’t always need a workbook to make it happen.

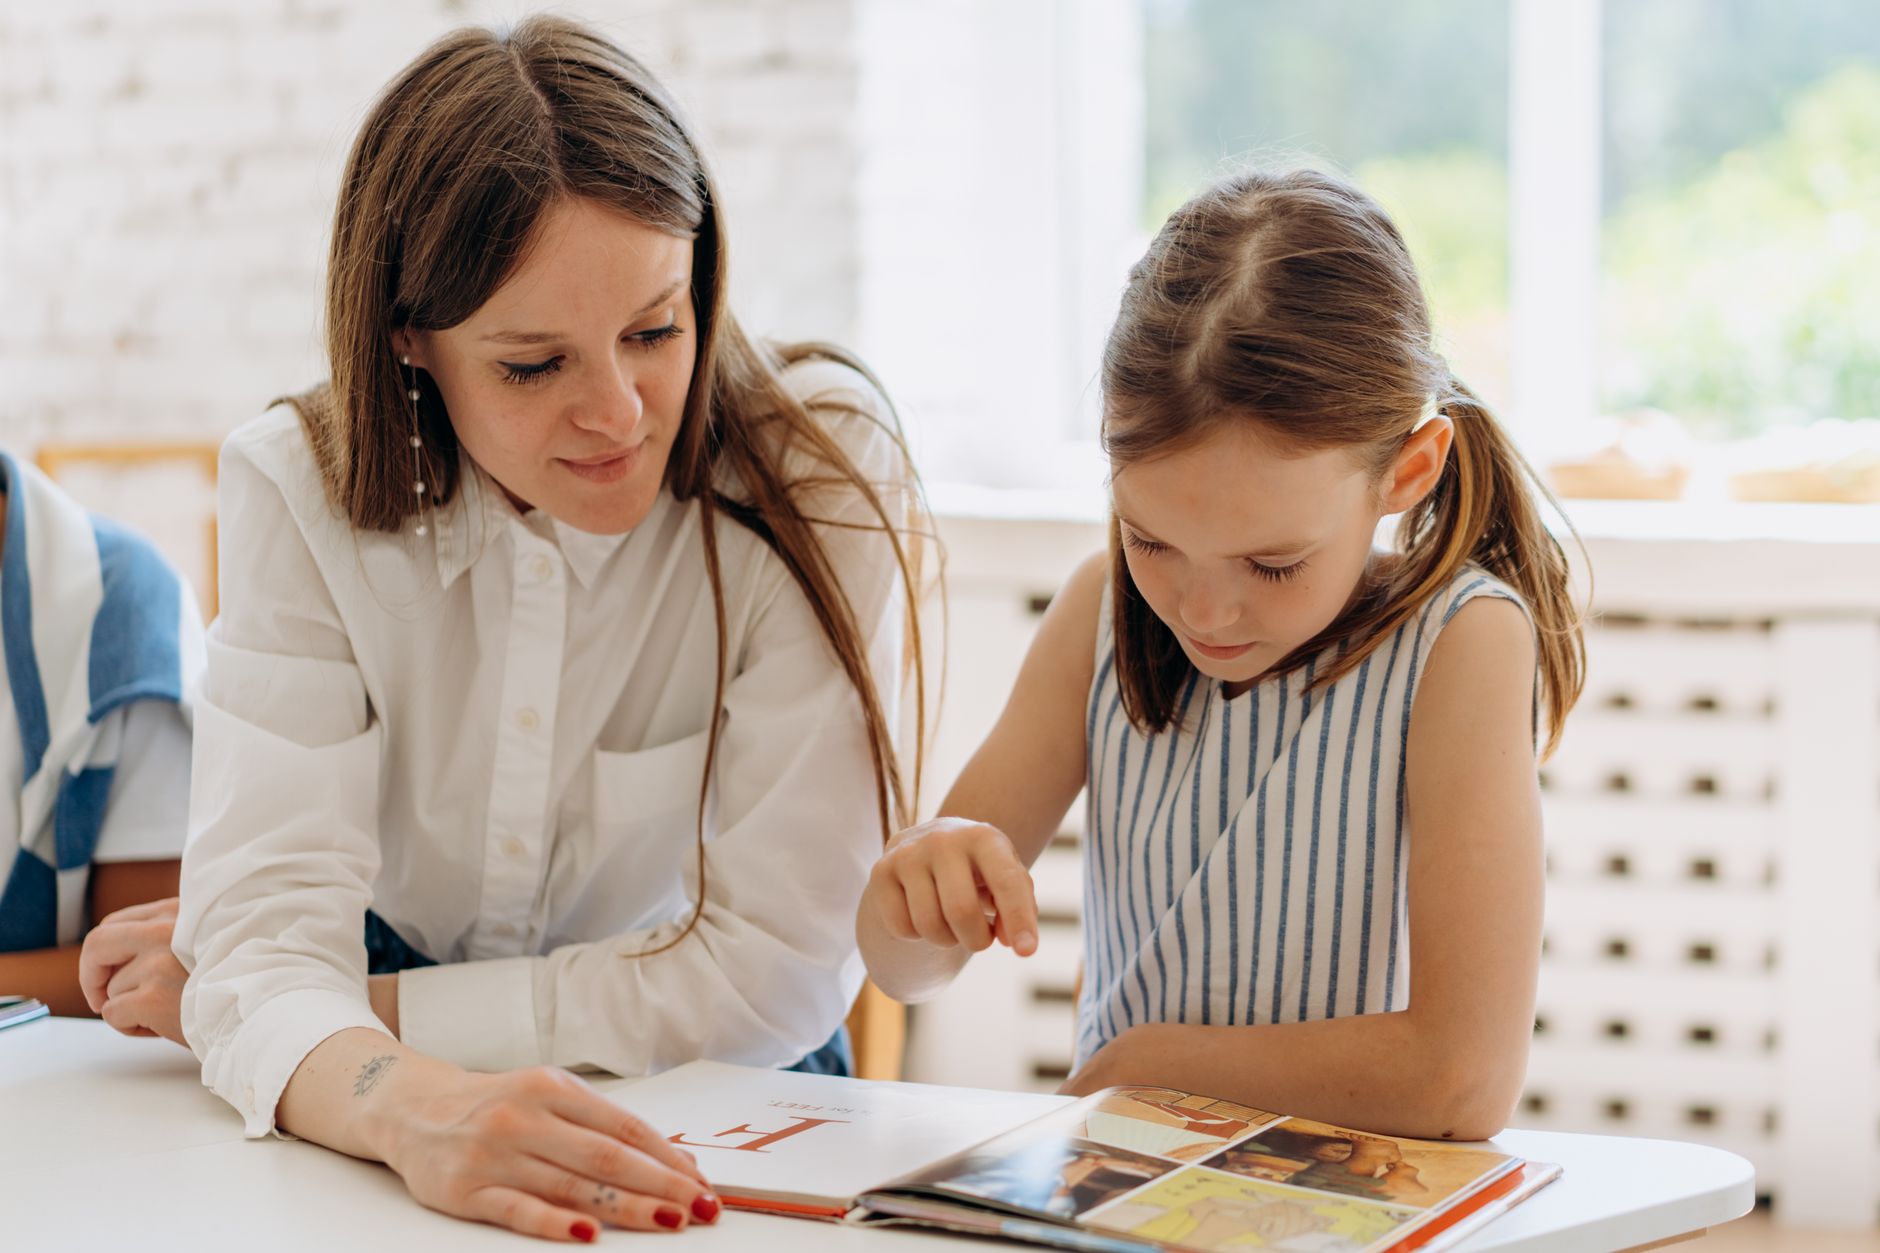
    Now, I want to be honest with you — I’m not anti-curriculum across the board. We use All About Reading for one of my kids because that’s what that child needed. But another one of mine? She basically taught herself to read through living books, being read to constantly, and a lot of patience on my part. Every kid is different, and that’s the whole point.

    What I am saying is that you don’t have to feel locked into a scripted program if it’s not working — or if you just want to start more gently. Teaching reading naturally is absolutely possible, and for a lot of families (especially those of us drawn to the Charlotte Mason approach), it’s actually a better fit.

    Here’s what that actually looks like in our home.


    What “Teaching Reading Naturally” Actually Means

    It doesn’t mean doing nothing and hoping for the best. It means being intentional without being rigid. It means creating an environment so rich in language, stories, and print that reading becomes the natural next step — not a performance your kid has to nail on a schedule.

    Charlotte Mason herself believed that young children shouldn’t be formally drilled on reading before age six. She emphasized living books, oral narration, and short focused lessons over long tedious workbook sessions. That philosophy has shaped how I approach this with my own kids, and it has relieved so much pressure for all of us.


    Start With Being Read Aloud To — A Lot

    This is the single most powerful thing you can do. Before a child ever picks up a book on their own, they need to fall in love with stories. They need to hear fluent reading, rich vocabulary, and sentences that are more complex than anything they’d encounter in a beginner reader.

    We do this in our Morning Basket every single day. Picture books, chapter books, poetry, nature books — whatever fits the season. We read outside on the back porch when the Florida weather cooperates, which is a lot of the year here in Northwest Florida (and you’d better believe the chickens wander over to supervise).

    This builds:

    • Vocabulary
    • Comprehension
    • A love of stories
    • Phonemic awareness (hearing the sounds in words)

    All before formal reading instruction even begins.


    Weave Phonics Into Real Life

    You don’t need a 45-minute phonics lesson to teach letter sounds. You need moments.

    • Point out letters on signs during errands
    • Let them “help” you write the grocery list
    • Spell out words in the garden — we’ve done it in the dirt with sticks
    • Write words on a whiteboard during lunch and just… talk about them
    • Play “I spy something that starts with the /s/ sound” on nature walks

    These micro-moments add up. And because they’re attached to real life instead of a worksheet, kids actually remember them.

    When my kids are ready to start connecting sounds more formally, I do use some structure — but even then, I keep sessions short (10-15 minutes max for young kids) and follow the child’s lead on pacing.


    Use Living Books — Not Just Readers

    Beginning readers (the decodable kind) have their place, especially for kids who need extra phonics support. But they are not the only books your emerging reader should be exposed to.

    Keep your home full of books that are above their independent reading level. Read them together. Let your child see you reading for pleasure. Visit the library regularly and let kids pick whatever they want — yes, even if it’s the same dinosaur book for the fifth week in a row.

    Nature books are huge in our house. A good field guide like the Sibley Birds Guide gets pulled out constantly during our nature walks, and even my youngest has started recognizing words in it because she wants to know what she’s looking at. Motivation is the best reading teacher there is.

    📌 Love this? Save it to Pinterest so you can find it later!


    Nature Journaling as a Reading and Writing Bridge

    This one surprises people, but nature journaling is one of the best literacy tools we have. When a child draws what they observed, then labels it, then writes a sentence about it — that is reading and writing instruction happening in the most meaningful possible context.

    We use a simple nature journal and Faber-Castell watercolors for illustrations. I’ll spell words for them when they ask. I never correct their invented spelling in journals — that comes later. Right now, the goal is that writing feels worth doing.

    If you want more on how we use nature journaling year-round here in Florida, I wrote a whole post about it: Charlotte Mason Nature Journal Ideas for Kids (What We Actually Do Year-Round in Florida).


    The 1990s Secret: Less Pressure, More Time

    Here’s the thing I keep coming back to. Kids in the 1990s weren’t being formally taught to read at age four. Kindergarten was play-based. First grade was gentle. And most kids? They learned to read just fine.

    We’ve somehow convinced ourselves that earlier is always better, that a child who isn’t reading fluently by the end of kindergarten is behind. But the research doesn’t actually support that panic. Many children — especially boys — aren’t neurologically ready for formal reading until age six or seven, and pushing hard before they’re ready can actually create reading aversion.

    Give them time. Give them books. Give them dirt and rain boots and a magnifying glass and a bug catcher kit. Let them live richly. That is not wasted time — it is building the brain that will one day read.


    When to Add More Structure

    Some kids will pick reading up almost on their own with rich environment and read-alouds. Others need more explicit phonics instruction, and that’s completely okay. Watch for these signs that your child might be ready for or benefit from more structure:

    • They’re showing interest in sounding out words on their own
    • They’re frustrated that they can’t read something they want to read
    • They’re 6-7+ and still not connecting letters to sounds

    If you decide to add a more structured phonics approach, All About Reading is hands-down our family’s favorite. It’s multisensory, low-stress, and actually fun. You can also check out my post on How to Homeschool Multiple Ages at Once for how I manage different reading levels without losing my mind.


    A Few Practical Things That Help

    • Label things around the house. Door. Window. Chair. Simple, old-school, and effective.
    • Let them see you read. Not just to them — for yourself. Kids imitate what they observe.
    • Keep books everywhere. Basket in the living room, books in the car, books on the back porch.
    • Don’t rush narration into writing. Oral narration counts. Let them tell you what a book was about before they can write it.
    • Celebrate small wins loudly. When my daughter sounded out “chicken” by herself near the coop one afternoon, we made it a whole moment. She still talks about it.

    You Know Your Kid Best

    I’ll wrap up with this: teaching reading naturally isn’t about being relaxed to the point of being hands-off. It’s about being present, intentional, and responsive to the actual child in front of you — not the imaginary average child the curriculum was written for.

    Some kids bloom early. Some bloom later. Both are okay. What matters is that reading stays something warm and wanted, not a source of shame or stress.

    You’re already doing something countercultural by homeschooling with intention, by choosing books over screens, by letting your kids get muddy and feed chickens and catch bugs. Trust that same instinct when it comes to reading. It’ll come. And when it does, it’ll be theirs.


    📖 You Might Also Like:

    Frequently Asked Questions

    Can a child learn to read without a formal reading curriculum?

    Yes — many children learn to read through rich read-aloud environments, phonics woven into daily life, and access to lots of books. Some kids need more structured phonics instruction, and that’s okay too. The key is watching your individual child and responding to what they need rather than following a one-size-fits-all program.

    At what age should I start teaching my child to read?

    There’s no single right age. Many children aren’t neurologically ready for formal reading instruction until age 6 or 7, especially boys. Before that, the best thing you can do is read aloud to them daily, expose them to rich language, and create a print-rich environment. Pushing too early can actually create reading aversion.

    What is the Charlotte Mason approach to teaching reading?

    Charlotte Mason believed in delaying formal reading instruction until around age 6, prioritizing living books and read-alouds, using short focused lessons rather than long drills, and keeping reading tied to real, meaningful content. She emphasized oral narration before written work and valued a child’s natural curiosity as the engine of learning.

    How do I teach phonics naturally without a workbook?

    You can teach phonics through everyday moments — pointing out letters on signs, spelling words in the garden or in sand, playing ‘I spy’ sound games on walks, writing the grocery list together, and labeling items around the house. These informal exposures add up significantly over time and keep phonics connected to real life.

    What if my child is older and still struggling to read — should I be worried?

    If your child is 7 or older and still not connecting letters to sounds despite exposure and read-alouds, it may be worth adding more structured phonics instruction or speaking with a specialist to rule out dyslexia or other learning differences. Programs like All About Reading are multisensory and work well for kids who need a more explicit approach. Early intervention for genuine struggles is always better than waiting.

  • Morning Basket Ideas for Charlotte Mason Homeschool Families (What We Actually Do Each Day)

    Morning Basket Ideas for Charlotte Mason Homeschool Families (What We Actually Do Each Day)

    Morning Basket Ideas for Charlotte Mason Homeschool Families (What We Actually Do Each Day)

    🌿 The Short Version: A Charlotte Mason morning basket doesn’t have to be complicated or expensive — ours is a simple, peaceful gathering time filled with read-alouds, art, nature study, and hymns that sets the whole tone for our homeschool day. This post shares exactly what we include, how we keep it flexible for multiple ages, and how you can build your own without overthinking it.

    This post contains affiliate links. I may earn a small commission at no extra cost to you.

    If you’ve been in the Charlotte Mason world for more than five minutes, you’ve heard the term “morning basket.” And if you’re anything like me when I first started, you Googled it, found seventeen gorgeous photos of linen-lined baskets overflowing with books and flowers, and thought — okay, but how does this actually work with real kids in a real house?

    Our mornings in Northwest Florida are not Pinterest-perfect. The dog is usually underfoot, someone’s already been out to check on the chickens, and at least one child is still in pajamas at nine o’clock. But our morning basket? It’s become the anchor of our whole homeschool day. It took some trial and error to figure out what actually works for our family — and that’s what I want to share with you today.

    What Is a Morning Basket, Really?

    A morning basket (sometimes called a morning time or morning meeting) is simply a time when you gather your children together — all ages, all at once — and share things that don’t need to be separated by grade level. Think poetry, read-alouds, hymns or folk songs, art appreciation, memory work, and nature study.

    Charlotte Mason believed that the best education was rich, living, and shared. Morning basket is the practical expression of that. It’s not a formal lesson. It’s more like… you’re all sitting around the table together and feeding your minds and souls before the individual work begins.

    If you’re homeschooling multiple kids at different levels, this is honestly one of the things that saves your sanity. I talked more about juggling different ages in my post on How to Homeschool Multiple Ages at Once (Tips That Actually Work for Real Families) — but morning basket is one of my top strategies there.

    What We Actually Put in Our Morning Basket

    Here’s the real, unsexy truth: our basket is a canvas tote from the kitchen counter. Nothing fancy. What matters is what goes in it — and that it stays consistent enough to be a habit.

    1. A Read-Aloud

    This is the heart of morning time. We’re always reading something together — a chapter book, a nature story, a living history book. This is where all the ages genuinely gather, because a good book pulls everyone in. My kindergartner listens just as well as my fourth-grader when the story is interesting enough.

    2. Poetry

    We keep a few poetry books in the basket and rotate through them. We read one poem slowly, talk about the images it brings up, sometimes read it again. Kids absorb more than you think, even if they’re doodling while you read.

    3. Nature Study and Nature Journaling

    Several days a week, we’ll spend part of morning time talking about something we’ve observed outside — a bird at the feeder, something one of the kids noticed in the garden, or what the chickens were doing that morning. Then we sketch it in our nature journals and add a few notes.

    We keep our Sibley Birds guide in the basket too, because bird questions come up constantly here in Florida. Living near the Gulf means we get some really interesting sightings.

    If you want more on how we do nature journaling year-round, I’ve got a whole post on Charlotte Mason Nature Journal Ideas for Kids (What We Actually Do Year-Round in Florida) that goes deep on this.

    4. Hymns or Folk Songs

    We sing one hymn or folk song a week, meaning we return to the same one until everyone knows it by heart. Even my youngest picks these up faster than I expect. It adds something to the morning that nothing else does — it just settles everyone.

    5. Art Appreciation or Artist Study

    Once or twice a week, we pull out a print of a painting we’re studying and just look at it together for a few minutes. Then we talk about it. What do you see? What do you wonder? Charlotte Mason called this picture study, and it’s one of those things that sounds fussy until you do it and your seven-year-old starts noticing light and shadow everywhere.

    We also keep Faber-Castell watercolors nearby for when inspiration strikes. Letting kids paint while they listen is not cheating — for some kids, it actually helps them focus better.

    6. Memory Work

    We cycle through scripture, a poem we’re memorizing, math facts, and sometimes a geography fact or timeline piece. Short and consistent. Two or three minutes max. This is where the magic of repetition really shows up — by the end of a month, kids know things they didn’t even realize they were learning.

    📌 Love this? Save it to Pinterest so you can find it later!

    How Long Does Morning Basket Take?

    Honestly? Anywhere from 20 minutes on a scattered day to 45 minutes when everyone’s engaged and the read-aloud is really good. We aim for 30 minutes most days. It’s the one part of our homeschool that rarely gets skipped, even on hard weeks, because it doesn’t feel like school — it feels like being together.

    Tips for Making It Actually Happen

    Start before the wiggle window closes. In our house, that means we start morning basket before anyone has been awake long enough to get bored and start picking at each other. Right after breakfast is our sweet spot.

    Keep it simple enough to be consistent. The fancy, elaborate morning baskets you see online are beautiful. They’re also often abandoned by week three because they require too much prep. Our basket has maybe five or six things in it. That’s it.

    Let kids have something to do with their hands. Coloring pages, playdough, beeswax, simple puzzles — something quiet and hands-on for the younger ones while you read aloud makes a huge difference. I am not above it.

    Rotate seasonally. We swap out books, poetry collections, and artist study every few weeks. This keeps it fresh without requiring you to reinvent the whole thing.

    Tie it to your nature study. If we’re watching what’s happening in the garden or with the flock that week, I’ll weave that into what we read or sketch. Right now we’re reading a book about bird behavior and comparing it to what we’re actually watching in the backyard. Living books meet living observations — that’s Charlotte Mason in a nutshell.

    A Note on the PEP Scholarship

    If you’re using the Florida PEP scholarship, morning basket is a fantastic way to cover multiple subjects in a documentable way — literature, fine arts, music, science (nature study), and history can all legitimately happen in that 30-minute window. Keep a simple log. It counts. For more on navigating Florida homeschool logistics, check out my post on Florida Unschooling Laws: What Families Actually Need to Know Before You Start.

    What You Don’t Need

    You don’t need a matching linen basket. You don’t need a laminated schedule. You don’t need to spend a hundred dollars at a curriculum fair. Our morning basket costs almost nothing extra because it’s built from books we already own, a cheap tote bag, and some basic art supplies.

    If you’re looking for curriculum to support the rest of your day after morning basket, I’ve shared a lot more in our post on the Best Unit Study Curriculum for Homeschool Families in 2026 — but honestly, a solid morning basket alone does more for your kids than most packaged curriculum ever will.

    This is what raising kids the old way looks like in practice. Sitting together. Reading real books. Noticing the world outside the window. Singing something together before the day gets loud. It’s not complicated. It’s just slow and intentional — and that’s exactly what makes it work.


    📖 You Might Also Like:

    Frequently Asked Questions

    What is a Charlotte Mason morning basket?

    A Charlotte Mason morning basket (also called morning time or morning meeting) is a daily gathering where all your children come together — regardless of age or grade — to share enriching activities like read-alouds, poetry, hymns, nature study, art appreciation, and memory work. It’s not a formal lesson; it’s a warm, communal start to the homeschool day.

    How long should a Charlotte Mason morning basket be?

    Most families aim for 20–45 minutes depending on the ages of their children and what’s included that day. For younger elementary kids, 20–30 minutes is a great starting point. You can always extend it on days when everyone is engaged and the read-aloud has everyone hooked.

    What should I put in a morning basket for elementary-age kids?

    Great morning basket staples for elementary kids include a chapter book read-aloud, one or two poems, a hymn or folk song, nature journaling or nature observation, artist study or picture study, and short memory work like scripture or math facts. Keep it simple — five or six rotating elements is plenty.

    Can morning basket count toward Florida PEP scholarship requirements?

    Yes! If you’re using the Florida PEP homeschool scholarship, morning basket can document multiple subject areas including literature, fine arts, music, and science (through nature study). Keep a simple daily log noting what you covered, and you’ll have plenty of documentation to support your scholarship use.

    How do I do morning basket with multiple ages at once?

    Morning basket is actually one of the easiest parts of homeschooling to do with mixed ages because most of the content — stories, poetry, songs, art — doesn’t need to be separated by grade level. Younger kids can color or use playdough quietly while you read aloud. Choose books and poems that are rich enough to interest your older kids, and your younger ones will absorb more than you expect just by being present.

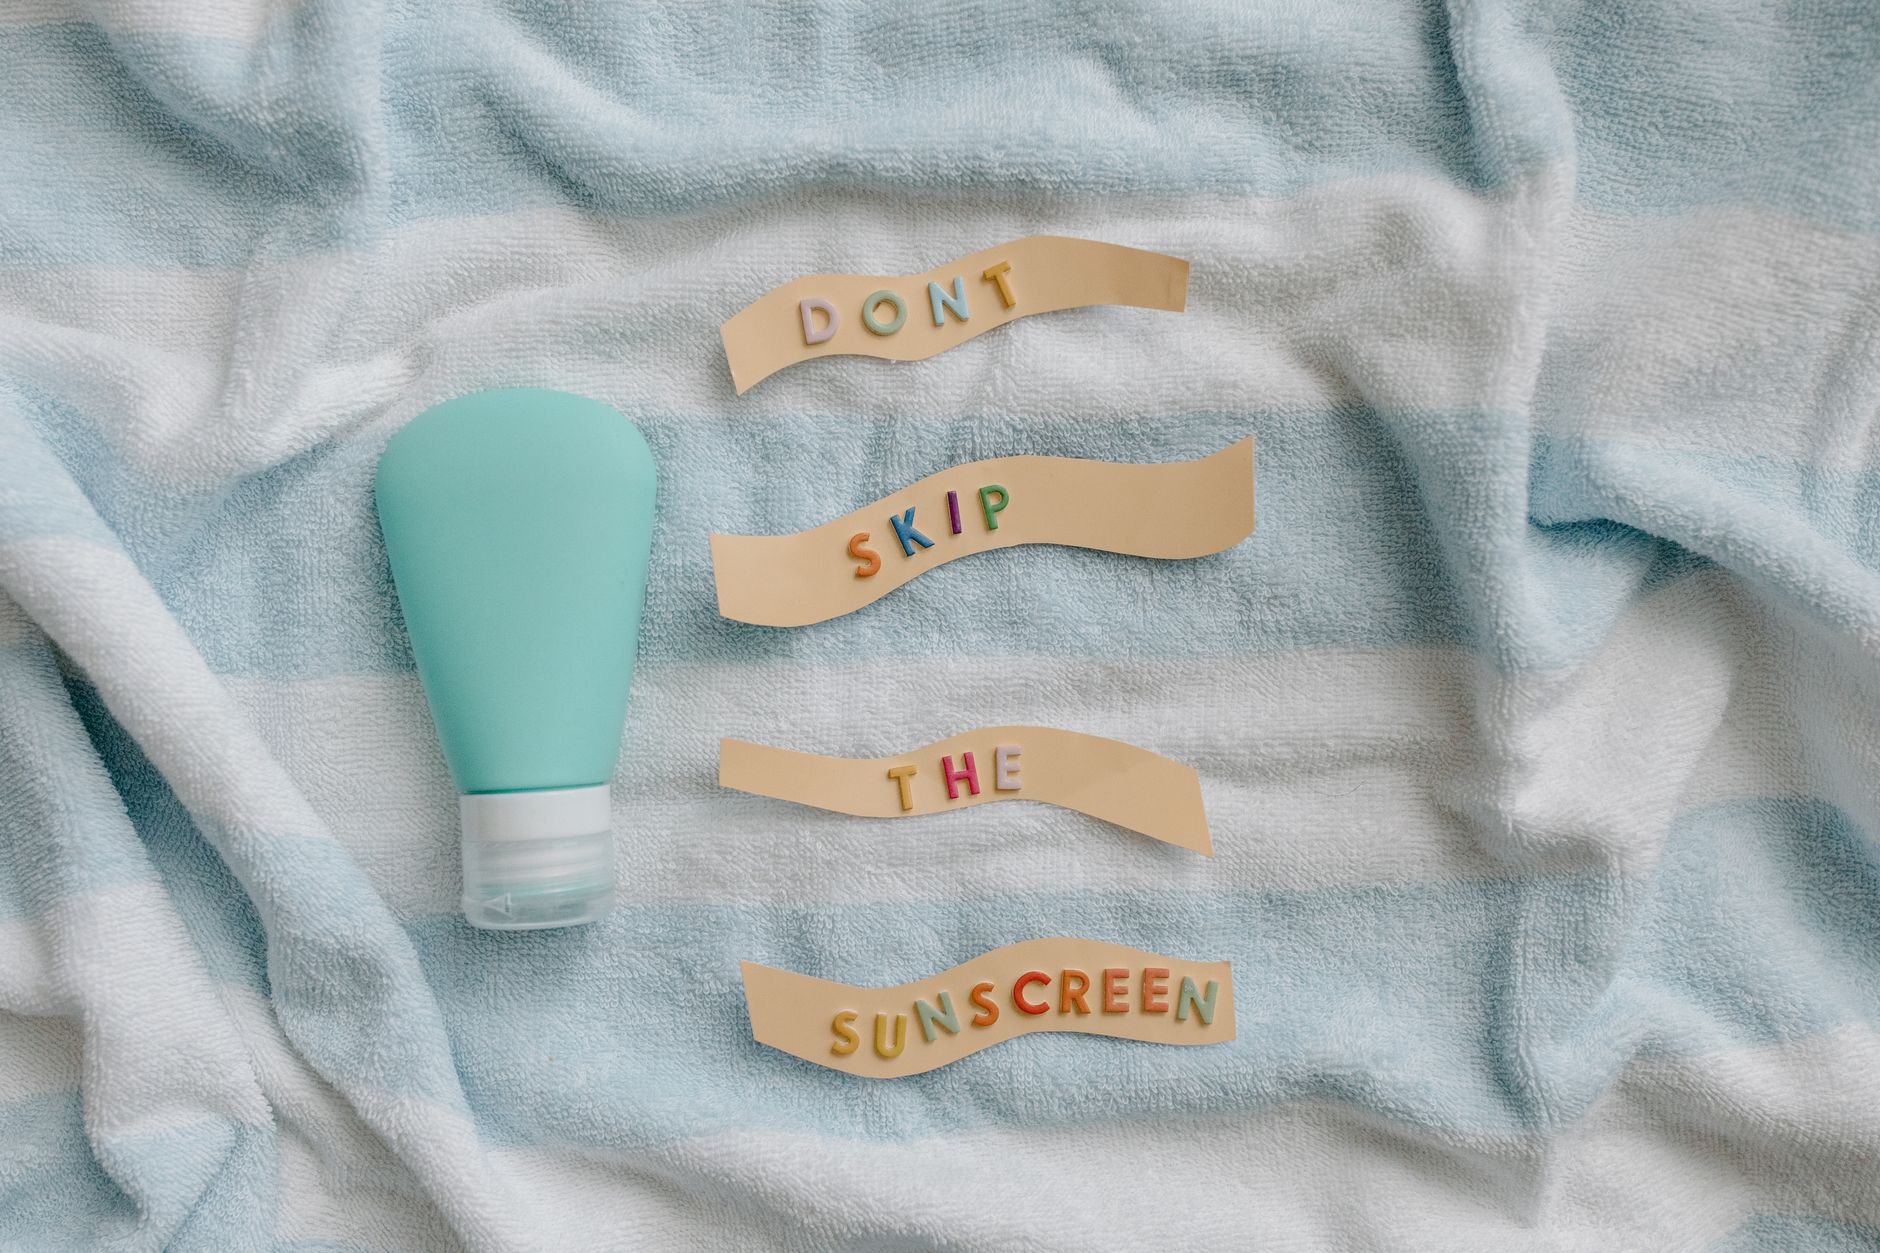
  • Non-Toxic Sunscreen for Babies Under 6 Months (What’s Actually Safe and What to Skip)

    Non-Toxic Sunscreen for Babies Under 6 Months (What’s Actually Safe and What to Skip)

    Non-Toxic Sunscreen for Babies Under 6 Months (What’s Actually Safe and What to Skip)

    🌿 The Short Version: Babies under 6 months have skin so thin and absorbent that most sunscreens — even “natural” ones — aren’t recommended for them at all. This post walks you through what the guidelines actually say, what mineral options exist for when you truly need them, and how to keep your baby protected the old-fashioned, low-intervention way.

    This post contains affiliate links. I may earn a small commission at no extra cost to you.

    If you’ve got a new baby and you’re staring down a Florida summer, I see you. The panic is real. It’s 94 degrees, the humidity is sitting somewhere around “inside a cloud,” and you’re wondering how on earth you’re supposed to take this tiny person outside without either cooking them or slathering them in something questionable.

    I’ve been there. And when I went looking for answers about non-toxic sunscreen for babies under 6 months, I was honestly surprised by what I found — because the answer is a little more nuanced than just “buy the clean sunscreen.”

    Let me share what I learned, what we actually do, and what I’d tell any mama friend over sweet tea on the back porch.


    Why Babies Under 6 Months Are in a Different Category Entirely

    Here’s the thing most sunscreen brands don’t lead with: the American Academy of Pediatrics (AAP) and the FDA both recommend avoiding sunscreen altogether on babies younger than 6 months when possible — even mineral-based formulas.

    It’s not that mineral sunscreen is dangerous for newborns, exactly. It’s that their skin is so thin, so absorbent, and their systems are so immature that we just don’t have great long-term data on what even zinc oxide does when applied regularly to skin that young. And in our house, when the data isn’t there, we lean toward less intervention, not more.

    This tracks with everything we already believe about raising kids intentionally — whether that’s how we approach our non-toxic home or the food we cook in our cast iron skillets. Less is often genuinely more.


    So How Do You Actually Protect a Newborn from the Florida Sun?

    Good news: shade and clothing do the heavy lifting, and they work really well.

    1. Shade First, Always

    For babies under 6 months, shade is your best friend and honestly your first line of defense. A covered stroller, a beach tent, a big live oak tree — all of these are doing more protective work than any bottle of sunscreen.

    We lived under our porch with our youngest during those first few months. Morning and late afternoon outings, never midday. Florida sun between 10am and 4pm in the summer is genuinely intense, and even adults should be thoughtful about it.

    2. UPF Clothing and Hats

    Light, breathable, long-sleeved UPF clothing and a wide-brimmed hat are the other game-changers. Yes, it sounds counterintuitive to put a baby in long sleeves in the heat, but loose, lightweight UPF fabric is cooler than bare skin in direct sunlight. A floppy hat that actually stays on (the kind with the chin strap — you know the one) protects their face, neck, and ears without anything going on their skin at all.

    3. Timing Your Time Outside

    This is the 1990s approach and honestly it just makes sense. We weren’t slathered in sunscreen every five minutes as kids — we went outside in the morning, came in during the hot part of the day, and went back out late afternoon. That rhythm works beautifully with babies too. It also happens to line up perfectly with a Charlotte Mason morning time routine.


    When You Truly Need Sunscreen for a Baby Under 6 Months

    Sometimes you can’t avoid it. A long outdoor event, a beach day that runs longer than expected, a moment where shade just isn’t available. In those cases, the AAP says it is acceptable to apply a small amount of mineral sunscreen to exposed areas like the face and back of the hands.

    What to Look for in a Mineral Sunscreen for Babies

    If you’re going to use sunscreen on a baby this young, you want:

    • Zinc oxide as the only active ingredient — not titanium dioxide, not any chemical filters like oxybenzone, octinoxate, or avobenzone
    • No fragrance — none, full stop
    • No parabens, no phthalates, no synthetic preservatives
    • Non-nano zinc oxide — nanoparticles are small enough to potentially absorb into skin, so we skip those
    • Short, clean ingredient list — if you can’t pronounce half of it, keep looking

    The non-toxic sunscreen options that consistently score well on EWG’s Skin Deep database and fit these criteria include brands like Badger Baby, Thinkbaby, and Earth Mama. I’d start there and cross-reference with EWG before buying.


    📌 Love this? Save it to Pinterest so you can find it later!


    What I’d Skip Entirely

    This is the part where I want to be your straight-talking friend, not a brand ambassador.

    Skip anything with oxybenzone or octinoxate. These are chemical UV filters that have been shown to absorb into the bloodstream — and in adults, not just babies. The FDA flagged them years ago and they’re still in plenty of “popular” sunscreens.

    Skip anything labeled “natural” or “clean” without reading the ingredient list. Marketing words mean nothing. The label is what matters.

    Skip spray sunscreens entirely for babies. The inhalation risk alone is reason enough, and getting even coverage on a wiggly baby with a spray is nearly impossible anyway.

    Skip anything with added fragrance. Even “natural fragrance” is a catch-all term that can hide dozens of undisclosed ingredients.


    Building Sun-Safe Habits That Carry Into Childhood

    Here’s something I love about this season of life with a new baby: the habits you build now carry forward. When we center our outdoor time around shade, good timing, and protective clothing from the very beginning, kids grow up with that as their normal.

    Our older kids — the ones out in the backyard with the chickens, doing nature study, catching bugs with their bug collection kit and sketching in their nature journals — they know to grab a hat, they know midday is a good time to come inside and read aloud, and they reach for sunscreen as a backup, not the first line of defense.

    That’s the goal. Raising kids who understand why we do things, not just doing things to them.

    If you’re building out your nature study routine alongside all of this, you might love what we shared in Charlotte Mason Nature Journal Ideas for Kids — lots of good stuff in there about getting outside intentionally in the Florida heat without it being miserable.


    Quick Reference: Baby Sun Protection by Age

    Under 6 months:

    • Shade, shade, shade
    • UPF clothing and wide-brimmed hat
    • Avoid peak sun hours
    • Sunscreen only as a last resort on small exposed areas — zinc oxide only, fragrance free

    6 months and up:

    • Mineral sunscreen (zinc oxide) is appropriate for regular use
    • Still prioritize shade and clothing
    • Reapply every 2 hours and after water exposure
    • Check EWG’s database for your specific product

    One More Thing About Florida Specifically

    We are not messing around down here. Northwest Florida gets serious UV index numbers basically 10 months out of the year, and even overcast days can burn fair-skinned babies faster than you’d expect. If you’re new to Florida or spending your first summer here with a newborn, please don’t underestimate it.

    But also — don’t let fear keep you inside. Fresh air, birdsong, the feel of a breeze — those things matter for babies too. We just do it wisely. Early mornings on the back porch, watching the chickens scratch around, with a light muslin blanket draped over the carrier for shade. That’s as close to perfect as it gets.


    Mama, you are paying attention to the right things. The fact that you’re researching what’s actually going on your baby’s skin instead of just grabbing whatever’s at the checkout aisle — that matters. Trust your instincts, keep it simple, and don’t let the noise of a thousand products convince you that you need more than shade, a hat, and a good pair of arms.

    You’ve got this.


    📖 You Might Also Like:

    Frequently Asked Questions

    Can I use sunscreen on my baby under 6 months old?

    The AAP and FDA recommend avoiding sunscreen on babies younger than 6 months when possible, prioritizing shade and protective clothing instead. If sun exposure is unavoidable, a small amount of mineral sunscreen with zinc oxide as the only active ingredient can be applied to exposed areas like the face and hands. Always choose fragrance-free, non-nano zinc oxide formulas.

    What is the safest sunscreen ingredient for newborns?

    Zinc oxide is considered the safest active ingredient when sunscreen is necessary for very young babies. It sits on top of the skin rather than absorbing into it, and it’s less likely to cause irritation or allergic reactions than chemical UV filters. Look for non-nano, fragrance-free formulas with a short, clean ingredient list.

    What sunscreens should I avoid for my baby?

    Avoid any sunscreen containing chemical UV filters like oxybenzone, octinoxate, homosalate, or avobenzone — these have been shown to absorb into the bloodstream. Also skip anything with added fragrance (even ‘natural fragrance’), parabens, phthalates, or nano-sized zinc particles. Spray sunscreens are also not recommended for babies due to inhalation risk.

    How do I protect my newborn from the sun without sunscreen?

    Shade is your most powerful tool. Use a covered stroller, baby carrier with a shade canopy, or beach tent. Dress your baby in lightweight UPF-rated clothing and a wide-brimmed hat with a chin strap. Plan outdoor time for early morning or late afternoon, avoiding the peak UV hours between 10am and 4pm. These methods are genuinely effective and preferred over sunscreen for babies this young.

    What are the best non-toxic sunscreen brands for babies?

    For babies 6 months and older (or for limited use in under-6-month situations), brands that consistently score well on EWG’s Skin Deep database include Badger Baby, Thinkbaby, and Earth Mama. Look for products with non-nano zinc oxide as the sole active ingredient, no fragrance, and a short ingredient list. Always verify your specific product on EWG’s website before purchasing.

  • Best Chicken Coop Predator-Proof Latches (What Actually Keeps Your Flock Safe at Night)

    Best Chicken Coop Predator-Proof Latches (What Actually Keeps Your Flock Safe at Night)

    Best Chicken Coop Predator-Proof Latches (What Actually Keeps Your Flock Safe at Night)

    🌿 The Short Version: Not all coop latches are created equal — raccoons and opossums in Northwest Florida are smart enough to open basic hook-and-eye closures in seconds. This post breaks down the best predator-proof latch types for backyard chicken coops, what we actually use, and how to layer your coop security so you stop waking up to heartbreak.

    This post contains affiliate links. I may earn a small commission at no extra cost to you.

    I’ll never forget the morning I walked out to the coop and found the door wide open. We hadn’t lost anyone — by some miracle — but something had absolutely been in there trying. The latch we’d been using, a simple little hook-and-eye we’d grabbed at the hardware store, was bent sideways. Raccoons, y’all. They are relentless and they are clever, and down here in the Florida panhandle, we’ve got them in spades.

    If you’ve got backyard chickens, predator-proofing your coop isn’t optional. It’s the whole game. And the latch is honestly one of the most overlooked pieces of that puzzle. People spend a lot of time on the coop itself — the wood, the hardware cloth, the ventilation — and then slap on a $2 latch and call it done. I did that too. Learned my lesson.

    So let’s talk about what actually works.

    Why Your Coop Latch Matters More Than You Think

    Here in Northwest Florida, we’re dealing with a real lineup of predators. Raccoons top the list, but we also see opossums, foxes, and the occasional neighborhood dog who’s decided your birds look interesting. Raccoons in particular have dexterous little hands — they can work simple latches, lift hooks, and even unscrew things over time if they’re motivated enough.

    A good latch needs to do two things: be easy for you to operate daily (especially in the dark on a groggy morning), and be essentially impossible for a raccoon to figure out. That’s a narrow window, but it exists.

    And if you have an automatic chicken coop door, you still need solid manual latches on nest box lids and any other access panels. Those automatic doors are amazing for daily convenience, but they don’t cover everything.

    The Latch Types That Actually Work

    1. Double-Action Spring Latches (Our Top Pick)

    This is what we use on our main coop door and I love it. A double-action or two-step latch requires you to lift and slide simultaneously to open — a motion raccoons genuinely cannot replicate. Look for heavy-duty steel ones, not the lightweight versions. The difference in quality is immediately obvious when you hold them.

    These are what I’d recommend to any backyard chicken keeper as a starting point. They’re easy enough that kids can learn to use them (ours do coop chores every morning with our Storey’s Guide to Chickens dog-eared on the shelf), but complex enough that a raccoon isn’t going to crack it in five minutes.

    2. Carabiner Clips as a Backup Layer

    We clip a locking carabiner through any latch that’s on a door we don’t open as frequently — like the back access panel. It adds about three seconds to our morning routine and makes the latch completely foolproof. You can grab a pack of them affordably and clip them wherever you have a weak point.

    This is especially smart for nest box lids. Nest boxes are low to the ground, easy to reach, and raccoons absolutely know that’s where the eggs are.

    3. Barrel Bolt Latches (With a Carabiner)

    A heavy barrel bolt — the kind with real weight to it — is a solid option, but only with a secondary lock. On their own, determined raccoons can slide them open. Paired with a carabiner or a spring clip through the bolt handle, they become much more secure. We use these on our run door.

    4. Padlocks for High-Risk Doors

    For any door that’s in a lower-traffic spot, an actual padlock is the gold standard. Yes, it’s a little more inconvenient. But if you’ve ever lost a bird to a predator, inconvenience starts looking really good real fast.

    📌 Love this? Save it to Pinterest so you can find it later!

    What to Avoid

    Please skip these for primary coop security:

    • Simple hook-and-eye latches — raccoons open these easily, often within minutes of discovering them
    • Cheap plastic latches — they break down fast, especially in Florida heat and humidity
    • Single-action slide bolts without backup — better than nothing, but not by much
    • Twist knobs — again, raccoon hands are not a myth

    We learned most of this the hard way and through lots of reading. If you’re newer to keeping chickens, the Kid’s Guide to Keeping Chickens is actually a surprisingly solid resource for the whole family — my kids read it cover to cover and now they’re the ones reminding me to check the latches at night.

    Building a Layered Security System

    Here’s the thing — no single latch is a complete predator-proofing plan. Think of it in layers:

    Layer 1: The coop structure itself. Hardware cloth (not chicken wire — hardware cloth) on all openings, secure wood, no gaps larger than half an inch.

    Layer 2: Your latches. Double-action or spring latches on main doors, barrel bolts with carabiners on secondary access, padlocks where feasible.

    Layer 3: Your closing routine. This is honestly where most losses happen. We’ve made coop lockup a non-negotiable part of our evening, same as brushing teeth. Our automatic chicken coop door handles the pop door at dusk, which has been a total game-changer for our family — but we still do a manual check on all the other latches every single night.

    Layer 4: Pest and predator deterrents. We use Wondercide around the perimeter of the coop area — it helps with insects that attract foraging critters, and it’s non-toxic, which matters a lot to us. We also dust the coop with food grade diatomaceous earth regularly for mite prevention, and it’s safe for our birds and our kids who are in and out of that coop constantly.

    Making Coop Chores a Learning Moment

    One thing I love about our chickens is that they’ve become such a natural part of our homeschool. My kids check the latches, fill the chicken waterer, collect eggs, and observe the flock every single morning. It’s built-in responsibility, real-world problem solving, and honestly a little bit of that 1990s-style childhood I’m always chasing — where kids have real jobs that actually matter.

    Talking through why we latch the coop a certain way opens up conversations about predator behavior, animal instincts, food chains. It ties right into our nature study. If you’re interested in how we weave this kind of thing into our Charlotte Mason days, I’ve written more about it in our Charlotte Mason Nature Journal Ideas post — because yes, we have absolutely sketched the tracks we found in the mud around the coop into our nature journals.

    And if you’re still in the early stages of figuring out your whole backyard flock setup, check out our guide on raising meat chickens at home — lots of overlap in the coop security principles there too.

    Quick Reference: Latch Recommendations by Coop Area

    • Main coop door: Double-action spring latch (primary) + carabiner (backup)
    • Pop door (if manual): Heavy barrel bolt + carabiner
    • Nest box lids: Spring latch or barrel bolt + carabiner
    • Run door: Heavy barrel bolt + carabiner, or padlock for infrequently used doors
    • Any gap or weak point: Hardware cloth + zip ties + a prayer, honestly

    The Bottom Line

    If you take nothing else from this post, take this: the $15-20 you spend upgrading your coop latches is the cheapest insurance you’ll ever buy for your flock. Losing a hen to a preventable predator attack is heartbreaking — for you and your kids. We’ve cried real tears over birds in this family, and I’d do just about anything to keep that from happening again.

    Layer your security, use double-action latches as your baseline, add carabiners everywhere, and check those doors every single night. Your chickens are counting on you — and so are the kids who named every single one of them.


    📖 You Might Also Like:

    Frequently Asked Questions

    What is the best predator-proof latch for a chicken coop?

    The best option for most backyard chicken keepers is a double-action spring latch — one that requires a lift-and-slide motion simultaneously to open. This type of latch is too complex for raccoons to operate but simple enough for kids and adults to use quickly during daily chores. Pairing any latch with a locking carabiner as a secondary layer adds even more security.

    Can raccoons really open chicken coop latches?

    Yes, absolutely. Raccoons have dexterous front paws that allow them to manipulate simple latches like hook-and-eye closures, single-action slide bolts, and twist knobs. They’re persistent and will work at a latch repeatedly until they figure it out. This is why double-action latches and carabiner backups are so important — they require a two-step motion raccoons can’t replicate.

    Do I need a latch on my chicken coop if I have an automatic door?

    Yes. Automatic coop doors handle the pop door — the small opening your chickens use to go in and out — but your coop likely has other access points like nest box lids, run doors, and large access panels that need their own secure latches. An automatic door is a great tool but it doesn’t replace securing every entry point on the coop.

    What’s the cheapest way to predator-proof a chicken coop latch?

    The most affordable upgrade is adding locking carabiners to whatever latches you already have. A pack of locking carabiners costs just a few dollars and clips through or around existing hardware to make it much harder for predators to open. It’s not a permanent solution for every door, but it’s a meaningful improvement while you upgrade to better latches over time.

    How do I know if my coop has been visited by a predator at night?

    Common signs include bent or displaced latches, scratch marks around door frames, feathers near the coop entrance, disturbed bedding or droppings near the base of the coop walls, and missing or injured birds in the morning. In muddy or sandy soil — common here in Florida — you may also see tracks. Sketching those tracks into a nature journal is actually a wonderful learning activity for kids alongside coop security conversations.

  • Florida Unschooling Laws: What Families Actually Need to Know Before You Start

    Florida Unschooling Laws: What Families Actually Need to Know Before You Start

    Florida Unschooling Laws: What Families Actually Need to Know Before You Start

    🌿 The Short Version: Florida doesn’t have a specific “unschooling” law — unschoolers operate under the same homeschool statutes as everyone else, and there are a few simple legal paths to choose from. This post breaks down exactly what you need to do to stay legal, which option fits an unschooling lifestyle best, and what it actually looks like day-to-day for a real Florida family.

    This post contains affiliate links. I may earn a small commission at no extra cost to you.

    If you’ve been down the rabbit hole of natural learning, child-led education, or just the idea that kids can thrive outside a classroom — and you’re wondering whether that’s even legal in Florida — I want you to take a deep breath. You’re not breaking any rules just by thinking differently about education.

    When we first started leaning into a more Charlotte Mason, nature-based approach here in Pensacola, I had so many questions. And honestly, the legal side of homeschooling — especially for families who want to unschool or do something more relaxed — felt murky at first. So let me just lay it all out for you the way I wish someone had done for me.

    First Things First: There Is No “Unschooling Law” in Florida

    Florida doesn’t use the word “unschooling” anywhere in its statutes. What Florida does have is a solid homeschool law, and unschoolers simply fall under that umbrella. The state genuinely doesn’t care whether you’re doing unit studies, classical education, Charlotte Mason nature journals, or full-on unschooling where your kid spends three hours building a chicken brooder and calls it school (because honestly, it kind of is).

    What the state does care about is that you’ve followed the proper legal steps to establish your homeschool and that you’re keeping some basic documentation.

    The Three Legal Paths for Florida Homeschoolers

    In Florida, there are three main ways to homeschool legally. Each works for unschoolers — but they’re not all created equal depending on your lifestyle.

    1. Homeschool Statute (F.S. 1002.41)

    This is the most common path and the one most unschooling families choose. Here’s what it requires:

    • File a Letter of Intent with your local school district within 30 days of starting (or within 30 days of your child’s 6th birthday if you’re just beginning)
    • Keep a portfolio — this is a collection of work samples and a log of educational activities. It does NOT have to look like school. It can include nature journal pages, photos of projects, recipes your kid helped cook, books read aloud, you name it.
    • Have an annual portfolio evaluation — once a year, a certified Florida teacher reviews your portfolio and signs off that educational progress is being made. They don’t grade your child or compare them to grade-level standards. They just confirm that learning is happening.
    • File a notice of termination when you’re done (or if you re-enroll in school)

    That’s genuinely it. No standardized testing required. No curriculum approval. No one coming to your house.

    2. Umbrella School or Cover School

    Some families enroll under a private umbrella school, which essentially means the school handles the legal paperwork on your behalf. You pay a small annual fee, and the umbrella school keeps your records. This can simplify things, but it adds a layer of structure some unschoolers don’t want.

    3. Florida PEP Scholarship (Formerly FES-EO)

    If your family uses the Florida PEP scholarship — which we do — there are a few more hoops to jump through. PEP requires you to purchase approved educational expenses through the scholarship account, which means you do need to show some structure in terms of what you’re spending the funds on. Pure unschooling is trickier to fit into PEP because the spending categories are defined. That said, many intentional homeschool families use PEP alongside a flexible approach and just make sure their purchases align with approved categories (curriculum, books, educational materials, etc.).

    If you want a full breakdown of how PEP works alongside a natural learning approach, it’s worth reading up on the specifics before you apply.

    What Does the Portfolio Actually Need to Look Like?

    This is where a lot of unschooling families get nervous — and they don’t need to be.

    Florida law says your portfolio should include a “log of educational activities” and “samples of the child’s work.” That’s intentionally broad. I’ve talked to evaluators who have signed off on portfolios full of nature sketches, pressed flowers, read-aloud book lists, cooking photos, and handwritten narrations.

    For our family, we use a nature journal year-round as a core part of our Charlotte Mason approach — and those pages absolutely count as portfolio material. Labeled bird sketches, weather observations, plant studies — it’s science, art, and writing all in one. If you want ideas for how we do this specifically in Florida, I’ve got a whole post on Charlotte Mason Nature Journal Ideas for Kids (What We Actually Do Year-Round in Florida).

    Other things that work great in a portfolio for a nature-based or unschooling family:

    • Photos of hands-on projects (building, cooking, gardening, animal care)
    • Book lists (even picture books count for younger kids)
    • Maps drawn from memory
    • Watercolor paintings — we love these Faber-Castell watercolors for nature painting
    • Math done in real life (measuring for a recipe, counting eggs, making change)
    • Nature observations through a pocket microscope

    📌 Love this? Save it to Pinterest so you can find it later!

    Finding a Portfolio Evaluator in Florida

    You need a Florida-certified teacher to do your annual evaluation. The good news: they’re easy to find, and most are completely supportive of non-traditional homeschool approaches.

    You can find evaluators through:

    • Florida homeschool co-ops and Facebook groups (search your county + “portfolio evaluator”)
    • FPEA (Florida Parent Educators Association) — they keep a list
    • Word of mouth in your local homeschool community

    Many evaluators have seen every kind of portfolio imaginable and genuinely enjoy the creative, real-life ones. I’d encourage you to find one who has experience with Charlotte Mason or relaxed homeschoolers — it makes the whole process feel much more natural.

    What About Socialization and “Proof” of Learning?

    I’ll be honest — the socialization question is tired, but the underlying worry is real for some new unschooling families. Here’s what I’d tell you: kids who spend their days raising backyard chickens, working in the garden, doing nature study, building things, cooking alongside their parents, and playing freely outside with neighborhood kids are extremely socialized. They’re learning the actual skills of life.

    Our kids’ “social studies” looks like collecting eggs every morning, using a bug collection kit to study insects in the yard, and running around outside the way kids did in the ’90s — with dirt under their fingernails and a healthy respect for fire ants. That’s Florida childhood. That’s learning.

    If you’re also thinking about how to teach multiple kids at different levels in a relaxed way, I wrote about that in How to Homeschool Multiple Ages at Once (Tips That Actually Work for Real Families) — it’s very relevant for unschooling families trying to navigate the natural age-gap chaos.

    A Few Practical Tips Before You Start

    • Start your portfolio from day one. Take photos. Keep a simple log on your phone. It’s so much easier than trying to reconstruct it in April.
    • Join a local co-op or Facebook group. Northwest Florida has a really active homeschool community, and connecting with other families is invaluable.
    • Don’t over-explain yourself. You don’t owe anyone a curriculum list or a justification of your philosophy. You just need to meet the legal requirements.
    • Use real life as your classroom. Florida gives us so much to work with — birds, bugs, tidal pools, native plants, the bay, the forest. All of it is school.

    For more on what we actually use day-to-day in our home — curriculum, art supplies, outdoor tools — check out our Florida Homeschool Art Curriculum Charlotte Mason Style post. It’ll give you a real picture of how a nature-based approach looks in practice.

    You’ve Got This, Mama

    Florida is actually one of the more homeschool-friendly states in the country, and the laws give families real flexibility. Whether you’re doing full unschooling, relaxed homeschooling, Charlotte Mason, or some mix that doesn’t have a name — you can do it here legally and confidently.

    The legal stuff feels big until you understand it, and then it’s really just: file a letter, keep a portfolio, get it evaluated once a year. That’s it. The rest is just living and learning together, which is the whole point anyway.

    If you’re just getting started or still figuring out what approach fits your family, take your time. Look outside. Watch what your kids are naturally drawn to. There’s a lot of wisdom in that.


    📖 You Might Also Like:

    Frequently Asked Questions

    Is unschooling legal in Florida?

    Yes, unschooling is legal in Florida. There is no specific “unschooling” statute, but unschoolers operate under Florida’s homeschool law (F.S. 1002.41). Families must file a letter of intent with their local school district, maintain a portfolio of educational activities, and have the portfolio evaluated annually by a Florida-certified teacher.

    Does Florida require standardized testing for homeschoolers or unschoolers?

    No. Under the Florida homeschool statute, families are not required to administer standardized tests. The annual evaluation is a portfolio review by a certified teacher — not a test. The evaluator simply confirms that educational progress is being made.

    What needs to be in a Florida homeschool portfolio for an unschooling family?

    Florida law requires a log of educational activities and samples of the child’s work. For unschooling families, this can include photos of hands-on projects, nature journal entries, book lists, cooking or gardening documentation, art, and any other evidence of learning. It does not need to look like a traditional school portfolio.

    Can you use the Florida PEP scholarship if you unschool?

    It depends on your approach. The PEP scholarship requires that funds be spent on approved educational expenses from an approved vendor list. Pure unschooling can be harder to fit into PEP’s structure, but many relaxed or interest-led homeschoolers do use PEP by purchasing books, educational materials, and curriculum resources that align with their child’s interests and the scholarship’s approved categories.

    How do I find a portfolio evaluator in Florida?

    You can find Florida-certified portfolio evaluators through local homeschool co-ops, Facebook groups (search your county name plus ‘portfolio evaluator’), or the FPEA (Florida Parent Educators Association) directory. Look for evaluators who have experience with Charlotte Mason, relaxed, or non-traditional homeschoolers — they’ll be the most comfortable with creative, real-life portfolios.

  • How to Homeschool Multiple Ages at Once (Tips That Actually Work for Real Families)

    How to Homeschool Multiple Ages at Once (Tips That Actually Work for Real Families)

    How to Homeschool Multiple Ages at Once (Tips That Actually Work for Real Families)

    🌿 The Short Version: Homeschooling multiple ages at once is totally doable — you just need the right mindset, a loose rhythm, and a few strategies that let kids learn together as much as possible. This post walks you through exactly how our Charlotte Mason family makes it work, day in and day out.

    This post contains affiliate links. I may earn a small commission at no extra cost to you.

    Some mornings everything clicks. The older two are working independently, the youngest is coloring at the table, somebody fed the chickens without being asked, and I actually have a hot cup of coffee in my hand. And then there are the other mornings — everyone needs me at once, the dog is losing his mind over a squirrel, and I’m pretty sure no actual learning is happening.

    If you’re homeschooling more than one kid at the same time, you know exactly what I mean. You also probably know that it can work beautifully — because you’ve seen those glimpses. The trick is building a rhythm that makes the good mornings more common than the chaotic ones.

    Here’s what’s actually working for our family right now, teaching kids across elementary grades in Northwest Florida with a Charlotte Mason approach.


    Start With a Rhythm, Not a Schedule

    I used to try to map out every subject for every child in thirty-minute blocks. That lasted about a week. What actually works is a rhythm — a predictable order to our day that everyone knows without me announcing it every five minutes.

    Our mornings look something like: outside time first (chickens, garden, free play), then breakfast, then our group morning time, then independent or one-on-one work, then lunch and a long outdoor break. The times shift with the season — and in Florida, that matters a lot. In July, we’re outside by 7:30 before the heat hits. In January, we might linger a little longer.

    When kids know what comes next, they don’t need to constantly check in with you. That breathing room is everything when you’re managing multiple grades.


    Lean Hard Into Group Learning

    This is the single biggest time-saver in a multi-age homeschool: teach as much as you possibly can together.

    Charlotte Mason’s approach is perfect for this because so much of it — read-alouds, nature study, picture study, folk songs, poetry, history — works across ages without any adaptation needed. A six-year-old and a ten-year-old can both sit and listen to a great chapter book. They both go outside and sketch what they see in their nature journals. They both notice the osprey flying over the pond and want to flip through the Sibley Birds guide to figure out what it was.

    The older kids narrate with more detail. The younger ones draw pictures and tell you one thing they remember. Same lesson, naturally differentiated. No extra prep on your end.

    For nature journaling specifically, I go deep on how we do this year-round in Florida in this post: Charlotte Mason Nature Journal Ideas for Kids (What We Actually Do Year-Round in Florida). It’s one of our most used tools across every age.


    Anchor the Littles Before Working With Olders

    Here’s the thing nobody tells you: the key to teaching your older kids isn’t having a perfect plan for them — it’s having a plan for your youngest.

    When my littlest has something meaningful to do, I can actually sit down with the older kids. So we keep a rotation of “little kid anchors” — activities that are engaging enough to hold their attention without me hovering. Some of our favorites:

    • Beeswax modeling
    • Watercolor painting with Faber-Castell watercolors (these are genuinely good quality and last forever)
    • Listening to an audiobook
    • Bug hunting in the backyard with their bug collection kit
    • Playing with the chickens (supervised, obviously, but our backyard flock keeps little ones busy for a surprising amount of time)

    Once the little one is settled, I do focused one-on-one lessons with whoever needs me most — usually reading or math, since those are the subjects that really do need direct instruction at every level.


    Use Curriculum That Does the Heavy Lifting

    You don’t have to reinvent the wheel for every subject. For the skills-based stuff — reading, handwriting, math — we use programs that are structured enough that kids can work somewhat independently once they’ve got the hang of it.

    All About Reading has been a game-changer for us with early readers. It’s scripted enough that I’m not guessing what to say, and the lessons are short — which matters when you’ve got multiple kids waiting on you.

    For math, Math-U-See is mastery-based, which means kids really own a concept before moving on. The manipulatives also make it something kids can work with independently while I’m with another child.

    And for handwriting, Handwriting Without Tears is simple, works across ages, and the workbooks are genuinely self-guided once you’ve introduced the concepts.

    If you’re looking for more curriculum ideas that work well for multiple ages, I’ve put together a full breakdown over here: Best Unit Study Curriculum for Homeschool Families in 2026 (What’s Actually Worth Your Time and Money).

    📌 Love this? Save it to Pinterest so you can find it later!


    Let the Older Kids Teach the Younger Ones

    This one feels almost too simple, but it works. When an older child teaches a concept to a younger sibling, they cement their own understanding in a way that no worksheet can touch.

    We call it “teaching down” in our house, and the older kids genuinely love it. My oldest has explained how caterpillars form chrysalises, walked a younger sibling through a simple addition problem, and read aloud to the littles more times than I can count. That’s real learning — and it’s also the kind of older-sibling responsibility that kids in the 1990s just had naturally, because there wasn’t a screen to hand them instead.


    Build In Long Outdoor Breaks (Non-Negotiable)

    I know this sounds counterintuitive when you’re already trying to fit in multiple kids’ worth of lessons — but outdoor time isn’t the thing you cut when the day gets busy. It’s the thing that makes the rest of the day possible.

    Kids who have had real outdoor time — not fifteen minutes on the back porch, but a solid stretch of digging, running, building, pretending — come back inside more focused, more cooperative, and genuinely more ready to learn. Every time.

    Down here in Northwest Florida, we have access to incredible outdoor spaces almost year-round. State parks, nature trails, the bay, our own backyard. The pocket microscope lives in our bag now because we never know when someone’s going to find something worth looking at more closely. That spontaneous curiosity? That’s the whole point.


    Give Yourself Grace on the Hard Days

    Some days the best lesson is everyone helping with chores, doing a read-aloud on the couch, and calling it done. That is still homeschooling. It’s still connection, it’s still learning, and it’s still a thousand times more intentional than checking boxes on a worksheet.

    If you’re homeschooling in Florida on the PEP scholarship, you know you’ve got documentation requirements to think about. But I want to remind you: nature walks count. Cooking together counts. Talking through a problem with your kid counts. Don’t let the fear of not doing enough make you miss the good stuff right in front of you.

    For more on how to make your Charlotte Mason homeschool work beautifully across subjects and ages, go check out Florida Homeschool Art Curriculum Charlotte Mason Style (What We Actually Do and Why It Works) — it’s one of the pieces of our day I’m most proud of.


    Multi-age homeschooling is genuinely one of the best gifts you can give your kids — they learn from each other, they move at their own pace, and they grow up knowing that learning isn’t something that stops when a bell rings. It’s just life. It happens in the garden and at the chicken coop and on a walk and around the table. You’re already doing more than you think. Keep going.


    📖 You Might Also Like:

    Frequently Asked Questions

    How do you homeschool multiple ages without losing your mind?

    The biggest key is building a daily rhythm everyone knows, leaning into group subjects as much as possible, and having a solid plan for your youngest before you try to teach your older kids. When your littlest has something meaningful to do, you can actually focus on the others. It takes a few weeks to find your groove, but it does click.

    What subjects can you teach to multiple ages at the same time?

    More than you’d think! Read-alouds, history, science, nature study, picture study, poetry, folk songs, and art all work beautifully across multiple ages without any extra prep. Charlotte Mason’s approach is especially well-suited to multi-age teaching because so much of it is living-book and discussion based rather than grade-level worksheets.

    What curriculum works best for homeschooling multiple grades?

    Unit study curricula and literature-based programs tend to work best because they’re naturally multi-level. For skills-based subjects like reading, math, and handwriting, look for mastery-based programs with short lessons that kids can eventually work through semi-independently. All About Reading, Math-U-See, and Handwriting Without Tears are all great options for elementary ages.

    How do you manage one-on-one time when you have several kids to teach?

    Prioritize one-on-one time for the subjects that truly need direct instruction — early reading and new math concepts especially. Do group subjects all together, and use independent anchors (audiobooks, art projects, outdoor free play) to keep younger kids busy while you’re working with olders. You don’t need equal time with every child every day — you need the right time with the right child at the right moment.

    Is it okay if my homeschool day looks different from other families’?

    Absolutely, yes. Every family’s homeschool looks different, and that’s one of the best things about it. What matters is that your kids are learning, growing, and thriving — not that your schedule matches someone else’s Instagram grid. Give yourself grace, especially in the early months, and focus on building a rhythm that actually fits your family’s life and temperament.