Blog

  • Best Egg Laying Chickens for Florida Heat (What Actually Thrives in Our Southern Backyard)

    Best Egg Laying Chickens for Florida Heat (What Actually Thrives in Our Southern Backyard)

    Best Egg Laying Chickens for Florida Heat (What Actually Thrives in Our Southern Backyard)

    🌿 The Short Version: Not all chickens handle Florida summers equally — some breeds slow way down or get dangerously stressed when the heat index hits 105°F. In this post I’m sharing the breeds that have actually kept laying and thriving in our Northwest Florida backyard, plus what to look for so your flock stays healthy through the long Southern summer.

    This post contains affiliate links. I may earn a small commission at no extra cost to you.

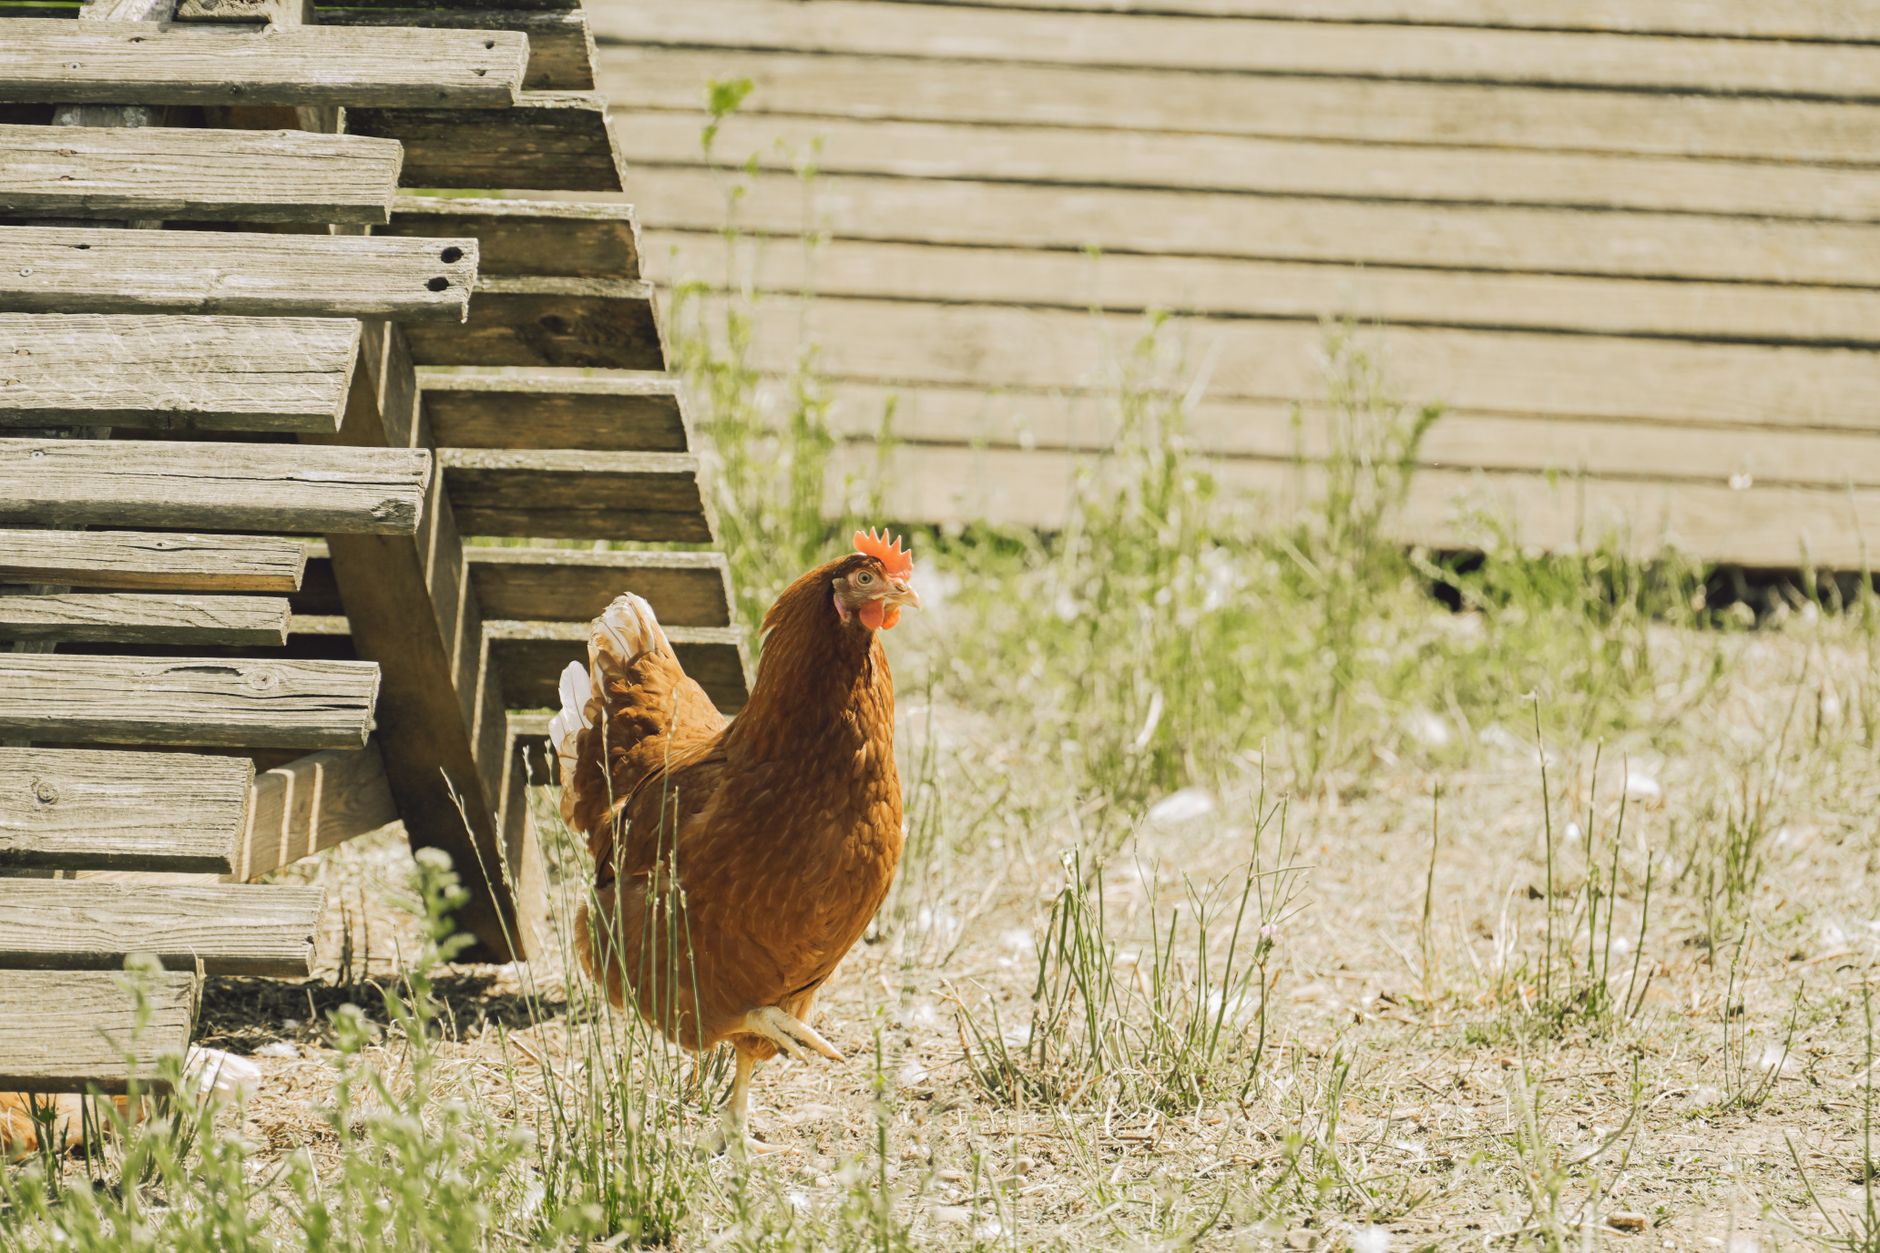
    If you’ve ever stood at your nesting boxes in late July, sweating through your shirt at 8 in the morning, and found exactly two eggs from a flock of six birds — you already know that Florida chicken keeping is its own thing entirely.

    We live just outside Pensacola, and our summers are long, humid, and relentless. By June the heat index is regularly over 100°F, and it stays that way until October. When we first started our backyard flock, I made the rookie mistake of choosing breeds based on what looked cute at the feed store without thinking hard about heat tolerance. We ended up with some very unhappy, barely-laying hens for our first two summers until I finally did the homework.

    Now our little flock actually lays consistently through the summer — not at winter rates, obviously, but enough to keep our family in eggs and even share a dozen or two with neighbors. Here’s what I wish someone had told me from the start.

    Why Heat Tolerance Matters So Much in Florida

    Chickens don’t sweat. They regulate their temperature by panting and holding their wings away from their bodies, and when the heat overwhelms that system, egg production is the first thing to go. In severe heat stress, you can lose birds — and in a Florida summer, that risk is very real if you’ve got the wrong breed.

    Heavy, fluffy, cold-hardy breeds that look gorgeous in a Vermont homestead blog? They often really struggle here. We’re talking Buff Orpingtons, Brahmas, heavy-feathered Cochins. Beautiful birds. Not ideal for Pensacola summers.

    What you want are breeds with:

    • Lighter body weight and lean build
    • Single combs or smaller combs (large single combs actually help with heat dissipation — more on that in a sec)
    • Mediterranean or tropical ancestry
    • A reputation for foraging — active foragers tend to be hardier overall

    If you’re just getting started with your backyard flock setup, our post on Best Chicken Tractor Plans for Small Yards (What Actually Works for a Backyard Flock) is a great companion read — good airflow in housing matters just as much as breed selection down here.

    Our Favorite Egg Laying Breeds for Florida Heat

    1. Leghorns

    Leghorns are the gold standard for a reason. These birds were built for warm Mediterranean climates, they’re lean, they’re active, and they lay white eggs like it’s their full-time job — because it basically is. A healthy Leghorn hen can give you 280–320 eggs per year, and she doesn’t slow down nearly as much in the heat as heavier breeds do.

    They’re not the cuddliest birds, which is worth knowing if your kids want lap chickens. But if eggs are the goal, nothing beats a Leghorn in a Florida summer. Ours have been our most reliable layers by a wide margin.

    2. Easter Eggers

    Okay, these are my personal favorites and my kids absolutely love them. Easter Eggers are mixed-breed chickens that carry the blue egg gene, so you get a beautiful rainbow of blue, green, and sometimes pinkish eggs in your nesting boxes. My kids treat egg collection like a treasure hunt every single morning.

    Easter Eggers tend to be mid-sized, active, and heat-tolerant. They’re not quite as prolific as Leghorns, but they’re steady layers and they have easygoing personalities. Ours are friendly with the kids and curious about everything — very much in keeping with our nature-study approach around here. My youngest has been sketching our Easter Egger, Marigold, in her nature journal all spring.

    3. Black Sex-Links (or Red Sex-Links)

    Sex-link chickens are hybrids bred specifically for high egg production, and they handle Florida heat surprisingly well given how productive they are. Black Sex-Links are calm, friendly, and consistent — they tend to lay 250–280 large brown eggs per year and don’t fuss much in the heat as long as they have shade and water.

    These are a great choice if you want a low-drama, reliable backyard flock. My neighbor has a small mixed flock anchored by Sex-Links and she almost never has a complaint.

    4. Australorps

    I want to be upfront: Australorps are a slightly heavier bird than the others on this list, and they do feel the heat more than Leghorns. But I’m including them because they’re exceptionally productive — the world record for egg laying is held by an Australorp — and with good management (deep shade, cool water, proper ventilation), they do well enough here that I’d still recommend them.

    They’re also one of the gentlest breeds you’ll find, which matters when you’ve got elementary-age kids helping with flock care. For that reason alone, they earn a spot on this list.

    5. Dominiques

    The Dominique is America’s oldest chicken breed, and it was developed to be a rugged, self-sufficient farmyard bird. They have a rose comb (which sits flat against the head and is actually excellent in heat because there’s less surface area to get frostbitten — but also less heat stress than a very large floppy single comb). They forage well, they’re calm, and they lay a steady supply of medium brown eggs.

    We don’t currently have Dominiques but I’ve seen them do really well in other Florida flocks. They’re on my list for our next flock expansion.

    📌 Love this? Save it to Pinterest so you can find it later!

    What We Do to Keep Our Florida Flock Laying Through Summer

    Breed selection is step one, but management matters just as much. Here’s what actually makes a difference in our yard:

    Shade, shade, shade. Our chickens have access to deep shade under our oak trees all afternoon. If you’re using a chicken tractor, move it into a shaded spot by late morning. Check out our guide on How to Build a Simple Chicken Tractor for Your Backyard Flock (Without Overcomplicating It) for how we set ours up for good airflow.

    Fresh, cool water constantly. We switched to a nipple waterer a couple years ago and it keeps the water cleaner and cooler much longer than open bowls. In peak summer I also toss in a few ice cubes in the afternoon.

    Diatomaceous earth in the coop. Food-grade diatomaceous earth helps keep the coop dry and controls mites and pests naturally — which is especially important in our humid Florida summers when moisture and bugs are relentless.

    An automatic coop door. This sounds like a luxury but honestly it’s one of the best things we’ve done. Our automatic coop door opens at dawn so the birds can get out into the cooler morning air early, and closes at dusk without me having to remember. Less heat buildup in the coop overnight means calmer, better-rested hens.

    Treat them to frozen watermelon. This is the most 1990s-summer thing I can think of — my kids and our chickens both get watermelon on a hot July afternoon. The hens go absolutely wild for it and it helps with hydration.

    Turning This Into a Learning Experience

    One thing I love about backyard chickens is how naturally they fold into our Charlotte Mason homeschool days. My kids have been keeping chicken observation notes for two years now — tracking which hens lay on which days, drawing the different egg colors, and noting behavior changes in the heat. It’s living science in the most hands-on way possible.

    If you want to go deeper on the educational side of chicken keeping, Storey’s Guide to Raising Chickens is the reference book I reach for, and Chick Days is written specifically for kids and is wonderful for younger readers who want to understand their flock.

    For bird identification beyond the backyard — because once kids start watching chickens, they start watching all the birds — the Sibley Birds guide lives on our morning basket shelf and gets pulled out constantly.

    A Few Breeds to Avoid in Florida Heat

    Just to save you some heartache: Buff Orpingtons, Cochins, Jersey Giants, and Silkies all struggle significantly in Florida summers. They’re lovely birds and I don’t want to talk you out of them entirely — but go in with eyes open, have excellent ventilation and shade in place, and watch them closely in July and August.

    The Bottom Line

    If you’re starting or expanding a backyard flock here in the Florida Panhandle — or really anywhere in the deep South — lean toward Leghorns, Easter Eggers, and Sex-Links as your foundation birds. Add an Australorp or two if you want that docile temperament and don’t mind being diligent about summer management. Skip the fluffy cold-hardy breeds unless you’re prepared to work extra hard to keep them comfortable.

    Chickens have been one of the best things we’ve ever added to our family’s life. The eggs are amazing, yes — but it’s really the daily rhythm of caring for them, the way my kids have learned responsibility and observation, and the way our backyard has come alive with something real and living that I love most. That’s worth getting the breed selection right from the beginning.

    Got questions about your flock or want to share which breeds have worked for you in the Florida heat? Drop it in the comments — I read every single one.


    📖 You Might Also Like:

    Frequently Asked Questions

    What is the best egg laying chicken for hot climates like Florida?

    Leghorns are widely considered the best egg layers for hot climates because of their Mediterranean heritage, lean build, and large single comb that helps with heat dissipation. Easter Eggers and Black Sex-Links are also excellent choices for Florida backyards — they’re productive, heat-tolerant, and tend to have calm temperaments that work well with families.

    Do chickens stop laying eggs in Florida summer heat?

    Heat stress can significantly reduce egg production in chickens, especially in breeds that aren’t well-suited to high temperatures. In Florida summers, you’ll likely see some drop in laying even from heat-tolerant breeds, but with good shade, constant access to cool fresh water, and proper coop ventilation, heat-hardy breeds like Leghorns and Easter Eggers tend to keep laying fairly consistently even through July and August.

    Are Buff Orpingtons good chickens for Florida?

    Buff Orpingtons are beautiful, docile birds, but they’re a heavy, densely-feathered cold-hardy breed that genuinely struggles in Florida’s summer heat and humidity. They can be kept in Florida with extra management — excellent shade, cool water, good ventilation — but they’re not the easiest choice for beginners in the deep South. If you love their gentle temperament, consider Australorps as an alternative that handles heat somewhat better.

    How many eggs can I expect from a backyard flock in Florida?

    It depends on the breed, age of your hens, and time of year. A small flock of 4–6 heat-tolerant hens like Leghorns or Easter Eggers can realistically provide 20–30 eggs per week in cooler months, dropping to maybe 12–20 per week during peak summer heat. Egg production also slows during molting season in fall, regardless of heat.

    What do I need to know about keeping chickens in Florida’s humidity?

    Humidity is actually one of the bigger challenges in Florida chicken keeping — it can make heat stress worse, encourages mold and bacteria in the coop, and creates ideal conditions for mites and other pests. Good coop ventilation is essential (not just a window — real cross-airflow), keeping bedding dry matters a lot, and using food-grade diatomaceous earth in the coop helps manage moisture and pests naturally. An automatic coop door can also help by letting birds out early in the cooler morning hours.

  • Best Chicken Tractor Plans for Small Yards (What Actually Works for a Backyard Flock)

    Best Chicken Tractor Plans for Small Yards (What Actually Works for a Backyard Flock)

    Best Chicken Tractor Plans for Small Yards (What Actually Works for a Backyard Flock)

    🌿 The Short Version: A chicken tractor is one of the smartest setups for a small-yard flock — it keeps your birds safe, moves them to fresh grass, and doesn’t take over your whole backyard. This post walks you through the best plans and configurations that actually work for families with limited space.

    This post contains affiliate links. I may earn a small commission at no extra cost to you.

    If you’ve got a small yard and a big dream of keeping chickens, I want you to know — it’s absolutely doable. We’re in Pensacola with a modest suburban backyard, a handful of hens, a labradoodle who thinks she’s in charge of everyone, and we have made it work. The secret weapon? A good chicken tractor.

    Not a complicated one. Not a Pinterest-perfect one that takes six weekends and a contractor. Just a solid, moveable, functional coop-on-wheels that keeps our girls safe, gives them fresh forage, and doesn’t turn our lawn into a dust bowl.

    If you’re trying to figure out the best chicken tractor plans for a small yard, I’ve got you. Let’s talk about what actually matters.

    What Is a Chicken Tractor (and Why Small Yards Love Them)

    A chicken tractor is basically a bottomless moveable coop. It sits directly on the ground, your chickens scratch and forage the grass underneath, and then you move it every day or every few days to fresh ground. No permanent run needed. No muddy, bare patch of earth where nothing ever grows again.

    For small yards, this is a game changer. Instead of fencing off a permanent section of your lawn and watching it become a wasteland, your flock slowly works their way across the yard like a very enthusiastic lawn crew. They eat bugs, scratch up weeds, fertilize as they go, and move on. Your grass recovers. Everybody wins.

    We actually wrote a whole post on building one: How to Build a Simple Chicken Tractor for Your Backyard Flock (Without Overcomplicating It) — if you want the step-by-step build guide, start there. But today I want to talk through the best plan styles for small spaces, so you can figure out which design actually fits your yard and your flock.

    The Main Chicken Tractor Styles (and Who Each One Is For)

    1. The A-Frame Tractor

    This is the classic. Two triangular end panels, a sloped roof that doubles as the enclosed sleeping area, and an open wire run underneath. It’s lightweight, easy to drag across the yard, and pretty simple to build if you’re even mildly handy.

    Best for: 2–4 hens, yards with some slope or uneven ground, families who want something that looks charming.

    What to watch for in Florida: The enclosed A-frame loft can get HOT down here in summer. You’ll want to make sure there’s ventilation at both ends and consider adding a small solar automatic coop door so birds can get into cooler air in the evening without you having to be home at dusk every single night.

    2. The Hoop Tractor

    This one uses PVC pipe bent into arches over a rectangular frame, covered with hardware cloth or chicken wire. It looks like a little tunnel greenhouse for chickens. Super lightweight, relatively cheap to build, and very easy to move.

    Best for: Families who want something quick and inexpensive. Great starter tractor. We used a version of this when we first got our flock.

    What to watch for: Hoop tractors don’t always have a fully enclosed sleeping area, so you may want to add a small plywood box on one end for roosting. Also, the lighter weight that makes them easy to move can be a problem in Florida storm season — you’ll want to stake it down when bad weather rolls in.

    3. The Rectangular Ark Tractor

    This is a more polished design — a rectangular enclosed coop box on top with a longer open run stretching out below, all on the same frame. It looks more like a traditional coop, moves in one piece, and usually has a bit more headroom.

    Best for: 4–6 hens, families who want something sturdy and weather-resistant. Good for folks who want it to look tidy in the yard.

    What to watch for: These are heavier and harder to move by yourself. Adding wheels or handles to the back end makes a huge difference. Don’t skip that step.

    4. The Salatin-Style Pasture Pen

    Inspired by Joel Salatin’s pastured poultry model — a large, low, skid-style pen moved daily with a dolly or rope. Usually around 10×12 feet and houses a good-sized flock.

    Best for: Bigger yards or families raising meat birds. It’s big, it’s simple, and it moves efficiently.

    What to watch for: For a truly small yard, this might be too much real estate. It’s better suited to a quarter acre or more where you have room to move it regularly without running out of space.

    📌 Love this? Save it to Pinterest so you can find it later!

    What to Prioritize in a Small-Yard Chicken Tractor Plan

    Here’s what I’d tell any friend who asked me. Don’t just grab the prettiest plan you find. Make sure your design checks these boxes:

    Predator protection. This is non-negotiable in Florida. We have raccoons, opossums, foxes, and hawks that will absolutely figure out a weak point. Use hardware cloth (not basic chicken wire — it’s not strong enough) and make sure every opening latches securely. Check out our post on Best Chicken Coop Predator-Proof Latches for what we actually use.

    Ventilation for heat. Summer in northwest Florida is brutal. A tractor that bakes your birds is worse than no tractor. Prioritize airflow in your design.

    Ease of moving. If it’s too heavy or awkward to move, you won’t move it. And if you don’t move it, the ground underneath becomes a muddy, parasite-ridden mess. Add wheels. Add handles. Make it easy.

    Ease of access. You need to be able to reach eggs, refill a chicken waterer, and check on your birds without climbing inside. A full-length door or a cleanout hatch makes daily care so much less of a chore.

    Size per bird. The general rule is 4 square feet of run space per bird minimum in a tractor. More is always better. Crowded chickens are stressed chickens, and stressed chickens stop laying.

    A Few Extra Things That Make Tractor Life Easier

    Once your tractor is built, these are the things that have made our daily chicken routine genuinely manageable:

    Speaking of kids — the chicken tractor has become one of our best unintentional homeschool tools. Moving it across the yard each morning is a real job with real responsibility. My kids have learned more about soil health, insect biology, and animal behavior by watching what happens under that tractor than from any worksheet I could hand them. We pull out the pocket microscope and look at what the chickens were scratching up. We sketch it in their nature journals. That’s Charlotte Mason in real life, y’all.

    How Many Chickens Can a Small-Yard Tractor Support?

    For most suburban lots, I’d aim for 3–5 hens max in a tractor setup. That’s enough for a steady egg supply for a family, manageable forage impact on your lawn, and a tractor you can actually move without throwing your back out.

    If you want more birds down the road, you might want a permanent coop with a large run and use the tractor for supervised free ranging — kind of the best of both worlds.

    The Bottom Line

    There’s no single “best” chicken tractor plan — it really depends on your yard size, your flock size, your budget, and how handy you are with a drill. But the A-frame and the rectangular ark are the two designs I’d point most small-yard families toward. They’re proven, they’re sturdy, and they’re built well enough to actually protect your birds through a Florida thunderstorm.

    Start simple. Build something you can actually finish. And then watch what happens when your kids have a small flock of hens to care for every single morning. There’s something about that kind of quiet, real-world responsibility that the 1990s-style childhood I’m trying to give my kids absolutely thrives on.

    You’ve got this. Your backyard is bigger than you think.


    📖 You Might Also Like:

    Frequently Asked Questions

    How big should a chicken tractor be for a small yard?

    For a small yard, aim for a tractor that provides at least 4 square feet of run space per bird. For 3–4 hens, a tractor around 4×8 feet is manageable to move and won’t overwhelm a smaller lawn. Going a little bigger is always better if you have room.

    How often do you move a chicken tractor?

    Most families move their chicken tractor every 1–3 days, depending on flock size and how fast the birds work through the grass. In hot Florida summers, you may want to move it daily to keep the ground from getting saturated and to give birds access to fresh, shaded forage.

    Can a chicken tractor work in a Florida backyard?

    Yes, but you’ll want to prioritize ventilation in your design since Florida summers are intense. Choose a plan with open wire sides and a well-ventilated roosting area. Avoid fully enclosed designs without good airflow, and consider adding an automatic coop door to help birds regulate their own temperature at dusk.

    What’s the difference between a chicken tractor and a regular coop?

    A regular coop is a permanent structure with a fixed run. A chicken tractor is a moveable, bottomless pen that you drag to fresh ground regularly. Chicken tractors are great for small yards because they let birds forage naturally without permanently destroying one section of lawn.

    How do I predator-proof a chicken tractor?

    Use hardware cloth instead of regular chicken wire — hardware cloth is much harder for predators to tear through. Make sure all latches are raccoon-proof (they’re surprisingly clever), check that the bottom edges sit flush with the ground, and stake it down at night if needed. In Florida especially, don’t underestimate raccoons, foxes, or even hawks.

  • Non-Toxic Kids Sunscreen Stick Honest Review (What We Actually Use in the Florida Sun)

    Non-Toxic Kids Sunscreen Stick Honest Review (What We Actually Use in the Florida Sun)

    Non-Toxic Kids Sunscreen Stick Honest Review (What We Actually Use in the Florida Sun)

    🌿 The Short Version: Not all “natural” sunscreen sticks are created equal — some leave a white cast the size of a ghost costume, others don’t actually protect. This post breaks down what ingredients to avoid, what to look for, and which non-toxic sunscreen sticks our family genuinely reaches for before we head outside in the Northwest Florida heat.

    This post contains affiliate links. I may earn a small commission at no extra cost to you.

    If you’ve spent any time in a Pensacola summer — or really anywhere along the Florida Panhandle — you already know the sun here is not playing around. By 9am it feels like the surface of the sun, and my kids are outside constantly. Feeding the chickens, digging in the garden, chasing the labradoodle around the yard, hunting for bugs. That’s just Tuesday.

    So yeah, sunscreen is not optional in our house. But when I started actually reading the ingredients on the bottles we’d been slathering on our kids without a second thought? I had a full-on label-reading spiral. Oxybenzone. Avobenzone. Homosalate. These are endocrine-disrupting chemicals that absorb into the bloodstream — and the EWG has flagged most of them for years. Once you know, you can’t un-know.

    But here’s the thing: switching to “clean” sunscreen can feel like a minefield of white-cast sticks, greasy formulas, and products that smell like a health food store in 1987. I’ve tried a lot of them so you don’t have to. Here’s my honest take.


    Why Sunscreen Sticks Specifically?

    For wriggly, busy kids — especially the elementary-aged ones who do NOT stand still — sticks are a game changer. There’s less mess, less waste, and I can actually get it on a moving target. No lotion drips, no fighting over whether their face is covered. I swipe it on and they bolt back outside.

    Sticks also travel better in our nature study bag alongside our nature journal and pocket microscope. When we’re out doing a bird walk with the Sibley Birds guide and I need to reapply mid-trail, a stick is just easier. It’s practical, and I’m all about practical.


    What to Actually Avoid (The Short List)

    You don’t need a chemistry degree, but here are the biggies to skip:

    • Oxybenzone — hormone disruptor, absorbs into bloodstream, also harmful to coral reefs
    • Octinoxate — similar issues, banned in some areas for reef damage
    • Homosalate — disrupts hormone function, found in many “sport” formulas
    • Fragrance/parfum — catch-all term that can hide hundreds of chemicals
    • Retinyl palmitate — a form of vitamin A that may speed up skin damage in the sun (yes, really)

    The safe actives we want to see? Non-nano zinc oxide and/or titanium dioxide. These are mineral-based, sit on top of the skin rather than absorbing into it, and have a long safety record. Non-nano means the particles are large enough that they won’t penetrate the skin — that detail matters.

    I’ve got a lot more on this topic in my post on Non-Toxic Sunscreen for Babies Under 6 Months if you want the deeper dive.


    What I Look for in a Non-Toxic Sunscreen Stick

    Beyond clean ingredients, here’s my practical checklist:

    • SPF 30-50 — 30 is genuinely sufficient with proper reapplication, but in Florida I usually grab 50 for outdoor days
    • Water resistant — because sweat and splash are a given
    • No white ghost cast — this is the big one. Some zinc sticks leave your kids looking like they face-painted for Halloween.
    • Doesn’t pill under clothing — nothing worse than sunscreen balling up on a shirt
    • Smells neutral or pleasant — artificial fragrance is out, but a light beeswax or coconut smell? We can work with that.
    • Easy to apply on a squirmy kid — the stick form has to actually glide, not drag

    Our Honest Reviews: The Non-Toxic Sunscreen Sticks We’ve Actually Tried

    The Ones We Keep Buying

    Non-toxic kids sunscreen sticks — I know this sounds vague, but this link is a solid starting point to search what’s current and well-reviewed. The market changes, formulas get updated, and Amazon’s search will show you what’s trending in the clean space right now. I always sort by rating and then go read the 3-star reviews first — those tell you the truth.

    What we’ve personally loved:

    • Badger Kids Sunscreen Stick — This is probably our most-reached-for. SPF 40, certified natural, smells faintly of chamomile. My daughter actually likes putting it on herself. Minor white cast but nothing dramatic — it absorbs reasonably well if you rub it in.
    • Think Baby / Think Sport Stick — Great for active outdoor days. Goes on smooth, no weird smell, water resistant. Works really well for faces.
    • Kokua Sun Care Zinc Sunscreen Stick — A little pricier but the texture is genuinely nice. No white cast at all. This one I use on my own face.

    What Didn’t Work for Us

    I won’t call out brand names in the “avoid” category, but here’s what steered me away from certain products:

    • Sticks that left a thick, visible white film that my son refused to wear to his co-op because “it looks like chalk”
    • Sticks with “natural fragrance” listed — that phrase is still not fully regulated and can hide synthetic ingredients
    • One brand that technically had clean ingredients but smelled so strongly of essential oils that it gave me a headache within ten minutes

    📌 Love this? Save it to Pinterest so you can find it later!


    Real Life: How We Actually Use Sunscreen in Our Daily Routine

    Our mornings in the warmer months — which is basically ten out of twelve months here in the Panhandle — start with sunscreen as part of getting dressed. It’s just a step, like shoes. We keep the stick on the kitchen counter, not buried in a cabinet somewhere, because visible equals actually used.

    We do a “swipe and rub” on faces, ears, and the back of the neck before anyone goes outside to do morning chicken chores. Then we reapply midday if we’re heading out for nature walk time or yard time. The stick makes reapplication a 30-second thing instead of a whole production.

    And because we’re outside with minimal clothing half the year, I do pair the sunscreen with lightweight UPF clothing and hats on really intense days. Sunscreen is great but it’s not the only tool.

    If you want to see how we think about outdoor toxin exposure more broadly, I wrote a whole room-by-room breakdown in How to Detox Your Home from Toxins Room by Room. Sunscreen fits right into that bigger picture of reducing our daily toxic load.


    A Quick Note on the 1990s Kid vs. Today

    I grew up in the generation where sunscreen was whatever was in the big orange bottle, applied once, never reapplied, and definitely not worried about. And I turned out fine — but we also didn’t have the research we have now. Knowing better means doing better, and that’s not preachy, that’s just parenting.

    The goal isn’t perfection. We still miss spots. My son occasionally escapes out the back door before I’ve gotten to him. But making the swap to cleaner sunscreen is genuinely one of the easier non-toxic swaps we’ve made — not expensive, not complicated, just a different product in the same routine.

    For more on how we think about Raising Kids Without Screens and maximizing that outdoor time intentionally, that post is a good companion read to this one.


    Bottom Line

    A good non-toxic sunscreen stick doesn’t have to cost a fortune or perform like a science experiment. Look for non-nano zinc oxide, skip the hormone-disrupting chemicals, and find a formula that your kids will actually tolerate on their faces. That last part might take some trial and error — but it’s worth it.

    We’ve been using clean sunscreen for a few years now and honestly? Once you make the switch you stop thinking about it. It just becomes normal. And that’s the best kind of healthy habit — one you don’t have to white-knuckle every single day.

    If you’ve got a stick you love that I haven’t mentioned, drop it in the comments. I’m always looking for new ones to try, especially anything that works well in serious Florida heat and humidity. We put these things through their paces down here, y’all.


    📖 You Might Also Like:

    Frequently Asked Questions

    Are sunscreen sticks as effective as sunscreen lotion for kids?

    Yes, when applied properly and rubbed in well, sunscreen sticks are just as effective as lotion. The key is making sure you apply enough — sticks can sometimes encourage under-application. Go over the area a couple of times and rub it in thoroughly, especially on the face.

    What makes a sunscreen stick ‘non-toxic’ for kids?

    A non-toxic kids sunscreen stick uses mineral-based active ingredients — typically non-nano zinc oxide and/or titanium dioxide — instead of chemical UV filters like oxybenzone, octinoxate, or homosalate, which have been linked to hormone disruption and skin absorption concerns. It should also be free of synthetic fragrance and parabens.

    Do non-toxic mineral sunscreen sticks leave a white cast?

    Some do, some don’t — it depends heavily on the formula. Many mineral sticks have improved significantly in the last few years. Brands like Kokua and Think Baby tend to have less white cast than older-style zinc formulas. Rubbing it in well rather than just swiping and leaving it also helps reduce the white appearance.

    What SPF should I use on my kids in Florida?

    SPF 30 offers about 97% UVB protection and is generally considered adequate when reapplied every two hours and after swimming or sweating. In intense Florida sun, many parents (including us) prefer SPF 40-50 for extra peace of mind, especially during peak sun hours between 10am and 3pm.

    How often should I reapply sunscreen on kids who are playing outside?

    The general recommendation is every two hours, and immediately after swimming or heavy sweating — even if the product is labeled water resistant. Water-resistant formulas typically maintain protection for 40 to 80 minutes of water exposure, after which reapplication is needed. Setting a phone timer helps make this a consistent habit.

  • How to Build a Simple Chicken Tractor for Your Backyard Flock (Without Overcomplicating It)

    How to Build a Simple Chicken Tractor for Your Backyard Flock (Without Overcomplicating It)

    How to Build a Simple Chicken Tractor for Your Backyard Flock (Without Overcomplicating It)

    🌿 The Short Version: A chicken tractor is a simple, movable coop that lets your hens graze fresh grass without destroying your whole yard. This post walks you through how to build one on a budget, what materials actually work in Florida’s heat and humidity, and how we use ours as a living homeschool lesson every single week.

    This post contains affiliate links. I may earn a small commission at no extra cost to you.

    Okay, so picture this: It’s a Tuesday morning. My kids are in the backyard in their pajamas, bare feet in the grass, watching our hens scratch around in a little patch of clover. Nobody’s on a screen. Nobody’s arguing. The dog is flopped out in the shade watching the whole scene like it’s her favorite TV show. And me? I’m drinking my coffee while it’s still hot.

    That’s what a chicken tractor gave us. And y’all — it was so much simpler to build than I expected.

    If you’ve been thinking about getting backyard chickens, or you already have a small flock and want to give them more freedom without letting them destroy every square inch of your yard (been there), a chicken tractor might be exactly what you need. Let me walk you through how we built ours, what actually works down here in the Pensacola heat, and how it’s quietly become one of our best homeschool tools too.

    What Even Is a Chicken Tractor?

    A chicken tractor is basically a bottomless, movable coop. It has walls, a roof, and sometimes a small attached run — but no floor. You set it right on the grass, the chickens scratch and peck and fertilize that patch of ground, and then you move it to a fresh spot every day or two. The old spot gets naturally fertilized and has time to recover. Everybody wins.

    It’s not a new idea. Farmers have been doing this for generations, and honestly it’s one of those things that just makes sense once you see it in action. Your hens get fresh forage, your yard gets natural fertilization, and you’re not stuck cleaning a fixed-floor coop every single week.

    If you want a solid foundation on all things flock-keeping, Storey’s Guide to Raising Chickens is the book I recommend to every new chicken mama. It covers tractors, feeding, health, and everything in between.

    Why a Chicken Tractor Works Especially Well in Florida

    Here in Northwest Florida, our summers are brutal. Standing water, humidity that’ll take your breath away, and bugs — oh, the bugs. A fixed coop sitting on dirt can get muddy, smelly, and problematic fast in our climate.

    Moving the tractor to fresh ground every couple of days means:

    • No mud pits under the coop
    • Less odor buildup
    • Natural pest control (the hens eat the bugs before they become a problem)
    • Healthier ground for your yard overall

    We also use food grade diatomaceous earth around the base of the tractor and in the nesting area to keep mites and lice from taking hold — especially important during our humid summers.

    If you’re still getting your flock management routines down, check out my post on Best Chicken Coop Predator-Proof Latches (What Actually Keeps Your Flock Safe at Night) — because whatever shelter you’re building, the hardware is everything.

    What You’ll Need to Build a Basic Chicken Tractor

    This is not a Pinterest-perfect, power-tool-required build. This is a real-life, built-it-on-a-Saturday-with-my-husband version. Here’s what we used:

    Materials:

    • 2×2 or 2×3 lumber for the frame
    • 1/2″ hardware cloth (NOT chicken wire — hardware cloth is much stronger against predators)
    • Poultry staples or zip ties to attach the wire
    • A small piece of plywood or corrugated metal for the roof section
    • Hinges and a latch for the access door
    • Handles or rope for moving it
    • Screws and a drill

    Basic Size: For 3-4 hens, a 4×8 foot footprint gives them room to move. You can attach a small covered sleeping area on one end if you plan to leave them in it overnight.

    Total cost? Ours came in around $60-80 using lumber from the hardware store and hardware cloth we already had on hand.

    Step-by-Step: How We Built Ours

    Step 1: Build the Frame

    Cut your lumber into a simple rectangular frame — four sides and a few cross supports for stability. We built ours as an A-frame shape (like a little tent) because it’s naturally more stable and sheds rain better, which matters a lot here in Florida during afternoon thunderstorm season.

    Step 2: Attach the Hardware Cloth

    Wrap hardware cloth around the entire frame and staple it in place with poultry staples. Cover the top too. Don’t skip the top — hawks are real, and we have plenty of them in this area. Use zip ties at the corners for extra security if anything feels loose.

    Step 3: Add a Small Covered Section

    One end of our tractor has a plywood roof section for shade and shelter. In Florida, shade is non-negotiable. Chickens can overheat fast in summer, so at least a third of the tractor should have solid overhead cover.

    Step 4: Build an Access Door

    Cut a door opening in one end, attach it with hinges, and add a secure latch. If you’re going to leave the hens in there while you’re away from home, make it a latch a raccoon can’t figure out. (Trust me on this one.)

    Step 5: Add Handles

    Screw on two wooden handles or thread rope through the frame so you can actually drag the thing across the yard. We move ours every 1-2 days, so this matters more than you’d think.

    Step 6: Add Water Inside

    We hang a small chicken nipple waterer from the top of the frame. It keeps water clean and off the ground, which is huge for keeping things sanitary inside the tractor.

    📌 Love this? Save it to Pinterest so you can find it later!

    How We Use the Chicken Tractor as a Homeschool Tool

    This is my favorite part, honestly. Our kids don’t just watch the chickens — they study them. We’ve turned chicken tractor days into real living science lessons.

    My kids sketch the hens in their nature journals — noting behavior, what they’re eating, how they interact with each other. We’ve talked about food chains (bugs → chickens → eggs → us), soil health, composting, and even simple animal behavior patterns. My oldest started tracking which patches of yard the hens prefer and why.

    This is exactly the kind of slow, observational learning that Charlotte Mason talked about — and it happens completely naturally when you put kids near animals and give them time. No worksheet required. If you want more ideas like this, my post on Charlotte Mason Nature Journal Ideas for Kids (What We Actually Do Year-Round in Florida) has a lot of our real-life routines.

    If you want to get the kids more formally involved in chicken keeping, the Kids’ Guide to Keeping Chickens is a genuinely great read for elementary-age kids. Mine have read it cover to cover multiple times.

    A Few Things I Wish I’d Known First

    • Move it more often than you think you need to. Especially in summer. The ground under a tractor gets stripped fast in Florida heat.
    • Don’t put it on slopes. It’ll slide, and gaps appear at the bottom — which is an invitation for predators.
    • Add shade cloth if needed. We zip-tied a strip of shade cloth over part of the hardware cloth top on really brutal summer days.
    • Check it every morning. Something is always trying to get in at night in Florida. Raccoons, opossums, the occasional confused armadillo.
    • An automatic coop door is worth it if your tractor has an attached sleeping area and you want to skip the early morning run outside.

    Is a Chicken Tractor Right for Your Setup?

    If you’ve got a small suburban yard, a few hens, and you want to give them a better life without sacrificing your lawn entirely — yes. A thousand times yes. It’s also a really manageable starting point if you’re newer to backyard chickens and not ready to commit to a full permanent coop build.

    If you’re curious about expanding your backyard flock situation, I also wrote about Best Backyard Duck Breeds for Egg Production (What Actually Lays Well and Fits a Real Family) — because once you’ve got the chicken tractor down, ducks start looking real appealing.

    You’ve Got This, Mama

    Building a chicken tractor doesn’t have to be a big production. Grab some lumber, a roll of hardware cloth, and a free Saturday morning. Put the kids to work handing you screws and calling out measurements. Let it be a little imperfect. Ours has a slightly wobbly handle and one corner that needed an extra zip tie — and our hens do not care one bit.

    What they care about is fresh grass, bugs to scratch for, shade on a hot afternoon, and clean water. A simple tractor gives them all of that. And honestly? Watching them get it gives me the same satisfaction every single time.

    This is the kind of slow, intentional, hands-in-the-dirt life we’re building over here — and a chicken tractor is one of the most humble, practical pieces of it.


    📖 You Might Also Like:

    Frequently Asked Questions

    How many chickens can fit in a chicken tractor?

    A standard 4×8 foot chicken tractor comfortably houses 3-4 standard-size hens. If you have bantam breeds, you can fit a couple more. The general rule of thumb is about 2-3 square feet of space per bird inside the tractor — more is always better if you can manage it.

    Can you leave chickens in a chicken tractor overnight?

    Yes, but only if the tractor has a fully enclosed, secure section with a predator-proof latch. Open hardware cloth sides alone won’t deter determined predators like raccoons at night. Many people use a chicken tractor during the day only and move their hens into a more secure fixed coop at dusk.

    How often should you move a chicken tractor?

    Every 1-3 days is the general recommendation, though in Florida’s summer heat you may need to move it daily. Once the grass starts looking sparse and the ground looks scratched bare, it’s time to move. Regular moving keeps the ground healthier and your hens happier.

    What is the best material to use for a chicken tractor in Florida’s humidity?

    Use pressure-treated lumber or cedar for the frame since both resist moisture and rot better in Florida’s climate. For the wire, always use 1/2-inch hardware cloth rather than traditional chicken wire — it’s far more durable and predator-resistant. Avoid OSB or untreated pine, which will break down quickly in our humidity.

    Do I need a floor in a chicken tractor?

    No — and that’s actually the point. A chicken tractor is intentionally bottomless so the hens can access the grass and soil beneath it. This allows them to forage naturally, scratch for bugs, and fertilize the ground as you move them around. Just make sure the sides sit flush with the ground to prevent gaps that predators could exploit.

  • Raising Kids Without Screens: What We Actually Do Every Day

    Raising Kids Without Screens: What We Actually Do Every Day

    Raising Kids Without Screens: What We Actually Do Every Day

    🌿 The Short Version: Raising kids with less screen time isn’t about being strict or perfect — it’s about filling the day with things worth doing. We’re sharing the real, practical rhythms our Florida homeschool family uses to keep kids busy, curious, and genuinely happy without defaulting to a device.

    This post contains affiliate links. I may earn a small commission at no extra cost to you.

    Somebody asked me the other day how we keep our kids off screens all day. And honestly, my first instinct was to laugh — because it’s not some complicated system we engineered. It’s more like… we just rebuilt what a normal childhood used to look like before everyone had a glowing rectangle in their pocket.

    I grew up in the ’90s. I spent summers outside until the streetlights came on. I caught bugs, dug in the dirt, built forts out of whatever I could find, and read books because there was nothing else to do after 8 p.m. That wasn’t deprivation. That was childhood. And I want that for my kids more than just about anything.

    Now, are we screen-free? No. I’m not going to sit here and tell you we’ve never turned on a movie or handed someone an iPad during a long car ride. But screens are genuinely rare in our house, and our kids — honestly — don’t miss them that much. Here’s why, and here’s what we actually do instead.


    The Real Reason Kids Reach for Screens

    Before I get into our day-to-day rhythms, I want to say this: kids reach for screens when they’re bored and nothing better has been set up for them. That’s it. It’s not a character flaw. It’s not laziness. It’s just that screens are the path of least resistance when there’s nothing else pulling at their attention.

    So the shift for us wasn’t about removing screens. It was about filling the environment with so many interesting, hands-on, real-life things that screens became… kind of boring by comparison. Which sounds impossible, but I promise you it works.


    What Our Days Actually Look Like

    Morning: Nature Study Before Anything Else

    We start most mornings outside. Even in the Florida heat, the early hours are magic — cool enough to enjoy, and the backyard is full of things to notice. Our kids check on the chickens first thing, which has become this grounding little ritual. They count eggs, freshen the chicken waterer, and just observe. Who’s broody. Who’s acting funny. What bugs are scratching around in the run.

    That naturally flows into nature journaling. We keep nature journals on the back porch table, and the kids sketch what they see — a spider web, a feather, a weird mushroom that showed up overnight. My older one has started identifying birds with the Sibley Birds guide, which has turned into a genuine obsession. I wrote more about this in our post on Charlotte Mason Nature Journal Ideas for Kids (What We Actually Do Year-Round in Florida) if you want the full breakdown.

    Midmorning: Actual School Time

    Our structured homeschool time runs about two to three hours, tops. Charlotte Mason-style means short lessons, living books, real conversations — not workbook after workbook. The kids stay engaged because the lessons are short enough to hold their attention without a screen in sight.

    We weave in watercolor nature illustrations using Faber-Castell watercolors, copywork, and read-alouds. When math feels abstract, we take it outside — counting chicken eggs, measuring garden beds, sorting seeds. Concrete and real beats digital every single time for this age.

    After Lunch: Free Play (For Real)

    This is the part people ask about most. After lunch, we have a chunk of unstructured time. No agenda, no organized activity, no screens. And in the beginning? Yes, my kids were bored. They wandered around and told me there was nothing to do. I’d point at the backyard and say, go figure it out.

    Within about a week, they stopped asking. Now they:

    • Dig in the garden with their kids’ garden gloves and actually help plant things
    • Use their bug catcher kit to find and identify whatever’s crawling around out there (Florida has plenty of material)
    • Run around the yard with walkie talkies playing whatever game they invented that week
    • Splash through puddles in their rain boots after a Florida afternoon storm — which is approximately every day in summer
    • Build, draw, make up stories, bother the dog, argue, make up, and generally just exist like kids are supposed to

    The boredom is the point. Boredom is where creativity lives.

    📌 Love this? Save it to Pinterest so you can find it later!

    Late Afternoon: Chores, Cooking, Real Life

    This is where I think we’ve made one of the biggest differences. Our kids have real responsibilities, and those responsibilities eat up time that might otherwise go to screens.

    The chickens get checked again in the evening — locked up safe, coop checked over, diatomaceous earth dusted around if needed. My older one can reference our copy of Storey’s Guide to Raising Chickens when she has questions, and my younger one has his own kid-friendly chicken guide that he loves. Caring for animals is one of the most grounding, screen-replacing things I know.

    We also cook together most evenings. Not every night — I’m not a saint — but most nights. Kids who are stirring something on the stove or kneading bread dough are not thinking about YouTube. And they’re learning something that will actually matter for their whole lives.


    What We Do When They’re Restless Indoors

    Florida summer afternoons get hot, and there are absolutely days when we’re stuck inside during a downpour or just hiding from the heat. Here’s what we reach for before we’d ever reach for a screen:

    • Art projects — loose parts, watercolor paints, chalk pastels, or whatever’s on the art shelf
    • Pocket microscope with things they collected outside — feathers, leaves, pieces of eggshell from the coop
    • Board games, card games, LEGOs, audiobooks
    • Read-aloud time — I’m always in the middle of a chapter book with each kid
    • Baking something, even if it’s just muffins

    None of this is fancy. Almost all of it is stuff that existed in 1993.


    A Word About Imperfect Days

    I want to be real with you: there are days this doesn’t go smoothly. Days someone is sick, or I’m underwater with work, or everyone is just off. On those days, yes — sometimes the TV goes on. I don’t spiral about it.

    The goal isn’t perfection. The goal is that screens are the exception, not the default. When your baseline is outdoor play, real books, hands-on work, and living creatures to care for, a movie afternoon here and there doesn’t undo any of it.

    And truly — if you’re building a homeschool rhythm that keeps kids genuinely engaged, you might be surprised how little they actually miss it. Check out our Morning Basket Ideas for Charlotte Mason Homeschool Families for more on how we start our school days in a way that sets a good tone before lunch.


    If You’re Just Starting Out

    If you’re reading this because you want this but don’t know where to begin, start small. You don’t have to overhaul everything at once.

    Pick one thing from this list. Get outside for 30 minutes before anyone touches a device. Set up a simple nature journal and let your kids sketch whatever catches their eye. Put a bug collection kit in the backyard and see what happens.

    Kids want to be outside. They want to do real things. They want your attention more than any screen. Sometimes we just have to make it easier for them to choose the better thing.


    I don’t think we’re doing anything radical. I think we’re just doing what families did for generations before the internet arrived and rearranged everything. Dirt under fingernails, eggs in a basket, a chapter book at bedtime, and kids who know how to be bored and survive it. That’s the whole plan, really. And most days, it works beautifully.


    📖 You Might Also Like:

    Frequently Asked Questions

    How do I get my kids to stop asking for screens all the time?

    The most effective thing is to fill their environment with better options before boredom hits. Set up an outdoor space with tools they can actually use — a bug catcher, garden gloves, a nature journal — and establish a rhythm where outside time comes first before any device is even on the table. Most kids stop asking within a week or two once there are genuinely interesting things competing for their attention.

    Is it realistic to raise kids without screens in today’s world?

    Completely screen-free is a personal choice, but significantly reducing screen time is very realistic. Many families find that screens become much less appealing when kids have real responsibilities (like backyard chickens), unstructured outdoor play, hands-on crafts, and a homeschool rhythm that keeps them genuinely engaged. The goal for most intentional families isn’t zero screens — it’s making screens the exception rather than the default.

    What do kids actually do all day without screens?

    More than you’d expect. Kids who are given the chance tend to fill their time with outdoor exploration, imaginative play, art, reading, helping with animals or gardening, building things, and inventing games. The key is resisting the urge to fill every quiet moment for them — boredom is the engine of creativity, and kids who learn to sit in it come out the other side with something they made up themselves.

    How do I handle screen-free time when it’s too hot to go outside in Florida?

    Florida heat is real, and indoor screen-free time is absolutely manageable. Watercolor painting, board games, audiobooks, LEGOs, baking together, and using a pocket microscope to examine things collected outside are all great indoor options. Afternoon indoor time can also be a great opportunity for quiet reading or a longer read-aloud, which naturally replaces the screen without anyone feeling like they’re missing out.

    Does less screen time actually help kids focus better for homeschool?

    Many homeschool families — including those using the Charlotte Mason approach — find that kids who aren’t overstimulated by screens come to lessons with longer attention spans and more genuine curiosity. Short, engaging lessons are easier to hold attention through when a child’s nervous system isn’t already flooded from hours of fast-paced media. The results aren’t always immediate, but most families notice a real shift within a few weeks of reducing screens consistently.

  • How to Start an Herb Garden in Florida Heat (What Actually Grows and When to Plant It)

    How to Start an Herb Garden in Florida Heat (What Actually Grows and When to Plant It)

    How to Start an Herb Garden in Florida Heat (What Actually Grows and When to Plant It)

    🌿 The Short Version: Florida’s heat doesn’t have to kill your herb garden dreams — it just means you need to plant the right herbs at the right time of year. This post walks you through exactly which herbs thrive in Northwest Florida, when to get them in the ground, and how to set up a simple setup your whole family (kids included) can actually keep alive.

    This post contains affiliate links. I may earn a small commission at no extra cost to you.

    I have killed more basil than I care to admit.

    I’d bring it home from the grocery store all hopeful, set it on my kitchen counter, try to nurse it along, and watch it slowly give up on life within a week. Or I’d plant it outside in June thinking, it’s warm, herbs love warm — and then stand there confused when it bolted, turned bitter, and basically rage-quit.

    Here’s what nobody tells you when you move to or grow up in the Florida Panhandle: gardening here runs completely backwards from what most books and YouTube videos describe. Our “winter” is prime growing season. Our summer is survival mode. Once I finally accepted that, everything clicked — and now we have a little herb bed that actually produces food for our kitchen, supports our nature study, and has become one of my kids’ favorite spots in the whole yard.

    If you’ve been wanting to start an herb garden in Florida heat but keep running into dead ends (or just dead plants), this one’s for you.


    First: Understand Florida’s Backwards Growing Calendar

    This is the thing that trips up almost every new Florida gardener. We are not a Zone 5 YouTube channel. We are not even a Zone 8 Pinterest graphic.

    In Northwest Florida (Pensacola and the surrounding area), we’re roughly in USDA Zone 8b-9a. That means:

    • Fall through spring = our golden growing window
    • Summer = brutal, humid, fungal-disease-prone, and honestly just hard

    So if you’re reading this in September or October — get those seeds in the ground now. That’s your prime herb-planting window. If you’re reading this in July, start planning, order your seeds, and wait just a little longer.

    For our family, herb gardening has become a year-round rhythm rather than a single season push. We start seeds indoors in late summer, transplant in the fall, harvest through winter and spring, and scale back in the summer to just the tough survivors.


    What to Plant: The Herbs That Actually Survive Florida

    Cool-Season Herbs (Plant September–February)

    These are your workhorses in a Florida herb garden:

    • Parsley — loves our mild winters, grows beautifully
    • Cilantro — finally! This is the one herb that actually wants our “cool” weather
    • Dill — self-seeds like crazy, great for kids to watch
    • Chives — almost no-fuss, and my kids eat them straight off the plant
    • Fennel — tall, feathery, and the swallowtail butterfly caterpillars go absolutely wild for it (nature study gold right there)
    • Chamomile — pretty, useful, and the kids love harvesting the flowers for tea

    Heat-Tolerant Herbs (Plant Spring, Survive Into Summer)

    • Rosemary — practically a shrub here, almost unkillable in Florida
    • Lemon balm — spreads like a weed but smells amazing
    • Lemongrass — thrives in Florida heat, mosquito-repelling bonus
    • Sweet potato leaf — not exactly a traditional herb, but edible and Florida-tough
    • Moringa — fast-growing, nutritious, and handles our summer like a champ

    Basil — Handle With Care

    Basil can grow here, but it needs some babying. Plant it after our last frost (typically mid-February in Pensacola), give it afternoon shade in the peak of summer, and water consistently. It will bolt fast in the heat, so pinch those flower tops constantly. We grow it in a pot we can move under the porch overhang when summer really cranks up.


    Setting Up Your Florida Herb Garden

    Raised Beds or Containers: Both Work

    Our sandy Northwest Florida soil drains fast — sometimes too fast. Herbs actually don’t mind this much, but if you’re starting from scratch, a raised bed gives you more control over your soil mix. If you’re just getting started and don’t want a big project, a few good-sized containers on your porch or patio work beautifully and let you move plants around as the season changes.

    We have a small raised bed dedicated to herbs right outside our back door — close enough that grabbing a handful of rosemary for dinner is a two-second task. My kids treat it like a snack bar. I find that highly encouraging.

    For seeds and starting supplies, we’ve used a simple seed starting kit to get things going indoors before transplanting — especially helpful for the late summer starts.

    Sun and Shade

    Most herbs want full sun, and Florida certainly delivers. But in the peak summer months, a little afternoon shade can mean the difference between thriving and frying. If you can position your herb garden where it gets morning sun and some relief in the hottest part of the afternoon, you’ll have happier plants.

    Watering Without Overdoing It

    This sounds counterintuitive, but overwatering is as big a problem as underwatering in Florida. Our humidity is already high. Most herbs want their roots to dry out a little between waterings. Water deeply but less frequently, and make sure your containers or beds drain well.


    Getting Kids Involved (This Is the Best Part)

    Herb gardening is one of those activities that fits seamlessly into a Charlotte Mason approach — it involves direct observation, nature journaling, real-life science, and sensory experience all in one. My kids have learned more about plant life cycles from our little herb bed than from any worksheet.

    Some things we do:

    • Sketch and label herbs in their nature journals — observing the shape of leaves, the texture, the smell
    • Harvest and dry our own herbs for tea and cooking (we have a whole post on how to preserve herbs from your garden if you want the details)
    • Watch the pollinators — when we let herbs like dill and fennel flower, the butterflies and bees show up fast. We keep a pair of kid-sized rain boots by the back door so nobody has an excuse not to go outside and observe
    • Feed scraps to the chickens — spent herb leaves, trimmings, and pulled plants go straight to the flock. Our girls love fresh herbs, and it’s been a great lesson in the garden-to-coop cycle

    If your kids are really into bugs and observation, the herb garden is prime territory. A bug catcher kit and a pocket microscope turn a quick garden walk into a full science lesson.

    📌 Love this? Save it to Pinterest so you can find it later!


    Keeping It Simple and Non-Toxic

    One of the reasons I love herb gardening with kids is that it naturally invites us to keep things clean. We’re growing food we put in our mouths — so we skip synthetic pesticides entirely.

    For pests (and Florida has plenty), we dust with food-grade diatomaceous earth around the base of plants, and we use Wondercide for any bigger pest issues around the garden perimeter. Both are safe around kids, pets, and our chickens.

    For the kids working in the garden, we keep kids’ garden gloves handy so there’s less resistance to getting hands in the dirt — though honestly, half the time they just dig in bare-handed anyway. That’s fine by me. A little soil on their hands never hurt anybody. That’s basically the whole point.

    And on those really sunny Florida mornings, we load up on non-toxic sunscreen before heading out. You can check out our full guide to non-toxic sunscreen for little ones if you’re navigating that too.


    Start Small, Start Now

    You don’t need a perfectly designed garden or a big budget to make this work. We started with four pots on a concrete porch and a $4 packet of seeds. What mattered was starting.

    If you want to grow herbs in Florida, the biggest thing I can tell you is this: work with our climate, not against it. Plant in the fall. Choose heat-tolerant varieties for summer. Let the kids get involved early and often. And don’t stress too much when something doesn’t make it — that’s information, not failure.

    Our herb garden has become one of my favorite quiet places on this little homestead. In the early morning before the heat kicks in, I’ll walk out barefoot with my coffee, snip some lemon balm, check on the rosemary, see what the chickens are hollering about — and feel genuinely grateful that we built this slower, more rooted kind of life. This is exactly the childhood I want my kids to remember: dirt under their fingernails, something growing by the back door, and the satisfaction of eating food they helped tend.

    You can have that too. Start with one pot. Start this week. It’s worth it.


    📖 You Might Also Like:

    Frequently Asked Questions

    What herbs grow best in Florida heat?

    Rosemary, lemongrass, lemon balm, moringa, and sweet potato leaf are among the most heat-tolerant herbs for Florida summers. For cooler months (fall through spring), cilantro, parsley, dill, chives, and fennel all do beautifully in Northwest Florida’s mild winters.

    When should I plant an herb garden in Florida?

    The best time to plant most herbs in Florida is September through February, which is our prime cool-season growing window. Unlike most of the country, Florida gardeners do their best growing in fall and winter — summer is survival mode for most plants here.

    Can I grow basil in Florida?

    Yes, but it takes some care. Plant basil after your last frost (around mid-February in the Pensacola area), give it afternoon shade in peak summer heat, and pinch flower tops regularly to keep it from bolting. Growing it in a movable container gives you the flexibility to protect it when temperatures spike.

    How do I keep pests off my herb garden without using chemicals?

    Food-grade diatomaceous earth dusted around the base of plants works well for soft-bodied insects. Wondercide is a great non-toxic spray option for broader pest control around the garden. Both are safe around children and pets, which matters a lot when you’re growing food you’ll actually eat.

    Do I need raised beds to grow herbs in Florida?

    Not necessarily. Florida’s sandy, fast-draining soil is actually decent for many herbs that don’t like wet feet. Raised beds give you more control over your soil mix, but containers work just as well — especially if you want to move plants around to manage sun and shade through the seasons.

  • Florida Homeschool Special Needs Resources and Support (What Actually Helps Real Families)

    Florida Homeschool Special Needs Resources and Support (What Actually Helps Real Families)

    Florida Homeschool Special Needs Resources and Support (What Actually Helps Real Families)

    🌿 The Short Version: Florida has more support for homeschooling families with special needs kids than most people realize — from the PEP scholarship to therapy co-ops to nature-based learning approaches that genuinely work for different learners. This post walks you through the real resources, the programs worth knowing about, and the mindset shift that made homeschooling our differently-wired kids feel possible.

    This post contains affiliate links. I may earn a small commission at no extra cost to you.

    If you’re sitting at your kitchen table right now, a little overwhelmed, wondering if homeschooling a child with special needs is actually something you can do — I want you to take a breath. Because I’ve been in that seat. And I want to tell you what nobody told me at first: Florida is genuinely one of the better states to be a special needs homeschool family. You just have to know where to look.

    We started our homeschool journey the Charlotte Mason way — nature walks, living books, morning baskets, the whole thing. What I didn’t expect was how naturally that approach would also work for my kid who processes the world a little differently. Slower mornings. More time outside. Learning through doing instead of sitting and drilling. Turns out, what’s good for curious kids is often really good for differently-wired kids too.

    But beyond the philosophy, there are real, practical resources here in Florida — and I want to make sure you know about them.

    The Florida PEP Scholarship: What Special Needs Families Need to Know

    If you’re not already familiar with Florida’s Personal Education Program (PEP) scholarship, this is the first place to start. It’s a scholarship specifically for students with disabilities or unique abilities, and it provides funding you can use toward curriculum, therapies, tutoring, and other educational expenses.

    This is not the same as the general homeschool scholarship — the PEP scholarship is designed with special needs families in mind. It’s administered through Step Up for Students, and the application process is more involved than the standard scholarship, but it’s absolutely worth pursuing if your child has a documented diagnosis.

    What can PEP funds cover? Depending on your child’s eligibility tier, you may be able to use funds for:

    • Approved curriculum providers
    • Speech, occupational, or behavioral therapy
    • Tutoring services
    • Assistive technology
    • Educational therapists

    If you’re already using the Florida PEP scholarship for general homeschooling, look into whether your child qualifies to transition to the special needs PEP — the funding amounts can be significantly higher.

    Curriculum That Actually Works for Different Learners

    One of the biggest gifts of homeschooling a special needs child is that you get to ditch the one-size-fits-all approach entirely. Here’s what we’ve found helpful and what a lot of special needs homeschool families in our area lean on:

    For Reading

    All About Reading is an Orton-Gillingham based program that is genuinely one of the best options out there for kids with dyslexia or phonological processing differences. It’s multisensory, it’s clear, and it doesn’t feel punishing. We’ve seen kids who were convinced they’d never read just bloom with this program. If you want more ideas on how we approach literacy naturally alongside structured phonics, check out How to Teach Reading Naturally Without Curriculum (What Actually Works for Real Kids).

    For Handwriting

    Handwriting Without Tears was literally designed with occupational therapists and is one of the most recommended programs for kids with dysgraphia, fine motor delays, or sensory processing challenges. The name says it all — it’s low frustration and genuinely effective.

    For Math

    Math-U-See is a manipulative-based math curriculum that lets kids touch and build math concepts before they’re expected to do it abstractly. For kids who struggle with traditional math instruction, this approach can be a total game-changer.

    For the Rest

    Timberdoodle puts together curriculum kits that are thoughtfully designed and include a lot of hands-on, non-worksheet learning — which tends to work beautifully for kids who need more movement and sensory input in their day. Rainbow Resource is also a great place to search by learning style when you’re looking for something specific.

    📌 Love this? Save it to Pinterest so you can find it later!

    Nature as Therapy: This Is Not Just a Nice Idea

    I want to push back gently on the idea that nature time is a “bonus” for special needs kids. For a lot of our differently-wired children — especially those with ADHD, sensory processing differences, anxiety, or autism — unstructured outdoor time is not just enriching. It is regulating.

    We do nature journaling as part of our Charlotte Mason approach, and it has been one of the most accessible, low-pressure learning activities for every single learning style in our house. Grab a nature journal, a set of Faber Castell watercolors, and head outside. No pressure to make it perfect. Draw a leaf. Paint a bird. Notice something. That’s it.

    For kids who are really into bugs and tiny things — which is a lot of kids who think differently — a pocket microscope or a bug collection kit can open up hours of focused, joyful engagement. We’ve also found that our backyard chickens provide something quietly therapeutic — caring for an animal, having a routine, watching life up close. If you’re considering adding chickens to your homestead, Storey’s Guide to Raising Chickens is the resource we always recommend first.

    For more on how we structure our nature-based learning, especially with multiple kids at different levels, see Charlotte Mason Nature Journal Ideas for Kids (What We Actually Do Year-Round in Florida).

    Florida-Specific Support Networks and Co-ops

    You do not have to do this alone. Here in the Pensacola area and across Northwest Florida, there are growing communities of homeschool families supporting kids with special needs. Here’s where to look:

    FPEA (Florida Parent Educators Association) — Florida’s largest homeschool organization holds an annual convention and has a special needs track with real, practical breakout sessions. Their website also has a directory of support groups by county.

    Local homeschool co-ops — Many co-ops in our area specifically welcome and accommodate special needs learners. If you’re looking to find or build one, I wrote a whole post about it: Best Homeschool Co-op Ideas and How to Start One (Even If You’re Starting from Scratch).

    Facebook groups — Search for “Florida Special Needs Homeschool” or your county name plus “homeschool special needs” and you’ll find active groups with parents sharing real-time recommendations for local therapists, co-ops, and curriculum.

    Pensacola-area therapy providers — Many speech, OT, and ABA therapists in our area work with homeschool families and can even provide documentation you need for PEP scholarship eligibility. Ask your pediatrician for referrals and specifically mention you’re homeschooling.

    Homeschooling Multiple Kids When One Has Special Needs

    This is real life for a lot of us — we’re not homeschooling one child. We’re managing different ages, different needs, and trying to hold it all together with some grace. If you’re juggling this, I really encourage you to read How to Homeschool Multiple Ages at Once (Tips That Actually Work for Real Families). The honest answer is that a Charlotte Mason/nature-based approach actually lends itself really well to this because so much of it can be done together.

    Read-alouds work for everyone. Nature walks work for everyone. Morning basket works for everyone. The individual, grade-specific work is actually a smaller portion of your day than you might think.

    A Word on Grace

    I want to close with this: homeschooling a child with special needs is hard in ways that are real and valid. There are days it feels like you’re failing. There are days your kid melts down before 9am and you wonder what you were thinking. There are also days when something clicks — when you see your child light up over a caterpillar in the garden, or read their first sentence, or finally understand subtraction with the blocks — and you know exactly why you’re doing this.

    You are not a therapist, and you don’t have to be. You are a parent who loves your child enough to figure out what they need. Florida has resources to help you. Your community has people who get it. And you are not alone in this.

    We’re in this together, one messy, beautiful day at a time.


    📖 You Might Also Like:

    Frequently Asked Questions

    Can I homeschool my child with an IEP in Florida?

    Yes. When you withdraw your child from public school to homeschool in Florida, the public school IEP no longer applies — you are no longer required to follow it. However, if your child has a documented diagnosis, they may qualify for the Florida PEP scholarship, which can fund therapies and curriculum. Some families choose to access public school services like speech therapy on a part-time basis while homeschooling; this varies by district and is worth asking your local school about.

    What is the Florida PEP scholarship for special needs homeschoolers?

    The Personal Education Program (PEP) scholarship, administered by Step Up for Students, provides funding for students with disabilities or unique abilities. It can be used for approved curriculum, private therapies (speech, OT, ABA, etc.), tutoring, and assistive technology. The amount varies based on your child’s eligibility tier. It is separate from the general Florida homeschool scholarship and requires documentation of your child’s disability or diagnosis.

    What homeschool curriculum works best for kids with dyslexia?

    All About Reading is widely considered one of the best options for kids with dyslexia because it uses an Orton-Gillingham approach, which is multisensory and systematic. Handwriting Without Tears is also highly recommended for kids who struggle with writing. Math-U-See works well for math because it uses physical manipulatives before moving to abstract concepts. These are all programs that many special needs homeschool families in Florida use successfully.

    Are there homeschool co-ops in Florida that support special needs kids?

    Yes — and they’re growing. Many homeschool co-ops in Florida, especially in areas like Pensacola, Tampa, Orlando, and Jacksonville, actively welcome and accommodate children with special needs. Your best bet is to search Facebook groups for your county plus ‘homeschool co-op’ or ‘special needs homeschool,’ or reach out to FPEA (Florida Parent Educators Association) for a directory of local groups. Starting your own inclusive co-op is also very doable — even from scratch.

    Is a nature-based or Charlotte Mason approach good for kids with ADHD or sensory processing differences?

    Many families find that a Charlotte Mason or nature-based approach is actually a better fit for kids with ADHD, sensory differences, or other learning challenges than traditional school-style learning. It emphasizes shorter lessons, movement, hands-on activities, and outdoor time — all of which support regulation and engagement for differently-wired kids. Nature journaling, animal care, gardening, and living books are all low-pressure, high-engagement activities that tend to work well across a range of learning needs.

  • Best Homeschool Co-op Ideas and How to Start One (Even If You’re Starting from Scratch)

    Best Homeschool Co-op Ideas and How to Start One (Even If You’re Starting from Scratch)

    Best Homeschool Co-op Ideas and How to Start One (Even If You’re Starting from Scratch)

    🌿 The Short Version: Starting a homeschool co-op doesn’t have to be complicated — it just takes a few like-minded families, a clear purpose, and a little organization. This post walks you through the best co-op ideas for nature-based and Charlotte Mason families, plus exactly how to get one off the ground without the overwhelm.

    This post contains affiliate links. I may earn a small commission at no extra cost to you.

    I remember the exact moment I decided we needed a co-op. It was a Tuesday morning, my kids were chasing the chickens around the backyard instead of doing their copywork, the labradoodle was barking at absolutely nothing, and I thought — we need our people. Not just playdates. Not just a park meetup. A real group of families doing this thing alongside us.

    If you’ve been homeschooling for more than five minutes, you’ve probably felt that same pull. The beautiful thing about homeschooling in Northwest Florida — especially around the Pensacola area — is that there are more families out here doing this than you might think. You just have to find each other. And sometimes, you have to be the one brave enough to start something.

    So whether you’ve been searching for a co-op that fits your vibe and coming up empty, or you’ve been quietly thinking I could probably organize something like this — this post is for you.

    What Is a Homeschool Co-op, Really?

    A co-op (short for cooperative) is just a group of homeschool families sharing the teaching load. One parent might lead a nature journaling session. Another might teach basic Spanish. Someone else handles art. The idea is that no one has to do it all alone — and the kids get that beautiful mixed-age, real-life social experience that reminds me a lot of how we grew up in the 90s, just being around other kids of all ages and figuring things out together.

    Co-ops can be as formal or as relaxed as your group decides. Some meet weekly with structured classes. Others gather twice a month for nature walks and a read-aloud. There’s no single right way.

    Best Homeschool Co-op Ideas for Nature-Based Families

    Before we get into the how-to, let me share some of my favorite co-op formats that really fit a Charlotte Mason or outdoor-focused approach. These are the kinds of things I’d actually want to show up for on a Thursday morning.

    Nature Study Co-op

    This is probably my favorite idea and honestly the easiest to pull off. Pick a local park, nature preserve, or even rotate through each other’s backyards. Each week, one family leads a simple nature observation — birds, insects, plants, whatever’s in season. Florida is genuinely incredible for this. We have painted buntings coming through in winter, gopher tortoises wandering around like they own the place, and more wildflowers than most people ever notice.

    Kids bring their nature journals and sketch what they find. Older kids help younger kids identify species. Someone brings a Sibley’s bird guide and a pocket microscope for inspecting bark and bugs up close. This ties beautifully into our Charlotte Mason nature journal practice and gives kids something real to come back to week after week.

    Backyard Homesteading Co-op

    This one is close to my heart. Rotating through families’ homes to learn hands-on skills — baking bread, starting seeds, caring for chickens, making herb bundles. Kids are learning things that matter, in real kitchens and real backyards, alongside real adults who are genuinely doing these things.

    If your co-op has a few chicken families, you could do a whole unit on backyard flocks. Storey’s Guide to Raising Chickens is a great resource to pull from for older kids, and the Kid’s Guide to Keeping Chickens is perfect for elementary-age ones who want to be in charge of the flock care rotation.

    We’ve also pulled in our Best Chicken Coop Predator-Proof Latches post as a starting point for teaching the older kids about flock safety. Real-world, living curriculum at its best.

    Art and Watercolor Co-op

    A Charlotte Mason art co-op is simple and low-pressure. One parent leads a picture study. Another teaches basic watercolor technique. Everyone’s welcome regardless of talent. We love Faber-Castell watercolors for kids — they’re quality enough that the paintings actually feel satisfying, but not so precious that you’re stressed if someone spills.

    You can check out how we approach this at home in our Charlotte Mason art curriculum post — a lot of those same ideas translate beautifully into a co-op setting.

    Outdoor Free Play Co-op

    Honestly? Sometimes the best co-op is just showing up somewhere outside and letting the kids go. Bring walkie talkies and bug catchers. Lay out some lawn games. Sit in the shade with the other mamas and actually talk. This is the 1990s childhood we’re trying to give our kids — unstructured, outside, with mixed ages, figuring out the world on their own terms.

    📌 Love this? Save it to Pinterest so you can find it later!

    How to Actually Start a Homeschool Co-op

    Okay, here’s the part everyone asks about. How do you actually do this?

    Step 1: Start Small and Start Simple

    You do not need 20 families. You do not need a church hall or a formal charter. Start with 3-5 families who share your general values and see if the chemistry is there. I’d rather have six kids who mesh well than twenty kids whose parents are going in different directions.

    Post in your local homeschool Facebook groups (there are several good ones for the Pensacola/NW Florida area), mention it at your next park day, or just text the homeschool mamas you already know.

    Step 2: Get Clear on Your Purpose

    Before your first meeting, have a casual conversation about what everyone actually wants. Is this a teaching co-op where parents rotate leading classes? A social co-op focused on free play and field trips? A skills co-op focused on homesteading and hands-on projects? Getting aligned early saves a lot of friction later.

    If you’re using the Florida PEP scholarship, it’s worth thinking through whether any co-op expenses might be eligible — some curriculum-based co-ops can align with what PEP covers.

    Step 3: Decide on Roles and Commitment

    Every co-op needs someone to hold the calendar. It doesn’t have to be fancy — a shared Google calendar and a group chat does the job. Decide how often you’ll meet, whether attendance is expected, and what each family is responsible for bringing or leading.

    For a teaching-style co-op, one simple model: each parent commits to leading one session per month on something they genuinely know. Nobody has to be an expert — they just have to care enough to prepare something real.

    Step 4: Pick a Format That Fits Real Life

    The co-ops that fall apart are the ones that were too ambitious from day one. Start with twice a month. Keep sessions to 2-3 hours max. Rotate locations if possible so no one family is always hosting. Build in margin for the weeks when someone’s kids are sick or life just happens.

    Step 5: Leave Room for It to Grow

    The best co-ops I’ve seen started messy and grew into something beautiful. Don’t try to plan everything perfectly before you begin. Show up, see what the kids gravitate toward, listen to what the parents actually need, and let the group evolve naturally. If you’re also teaching multiple ages, our post on homeschooling multiple ages at once has some practical tips that apply just as well in a co-op setting.

    A Note on Keeping It Low-Pressure

    The goal isn’t perfection. The goal is connection — for your kids and for you. Some of the richest moments in our co-op have been the least planned ones. A mama who brought her sourdough starter and just let the kids punch dough. The afternoon we all ended up watching a red-tailed hawk hunt from someone’s back fence, completely off-schedule, and every single kid was riveted.

    That’s the stuff that sticks. That’s the stuff they’ll remember when they’re grown.

    If you’re building something like this from the ground up, give yourself grace. It won’t look perfect at first. But a year from now, you’ll look at your kids and those other families and know you built something that mattered.

    You’ve got this, mama. Go find your people.


    📖 You Might Also Like:

    Frequently Asked Questions

    How many families do you need to start a homeschool co-op?

    You really only need 3-5 committed families to get started. Smaller groups are easier to coordinate, tend to have better chemistry, and are less overwhelming to organize. You can always grow from there once you find your rhythm.

    Do homeschool co-ops cost money to join or run?

    It depends on the co-op. Many informal co-ops cost little to nothing — families just take turns hosting or leading activities and split any supply costs. More structured co-ops that rent space or bring in outside teachers may have monthly dues. Starting simple keeps the cost low and the commitment manageable.

    Can homeschool co-op expenses be covered by the Florida PEP scholarship?

    Potentially, yes — if the co-op is providing curriculum-aligned instruction and the expenses are for approved educational purposes. It’s worth reviewing the current PEP scholarship guidelines or checking with your scholarship funding organization to confirm what qualifies.

    What’s the best co-op format for Charlotte Mason or nature-based homeschool families?

    Nature study co-ops are a natural fit — regular outdoor meetups where families rotate leading observations, sketching sessions, and species identification. Art co-ops with watercolor and picture study are also very popular in CM circles. The key is keeping it hands-on, low-pressure, and rooted in real experiences rather than worksheets.

    How do you keep a homeschool co-op from falling apart after a few months?

    Start with a clear, shared purpose and realistic expectations. Don’t overcommit on frequency or structure right away. Make sure every family has a role so it doesn’t fall on one person’s shoulders. And leave room for the group to evolve — the best co-ops grow organically once families find what actually works for them.

  • Best Backyard Duck Breeds for Egg Production (What Actually Lays Well and Fits a Real Family)

    Best Backyard Duck Breeds for Egg Production (What Actually Lays Well and Fits a Real Family)

    Best Backyard Duck Breeds for Egg Production (What Actually Lays Well and Fits a Real Family)

    🌿 The Short Version: Not all ducks are created equal when it comes to egg production — some breeds lay nearly as well as chickens, while others are mostly ornamental. This post breaks down the best backyard duck breeds for egg production, with honest notes on temperament, care, and what actually thrives in a warm, humid Florida climate.

    This post contains affiliate links. I may earn a small commission at no extra cost to you.

    So here’s how it started for us: our chickens were molting, eggs were sparse, and my kids were devastated that the egg basket was basically empty for weeks. My oldest looked at me one afternoon and said, “Mama, what if we got ducks? Don’t they lay in winter?”

    Honest answer? I had no idea. But we looked it up together — which, by the way, is one of my favorite parts of homeschooling — and down the rabbit hole we went. Turns out, certain duck breeds are incredible egg layers. Some actually outpace chickens. And for us, living in Northwest Florida where the humidity is real and the summers are brutal, ducks ended up being a genuinely great fit.

    If you’ve been curious about adding ducks to your backyard flock specifically for egg production, let me save you a few hours of searching. Here’s what we’ve learned.


    Why Ducks for Eggs?

    Before we get into breeds, let’s just talk about why duck eggs are worth the effort. Duck eggs are larger than chicken eggs, richer in fat and protein, and many people who are sensitive to chicken eggs can actually tolerate duck eggs just fine. They’re also phenomenal for baking — your sourdough and muffins will thank you. (If you haven’t started your sourdough journey yet, I wrote all about it over here: How to Make Homemade Sourdough Bread from Scratch (Even If You’ve Killed Every Starter You’ve Ever Had).)

    Ducks also tend to be hardier than chickens in wet conditions, they’re more resistant to many common poultry diseases, and — this is the part my kids love — they are genuinely entertaining to watch waddle around the yard. Pure 1990s backyard magic.


    The Best Duck Breeds for Egg Production

    1. Khaki Campbell — The Gold Standard

    If you want eggs, start here. The Khaki Campbell is hands-down the most productive egg-laying duck breed available. We’re talking 250–340 eggs per year, which honestly puts a lot of chicken breeds to shame. They’re medium-sized, calm enough around kids, and they don’t require a full pond — a kiddie pool or a good chicken waterer setup works fine for them.

    They’re a little more skittish than some other breeds, so they’re not necessarily a “lap duck,” but they are consistent and reliable layers. If egg production is your primary goal, Khaki Campbells are your bird.

    2. Indian Runner — The Quirky, Upright Layer

    Okay, these ducks are hilarious. They stand upright like little penguins and basically run everywhere instead of waddling. My kids were obsessed the first time they saw them in person. But beyond the entertainment value, Indian Runners are excellent layers — expect 150–300 eggs per year depending on the individual bird and care.

    They’re active foragers, which makes them great for a yard with bugs to chase down. They do need space to roam. For our Florida property, the fact that they forage so aggressively has been a bonus — they help keep the pest population manageable in ways our chickens don’t quite match.

    3. Welsh Harlequin — Beautiful and Productive

    This is the breed I’d recommend if you want a good layer and a duck that’s genuinely pleasant to be around. Welsh Harlequins are calm, friendly, beautiful birds that lay around 240–330 eggs per year. They’re also good foragers and tend to do well in warmer climates.

    For a Charlotte Mason family, there’s something really lovely about having a breed this pretty in your yard. My kids have sketched them in their nature journals multiple times — the feather patterns are genuinely gorgeous and worth studying up close. Pair that with a pocket microscope to look at feather structure and you’ve accidentally turned duck chores into a full nature study lesson.

    4. Pekin — The Family-Friendly Option

    Pekins are probably the most recognizable duck — big, white, cheerful-looking. They’re the quintessential backyard duck for good reason. They’re docile, friendly with kids, and while they’re not quite as prolific as Campbells, they still lay a solid 125–225 eggs per year.

    If you have little ones who want to interact with the ducks regularly, Pekins are the most forgiving temperament-wise. They’re also dual-purpose (meat and eggs) if that matters to your family down the road. They do run hot in Florida summers, so shade and water access are non-negotiable.

    5. Ancona Duck — The Underrated Option

    Ancona ducks don’t get nearly enough attention. They lay 210–280 eggs per year, come in fun spotted color patterns, and are calm and friendly. They’re also good foragers and adapt well to a range of climates — including the heat and humidity we deal with here in the Pensacola area.

    I’d honestly recommend Anconas to any Florida family who wants a solid layer that’s also easy to handle. They’re a great middle-ground bird.


    Duck Care Basics (The Real Talk)

    Ducks are messier than chickens. I want to be upfront about that. They love water, they splash it everywhere, and their bedding gets wet fast. If you go in knowing that, you won’t be caught off guard.

    A few things that have made our setup manageable:

    • A good coop situation. We use a covered, secure area at night. An automatic coop door has been a game-changer for us — it closes at dusk without us having to remember every single night. (We use ours for both chickens and ducks.)
    • Clean water access. Ducks need to dunk their heads to keep their nostrils clear. A simple tub or kiddie pool refreshed regularly does the job.
    • Pest control without toxins. We use Wondercide around the perimeter of our coop and yard to keep mosquitoes and pests down without exposing our birds or kids to harsh chemicals.
    • Diatomaceous earth sprinkled in bedding helps manage moisture and pests naturally.

    For deeper reading on flock care and setup, Storey’s Guide to Raising Chickens actually has helpful poultry fundamentals that translate well to ducks too. And if your kids want their own resource to read through, the Kid’s Guide to Chickens is a sweet place to start — our kids have learned so much from having their own animal care books to reference.

    📌 Love this? Save it to Pinterest so you can find it later!


    Ducks + Kids = The Best Nature Study

    Here’s the thing I didn’t fully anticipate when we added ducks: how much learning would happen just from watching them. My kids have noticed foraging patterns, egg-laying schedules, social behavior between the ducks, and how they respond to weather changes. All of that is living, breathing nature study — no curriculum required.

    We log duck observations in nature journals alongside bird sketches and plant findings. If you’re not already doing regular nature journaling, I shared what our rhythm actually looks like over here: Charlotte Mason Nature Journal Ideas for Kids (What We Actually Do Year-Round in Florida).

    Adding a Sibley Birds guide to your shelf helps kids connect backyard ducks to wild waterfowl in the area — and here in Northwest Florida, we have plenty of native waterfowl to compare and contrast. That kind of connection — from your own backyard to the wild world — is exactly what I want our kids growing up with.

    For more on our broader backyard flock and what breeds we’ve tried, check out: Best Duck Breeds for a Florida Backyard Flock (What Actually Thrives Down Here).


    A Few Honest Notes for Florida Families

    • Heat matters. Khaki Campbells and Indian Runners handle heat better than Pekins. If you’re in Central or South Florida, lean toward those breeds first.
    • Predators are real. Here in the Panhandle we deal with raccoons, opossums, and the occasional hawk. A secure night setup is non-negotiable. We wrote more about coop security over here: Best Chicken Coop Predator-Proof Latches (What Actually Keeps Your Flock Safe at Night).
    • Ducks lay in the morning. Unlike chickens who can lay throughout the day, most ducks lay before 9am. Keep them in their enclosure until mid-morning and you’ll collect eggs much more reliably.
    • Start with 2-4 birds. Ducks are social and do poorly alone. A small starter flock of 2-4 hens is a sweet spot for most families.

    Our Bottom Line

    If I had to pick one breed for a Florida family who wants eggs and easy-going birds, I’d say Welsh Harlequins for temperament plus production, or Khaki Campbells if max egg count is the goal. Either way, you’ll be cracking duck eggs into your sourdough before you know it and wondering why you waited so long.

    Adding ducks has been one of those decisions our family just keeps feeling good about. The kids are more connected to where their food comes from, our yard has a little more life and personality in it, and there’s something about watching kids chase happy ducks around the yard on a sunny Florida morning that just feels right. That’s the childhood we’re building here — muddy, real, and full of living things.

    If you’re thinking about adding ducks, just start. Pick a breed, build or buy a simple setup, and go for it. You don’t have to have it all figured out first.


    📖 You Might Also Like:

    Frequently Asked Questions

    What is the best duck breed for egg production?

    The Khaki Campbell is widely considered the best duck breed for egg production, laying 250–340 eggs per year. Welsh Harlequins and Indian Runners are also excellent choices, combining solid egg production with a calmer, more family-friendly temperament.

    Do ducks lay more eggs than chickens?

    Some duck breeds — especially Khaki Campbells — can actually out-lay many chicken breeds. Ducks also tend to lay more consistently through winter than chickens, which makes them a great complement to a backyard flock that slows down during molting season.

    What duck breeds do best in Florida heat?

    Khaki Campbells, Indian Runners, Welsh Harlequins, and Ancona ducks all handle Florida’s heat and humidity reasonably well. Pekins can struggle more in extreme heat, so make sure they have plenty of shade and fresh water access if you’re in a warmer part of the state.

    How many duck eggs does a duck lay per week?

    A good laying duck breed like a Khaki Campbell or Welsh Harlequin can lay 5–7 eggs per week during peak production. Production naturally slows during molting or very short winter days, but ducks generally maintain more consistent laying than chickens year-round.

    Are duck eggs healthier than chicken eggs?

    Duck eggs are larger and contain more fat, protein, and several vitamins compared to chicken eggs. They’re also often tolerated by people who have sensitivities to chicken eggs. Many bakers prefer duck eggs for richer, fluffier results in baked goods like sourdough bread, muffins, and cakes.

  • Charlotte Mason Picture Study: How to Actually Do It (Without Overthinking It)

    Charlotte Mason Picture Study: How to Actually Do It (Without Overthinking It)

    Charlotte Mason Picture Study: How to Actually Do It (Without Overthinking It)

    🌿 The Short Version: Charlotte Mason picture study is simpler than most blogs make it sound — one artist, one painting at a time, with a little looking and a little narrating. This post walks you through exactly how our family does it, what supplies actually help, and why it’s become one of our favorite parts of our homeschool week.

    This post contains affiliate links. I may earn a small commission at no extra cost to you.

    When I first started looking into Charlotte Mason picture study, I did what any good homeschool mama does — I fell down a rabbit hole of blog posts and Pinterest boards and ended up more confused than when I started. Lapbooks? Portfolios? Fancy art prints? Special binders?

    Y’all. It doesn’t have to be that complicated.

    We’ve been doing picture study in our homeschool for a couple of years now, and I’m here to tell you it is one of the simplest, most beautiful things we do all week. My kids actually ask for it. And if you know elementary-age kids, you know that is saying something.

    Here’s how we actually do it — no overwhelm, no perfection required.


    What Is Charlotte Mason Picture Study, Really?

    Charlotte Mason believed children deserved a rich, full education — one that included exposure to great art the same way it included great books and time in nature. She called it “picture study,” and the basic idea is this: you spend a term (about 12 weeks) studying one artist. You look at one painting at a time. You look at it carefully. Then you put it away and describe what you remember.

    That’s it. That’s the whole method.

    No worksheets. No quizzes. No art history textbooks (unless you want them later). Just looking, noticing, and narrating. It’s the same principle behind narration in reading — we learn by paying attention and then putting what we observed into our own words.

    Miss Mason believed that children who are trained to really see a painting develop something lasting — an eye for beauty, a habit of attention. In a world that’s moving faster and faster, I think that matters more than ever.


    How We Set Up Our Picture Study Terms

    We follow a simple rotation. Each term (we run three terms a year), we pick one artist. I don’t stress over which artist — I just think about what might connect to whatever else we’re studying, or I pick someone whose work I personally love.

    Some artists we’ve done:

    • Winslow Homer (water, boats, nature — perfect for us here on the Gulf Coast)
    • Monet (the kids were obsessed with the water lilies)
    • Beatrix Potter (yes, she counts — and the kids loved it)
    • Mary Cassatt (great entry point for younger kids)

    I print six to eight paintings per artist, one per week. You can find high-quality images for free on WikiArt or the Google Arts & Culture app. I print them at home on cardstock or order a few prints from a local office supply store. Nothing fancy.


    Our Actual Picture Study Routine (Step by Step)

    This whole thing takes about 10–15 minutes once a week. We do it as part of our morning basket, usually on Thursdays.

    Step 1: Look.

    I prop the painting up where everyone can see it — sometimes on the whiteboard ledge, sometimes just propped on the table. I set a timer for 3–5 minutes (we use a little sand timer), and we all just look. Silently. No talking yet.

    This part felt weird at first. My kids squirmed. Now they settle right into it. That quiet looking is actually training their attention spans in a way that no worksheet ever could.

    Step 2: Discuss.

    After the silent looking, I turn the painting face-down and we talk. I ask things like:

    • What do you remember seeing?
    • What were the colors like?
    • Was there a person in the painting? What were they doing?
    • How did it make you feel?

    I do not quiz them. I do not correct them if they miss something. I just listen and ask follow-up questions. Sometimes my youngest says something so unexpectedly profound about a painting that it takes my breath away.

    Step 3: Look Again.

    We flip the painting back over and look a second time. Now they see things they missed. This is where the real noticing happens.

    Step 4 (Optional): Narrate or Draw.

    For older kids, I sometimes ask them to write a sentence or two in their nature journal about the painting — not a summary, just an impression. What did it remind you of? What question does it make you want to ask?

    For my younger ones, I’ll sometimes pull out the Faber-Castell watercolors and let them paint something inspired by what we looked at. Not a copy — just something the painting made them want to make. This is so good for little hands and big imaginations.


    📌 Love this? Save it to Pinterest so you can find it later!

    Connecting Picture Study to the Rest of Our Days

    One of my favorite things about the Charlotte Mason approach is how it all weaves together. Picture study doesn’t have to live in a silo.

    When we studied Winslow Homer, we were also spending a lot of time at the beach and bay here in Northwest Florida. We talked about how he painted water and light. My kids started noticing light on the Gulf differently — the way the afternoon sun turns the water silver-green, the way shadows fall across the white sand. That is picture study working.

    We’ve also connected it to our Charlotte Mason nature journal practice — looking carefully at a painting and looking carefully at a bird or a flower are the same skill. Attention. Noticing. Holding what you see in your mind long enough to put it into words or pictures.

    For kids who are also working through art curriculum, picture study fits in naturally alongside technique practice. They’re learning to see through the masters while also learning to make with their own hands.


    Do You Need Any Special Supplies?

    Honestly? Not really. But here’s what we use and love:

    • A nature journal or sketchbook — this one is our longtime favorite and holds up beautifully to watercolor
    • Watercolors — Faber-Castell are our go-to; good quality, non-toxic, last forever
    • Printed art images — free from WikiArt, printed on cardstock
    • A quiet 10 minutes and a little willingness to let learning look like looking

    That’s it. I’ve seen people sell elaborate picture study kits and curriculum packages, and while some of them are lovely, you truly do not need them. The method is the thing.


    What About Multiple Ages?

    Picture study is one of those beautiful parts of homeschool that works across all ages at once — which is a gift when you’re juggling multiple kids. My kindergartner and my fourth grader look at the same painting. They notice different things. They describe it differently. And somehow they both get exactly what they need from it.

    If you’re figuring out how to run a homeschool with a range of ages, I have a whole post on homeschooling multiple ages at once that might help you see how picture study fits into the bigger picture (pun intended).


    A Note on Slowing Down

    I grew up in the 90s. We didn’t have iPads or YouTube or infinite content competing for our attention every second. We were bored sometimes, and out of that boredom came creativity and curiosity and a real ability to just… be somewhere and notice it.

    Picture study, in a small way, gives our kids some of that back. Ten minutes a week where we put everything down and just look at something beautiful. No right answer. No score. Just attention.

    In a world that is constantly rushing my children toward the next thing, I am fiercely protective of that slow space. Picture study is one of the ways we hold it.

    If you’re just starting out with Charlotte Mason and feeling overwhelmed by all the pieces — picture study is a wonderful place to begin. Start with one artist. Print one painting. Set a timer. Look.

    You’ll be surprised what your kids see.


    📖 You Might Also Like:

    Frequently Asked Questions

    How often should you do Charlotte Mason picture study?

    Once a week is the traditional Charlotte Mason recommendation, and it’s what works best for most families. You spend one term (roughly 12 weeks) on a single artist, looking at a new painting each week. That pace gives kids time to really absorb an artist’s style without rushing.

    What artists are best to start with for Charlotte Mason picture study?

    Great starting artists for younger kids include Monet, Mary Cassatt, Winslow Homer, and Beatrix Potter. They have visually engaging work that kids connect with naturally. As children get older, you can branch into more complex artists. There’s no strict order — just pick someone whose work genuinely interests you or connects to what you’re already studying.

    Do I need to buy a picture study curriculum or special prints?

    No! You can find high-quality, free images of famous paintings on WikiArt.org and the Google Arts & Culture app. Print them at home on cardstock for a few cents each. Some families enjoy purchasing art print sets, but it’s completely optional — the method is what matters, not the materials.

    How long does Charlotte Mason picture study take each week?

    About 10 to 15 minutes per session, once a week. That’s it. It’s one of the quickest wins in a Charlotte Mason homeschool — a short investment of time that pays off in big ways over months and years of consistent practice.

    Can Charlotte Mason picture study work for mixed ages?

    Yes, and this is actually one of its biggest strengths. Kids of different ages look at the same painting and naturally engage with it at their own level. A kindergartner notices colors and shapes; an older child might notice mood, composition, or historical context. It’s a rare homeschool activity that truly works for everyone at the same table.