Blog

  • How to Teach Kids to Cook Basic Skills by Age (Without Losing Your Mind or Your Kitchen)

    How to Teach Kids to Cook Basic Skills by Age (Without Losing Your Mind or Your Kitchen)

    How to Teach Kids to Cook Basic Skills by Age (Without Losing Your Mind or Your Kitchen)

    🌿 The Short Version: Teaching kids to cook doesn’t have to be a Pinterest-perfect production — it just takes starting small, matching tasks to their age and ability, and letting them actually do the thing even when it’s messy. This guide breaks down real, practical cooking skills by age so you can raise capable kids who aren’t helpless in a kitchen.

    This post contains affiliate links. I may earn a small commission at no extra cost to you.

    Somewhere along the way, we stopped teaching kids how to feed themselves. I don’t mean snacks out of a bag — I mean actually cook. Crack an egg. Stir a pot. Know what it smells like when butter is about to burn. My grandmother could make biscuits from scratch at nine years old. My mom could debone a chicken by middle school. And here we are, handing our kids a tablet and telling them dinner’s ready.

    I’m not here to be preachy about it — because honestly, I had to work at this too. Getting kids into the kitchen is chaotic. It takes longer. Things get spilled. But somewhere between the flour cloud and the scrambled eggs that are a little too brown, something real is happening. They’re learning to feed people they love. And that matters.

    We’ve been weaving cooking into our homeschool days for years now, and it fits naturally into our Charlotte Mason approach — real life is the curriculum. The kitchen is just another classroom.

    Why the Kitchen Is One of the Best Places to Homeschool

    Seriously. Before we even get into the age-by-age breakdown, I want to say this: cooking with kids covers so many subjects at once. Fractions in measuring cups. Reading through a recipe. Science in how yeast works or why eggs bind. History when you make a dish from another culture. And for my kiddos, it ties directly into what we do outside — gathering eggs from our backyard flock, using herbs from the garden, understanding where food actually comes from.

    If you’re looking for ways to make your days feel more connected and less like you’re checking boxes, the kitchen is it. (And if you want more ideas like that, I wrote about this in Intentional Parenting: What It Actually Looks Like Day to Day — it’s one of my favorite posts.)

    Teaching Kids to Cook Basic Skills by Age

    Ages 3–5: The Helper Stage

    At this age, the goal isn’t a finished product. The goal is familiarity. You want them comfortable in the kitchen, not scared of it.

    What they can do:

    • Rinse fruits and vegetables
    • Tear lettuce or herbs
    • Stir batter (with help holding the bowl)
    • Pour pre-measured ingredients
    • Use a kid-safe spreader on toast or muffins
    • Wash hands (this one takes a thousand reminders, but still)

    Keep it low-stakes. Give them a job every single time you’re in the kitchen, even if it’s just handing you things. The repetition is the teaching. And yes, it’s slower. Yes, there will be a puddle of something on the floor. That’s fine.

    This is also the age we start talking about where food comes from. We walk out to the coop together in the morning to collect eggs — my little one carries the basket now, very seriously — and that connection between animal care and breakfast is something a worksheet never could have taught.

    Ages 6–8: The Real Skills Start

    This is where it gets good. Kids this age are capable of so much more than we give them credit for. They want to do real things, not pretend things.

    What they can do:

    • Crack eggs (yes, for real — just expect some shells at first)
    • Measure dry and wet ingredients accurately
    • Use a vegetable peeler with supervision
    • Make simple salad dressings or dips
    • Operate a toaster or microwave with basic safety rules
    • Make a simple sandwich or wrap start to finish
    • Help set and understand a kitchen timer
    • Scramble eggs on the stovetop with you right there

    We started letting our oldest crack eggs for breakfast around age six, and now at eight she can make the whole scramble herself. The eggs from our girls out back make it feel even more meaningful — she knows those hens by name.

    This is also a great time to pair kitchen time with a little nature journaling. If you’re making something with herbs or seasonal produce, have them sketch it first in a nature journal before you cook it. Charlotte Mason would absolutely approve.

    📌 Love this? Save it to Pinterest so you can find it later!

    Ages 9–11: Building Real Independence

    By this age, we’re aiming for a kid who can make a simple meal with minimal hand-holding. Not every night, not perfectly — but genuinely. This is the stage where the 1990s kid in me kicks in hardest. We were doing things at this age. Real things.

    What they can do:

    • Follow a simple recipe independently from start to finish
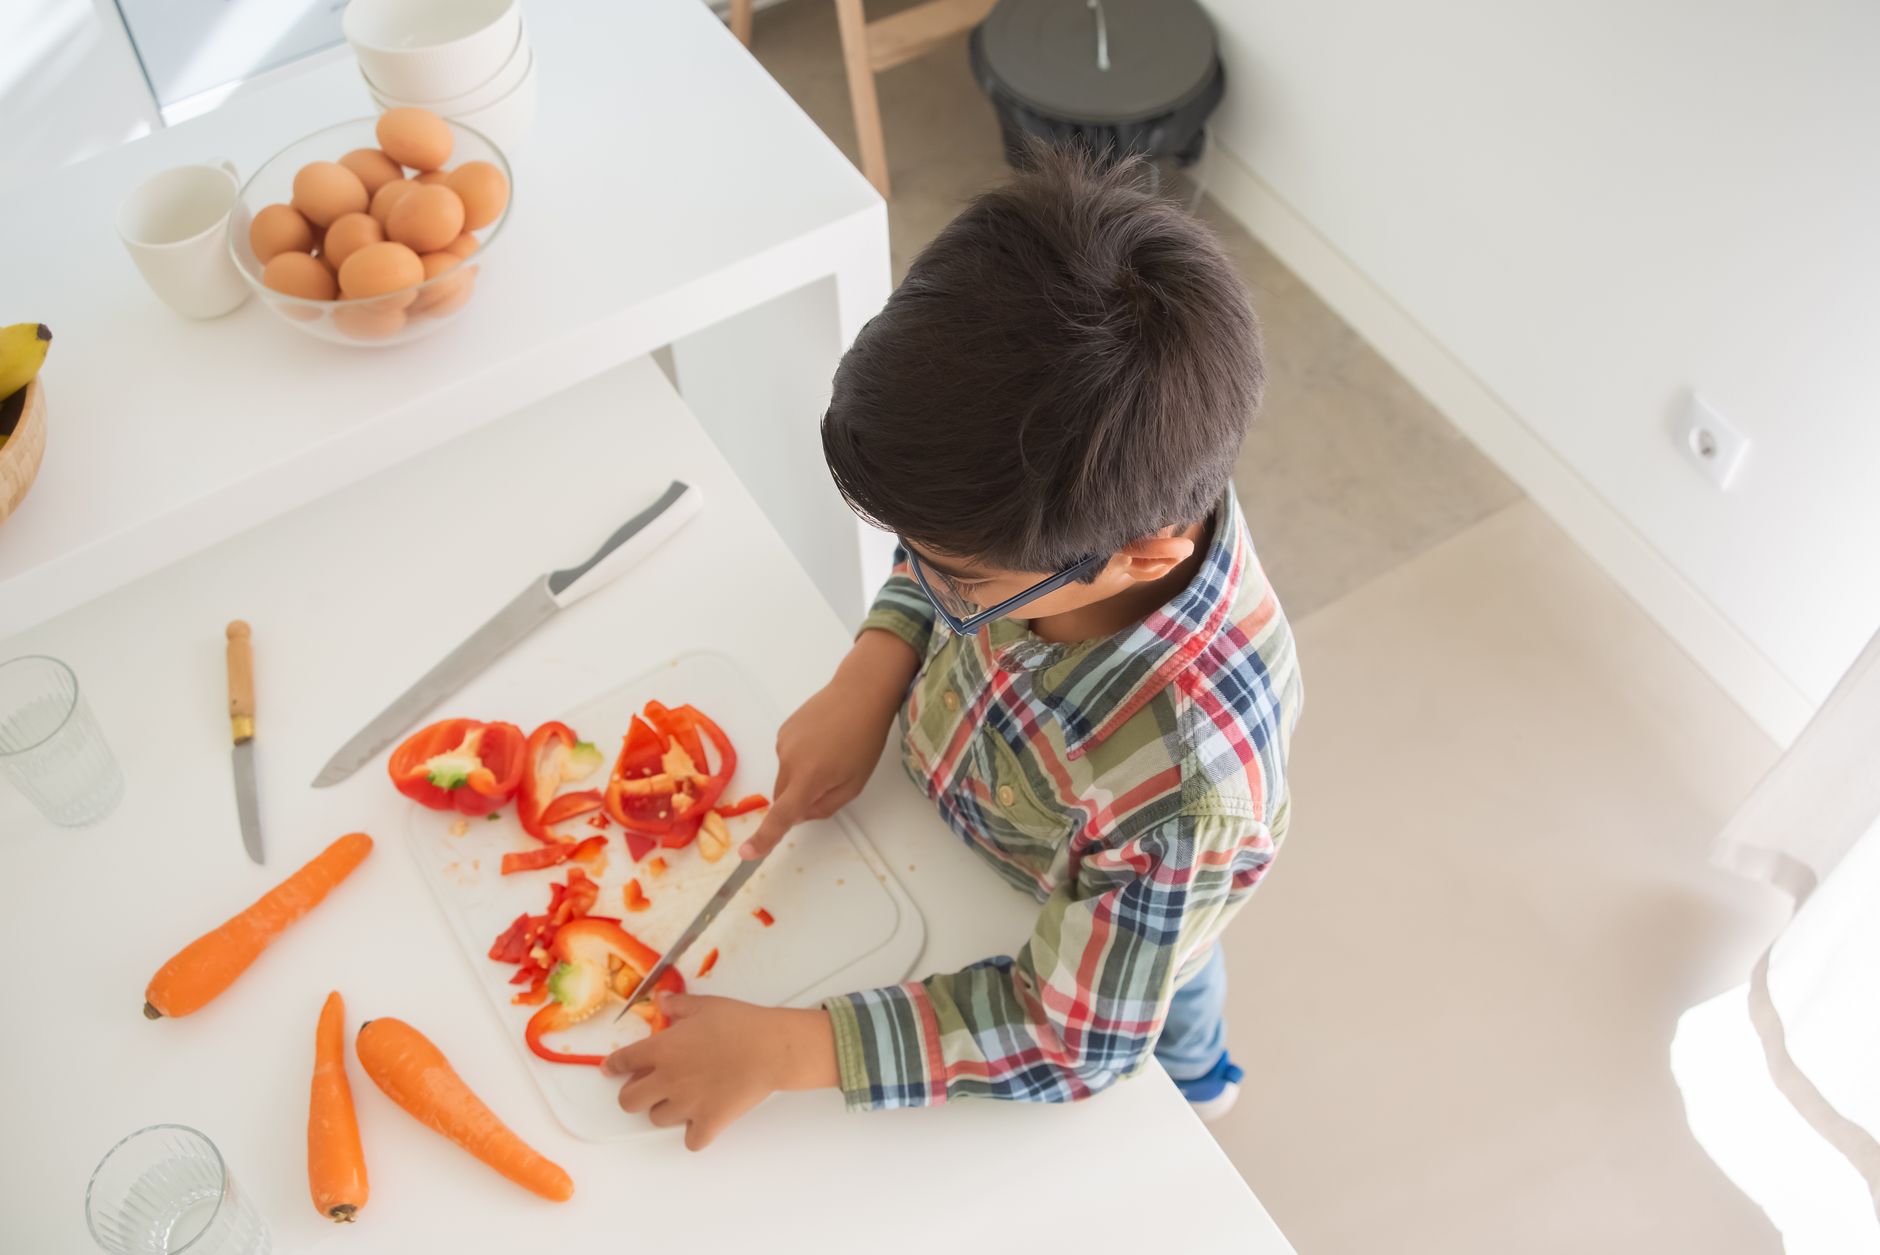
    • Use a sharp knife with proper training (start with the pinch grip and a soft vegetable like a banana, then work up)
    • Cook pasta, rice, or oatmeal on the stovetop
    • Make a basic soup or stew with supervision
    • Bake muffins, cornbread, or simple cookies from scratch
    • Understand food safety basics — temps, cross-contamination, handwashing
    • Help plan a simple family meal
    • Fry an egg or make French toast

    Here in Northwest Florida, we do a lot of cooking with what’s in season or what the garden gives us. Getting kids involved in that whole cycle — from planting to harvesting to cooking — is one of the most grounding things we do as a family. If you want to bring that piece in too, check out How to Involve Kids in Homestead Chores by Age — it pairs really well with what we’re talking about here.

    Practical Tips That Actually Make This Work

    Start with breakfast. It’s the lowest-pressure meal. No one’s starving and stressed waiting on it (usually). Eggs, toast, oatmeal, smoothies — all totally doable for elementary kids.

    Give them ownership over one meal a week. Even if it’s just Saturday lunch. Let them pick it, help you shop for it (or plan from what we have), and make it. The pride on their face when the family eats something they made is worth every spilled measuring cup.

    Don’t rescue them too fast. If they drop an egg, hand them a paper towel and let them clean it up. That’s part of it. If the pancakes are a little flat, eat them anyway and figure out together why that happened. The troubleshooting is the lesson.

    Keep good tools accessible. Kids need tools that actually fit their hands. Kids garden gloves for garden-to-kitchen tasks, a small cutting board that doesn’t slide, a whisk they can actually grip. Set them up to succeed.

    Use a cast iron skillet. I know that sounds like a hill, but cooking on a cast iron skillet teaches kids so much about heat management — and it’s non-toxic, which matters to me. No weird coatings flaking into our food.

    Talk about the food. Where did this chicken come from? What makes bread rise? Why do we salt pasta water? The conversation is the Charlotte Mason piece. It’s narration. It’s living education.

    Connecting Cooking to the Bigger Picture

    One of the reasons I love teaching cooking as part of our homeschool is that it’s inherently connected to everything else we value. It ties into our chickens and the eggs they give us. It ties into our garden and what we grow. It connects to simple living, seasonal rhythms, and the kind of capable, grounded childhood I want my kids to have.

    If you’re building out more of those rhythms in your home, Seasonal Living Ideas for Families is a post I come back to constantly — it’s full of simple ways to anchor your year around real, meaningful things instead of busyness.

    And when they’re cooking those backyard eggs, it doesn’t hurt to have good information on hand. Storey’s Guide to Raising Chickens is still my go-to flock reference, and the Kids’ Guide to Keeping Chickens is one my kids actually read on their own — it’s approachable and detailed without being overwhelming.

    You Don’t Have to Have It All Figured Out

    I’m going to be honest with you: our kitchen is not always peaceful. Sometimes someone cries because the eggs broke. Sometimes I forget to be patient and I jump in too fast and do it for them, and then I have to apologize for that. This is a practice, not a performance.

    But we keep showing up in the kitchen together, and slowly, surely, my kids are becoming people who know how to feed themselves and others. That’s the goal. Not Instagram-worthy cooking videos. Just capable, confident kids who know their way around a kitchen.

    That’s a life skill that will outlast any worksheet we ever did.


    📖 You Might Also Like:

    Frequently Asked Questions

    What age should kids start learning to cook?

    Kids can start participating in the kitchen as young as 2-3 years old with simple tasks like rinsing vegetables or stirring batter. By age 6-8 they can crack eggs and follow simple steps, and by 9-11 many kids can make a basic meal from start to finish with minimal supervision. The key is matching the task to what they’re developmentally ready for and letting them actually do it — not just watch.

    Is it safe for young kids to use the stove?

    With proper supervision and teaching, yes. Most kids around age 7-8 can begin learning basic stovetop skills like scrambling eggs or stirring oatmeal with a parent right there guiding them. Teach them about burner heat, what handles to watch, and never leaving something unattended. Starting on low heat with simple foods builds confidence safely.

    What are the most important cooking skills to teach elementary-age kids?

    The basics that matter most are: cracking and cooking eggs, measuring ingredients accurately, using a knife safely, reading and following a recipe, understanding basic food safety (handwashing, temperatures, cross-contamination), and making at least one simple meal from start to finish. These cover the foundations everything else builds on.

    How do I get my kids interested in cooking if they don’t want to help?

    Give them real ownership instead of just asking them to help you. Let them pick a recipe, choose a meal for the week, or be in charge of one specific dish. Kids disengage when they feel like a sous chef for your vision. When it’s genuinely theirs — including the failures — they stay invested. Tying cooking to something they already love (animals, gardening, a favorite food) helps too.

    Can cooking count as part of our homeschool curriculum?

    Absolutely. Cooking naturally covers math (fractions, measurement, timing), reading (following recipes), science (chemistry of baking, food safety), and practical life skills. In a Charlotte Mason approach especially, real-life tasks like cooking are core to the philosophy of living education. Many families using the Florida PEP scholarship incorporate cooking as part of their documented homeschool activities.
  • Best Kids Garden Tools That Actually Work (And Won’t Fall Apart After One Season)

    Best Kids Garden Tools That Actually Work (And Won’t Fall Apart After One Season)

    Best Kids Garden Tools That Actually Work (And Won’t Fall Apart After One Season)

    🌿 The Short Version: Most kids’ garden tools are flimsy plastic that break before the seeds even sprout — but a few brands actually get it right. This post covers what to look for, what to skip, and the specific tools our family uses to get real garden work done with elementary-age kids.

    This post contains affiliate links. I may earn a small commission at no extra cost to you.

    If you’ve ever handed your kid a cheap plastic trowel from the dollar section and watched it snap in half before they even hit dirt — you already know the problem. Most tools marketed to children are basically toys dressed up as garden tools. They’re sized small, sure. But they’re also so flimsy and poorly made that they can’t actually do anything useful, which means your kid gets frustrated, you get frustrated, and everybody ends up just standing there.

    We garden here in Northwest Florida pretty much year-round. I’m talking fall tomatoes, winter greens, spring herbs, summer okra in the blazing Pensacola heat. My kids are out there with me because that’s part of how we learn — Charlotte Mason called it “living education” and I just call it Tuesday. But for that to actually work, they need tools that function. Real tools, just appropriately sized.

    Here’s what we’ve learned after a few seasons of trial and error (and one very sad broken rake incident).


    What to Look For in Kids Garden Tools

    Before I get into specific picks, let me save you some money with a few quick guidelines.

    Skip the all-plastic sets. If it comes in a pastel gift box and costs $8 for four pieces, it’s going to break. Those tools can’t penetrate Florida’s sandy soil (or worse, our clay-heavy patches) with any kind of force.

    Look for metal heads with wooden or sturdy composite handles. These are real tools made small. They’ll last multiple seasons and actually do the job.

    Size matters — but not the way you think. The tool should be sized so your child can use it comfortably without bending awkwardly, but it should still be heavy enough to work. Lightweight doesn’t always mean better for kids — sometimes a little weight behind a trowel is what makes it dig.

    Involve them in picking. When kids have a say in their tools, they take ownership. We use our nature journal to sketch and plan the garden before we even start, and letting the kids pick their own gloves is part of that buy-in.


    The Kids Garden Tools We Actually Use

    1. A Good Trowel — The Non-Negotiable

    This is the workhorse of the garden. We look for a trowel with a stainless steel or carbon steel head and a handle that fits smaller hands without being so short it’s awkward. Radius Garden makes a great one, and DeWit offers scaled-down versions of their adult tools that are genuinely excellent.

    What we use ours for: transplanting seedlings (especially from our indoor seed starting kit), dividing herbs, and general digging. My second grader can actually transplant a pepper start without me doing it for her. That’s the goal.

    2. A Hand Cultivator / Claw

    Three-pronged hand cultivators are fantastic for kids because they can break up soil and pull weeds without needing a lot of force. Even my kindergartner can use one independently. We do most of our weeding this way in the cooler months when the garden beds are active.

    This is also great for aerating around established plants — something we do regularly in our beds because Florida soil compacts fast, especially after our afternoon thunderstorms all summer.

    3. A Small Garden Rake

    Not the leaf rake — the bow rake style, just smaller. Great for smoothing out beds before planting, which is something even a five-year-old can do with confidence. One job they can own start to finish. Pair this with some kids garden gloves and they’re ready to go.

    4. A Watering Can with a Removable Rose Head

    This sounds boring but it matters. The rose head (the sprinkle attachment) lets kids water seedlings without blasting them out of the soil. Without it, my son once watered a newly planted bed into a small flood. We still talk about it.

    Look for a one-gallon or smaller metal watering can. The metal ones hold up way better than plastic, and honestly they look better too. We hang ours on a hook in the garden shed.

    5. Rain Boots — Yes, This Counts

    Okay, not technically a tool, but absolutely essential equipment. We are outside in the rain, in the mud, stomping through the chicken area before heading to the garden beds. Proper kids rain boots that fit well and don’t let water in are non-negotiable in this family. My kids have learned to grab their boots before they grab their tools — and that’s a life skill I’m proud of.

    6. A Bug Catcher for the Inevitable Discoveries

    I know, I know — but hear me out. The second you turn over a shovelful of soil in a Florida garden, someone is finding a worm, a pillbug, a beetle larvae, or something completely unidentified. That is a nature study moment, and I’m not going to rush past it.

    We keep a bug catcher right in the garden basket so we can pause, observe, maybe sketch in the nature journal, and then return the critter to the soil where it belongs. This is the 1990s way of doing it — you don’t scroll past the interesting thing, you stop for it.

    📌 Love this? Save it to Pinterest so you can find it later!


    How We Use the Garden as a Classroom

    Gardening isn’t separate from homeschool in our house — it is homeschool, at least part of it. We track planting dates in our nature journals. We observe and sketch what’s growing. We measure plant height for math. We read seed packets for reading comprehension. We talk about the water cycle when it rains. We compost our kitchen scraps (if you want to start, check out my post on how to build a simple compost bin for beginners) and watch what happens over time.

    The chickens are part of this ecosystem too — they scratch through finished compost, eat garden pests, and produce the manure that feeds the soil. We use Storey’s Guide to Raising Chickens as a reference, and my older kids can now explain the nitrogen cycle using chickens and compost. That’s real science.

    For nature journaling in the garden specifically, Faber-Castell watercolors are our go-to. The colors are gorgeous, they’re easy to use outside, and they make the whole experience feel more like art than a worksheet — because it is.

    If you’re building out a more intentional outdoor learning space, my post on how to create a nature play yard in your backyard has a lot of overlap with what we’ve done in the garden area.


    Tips for Actually Getting Kids to Garden (Without It Becoming a Battle)

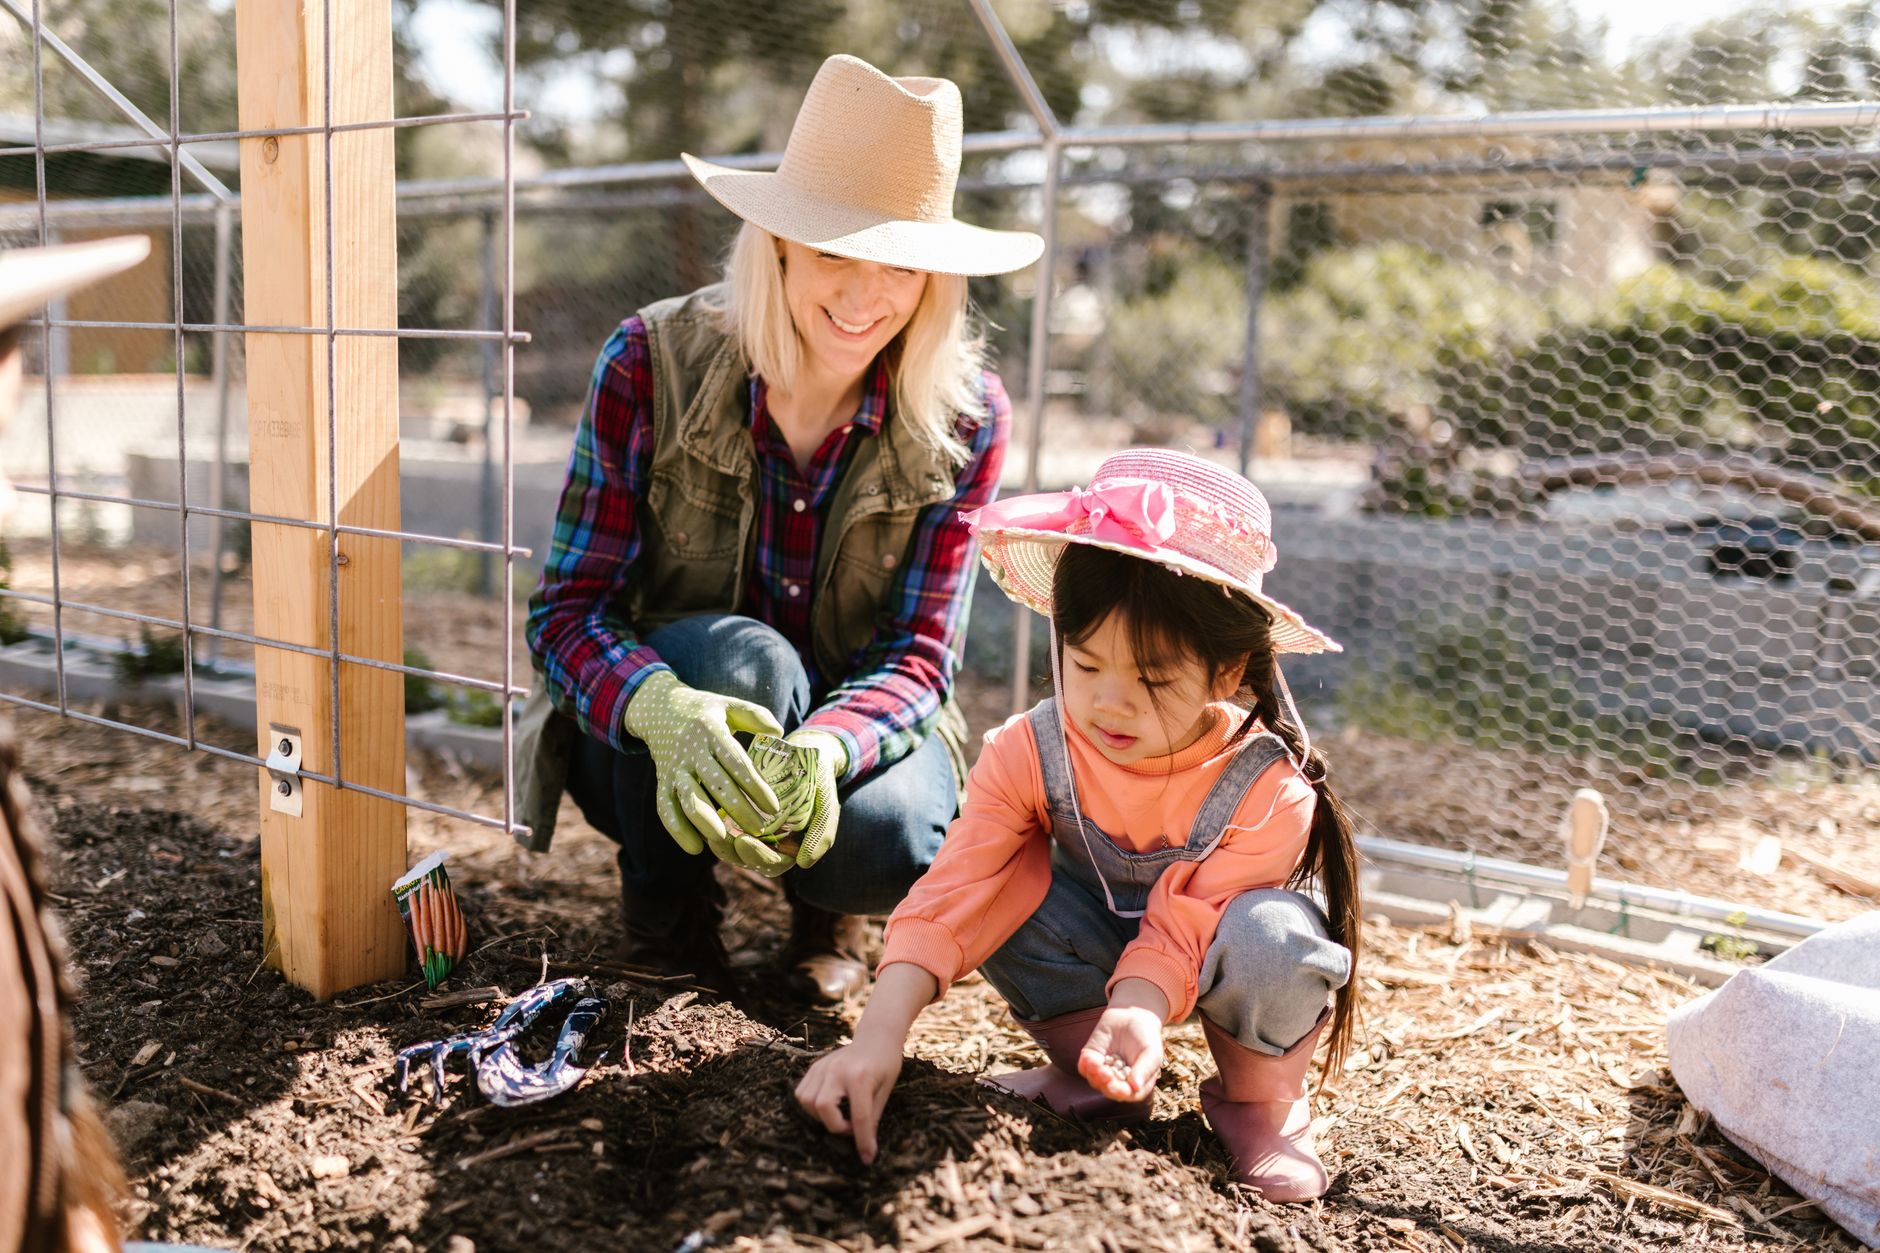
    • Give them their own space. Even if it’s one raised bed or two square feet, ownership changes everything. My daughter’s bed is hers to plant and tend as she chooses (within reason).
    • Let it get messy. Florida soil in July is wet and heavy and wonderful. Mud is not the enemy.
    • Don’t hover. Let them make mistakes — plant too close together, overwater, forget to weed. Natural consequences are the best teacher, and you can talk through what happened without any lecture required.
    • Connect it to real life. When they eat something they grew, it matters in a way nothing else can replicate. My pickiest eater will eat a tomato straight off the vine that he wouldn’t touch if I put it on his plate.

    For more on weaving these kinds of hands-on chores and skills into daily life, I really recommend reading through my post on how to involve kids in homestead chores by age — it’s one of the most practical things I’ve written.


    A Simple Starter Kit If You’re Just Beginning

    If you’re just setting up a kid-friendly garden and want a simple shopping list, here’s what I’d start with:

    That’s genuinely all you need to get started. You don’t need a fancy raised bed system or a Pinterest-perfect potting bench. You need good tools, some good soil, seeds, and a kid who’s allowed to get dirty.


    Honestly, some of my favorite homeschool moments have happened in the garden with muddy knees and nobody knowing what time it is. That’s the magic of it. When kids have tools that actually work, they feel capable — and that feeling carries way beyond the garden. We want to raise kids who know how to do real things in the real world. Gardening is one of the most grounding, literal ways to do exactly that. So get them good tools. Let them dig. See what grows.


    📖 You Might Also Like:

    Frequently Asked Questions

    What are the best garden tools for young kids ages 4-7?

    For young kids in the 4-7 range, the most useful tools are a sturdy metal-head trowel, a hand cultivator, and a small watering can with a removable rose head. Skip all-plastic sets — they break fast and can’t actually penetrate real soil. Look for scaled-down versions of real garden tools with wooden or composite handles. Adding a pair of kids garden gloves and rain boots makes them feel like real gardeners, which matters more than you’d think at that age.

    Are plastic kids garden tools worth buying?

    Most cheap plastic kids garden tool sets are not worth buying — they’re essentially toys and will snap under any real use. If you want tools your kids can actually garden with, look for metal heads (stainless or carbon steel) on appropriately sized handles. A few dollars more upfront means tools that last multiple seasons instead of one afternoon.

    What size garden tools should I get for a 6-year-old?

    For a 6-year-old, look for tools with handles around 10-14 inches long — short enough to control comfortably but not so short that they have to crouch awkwardly. The tool head should be proportionally smaller than an adult version but still made of metal so it can do real work. Brands like Radius Garden and DeWit make genuinely child-appropriate tools in this range.

    How do I get my kids interested in gardening?

    Give them ownership — their own small bed or even just a container they’re responsible for. Let them choose what to plant. Use a nature journal to sketch plants and track growth. Involve them in the full cycle from seed to table. The biggest thing is to step back and let them do it themselves, even imperfectly. Kids who feel capable in the garden come back to it. Kids who feel micromanaged don’t.

    Can gardening count as homeschool learning?

    Absolutely — and it covers more subjects than you’d expect. Gardening naturally incorporates science (plant biology, soil health, ecosystems, water cycle), math (measuring, counting, spacing), reading (seed packets, garden journals, nature books), and even art through nature journaling and sketching. For Charlotte Mason homeschoolers especially, the garden is one of the most natural extensions of a living education approach.

  • How to Create a Nature Play Yard in Your Backyard (Without Spending a Fortune)

    How to Create a Nature Play Yard in Your Backyard (Without Spending a Fortune)

    How to Create a Nature Play Yard in Your Backyard (Without Spending a Fortune)

    🌿 The Short Version: A nature play yard doesn’t need fancy equipment or a big budget — it needs loose parts, living things, and a little intentional setup. This post walks you through exactly how we built ours in the Florida Panhandle, step by step.

    This post contains affiliate links. I may earn a small commission at no extra cost to you.

    If you grew up in the ’90s like I did, your backyard was basically your whole world from about 8am until the streetlights came on. There were no organized activities, no screens calling you back inside, no adult narrating your play. You just… went outside. You dug holes. You caught bugs. You made up entire civilizations out of sticks and mud.

    That’s what I want for my kids. Not a Pinterest-perfect backyard with a $3,000 play set they’ll be bored of by next summer — but a real space that invites discovery, gets messy, and keeps them outside for hours without me having to orchestrate a single thing.

    We’ve been slowly building our nature play yard here in the Pensacola area for the last couple of years, and y’all — it’s one of the best things we’ve ever done for our homeschool and our family. Let me show you how we did it.


    What Even Is a Nature Play Yard?

    A nature play yard is basically a backyard space designed with natural elements that invite open-ended, child-led exploration. Think loose parts, living plants, water features, digging spots, and sensory experiences — not plastic slides and prefab playhouses.

    The concept is rooted in something Charlotte Mason educators have known for over a century: children learn best through direct contact with the living world. Time outside isn’t a break from education. It is the education.

    And here in Northwest Florida, we’re honestly spoiled. We’ve got mild winters, an incredibly diverse ecosystem, and a long outdoor season. There’s no reason our kids shouldn’t be outside most of the day — so let’s build a space that makes that irresistible.


    Start With the Zones: What Every Nature Play Yard Needs

    You don’t need acres of land. Even a modest backyard can be broken into a few simple zones that serve different types of play.

    1. A Digging Zone

    This is the single most important thing you can add. Kids are wired to dig. Give them a designated patch of earth — or a raised bed filled with plain dirt and sand — and watch them disappear into it for hours.

    We have a simple corner of our yard where the kids know they can dig freely. No off-limit plants, no worrying about the garden beds. Just dirt. We toss in a few kids’ garden gloves and some old spoons and let them at it.

    Bonus: if you have chickens like we do, letting the flock scratch around near the digging zone means natural aeration and plenty of interesting findings for little scientists. Our kids have found worms, beetle larvae, and once — an entire colony of tiny ants — all of which became full Charlotte Mason nature study moments.

    2. A Bug Investigation Station

    Put a log or two on the ground. Add some flat rocks. Let the grass grow a little longer in one corner. That’s it — you’ve just created bug habitat.

    We keep a bug collection kit and a pocket microscope in a little bin near the back door so the kids can grab them and go. When they find something interesting, they sketch it in their nature journal and we look it up together. Sometimes they use the Sibley Birds guide for flying visitors too — we get some beautiful species in the Florida Panhandle that most people walk right past.

    This kind of unstructured nature observation is the backbone of a Charlotte Mason education, and honestly? It costs almost nothing to set up.

    3. A Water Play Area

    In Florida, water play is basically a year-round activity. We keep it simple: a large plastic tub, a hose, and a collection of cups, funnels, and tubes the kids can manipulate freely.

    Rain days are the absolute best. Get them a pair of kids’ rain boots and let them splash. Our kids have learned more about water volume, flow, and erosion through puddle play than any workbook has ever taught them.

    4. A Living Garden Space

    Even a few containers count. We have a small raised bed where the kids each have their own section. They choose what to plant, help with watering, and observe the whole growth cycle from seed to harvest.

    If you’re just starting, a seed starting kit is a great way to get going indoors and then transition plants outside. Florida’s growing seasons are different from most of the country — fall and winter are actually prime time for veggies here, which surprises people — so lean into that.

    The garden also naturally ties into our homeschool. It’s living math (measuring, counting, estimating), living science (plant biology, soil health, pollination), and even writing when the kids narrate what they observe. We also love how it connects to our composting work — the kids understand the full circle now in a way that just clicks.

    5. A Loose Parts Area

    This is the secret weapon of nature play yards. Loose parts are any open-ended materials kids can move, rearrange, build with, and reimagine. Think:

    • Stumps and logs of different heights
    • Smooth river rocks and pinecones
    • Bamboo poles and sticks
    • Old wooden crates or pallets
    • Shells (we have no shortage of those living near the Gulf)

    Resist the urge to tell them what to do with any of it. That’s the whole point. Check out our post on outdoor play ideas that need zero equipment for more on why unstructured play is the real goal here.

    📌 Love this? Save it to Pinterest so you can find it later!


    Add Life to the Space

    Plant for Pollinators and Wildlife

    Native Florida plants are your best friend here. Firebush, beautyberry, and native wildflowers bring in butterflies, bees, and birds — all natural invitations for observation. We’ve had monarch butterflies lay eggs on our milkweed, and watching the caterpillar-to-chrysalis-to-butterfly process has been one of the most memorable homeschool moments we’ve had.

    We also use Wondercide for pest control around the yard so we’re not harming the beneficial insects our kids are studying. It’s one of those things that just makes sense when you’re trying to keep the space genuinely alive.

    Let the Chickens Be Part of It

    If you have backyard chickens (or you’re considering it — here’s our go-to Storey’s Guide to Chickens and a great kid-friendly chicken book), they add so much richness to a nature play yard. Our kids help collect eggs, observe chicken behavior, and have genuinely learned about animal instinct, flock dynamics, and even life cycles through our little backyard flock.

    Just designate areas that are chicken-safe versus garden-only — those girls will eat everything if you let them.


    Keep It Low-Maintenance and Non-Toxic

    One of my biggest goals with our outdoor space is that it stays manageable. I’m not trying to run a botanical garden over here.

    A few things that help:

    • Mulch pathways instead of grass in high-traffic areas — less mowing, more natural texture
    • Simple watering systems so the garden doesn’t die during busy weeks
    • Non-toxic pest control throughout — we’ve shared more on this in our post about natural remedies for chicken mites and it applies to the broader yard too
    • Non-toxic sunscreen always accessible by the back door, because Florida sun is no joke and we’re outside constantly

    You Don’t Have to Do It All at Once

    Here’s my honest advice: pick one zone and start there. We started with the digging spot and the bug logs. That’s it. The rest came over time, as we figured out how our kids actually used the space.

    A nature play yard isn’t a project you finish. It’s something that grows with your family — and that’s kind of the whole point. The kids are more invested when they help shape it. Ask them what they want. Let them move things around. Let it be a little wild.

    That wildness? That’s where the magic happens. It’s where my kids have had the longest, deepest, most creative play of their lives — no screen, no toy, no adult direction required.

    That’s the 1990s childhood I’m trying to give them. Just in flip-flops, with a little more sunscreen.

    If you’re working on building a more intentional rhythm around outdoor time, you might also love our post on seasonal living ideas for families — because a nature play yard really does feel different in every season, even here in Florida.


    📖 You Might Also Like:

    Frequently Asked Questions

    What is a nature play yard?

    A nature play yard is a backyard space designed with natural, open-ended elements — like digging areas, loose parts, plants, water, and bug habitat — that invite child-led exploration and imaginative play. Unlike traditional playgrounds, the focus is on unstructured time in nature rather than fixed equipment.

    How do I start a nature play yard on a small budget?

    Start simple. A designated digging patch, a few logs for bug habitat, and a bin of loose natural materials (sticks, rocks, pinecones) cost almost nothing and provide hours of open-ended play. You can add more zones over time as your family’s needs become clear.

    What age is a nature play yard good for?

    Nature play yards work beautifully for a wide age range — typically toddlers through early elementary (ages 2-10), though older kids often stay engaged too, especially with garden projects or bug investigation stations. The open-ended nature of the space means kids grow into it rather than out of it quickly.

    Can I create a nature play yard in a small Florida backyard?

    Absolutely. You don’t need a large yard — even a modest space can be divided into a digging zone, a container garden, a water play area, and a loose parts corner. Florida’s year-round outdoor climate actually makes small yards work really well because kids can use the space in every season.

    How do I keep a nature play yard safe and non-toxic?

    Use native plants where possible, avoid chemical pesticides and herbicides, opt for non-toxic pest control products like Wondercide, and keep a non-toxic sunscreen accessible by the back door. Also make sure any loose parts (logs, rocks, pallets) are free from mold, splinters, or chemical treatments before adding them to the space.

  • Outdoor Play Ideas for Kids That Need Zero Equipment (And Why That’s Actually the Point)

    Outdoor Play Ideas for Kids That Need Zero Equipment (And Why That’s Actually the Point)

    Outdoor Play Ideas for Kids That Need Zero Equipment (And Why That’s Actually the Point)

    🌿 The Short Version: You don’t need a single piece of plastic to give your kids a rich, memorable outdoor childhood. This post is packed with no-equipment outdoor play ideas that build creativity, resilience, and connection — the same way kids played in the 1990s, and honestly, the way they were always meant to.

    This post contains affiliate links. I may earn a small commission at no extra cost to you.

    Somewhere along the way, we got sold the idea that kids need stuff to play outside. A water table. A playset. A specific kit with a specific purpose. And listen — I’m not knocking any of that. We have some of it too. But some of our best summer afternoons here in Northwest Florida have looked like this: kids barefoot in the backyard, chasing lizards along the fence line, making up elaborate stories about kingdoms and caves, completely unbothered by the heat and completely unaware that I was watching from the porch with my coffee going cold.

    That’s the play I grew up with. And it’s the play I’m fighting for my kids to have.

    If you’ve got a yard, a sidewalk, a patch of woods, a stretch of beach, or even just a driveway — you have everything you need. Here’s how we make it work.


    Why No-Equipment Play Is Actually Better

    This isn’t just a budget thing (though hey, saving money is never bad). It’s a brain thing. When kids don’t have a predetermined toy telling them what to do, they have to invent it themselves. That’s the whole Charlotte Mason idea of letting children be the narrators of their own experience — giving them space and time to observe, wonder, and create without adult direction.

    Unstructured outdoor play builds problem-solving, negotiation skills, physical coordination, and emotional regulation in ways that structured activities simply can’t replicate. And here in Florida, where we have gorgeous outdoor weather about nine months of the year — and survivable weather the other three if you head out early enough — we really have no excuse not to use it.


    No-Equipment Outdoor Play Ideas by Category

    Imaginative and Pretend Play

    Build a fort from sticks and leaves. This is a perennial favorite at our house. The kids spend more time building it than playing in it, and that’s fine — building is the play. They argue, negotiate, problem-solve, and eventually come up with something they’re genuinely proud of.

    Create a mud kitchen. Find a shady corner of the yard, add water from the hose, and let them cook. Mud pies, acorn soup, leaf salad — the whole menu. Messy? Yes. Worth it? Absolutely.

    Pretend the yard is a wilderness survival camp. This one goes well with nature study. Who can find the most different types of leaves? Who can identify a bird by sound? We keep a nature journal and a copy of the Sibley bird guide on the back porch for exactly this reason — so when curiosity strikes, we can chase it.

    Set up an outdoor “school” or market. My daughter has run a full pretend farmers market in our backyard using sticks, rocks, leaves, and pinecones as currency. Zero dollars. Maximum engagement.


    Nature Study and Discovery

    Go on a bug hunt. Flip over logs, check under rocks, dig in the soil. Florida has bugs — that is not a secret — and kids who grow up handling roly-polies and learning the names of beetles are kids who aren’t afraid of the natural world. If you want to take it up a notch, a pocket microscope or a simple bug collection kit turns a casual hunt into a full-on science lesson.

    Track the chickens. If you have backyard hens, you basically have a built-in nature study curriculum. My kids have learned more about animal behavior, biology, and responsibility from our flock than from any textbook. They watch the pecking order shift, notice when someone’s molting, and ask questions I genuinely have to look up. If you’re newer to chickens and want your kids more involved, Storey’s Guide to Raising Chickens and the kid-specific guide are both great for making it a real learning experience. (See also: How to Involve Kids in Homestead Chores by Age — that post has completely changed how we approach morning chores around here.)

    Cloud watching and weather journaling. Lay on a blanket and just look up. Name the clouds. Sketch them. Notice if the wind has shifted. In Florida, afternoon storm watching is basically a sport — we get the most dramatic skies, and the kids have learned to read them pretty well.

    Start a nature collection. Feathers, shells, interesting rocks, seed pods. No equipment required. Just curiosity and maybe an egg carton or jar from the recycling bin to display it all.

    📌 Love this? Save it to Pinterest so you can find it later!


    Classic 1990s Outdoor Games

    This is my love language, honestly. These are the games I played until the streetlights came on, and they translate perfectly to our backyard right now.

    Freeze tag, TV tag, shadow tag. No equipment. Needs at least two kids. Produces a lot of laughter and a lot of grass-stained knees.

    Red Light Green Light and Simon Says. Great for littles and big kids together — we play these across a big age range and everyone has fun.

    SPUD. If you have a soft ball, great. If not, a rolled-up sock works fine. Classic game, teaches so many things.

    Capture the Flag. Perfect for the late afternoon when the Florida heat finally backs off a little. Use old bandanas or dish towels as flags. Kids will play this for hours.

    Chalk obstacle courses. Even if it’s just your driveway, a piece of sidewalk chalk can create an entire world. Hopscotch, balance beams, mazes — let the kids design it themselves.

    Follow the leader on the nature trail. Whether you have a wooded lot or a neighborhood park nearby, this game gets surprisingly complex when kids are leading each other over logs and under branches.


    Sensory and Creative Play Outside

    Water play with just a hose and containers. Repurpose old pots, cups, and bottles. Give them a hose and a mission — fill the big pot without touching the small one, create a water canal, see how high they can build a mud dam. Engineering in action.

    Outdoor art with found materials. Arrange leaves, sticks, and rocks into mandalas or patterns on the ground. Take a photo of it. Let it go. This is a beautiful mindfulness practice for kids who don’t even know that’s what it is. Add some watercolor paints and a nature journal for a Charlotte Mason nature study moment that feels completely natural and not at all like school.

    Barefoot sensory walks. Grass, dirt, sand, mud, pinecones — take a walk and name every texture. This sounds simple, but for little ones it’s genuinely rich.

    For more ideas on how we weave this kind of play into our family’s rhythms throughout the year, check out our post on Seasonal Living Ideas for Families — it’s one of my favorites I’ve written.


    A Few Practical Notes for Florida Families

    If you’re in the Panhandle like us, you know that outdoor time in July and August means early morning or after 5pm, period. We do our big outdoor play blocks right after morning chores — usually 8 to 10am — and then again in the evening before dinner. Slathering on some non-toxic sunscreen is just part of the morning routine at this point.

    Also: kids’ rain boots are genuinely the best investment for outdoor play in Florida. After-storm puddles and muddy garden beds are some of our kids’ favorite play spaces, and the right boots mean I’m not stressed about shoes.

    And if your kids are heading into the woods or brushy areas, we love Wondercide as our go-to non-toxic bug spray — safe for kids, safe for our dog, and it actually works on Florida mosquitoes, which feel like they were designed to be invincible.


    The Real Point

    I think a lot of us — myself included, in weaker moments — reach for stuff when what our kids actually need is time. Time outside, time to be bored, time to figure out what to do when there’s nothing to do. That boredom is the starting point for almost every creative, memorable outdoor adventure they’ll ever have.

    You don’t need to buy anything to give your kids a rich outdoor childhood. You just have to open the back door and let them go. That’s what our parents did for us, and honestly? We turned out okay.

    If you’re looking for more ways to build that kind of intentional, simple family life, I think you’ll love our post on Intentional Parenting: What It Actually Looks Like Day to Day — it’s the heart behind everything we do here.

    Now go kick your kids outside. 🌿


    📖 You Might Also Like:

    Frequently Asked Questions

    What are some outdoor play ideas for kids with no equipment?

    Some of the best no-equipment outdoor play ideas include building stick forts, playing classic games like freeze tag and capture the flag, going on bug hunts, making mud kitchens, cloud watching, and creating nature mandalas from leaves and rocks. Kids don’t need purchased toys to play richly — they need time, space, and permission to explore.

    How do I get my kids to play outside without screens or toys?

    Start by simply sending them out with no agenda. If they complain of boredom, resist the urge to fix it — boredom is actually the starting point for creative play. You can also give them a loose prompt like ‘find five different bugs’ or ‘build something using only what you find in the yard’ to spark imagination without over-directing them.

    What outdoor games did kids play in the 1990s?

    Classic 1990s outdoor games include freeze tag, shadow tag, TV tag, SPUD, Red Light Green Light, Simon Says, Capture the Flag, hopscotch, and kick the can. These games require little to no equipment and work across a range of ages, making them perfect for families with multiple kids.

    How can I make outdoor play part of our homeschool day?

    Outdoor play integrates naturally into a Charlotte Mason homeschool through nature journaling, bug hunts, bird watching, cloud study, and gardening. Even unstructured outdoor time counts as physical education, sensory development, and social learning. Try scheduling a dedicated outdoor block each morning before the Florida heat peaks.

    What can kids do outside in Florida during the summer heat?

    In Florida summers, the best outdoor play happens early morning (before 10am) or in the evening after 5pm when temperatures drop a little. Great hot-weather options include water play with a hose and containers, shady stick fort building, early morning nature walks, and evening games like capture the flag or freeze tag. Always apply non-toxic sunscreen and keep water bottles handy.

  • How to Make Homemade Elderberry Gummies for Kids (Simple Recipe That Actually Works)

    How to Make Homemade Elderberry Gummies for Kids (Simple Recipe That Actually Works)

    How to Make Homemade Elderberry Gummies for Kids (Simple Recipe That Actually Works)

    🌿 The Short Version: Homemade elderberry gummies are easier than you think — just elderberry syrup, gelatin, and a silicone mold. This post walks you through the whole process, including how to make the syrup from scratch and why these are a staple in our non-toxic home.

    This post contains affiliate links. I may earn a small commission at no extra cost to you.

    Every fall, without fail, the sniffles start making their way through our neighborhood like they’re on some kind of schedule. And if you’ve got kids in any kind of co-op, church group, or just — you know — outside where kids gather, you know exactly what I’m talking about. Here in Northwest Florida, we don’t always get a dramatic seasonal shift, but the back-to-fall-rhythm still brings its share of congestion and coughs.

    For years I was buying pre-made elderberry gummies from the health food store, and honestly? They were fine. But they were also expensive, full of ingredients I couldn’t always pronounce, and my kids went through them like candy. So I finally just made my own. And now I can’t imagine going back.

    These homemade elderberry gummies have become a real staple in our house — the kids ask for them by name, they’re made from ingredients I trust, and the whole process is actually a lovely little kitchen moment we do together. Which, if you’re a Charlotte Mason mama like me, you know — that counts as school.

    Why Elderberries?

    Elderberries (Sambucus nigra) have been used for centuries as a natural support for the immune system, and modern research has started catching up to what our grandmothers already knew. They’re rich in antioxidants and vitamins, particularly vitamin C, and there’s real evidence they may help reduce the duration and severity of colds and flu.

    Now, I’m not a doctor and I’m not here to make any medical claims — I’m just a Florida homeschool mama who likes to keep her family healthy with real food and smart choices. Elderberries fit beautifully into that. And when you make your own syrup at home, you control exactly what goes in.

    If you want to skip straight to a ready-made kit while you’re still getting comfortable, this elderberry syrup kit is a great starting point — it comes with dried elderberries, spices, and instructions.

    What You’ll Need

    For the Elderberry Syrup:

    • 1 cup dried black elderberries
    • 3 cups water
    • 1 cinnamon stick
    • 4-5 whole cloves
    • 1 tablespoon fresh grated ginger (or 1 tsp dried)
    • 1 cup raw honey (added after cooking — never boil honey)

    For the Gummies:

    • 1 cup elderberry syrup (recipe above or store-bought)
    • 3 tablespoons grass-fed gelatin powder (unflavored)
    • Silicone molds (bear shapes are a huge hit at our house)

    That’s it. Seriously.

    How to Make the Elderberry Syrup

    This is the part that sounds intimidating but really isn’t. It’s basically just simmering berries in water like you’re making tea.

    1. Add your dried elderberries, water, cinnamon stick, cloves, and ginger to a medium saucepan.
    2. Bring to a boil, then reduce heat and simmer uncovered for about 45 minutes to an hour, until the liquid has reduced by roughly half.
    3. Remove from heat and let cool until it’s just warm — not hot.
    4. Mash the berries gently with a fork or potato masher, then strain through a fine mesh strainer or cheesecloth into a bowl. Press the berries to get all that good juice out.
    5. Once the liquid is cooled to lukewarm (this is important — you don’t want to destroy the enzymes in raw honey), stir in the honey until fully combined.

    Your syrup will keep in the refrigerator in a mason jar for 2-3 months. We use it in the gummies AND sometimes just take a spoonful straight — my kids genuinely like the taste.

    Turning the Syrup Into Gummies

    This step takes maybe 10 minutes, and then you just wait for them to set.

    1. Pour 1 cup of your elderberry syrup into a small saucepan over low heat. You want it warm but not boiling — around 100-110°F if you’re using a thermometer.
    2. Sprinkle the gelatin powder over the warm syrup a little at a time, whisking constantly to avoid clumping. Keep whisking until it’s fully dissolved and the mixture is smooth.
    3. Pour into silicone molds. I use a small measuring cup with a pour spout to make this less messy. Bear molds, star shapes, dinosaurs — whatever your kids are into works great.
    4. Refrigerate for at least 2 hours until fully set.
    5. Pop them out and store in an airtight container in the fridge for up to two weeks.

    Dosing note: We typically do 1-2 gummies per day for our kids as a regular wellness routine, and up to 4 per day when something is going around. But again — talk to your pediatrician if you have specific questions.

    📌 Love this? Save it to Pinterest so you can find it later!

    Making This a School Moment

    One of the things I genuinely love about our Charlotte Mason approach is that real life is learning. Making elderberry gummies with your kids hits more subjects than you might think:

    • Science: Why do we cook the berries? What does gelatin do? Why can’t we boil the honey? These are real chemistry questions with real answers.
    • Math: Measuring, halving or doubling the recipe, timing the simmer.
    • History/Nature Study: Where do elderberries grow? What did people use them for before modern medicine? This dovetails beautifully into herbal lore and nature notebooks.

    My kids love to sketch the dried elderberries in their nature journals before we start cooking. It’s become a little ritual. And if you want to go deeper into the plant identification side of things, the Sibley field guides are wonderful for older kids who want to learn more about native plants and their uses.

    A Few Tips I’ve Learned the Hard Way

    Don’t skip the whisking. If you dump all the gelatin in at once, you’ll get lumpy gummies. Sprinkle and whisk, sprinkle and whisk.

    Keep the honey raw. This is a big one for me. Raw honey has enzymes and beneficial properties that get destroyed by heat. Always let your syrup cool before adding it.

    Use a silicone mold. Plastic molds are a pain and gummies stick to them. Silicone pops right out.

    Label and date your jar. I keep our syrup in the fridge in a wide-mouth mason jar with a little piece of tape that says when I made it. Two to three months is the guideline, but it honestly never lasts that long around here.

    Double the batch. This recipe is so easy once you get the hang of it — just make more. We go through these fast.

    This is also a great recipe to pull out as part of a broader seasonal wellness rhythm for your family. We’ve written about that kind of intentional seasonal living over here: Seasonal Living Ideas for Families: Simple Ways to Celebrate Every Season All Year Long.

    Keeping It Non-Toxic

    Part of why I started making these at home was the ingredient list on store-bought gummies — corn syrup, artificial flavors, carrageenan. None of that needed to be in my kids’ daily wellness routine. Homemade means I know exactly what’s in them.

    We try to approach our whole home that way — thoughtful, intentional, nothing I can’t pronounce or spell. If you’re on that same journey and looking for more non-toxic swaps for your home and cleaning routine, I love sourcing from Grove Collaborative for a lot of our household basics.

    And if you want to dig further into simple living as a whole family practice — not just the products but the mindset — this post is one of my favorites: Simple Living with Kids: Practical Tips That Actually Work for Real Families.

    The 1990s Parallel

    Here’s what I keep thinking about with things like this: our moms and grandmothers made stuff. They made chicken soup, they made herbal teas, they trusted simple remedies that had been passed down. Somewhere along the way we got convinced that if something wasn’t in a bottle with a UPC code and a clinical study attached, it wasn’t legitimate.

    I’m not anti-medicine. Not even a little. But I do believe in bringing some of that old-fashioned, trust-your-kitchen wisdom back. And making a batch of elderberry gummies with my kids on a slow Tuesday morning feels like exactly that. We’re stirring something on the stove together, talking about where elderberries come from, and making something that’s going to take care of our family. That’s the kind of memory I want them to have.


    📖 You Might Also Like:

    Frequently Asked Questions

    Are homemade elderberry gummies safe for kids?

    Yes, when made properly, elderberry gummies are generally considered safe for kids. The key is to always cook the raw elderberries before using them — raw elderberries contain a compound that can cause nausea if eaten uncooked. Cooked and strained elderberry syrup is what goes into the gummies. Always check with your pediatrician if your child has specific health conditions or takes any medications.

    How long do homemade elderberry gummies last?

    Stored in an airtight container in the refrigerator, homemade elderberry gummies typically last up to two weeks. Because they’re made with real fruit syrup and honey rather than preservatives, they won’t last as long as commercial versions — but they also disappear pretty fast once the kids find them.

    Can I use store-bought elderberry syrup to make gummies?

    Absolutely. If you don’t have time to make your own syrup from scratch, a high-quality store-bought elderberry syrup works just fine in this recipe. Just look for one made with clean ingredients — ideally raw honey, no corn syrup or artificial flavors. You can also use an elderberry syrup kit to make your own in less time than you’d think.

    What kind of gelatin should I use for elderberry gummies?

    Grass-fed, unflavored gelatin powder is what you want. Look for brands that source from pasture-raised animals for the best quality. Avoid flavored gelatin mixes — those have sugar and artificial ingredients that you don’t need here. The gelatin is what gives the gummies their chewy texture and also adds a nice protein boost.

    How many elderberry gummies should kids take per day?

    Most families use 1-2 gummies per day as a general wellness routine and increase to 3-4 per day when illness is going around or the child is already sick. That said, dosing recommendations vary, and I’d always encourage checking with your pediatrician for personalized guidance, especially for younger children or kids with health conditions.

  • Best Picture Books for Nature-Loving Kids (That Actually Hold Their Attention)

    Best Picture Books for Nature-Loving Kids (That Actually Hold Their Attention)

    Best Picture Books for Nature-Loving Kids (That Actually Hold Their Attention)

    🌿 The Short Version: If you’ve got a kid who’d rather be outside turning over rocks than sitting still for a story, these picture books might just be the bridge between the two. We’re sharing our family’s real favorites — the ones that spark curiosity, hold up to a hundred reads, and pair beautifully with a Charlotte Mason nature study.

    This post contains affiliate links. I may earn a small commission at no extra cost to you.

    Here’s the thing about raising nature kids — they don’t always want to sit down with a book. My crew would rather be out back checking on the chickens or chasing lizards through the yard than curled up on the couch. And honestly? Good. That’s exactly how I want it.

    But over the years, I’ve found a collection of picture books that my kids actually ask for. Books that feel like an extension of what they’re already doing outside — not a replacement for it. Books that make them look up and say, “Wait, is that the bird we saw at the feeder last week?”

    That’s the sweet spot. And if you’re doing any kind of Charlotte Mason or nature-based homeschool, you already know how powerful the right book at the right moment can be.

    So here’s our honest, well-loved, read-a-hundred-times list.


    What Makes a Great Nature Picture Book?

    Before I dive in, here’s what I’m actually looking for — because not all “nature books” are created equal.

    • Real illustrations or accurate artwork. Watercolor is great. Cartoonish bugs with faces? Hard pass for nature study purposes.
    • Something that sparks a question. The best books make my kids run outside right after.
    • Language that respects kids. No dumbing it down. Kids absorb more than we give them credit for.
    • Reread value. If we’ve read it fifty times and it still gets pulled off the shelf, it earns a permanent spot.

    Okay. Let’s get into it.


    Our Favorite Picture Books for Nature-Loving Kids

    For the Bird Obsessed

    Mama Built a Little Nest by Jennifer Ward — This one is just beautiful. Simple text, gorgeous illustrations, and it covers different types of bird nests in a way that actually teaches something. After we read this one, my daughter spent a week checking every shrub in the backyard for nests. Mission accomplished.

    If your kids are getting really into birds, we keep a Sibley’s field guide on the nature table alongside books like this so they can flip between the story and the real thing. That combo is chef’s kiss for Charlotte Mason nature study.

    About Birds: A Guide for Children by Cathryn Sill — Part of the wonderful “About…” series. These books are calm, factual, and illustrated with realistic paintings. Perfect for morning basket or quiet time.


    For the Bug Hunters

    Bugs Are Insects by Anne Rockwell — A Let’s-Read-and-Find-Out Science book that’s simple enough for kindergarteners but doesn’t talk down to them. Great for kicking off an insect unit.

    Tiny Creatures: The World of Microbes by Nicola Davies — Okay, technically microbes aren’t bugs, but the kids who love bugs tend to love this one too. It opens up this whole invisible world in a way that genuinely blows their minds.

    After reading anything bug-related, we head outside with our bug collection kit and a pocket microscope and just… explore. That’s the 1990s childhood right there, y’all. No app required.


    For the Garden Crew

    Planting a Rainbow by Lois Ehlert — A classic for good reason. Bold, bright, simple. Even my youngest has “read” this one by herself by memorizing it. Great for introducing flower and plant vocabulary.

    The Tiny Seed by Eric Carle — Another classic that never gets old. We love reading this one in early spring right before we start seeds indoors. Speaking of which, if you want to turn this into a full unit, grab a seed starting kit and let the kids plant something the same week. The connection between book and real life is everything.


    For the Seasons and the Slow Life

    Goodbye Summer, Hello Autumn by Kenard Pak — This whole series (there’s one for each season transition) is just quietly wonderful. The illustrations feel like a walk outside. My kids always want to go find the things they see on the pages.

    We read these at the actual season changes as part of our seasonal living rhythm. It’s become a little tradition I didn’t even plan — they just started asking for it.

    When We Were Alone by David A. Robertson isn’t nature-focused, but it touches land and connection in a way that pairs well with nature study for older elementary kids. Worth knowing about.


    For the Animal Lovers (Chickens Included)

    Chickens Aren’t the Only Ones by Robert Heller — A read-aloud about egg-laying animals that my chicken-obsessed kids absolutely love. It’s old (1981) but worth hunting down. Pairs perfectly with our backyard flock conversations.

    If your kids are starting to really get into chickens and want to understand them better, the Kid’s Guide to Raising Chickens is a great next step after the picture book phase. My older kids have devoured it.

    Stellaluna by Janell Cannon — Bats, belonging, being different. Beautifully illustrated and surprisingly deep. Always leads to great conversations.


    📌 Love this? Save it to Pinterest so you can find it later!


    For the Watercolor and Art-Nature Kids

    The Illustrated Compendium of Amazing Animal Facts by Maja Safstrom — Half art book, half nature facts. Perfect for the kid who loves to draw animals. Works beautifully alongside a nature journal and some Faber-Castell watercolors for nature journaling after reading.

    Watercolor nature journaling is one of our favorite Charlotte Mason habits — and honestly it doesn’t take much to get started. Read a book, go outside, sketch what you saw, paint it later. That’s the whole plan.


    How We Use These Books in Our Homeschool

    We’re in Pensacola, and y’all — Northwest Florida is an incredible place to raise nature kids. We’ve got the Gulf, longleaf pine forests, sandhills, pitcher plants in the bogs, gopher tortoises wandering through the yard. There is no shortage of living things to study.

    These picture books live on our nature table and rotate into our morning basket based on what we’re seeing outside or what season we’re in. We don’t use them as formal curriculum, exactly — more like conversation starters.

    After reading, we usually:

    • Go outside and look for whatever the book was about
    • Sketch something in our nature journal
    • Look it up in a field guide if we want to know more
    • Sometimes add it to a nature tray or collection

    It sounds simple because it is. That’s kind of the whole point.

    If you’re looking for ways to get the kids more involved in the doing side of nature life — not just the reading — I’ve written about how to involve kids in homestead chores by age in a way that actually works without power struggles.

    And if you want to extend the learning beyond picture books into real living history and nature narratives for your older elementary kids, check out our list of best living history books for elementary homeschool — lots of overlap with nature lovers there.


    A Note on Building a Nature Book Collection Slowly

    You don’t need fifty books. You need a dozen that get read over and over. We built our collection slowly — library sales, thrift stores, birthday gifts, and a few intentional purchases. Rainbow Resource is a great place to find Charlotte Mason-friendly books at reasonable prices, and Timberdoodle often carries wonderful nature-based titles too.

    Buy slowly. Read repeatedly. Let the books get worn out.


    I hope this list gives you a few new titles to add to your pile — or maybe just validation that the worn-out books already on your shelf are doing exactly what they’re supposed to do. The goal was never perfect, pristine books. It was muddy fingers and curious minds and kids who see the world outside as something worth paying attention to.

    We’re still working on that every single day over here. One read-aloud at a time.


    📖 You Might Also Like:

    Frequently Asked Questions

    What are the best picture books for a Charlotte Mason nature study?

    Some of our favorites for Charlotte Mason nature study include Mama Built a Little Nest, About Birds by Cathryn Sill, Planting a Rainbow by Lois Ehlert, and the Goodbye Summer Hello Autumn seasonal series. These books use accurate illustrations and real language, which pairs perfectly with nature journaling and outdoor observation — the heart of a Charlotte Mason approach.

    What age are nature picture books best for?

    Most nature picture books work beautifully for ages 3–8, but many hold up well into early elementary (grades 1–3) especially when used alongside field guides, nature journals, and hands-on activities. Books like The Illustrated Compendium of Amazing Animal Facts can even engage kids up to age 10 or 11 if they’re artistic or science-minded.

    How do I use picture books in a nature-based homeschool?

    The simplest approach: read the book, then go outside and look for what you just read about. Follow that with a nature journal sketch or watercolor painting. You can also pair books with a relevant field guide to deepen the learning. The key is letting the book open the door to real-world observation rather than treating it as the destination.

    Are there good picture books about chickens for kids?

    Yes! Chickens Aren’t the Only Ones by Robert Heller is a beloved classic that covers egg-laying animals in a fun, accurate way. For kids who are ready to go deeper, the Kid’s Guide to Raising Chickens bridges the gap between picture books and real hands-on learning with your backyard flock.

    Where can I find affordable nature books for homeschool?

    Library sales, thrift stores, and used book marketplaces are great starting points. For new books with good homeschool-friendly selection and pricing, Rainbow Resource and Timberdoodle are two of our favorites. Building your collection slowly and focusing on books that get reread constantly is always better than buying a huge stack at once.

  • Best Natural Remedies for Chicken Mites (What Actually Works Without Harsh Chemicals)

    Best Natural Remedies for Chicken Mites (What Actually Works Without Harsh Chemicals)

    Best Natural Remedies for Chicken Mites (What Actually Works Without Harsh Chemicals)

    🌿 The Short Version: Chicken mites are a real, frustrating problem — but you don’t need harsh chemical treatments to deal with them. This post walks you through the best natural remedies that actually eliminate mites, keep your flock healthy, and won’t make you nervous about your kids being near the coop.

    This post contains affiliate links. I may earn a small commission at no extra cost to you.

    You go out to collect eggs one morning, flip a hen over to check on her, and there they are — tiny little specks moving around near her vent feathers. Your stomach drops a little. I know that feeling. The first time I spotted mites on one of our girls, I immediately went into research mode while simultaneously trying not to let my kids see me freak out.

    Here’s the thing about keeping backyard chickens in Florida: the heat and humidity create a near-perfect environment for mites and other parasites to thrive. It’s just part of the deal down here. But that doesn’t mean you have to reach for a chemical pesticide the second you spot them. There are genuinely effective natural remedies for chicken mites, and we’ve tested most of them ourselves in our little Pensacola backyard flock.

    First, Know What You’re Dealing With

    Not all chicken mites are the same, and identifying which type you have actually matters.

    Northern Fowl Mites live on the bird itself — you’ll find them clustered around the vent, under the wings, and near the base of the tail feathers. These are the most common in backyard flocks and the ones you’re most likely to catch during a routine check.

    Red Poultry Mites (also called chicken mites or roost mites) hide in the coop during the day and come out at night to feed. If you go out after dark with a flashlight and see tiny red or gray dots moving around the roost bars and cracks in the wood — that’s them.

    Knowing which one you have helps you target your treatment more effectively. If you want to go deeper on coop pest management, I’ve got a whole post on Best Natural Bug Spray for Chicken Coops (What Actually Works and Won’t Harm Your Flock) that covers the broader topic.

    The Best Natural Remedies for Chicken Mites

    1. Diatomaceous Earth (Food Grade Only)

    This is the one most chicken keepers already know about, and for good reason — it works. Food grade diatomaceous earth is made from fossilized algae, and the microscopic sharp edges physically damage the exoskeletons of mites and insects, causing them to dry out and die. It’s mechanical, not chemical.

    How we use it:

    • Dust it directly into your dust bath area (your hens will do the work themselves)
    • Sprinkle it along roost bars, in coop corners, and in the nesting boxes
    • Apply lightly to affected birds, working it gently into the feathers near the vent and under the wings

    Wear a mask when you’re applying it — the fine powder isn’t great to breathe in for you or the birds if you’re pouring it heavily. Use it as part of your regular coop maintenance rather than waiting for an outbreak.

    2. Neem Oil

    Neem oil is one of those things that genuinely earns its reputation. It’s a natural insecticide derived from the neem tree, and it works against mites by disrupting their life cycle and suffocating them. Mix a few drops of pure neem oil with water and a tiny bit of liquid dish soap (to help it emulsify), then spray it directly onto the birds — avoiding eyes — and into the coop crevices.

    For ongoing prevention, Wondercide makes a plant-based pest control spray that we use around our property and have used safely around the coop. It’s one of those products where I feel genuinely good about what I’m spraying near my kids and animals.

    3. Wood Ash Dust Baths

    If you have a fire pit or wood stove, save your wood ash. Adding it to your chickens’ dust bath area is an old-school remedy that actually has solid logic behind it — the alkaline, fine-particulate nature of wood ash suffocates and deters mites similarly to diatomaceous earth. Mix it into the dust bath area and let your hens do what they naturally want to do anyway.

    This is one of those 1990s-era homestead tricks that got forgotten when chemical products took over, and honestly, it’s one of the simplest things you can add to your regular chicken routine.

    4. Herbs in the Nesting Boxes

    Fresh or dried herbs like lavender, mint, rosemary, and yarrow have natural insect-repelling properties. Tucking them into your nesting boxes serves double duty — it deters mites and other insects while also acting as a mild stress reducer for your hens (lavender especially).

    We love this one because it doubles as a nature study moment. My kids help harvest herbs from our little garden and stuff them into the boxes. It’s simple, it smells wonderful, and it actually helps.

    📌 Love this? Save it to Pinterest so you can find it later!

    5. Clean, Dry Bedding — More Often Than You Think

    This one isn’t glamorous but it’s probably the most important natural remedy on this list: keep your coop clean and dry. Mites thrive in warm, damp, dirty conditions — which, let’s be honest, describes a Florida chicken coop in July if we’re not on top of it.

    Deep litter can work beautifully when managed well, but if you’re dealing with an active infestation, a full clean-out is necessary. Pull everything out, let the coop air and dry in the sun, dust with diatomaceous earth, and start fresh with clean bedding.

    If coop chores feel like a lot, rope the kids in — I’ve got a whole post on How to Involve Kids in Homestead Chores by Age (Without the Whining or the Burnout) that might help make this more sustainable for your family.

    6. Garlic Water

    Anecdotal but worth mentioning — some backyard chicken keepers swear by adding crushed garlic or garlic juice to the flock’s drinking water. The theory is that it makes the blood less appealing to mites. The research isn’t conclusive, but garlic is good for immunity in general, it won’t harm your birds, and it costs almost nothing to try. We’ve used it during active outbreaks just to cover all our bases.

    Speaking of waterers — if you’re still fighting slime and mess with traditional waterers, switching to a nipple-style chicken waterer keeps the water cleaner and reduces the damp conditions mites love.

    Treating an Active Infestation: What We Actually Do

    When we have an active outbreak, we run a full protocol rather than just one thing:

    1. Full coop cleanout — remove all bedding, scrub surfaces
    2. Let the coop dry completely in the Florida sun (usually only takes a few hours in summer)
    3. Dust every crack, corner, and roost bar with diatomaceous earth
    4. Treat affected birds by applying diatomaceous earth or a diluted neem oil spray to feathers
    5. Refresh the dust bath with a mix of DE, wood ash, and sand
    6. Add herbs to nesting boxes
    7. Repeat in 7-10 days to catch any eggs that hatched

    For ongoing monitoring, I also recommend doing a regular flock check — flip each bird over, look near the vent and under wings, check the skin for any redness or feather loss. Making it a routine means you catch things early. Storey’s Guide to Raising Chickens has a great section on parasite identification and prevention if you want a solid reference to keep on your shelf.

    If your kids are old enough to be helping with chicken care, A Kid’s Guide to Keeping Chickens is a wonderful resource that explains flock health in a way that makes sense to elementary-age children — very Charlotte Mason in spirit, rooted in real observation and care.

    A Note on Chemical Treatments

    I’m not here to tell you that you should never use conventional treatments — there are situations where a serious infestation, a stressed bird, or a health concern might mean you need to bring in something stronger. Talk to a livestock vet if your birds are losing significant weight, going off lay, or showing skin damage. Natural remedies work beautifully for prevention and mild-to-moderate outbreaks, but know your limits.


    Dealing with chicken mites is just part of the backyard flock journey, especially here in the Gulf Coast heat. But you don’t have to feel helpless or reach for something you’re not comfortable with. A little diatomaceous earth, some neem oil, clean bedding, and consistent monitoring goes a really long way. Our girls stay relatively healthy because we’ve built these habits into our regular rhythm — and honestly, checking on the chickens is one of our kids’ favorite parts of the school day. There’s real learning in it. Real responsibility. Real life.

    That’s what this whole thing is about, right?


    📖 You Might Also Like:

    Frequently Asked Questions

    What is the fastest natural remedy for chicken mites?

    Food grade diatomaceous earth applied directly to the birds and throughout the coop is one of the fastest-acting natural remedies. It works mechanically by damaging the mites’ exoskeletons, and you’ll often see a noticeable reduction within a few days. Pair it with a full coop cleanout for best results.

    Can chicken mites spread to humans or dogs?

    Northern fowl mites and red poultry mites can temporarily bite humans and pets if the infestation is severe, but they cannot complete their life cycle on us — we’re not their preferred host. You may notice itching or small red bites if you’re in heavy contact with an infested flock, but they won’t set up permanent residence on people or dogs. Treat your flock promptly and the problem resolves.

    How often should I apply diatomaceous earth for mite prevention?

    For prevention, applying food grade diatomaceous earth to your dust bath area, nesting boxes, and roost bars every 2-4 weeks is a good rhythm. In Florida’s humid summers, you may want to refresh more frequently since humidity can reduce its effectiveness. Always reapply after a heavy rain or a full coop cleanout.

    Does neem oil actually work on chicken mites?

    Yes — neem oil works by disrupting the mite life cycle and suffocating them on contact. Dilute it with water and a small amount of dish soap to help it mix, then spray onto affected areas of the bird and into coop crevices. It’s not an instant kill like some chemical treatments, but used consistently it’s genuinely effective and safe.

    How do I know if my chicken has mites or lice?

    Mites are tiny and fast-moving — often visible as small moving dots near the vent, under wings, or on the skin. Red poultry mites may appear grayish when unfed and red after feeding. Lice are larger, yellowish, and tend to cluster at the base of feathers, often leaving visible egg clusters (nits) on the feather shafts. Both are treatable with natural methods like diatomaceous earth, but it helps to identify which parasite you’re dealing with for targeted treatment.

  • Seasonal Living Ideas for Families: Simple Ways to Celebrate Every Season All Year Long

    Seasonal Living Ideas for Families: Simple Ways to Celebrate Every Season All Year Long

    Seasonal Living Ideas for Families: Simple Ways to Celebrate Every Season All Year Long

    🌿 The Short Version: Seasonal living doesn’t have to be complicated or curated — it’s really just about slowing down and letting the rhythm of the year shape your family’s days. This post walks through simple, doable seasonal living ideas for families in every season, with a special nod to life here in Northwest Florida where the seasons look a little different than the rest of the country.

    This post contains affiliate links. I may earn a small commission at no extra cost to you.

    Can I tell you something that took me way too long to figure out?

    I used to plan our homeschool year like one long march forward — unit studies, curriculum checklists, read-alouds scheduled by the quarter. And it was fine. But something felt a little flat. Like we were moving through the year instead of actually living in it.

    Then one October morning, my kids found a massive spider web covered in dew out by the chicken coop. We spent forty-five minutes out there. Nobody planned it. Nobody scheduled it. And it was one of the best nature study moments we’ve ever had.

    That’s when it clicked for me. The seasons are the curriculum. The year itself is the rhythm. We just have to slow down enough to notice it.

    So if you’re looking for seasonal living ideas for families that don’t require a Pinterest-perfect home or a $200 seasonal basket — you’re in the right place. This is what it actually looks like at our house.


    What Seasonal Living Actually Means (It’s Simpler Than You Think)

    Seasonal living isn’t an aesthetic. It’s not a fall tablescape or matching linen aprons. It’s just the practice of letting the time of year shape what you do, what you eat, what you notice, and what you celebrate.

    For our family, that means our days look different in July than they do in January. Our morning baskets shift. Our outside time shifts. Even what we’re cooking shifts. And our kids feel that — even without being told about it.

    If you want to dig into how this connects to your daily flow, I wrote more about it in Family Rhythm vs Routine: What Actually Works (and Why the Difference Matters More Than You Think). But the short version is: rhythm is gentler than routine, and seasons give you rhythm for free.


    Fall: Slower Mornings and Noticing the Shift

    Here in Pensacola, fall doesn’t look like Vermont. I’ll just say that upfront. We’re not getting a blaze of orange and red in September. But around October and into November, something does shift — the light gets softer, the humidity backs off, and the mornings are finally breathable again.

    We feel it. The kids feel it. Even the chickens seem a little more cheerful.

    What we actually do in fall:

    • Pull the nature journals back out and do a dedicated observation walk. The nature journal I’ve linked here is the one we’ve used for two years — simple, durable, perfect for elementary ages.
    • Watch for migratory birds. Northwest Florida is right in the flyway, and it is spectacular if you know to look. We keep the Sibley Birds guide on the kitchen windowsill this time of year.
    • Start composting in earnest — fall yard waste is gold. If you haven’t started a compost system yet, I’ve got a whole beginner’s guide: How to Build a Simple Compost Bin for Beginners (No Skills Required).
    • Let the kids spend more time outside in the afternoons. After months of noon heat that sends us all indoors, fall afternoons feel like a gift. We lean into it hard.

    Winter: Cozy, Quiet, and Honestly Underrated

    Winter in Northwest Florida is mild but real. We get genuine cold snaps — sometimes into the twenties overnight — and we absolutely make a big deal of it. When you live somewhere that’s hot eight months of the year, a cold gray week feels like an event.

    What winter looks like for us:

    • More slow mornings with hot cocoa and read-alouds. This is when we get through the thicker history books and longer chapter books as a family.
    • Watercolor painting at the table. Faber-Castell watercolors are our go-to — non-toxic, true colors, and they last forever with elementary kids.
    • Seed planning for the spring garden. We pour over seed catalogs and talk about what we want to grow. A seed starting kit makes it hands-on even when it’s too cold to do much outside.
    • Keeping an eye on the chickens during cold snaps. Florida cold is still cold for a flock used to heat. We check on ours more often in January and February, and it’s a great teaching moment for the kids about animal stewardship. If you’re newer to keeping chickens, Storey’s Guide to Raising Chickens has a solid section on cold weather care.

    📌 Love this? Save it to Pinterest so you can find it later!


    Spring: The Season That Does the Most Work For You

    If you want to try seasonal living and you don’t know where to start — start in spring. It basically sells itself.

    Everything is waking up, everything is blooming, and kids are naturally drawn outside. In Florida, spring comes early. By February we’re seeing azaleas. By March the kids are outside barefoot most of the day.

    Spring seasonal living ideas for families:

    • Nature journaling with a focus on what’s new. What flowers just appeared? What birds are nesting? Pull out a pocket microscope and let the kids look at flower structures, soil, pond water — anything. Genuine science, zero worksheet required.
    • Bug season is prime here in Northwest Florida. Get a bug collection kit and let your kids loose. This is the closest thing to a 1990s childhood I can manufacture on purpose — just kids outside, catching things, being curious.
    • Start the garden for real. Get the kids their own garden gloves and give them their own plot, even if it’s just a pot. Ownership changes everything.
    • Check in with your Charlotte Mason nature study rhythm. I’ve written a whole post of seasonal journal prompts that might be helpful: Charlotte Mason Nature Study Journal Prompts by Season (For Real Kids Who’d Rather Be Outside).

    Summer: Lean Into the Wildness

    Okay, Florida summer is intense. I’m not going to sugarcoat it. By June, we are back inside by 11am most days. The heat is not a joke.

    But here’s what I’ve learned: summer is not a season to fight. It’s a season to surrender to.

    What that looks like for us:

    • Early mornings outside — like, really early. Before 9am, outside. After 10am, inside or in the shade. We do morning chores with the chickens, water the garden, take a short walk. Then we come in.
    • Slower school days with more afternoon quiet time. This is when audiobooks, nature journals, and independent reading really shine.
    • Evening outdoor time is sacred. After dinner, when the heat breaks a little, we go back outside. Lawn games, backyard exploring, catching lightning bugs — it’s the closest thing to a classic summer evening we can get.
    • Letting the kids be bored. I mean this sincerely. Boredom is a feature, not a bug. Some of the most creative afternoons in our house have started with “I’m bored.” We don’t fix it for them.

    A Few Things That Make Seasonal Living Stick

    You don’t need a seasonal subscription box or a color-coordinated nature table (though I will not stop you if that’s your thing). What actually makes seasonal living stick is repetition over years.

    When your kids remember that every October you look for migratory birds, that every February you start seeds together, that every summer you have slow mornings and wild evenings — that’s when it becomes part of who your family is.

    And honestly? That’s the whole goal. Not a perfect Instagram moment. Just a family that knows what season they’re in and lives like it matters.

    If you’re thinking about how to weave this more intentionally into your home life, my post on Intentional Parenting: What It Actually Looks Like Day to Day is a good companion read.


    We are not a family who does everything beautifully. Our nature journals have scribbles in them. Our garden has weeds. The chickens occasionally escape and our labradoodle loses her mind about it. But we are a family who pays attention to the year, who lets the seasons set the pace, and who believes that a childhood shaped by the natural world is worth fighting for — even in the Florida heat.

    I hope something in here gives you a starting point, or permission to slow down, or just the reminder that you don’t have to do it perfectly for it to matter. You really don’t.


    📖 You Might Also Like:

    Frequently Asked Questions

    What is seasonal living for families?

    Seasonal living for families is the practice of letting the rhythm of the natural year shape your daily life — what you eat, how you spend your time, what you study, and what you celebrate. It doesn’t have to be elaborate. Even small things like planting a spring garden, watching for migrating birds in fall, or doing more slow indoor activities in winter help your family feel connected to the world around them.

    How do you practice seasonal living in Florida when the seasons aren’t very distinct?

    Florida seasons are real — they’re just subtle. In Northwest Florida, fall brings migratory birds and cooler mornings, winter has genuine cold snaps, spring arrives early with wildflowers and bug season, and summer means intense heat that shapes your whole daily schedule. The key is learning to notice the smaller shifts: the light changing, the wildlife moving, the garden responding. Once you start looking, you’ll find the seasons everywhere.

    What are some simple seasonal activities for elementary-age kids?

    Simple seasonal activities for elementary kids include keeping a nature journal with seasonal observations, starting seeds indoors in late winter, bug collecting in spring and summer, bird watching during fall migration, watercolor painting of seasonal scenes, and tending a backyard garden. The goal is less about structured activities and more about building habits of noticing and engaging with the natural world across the year.

    How does seasonal living connect to Charlotte Mason homeschooling?

    Charlotte Mason’s philosophy is deeply rooted in nature study and living books — both of which connect naturally to seasonal living. She believed children should spend significant time outdoors observing the natural world, keeping nature journals, and developing a real relationship with their environment. Letting the seasons guide your homeschool schedule, nature study focus, and even your read-alouds is a very Charlotte Mason approach to education.

    Do I need to spend a lot of money to practice seasonal living with my family?

    Not at all. The core of seasonal living is attention and presence, not purchases. A nature journal, a field guide, and time outside are really all you need to start. Beyond that, seasonal cooking with what’s in season locally, planting a small garden, and simply adjusting your daily schedule to match the weather and daylight are all free. The investment is mostly time and intention, not stuff.

  • How to Build a Simple Compost Bin for Beginners (No Skills Required)

    How to Build a Simple Compost Bin for Beginners (No Skills Required)

    How to Build a Simple Compost Bin for Beginners (No Skills Required)

    🌿 The Short Version: Building a compost bin doesn’t require fancy supplies, special skills, or a lot of space — just a few materials, a corner of your yard, and a little patience. This post walks you through the simplest setup that actually works, plus how to get your kids involved so composting becomes part of your family’s everyday rhythm.

    This post contains affiliate links. I may earn a small commission at no extra cost to you.

    For the longest time, I had a pile of good intentions sitting right next to my back door. Literally. Every time I peeled a banana or trimmed green beans, I’d think, I really should be composting this. Then I’d toss it in the trash and feel a little guilty about it.

    The thing is, I’d always pictured composting as something that required a special bin, a complicated system, and some kind of degree in soil science. It seemed like one of those things other people did — the really organized homesteaders with Pinterest-perfect setups and color-coded turning schedules.

    Y’all. It is so much simpler than that.

    Once I actually built our first compost bin — like, a real physical structure I could toss scraps into — it clicked. Now composting is just part of our daily rhythm, the kids fight over who gets to dump the kitchen bucket, and our backyard chickens have the most beautiful soil in the whole neighborhood. Here’s exactly how we got there.


    Why Bother Building a Bin at All?

    You can just compost in a pile on the ground. Plenty of people do. But a simple bin keeps things contained (important if you’ve got a dog — our mini labradoodle would absolutely riot in an open pile), holds in some moisture, and helps the pile heat up faster, which means finished compost sooner.

    Down here in Northwest Florida, heat is already on our side for most of the year. A contained bin just helps us use that to our advantage.

    And honestly? A bin makes it feel more intentional. More like a system. Which means we actually use it.


    The Simplest Compost Bin You Can Build This Weekend

    What You’ll Need

    There are about a dozen ways to build a compost bin, but I’m going to give you the one that requires the least skill, the least money, and the least time — because that’s the one you’ll actually do.

    Option 1: Wire Hoop Bin (Our Favorite for Beginners)

    This is our go-to. It takes about 20 minutes to put together and costs next to nothing if you already have some wire fencing lying around.

    • 10 feet of hardware cloth or welded wire fencing (about 3–4 feet tall)
    • 3–4 wooden stakes or metal T-posts
    • Zip ties or wire to connect the ends
    • Work gloves (wire edges are poky — grab some kids’ garden gloves if the littles are helping)

    Just form the wire into a circle, secure the ends together, and pound your stakes in around the outside for support. That’s it. You’ve got a compost bin.

    Option 2: Wooden Pallet Bin

    If you want something sturdier and more permanent, grab 3–4 wooden pallets (most feed stores and hardware stores give these away free), stand them upright in a U-shape, and wire them together at the corners. Leave the front open or add a fourth pallet that can be removed for easy turning. This is a great Saturday project to do with older kids.

    Option 3: A Purchased Bin

    No shame in this at all. A good kitchen compost bin for countertop scraps plus a basic outdoor tumbler is a perfectly valid setup, especially if you’re short on yard space or time. We use a small countertop bin to collect scraps through the week and then transfer to the outdoor bin — it makes the whole process a lot less messy.


    What Goes In (and What Doesn’t)

    This is the part that trips people up the most, so let’s keep it simple.

    Greens (nitrogen-rich):

    • Fruit and vegetable scraps
    • Coffee grounds and filters
    • Fresh grass clippings
    • Chicken manure and bedding (yes — this is liquid gold from our girls)
    • Fresh plant trimmings

    Browns (carbon-rich):

    • Dry leaves
    • Cardboard (torn up, no glossy coatings)
    • Paper bags and newspaper
    • Straw or pine shavings from the chicken coop
    • Dry garden debris

    The basic rule is to aim for roughly 2–3 parts browns to every 1 part greens. If your pile smells bad, add more browns. If it’s not breaking down, it might need more greens or more moisture.

    Don’t add: meat, dairy, cooked food with oils, diseased plants, or dog/cat waste.


    Getting Kids Involved (The Best Part)

    This is genuinely one of our favorite nature study activities, and it requires zero prep on my end. Kids are naturally fascinated by decomposition — it’s basically science magic happening right in the backyard.

    We keep a small kitchen compost bin on the counter, and it’s become one of the kids’ daily jobs to carry it out and dump it. My youngest calls herself the Compost Queen. I’m not going to argue.

    For a little more structured nature study, we’ve used a pocket microscope to look at compost material up close — the fungi and tiny organisms you can see are absolutely wild. Pair that with some sketching in a nature journal and you’ve got a full Charlotte Mason science lesson without opening a single textbook. We also keep a bug collection kit handy for when we find something interesting while turning the pile.

    If you want more ideas for weaving this kind of daily hands-on work into your kids’ lives without it feeling like school, check out our post on How to Involve Kids in Homestead Chores by Age (Without the Whining or the Burnout). Spoiler: the trick is making it feel less like a chore and more like a role.


    📌 Love this? Save it to Pinterest so you can find it later!


    How to Actually Maintain It (Without Overthinking It)

    Here’s the secret: you don’t have to be perfect at this. A compost pile will do its thing even if you’re not turning it on a schedule or monitoring the moisture levels obsessively.

    That said, a few easy habits make it work a lot better:

    Turn It Occasionally

    Every couple of weeks (or whenever you remember), use a pitchfork or shovel to mix the pile up. This introduces oxygen and speeds up decomposition. In the Florida heat, things break down fast — sometimes we’ve had usable compost in as little as 6–8 weeks in the summer.

    Keep It Moist, Not Wet

    The pile should feel like a wrung-out sponge. Down here, summer rain usually handles this for us. In the drier winter months, you might need to water it a little.

    Layer as You Go

    When you add kitchen scraps, try to cover them with a layer of browns. This keeps smells down (important if your bin is near the back door) and helps balance the pile.

    And if you want to take things even further, consider adding a worm composting bin for kitchen scraps — vermicomposting produces incredibly rich castings and is a great companion to a regular outdoor pile. We wrote a whole post on that: Best Worm Composting Bin for Beginners (What Actually Works and Why We Love It).


    How the Chickens Fit In

    If you’ve got backyard chickens, composting and chicken keeping go hand in hand in the best possible way. Chicken manure and bedding are some of the richest compost ingredients you can add, and the finished compost goes right back into the garden beds that grow food for the family.

    We let our girls scratch through the older parts of the pile occasionally — they eat bugs, turn the material, and seem deeply satisfied with themselves afterward. It’s a whole little ecosystem happening right behind our house.

    For more on keeping a healthy flock without a lot of fuss, Storey’s Guide to Raising Chickens is the book I recommend to every new chicken keeper. It covers everything from manure management to coop setup in a way that’s actually readable.


    You Don’t Need a Perfect System — You Just Need to Start

    Here’s what I want you to take away from this: the best compost bin is the one you actually build and use. It doesn’t have to be pretty. It doesn’t have to be Pinterest-worthy. Ours is a slightly lopsided wire hoop in the corner of the yard, and I love it.

    This is the kind of slow, purposeful, real thing I want my kids growing up doing. Turning scraps into soil. Watching things break down and become something useful again. Understanding in a very concrete way that nothing is wasted. That’s the 1990s-style childhood I’m always chasing — not the nostalgia, but the substance of it. Getting your hands in the dirt and knowing that what you do actually matters.

    Start with whatever materials you have. Make it simple. Get the kids involved. The rest will follow.


    📖 You Might Also Like:

    Frequently Asked Questions

    What is the easiest compost bin to build for beginners?

    The simplest option is a wire hoop bin — just form a circle with hardware cloth or welded wire fencing, secure the ends with zip ties, and stake it in place. It takes about 20 minutes to set up, costs very little, and works really well. If you want something sturdier, three wooden pallets wired together in a U-shape is another great beginner option that requires no special tools or skills.

    What should you not put in a compost bin?

    Avoid adding meat, fish, dairy, cooked foods with oils or sauces, pet waste (dog or cat), and diseased plants. These can attract pests, create odors, or introduce pathogens into your compost. Stick to raw fruit and vegetable scraps, coffee grounds, dry leaves, cardboard, and yard waste for best results.

    How long does it take for compost to be ready?

    It depends on your climate, how often you turn the pile, and what you’re adding. In a warm, humid climate like Northwest Florida, a well-managed pile can produce usable compost in as little as 6–8 weeks in the summer. In cooler weather or with less turning, it might take 3–6 months. You’ll know it’s ready when it looks dark, crumbly, and smells like earthy soil.

    Can you compost chicken manure?

    Yes — and it’s fantastic for your compost pile! Chicken manure is nitrogen-rich and breaks down beautifully when mixed with carbon-rich browns like straw, dry leaves, or cardboard. If you have backyard chickens, the used bedding from your coop is some of the best material you can add. Just make sure it gets well mixed and has time to decompose before adding it directly to garden beds.

    How do I keep my compost bin from smelling bad?

    A smelly compost bin usually means one of two things: too many greens (nitrogen-rich materials) without enough browns to balance them, or too much moisture. The fix is usually simple — add a layer of dry leaves, torn cardboard, or straw on top of any fresh scraps you add, and give the pile a turn to introduce some airflow. Aim for a ratio of roughly 2–3 parts browns to 1 part greens, and make sure your bin has some drainage so it doesn’t get waterlogged.

  • Best Living History Books for Elementary Homeschool (That Kids Actually Want to Read)

    Best Living History Books for Elementary Homeschool (That Kids Actually Want to Read)

    Best Living History Books for Elementary Homeschool (That Kids Actually Want to Read)

    🌿 The Short Version: Living history books replace dry textbook facts with stories that pull kids in and make the past feel real. This is our family’s curated list of the best living books for elementary homeschool history — Charlotte Mason-style, tried-and-true, and genuinely loved by our kids.

    This post contains affiliate links. I may earn a small commission at no extra cost to you.

    If you’ve ever watched a kid’s eyes glaze over during a history lesson, you already know the problem. Dates. Bullet points. Textbook summaries that suck all the life out of something that was actually pretty remarkable. I’ve been there. I handed my oldest a traditional history workbook once and she looked at me like I’d asked her to sort feed corn. Hard pass.

    The Charlotte Mason approach fixed all of that for us — not by dumbing history down, but by letting real storytelling do the heavy lifting. Charlotte Mason called them “living books” — books written by authors who genuinely loved their subject and could make you feel like you were there. And once we made the switch? History became one of our favorite subjects. We read aloud under the oak tree in the backyard, our chickens scratching around nearby, our labradoodle sprawled across someone’s feet, and nobody was watching the clock.

    If you’re homeschooling in Florida or anywhere else and you’re ready to ditch the textbook, this list is for you.


    What Makes a Book a “Living History Book” Anyway?

    A living history book is one that reads like a story, not a report. It’s written with personality and passion. It pulls you into the time period instead of just describing it from the outside. Charlotte Mason believed that children learn best through rich narratives, and honestly? She was right. This is basically the 1990s way of learning — fewer worksheets, more stories, more imagination.

    A good living history book will:

    • Have a real human being (or animal!) at the center of the story
    • Use descriptive, vivid language — not dry summaries
    • Be written by someone who genuinely cared about the subject
    • Leave your kid with feelings about history, not just facts

    For pairing with your Charlotte Mason nature study, check out our Charlotte Mason Nature Study Journal Prompts by Season (For Real Kids Who’d Rather Be Outside) — history and nature study honestly work together beautifully in our rhythm.


    Our Favorite Living History Books by Time Period

    American History

    The Little House Series by Laura Ingalls Wilder — This is the gold standard for living books about 19th-century American life. Frontier living, family rhythms, hard work, and real joy. My kids ask for “just one more chapter” every single time. The whole series covers westward expansion in a way no textbook ever could.

    The Courage of Sarah Noble by Alice Dalgliesh — A short, powerful story about a young girl who travels with her father into the Connecticut wilderness in the 1700s. Great for K-2. Finishes in just a few read-aloud sessions and always sparks conversation.

    Johnny Tremain by Esther Forbes — Older elementary (grades 4–5), but absolutely worth it for the American Revolution. The writing is rich and the characters are compelling. One of those books that sticks with you.

    Amos Fortune, Free Man by Elizabeth Yates — A Newbery Medal winner about an African man captured into slavery who eventually earns his freedom. Honest, dignified, and beautifully written. This is not a comfortable book and it shouldn’t be. It’s the kind of story that changes how kids see history.

    Ancient History

    The Golden Goblet by Eloise Jarvis McGraw — Ancient Egypt through the eyes of a young goldsmith’s apprentice. Suspenseful and immersive. My daughter read this in two days flat and then asked if we could study hieroglyphics. Yes, please.

    The Bronze Bow by Elizabeth George Speare — Set in ancient Israel during the time of Roman occupation. A beautifully written coming-of-age story. Best for grades 4 and up. Another Newbery winner that earns its medal.

    Medieval History

    Adam of the Road by Elizabeth Janet Gray — A 13th-century minstrel boy traveling through medieval England. Rich with detail, warm in tone, and genuinely adventurous. Great for grades 3–5.

    Catherine Called Birdy by Karen Cushman — Middle ages through the eyes of a spirited teenage girl who does NOT want to get married off. Funny, feisty, and packed with historical detail. Slightly older (grades 4–5), but kids who like humor eat this up.

    World History

    Mara, Daughter of the Nile by Eloise Jarvis McGraw — Ancient Egypt again, but this one is more of a spy thriller. Older elementary loves this one.

    The Wheel on the School by Meindert DeJong — Set in a small Dutch fishing village. It’s not action-packed, but it’s deeply human and teaches kids so much about community, perseverance, and cooperation. A quiet favorite in our home.


    📌 Love this? Save it to Pinterest so you can find it later!

    How We Use Living Books in Our Homeschool Day

    We don’t read living history books and then fill out worksheets about them. That kind of defeats the purpose. Instead, we:

    Read aloud together. Most of these books I read aloud to my kids. There’s something about hearing a story told out loud that lands differently than reading silently. Our mornings often start with a chapter before anything else.

    Narrate instead of test. Charlotte Mason used narration — just asking your child to tell back what they heard. No quiz, no worksheet. Just “what happened?” or “tell me about Amos.” The retelling itself is the learning.

    Draw and paint scenes. After a chapter that really landed, we’ll get out the Faber-Castell watercolors and paint a scene. A medieval road. A covered wagon. The Nile at sunset. It deepens the memory without feeling like school.

    Add to the nature journal. If a book mentions plants, animals, or weather patterns from a specific region or era, we sketch them in our nature journal. History and nature study crossing paths is one of my favorite things about Charlotte Mason.

    Let them just absorb it. Sometimes a book just does its job quietly. Kids will bring up a character weeks later at dinner, or connect something they read to something they see outside. That’s living education working exactly the way it’s supposed to.

    For more on building a rhythm that fits your family — not someone else’s schedule — Family Rhythm vs Routine: What Actually Works is worth a read.


    A Few Practical Tips for Florida Homeschool Families

    If you’re using the Florida PEP scholarship, living books absolutely count toward your curriculum spending. Many of these titles are available through vendors like Rainbow Resource and Timberdoodle, both of which are PEP-eligible suppliers. Stock up — a great book library is one of the best investments you’ll make in your homeschool.

    Also — if you’re newer to homeschooling in Florida and still figuring out your legal setup, Florida Homeschool Umbrella School Options Explained is the clearest breakdown I’ve written on the subject.

    One more thing: reading aloud outside is always better than reading inside, especially in fall and winter here in Northwest Florida when the weather is actually perfect. Grab a blanket, let the kids sit in the grass, and read a chapter while they fidget and listen and absorb more than you think they are. It’s the 1990s childhood approach to education — low-tech, high-relationship, and it works.


    Wrapping It Up

    Honestly, living history books changed everything about how history feels in our homeschool. My kids talk about these characters like they knew them. They care about what happened. They ask questions. They want to know more. That’s exactly what a history education should do — not produce kids who can fill in a timeline, but kids who understand that real people made real choices in real moments that shaped the world they’re living in now.

    Start with one book. Read it aloud. See what happens. I think you’ll be surprised.


    📖 You Might Also Like:

    Frequently Asked Questions

    What is a living history book in Charlotte Mason homeschool?

    A living history book is a book written with passion and narrative storytelling that pulls readers into a time period rather than just listing facts. Charlotte Mason believed children learn best through rich stories written by authors who genuinely love their subject, rather than dry textbook summaries. These books have real characters, vivid language, and make history feel personal and meaningful.

    What are the best living history books for elementary-age kids?

    Some of the most beloved living history books for elementary homeschool include the Little House on the Prairie series, Johnny Tremain, The Courage of Sarah Noble, Amos Fortune Free Man, The Golden Goblet, Adam of the Road, and The Bronze Bow. These titles span American history, ancient history, and medieval history and are staples in Charlotte Mason homeschool communities.

    Can I use living books to meet Florida homeschool requirements?

    Yes. Florida law requires that homeschool families provide a sequentially progressive curriculum of fundamental skills, and living books absolutely count as part of your history and language arts instruction. If you’re using the Florida PEP scholarship, many of these books can be purchased through PEP-eligible vendors like Rainbow Resource or Timberdoodle.

    How do I use living history books without worksheets or tests?

    Charlotte Mason recommended narration — simply asking your child to tell back what they heard or read in their own words. This can be verbal, written, or even drawn. You can also pair books with artwork, map work, or nature journal entries connected to the time period. The goal is engagement and retention through relationship with the story, not rote recall.

    How many living history books should I use per school year?

    There’s no set number, but most Charlotte Mason-inspired families use one or two main living history books per term (roughly 12 weeks), supplemented by shorter picture books, biographies, or poetry from the same era. Quality and depth matter more than quantity — one book read slowly and discussed well is worth far more than five books skimmed through.