Blog

  • Intentional Parenting: What It Actually Looks Like Day to Day

    Intentional Parenting: What It Actually Looks Like Day to Day

    Intentional Parenting: What It Actually Looks Like Day to Day

    🌿 The Short Version: Intentional parenting isn’t about having a Pinterest-perfect routine or saying yes to every enriching opportunity — it’s about knowing your family’s values and letting those guide the small, ordinary choices you make every single day. This post breaks down what that actually looks like in real life, not the highlight reel.

    This post contains affiliate links. I may earn a small commission at no extra cost to you.

    If you’ve been around this little corner of the internet for a while, you already know I’m not here to sell you a perfect life. Our mornings are loud. The dog tracks mud in from the backyard at least twice a day. Somebody is always looking for a shoe. And yet — underneath all of that beautiful chaos — there’s something we keep coming back to that shapes pretty much every decision we make as parents. It’s not a curriculum or a schedule or a philosophy we read about in a book. It’s just this constant, quiet question: Is this actually what we want for our kids?

    That’s intentional parenting, y’all. And it’s way less glamorous than Instagram makes it look.

    What Intentional Parenting Actually Means (and What It Doesn’t)

    I want to clear something up right away because I think this phrase gets thrown around in a way that makes regular mamas feel like they’re failing. Intentional parenting doesn’t mean scheduled, optimized, or curated. It doesn’t mean your kids are in a linen apron doing watercolor studies at a perfectly arranged table at 9 a.m. every morning.

    (Although honestly, sometimes they are, and that’s genuinely wonderful. We love our Faber-Castell watercolors around here.)

    What it does mean is that you’ve stopped making parenting decisions on autopilot. You’ve thought about what actually matters to your family — your real values, not just the ones that sound good — and you try to let those guide you when you’re making the hundred little choices that make up a day.

    For us, those values look like: less screen time, more outdoor time. Real food cooked in our cast iron skillet. Books over busy schedules. Nature as the main classroom. Chores as part of belonging to a family, not as a transaction. And a whole lot of time outside in the Northwest Florida heat, even when it’s easier to stay in.

    The Day-to-Day Reality of Living Intentionally with Kids

    Mornings That Set the Tone

    We don’t start school with a screen. That’s a hard line for us. Instead, we try to ease into the day — morning basket, read-aloud, maybe some time to go check on the chickens before we sit down for any real academics. There’s something about starting the day outside, watching the girls do their thing in the yard, that settles everybody down. Even the labradoodle.

    Our Charlotte Mason approach means we’re leaning into living books, nature study, and narration rather than workbooks and busy packets. If you’re curious what that looks like in the morning specifically, I’ve written more about it in Best Homeschool Morning Basket Books for Toddlers.

    Saying No to Good Things So You Can Say Yes to Better Things

    This one is hard. Intentional parenting means you will decline things that sound genuinely good. Classes, co-ops, activities, playdates — all perfectly lovely — because you’ve decided that a slower pace is actually better for your family right now. We’ve had seasons where we said yes to too much and the whole family felt it. The kids got snippy. I got frazzled. Nobody was thriving.

    Simplifying on purpose changed that. If you haven’t read How to Slow Down and Simplify Family Life yet, that post goes way deeper into what that actually looked like for us.

    Letting Kids Be Bored (On Purpose)

    This is probably the most 1990s thing about our parenting and I will die on this hill: boredom is not a problem to solve. When my kids tell me they’re bored, I point outside. Every single time. Because what happens after the whining stops is genuinely magical — they build something, they discover something, they make up a game with sticks and rocks and whatever they find in the yard.

    We keep a few things on hand that spark that kind of independent exploration — a bug collection kit, a pocket microscope, and their nature journals for sketching what they find. But mostly? I just open the back door and let them figure it out.

    Here in Florida, that means year-round outdoor time. We’ve had nature study happen in January in bare feet. That doesn’t happen everywhere, and I don’t take it for granted.

    📌 Love this? Save it to Pinterest so you can find it later!

    Chores and Responsibility as Part of the Whole

    Our kids have real chores. Not token chores — real ones. They help feed and water the chickens (we use a nipple chicken waterer that the kids actually help refill), they sweep the kitchen, they help with laundry, and they’re learning to cook alongside me. We use Storey’s Guide to Raising Chickens as a reference when they have questions about the flock, and my oldest has her own copy of the Kid’s Guide to Chickens that she refers to like it’s scripture.

    The point isn’t to produce the world’s most competent eight-year-old. The point is that kids need to feel genuinely needed. That’s not something we’ve outsourced or replaced with a chore chart app.

    Protecting What You’ve Built

    Intentional parenting also means you protect the environment you’re working to create. That looks different for every family, but for us it means:

    • A non-toxic home as much as practically possible (everything from cleaning products to sunscreen — I use non-toxic sunscreen on the kids every single day we’re outside, which in Florida is basically always)
    • Limiting the news and background noise
    • Being selective about what media comes in and when
    • Keeping our home as a place where kids can breathe and just be

    This ties into our whole approach to simple living with kids — it’s not minimalism for aesthetics. It’s clearing the clutter so the good stuff has room.

    Intentional Parenting Doesn’t Mean Perfect Parenting

    I want to say this plainly because I think it needs to be said: we lose our tempers. We let the kids watch a movie when we’re tired and nobody has anything left. We have days where the nature journal doesn’t come out, the chickens are just chores and not learning opportunities, and everyone eats cereal for dinner.

    And that’s still intentional parenting. Because intentional doesn’t mean flawless — it means you keep coming back to your why. You notice when you’ve drifted and you course-correct without a lot of drama. You give yourself the same grace you’d give your kids.

    We also use the PEP scholarship here in Florida, which means our curriculum choices are documented and our approach has to be thought through enough to explain. That level of accountability has actually been really good for keeping us anchored to what we say we believe. If you’re navigating that system, our free Florida homeschool transcript template might help you think through how to document an approach like ours.

    So What Does Intentional Parenting Look Like Today?

    It looks like asking your kid what they noticed outside instead of what level they got to. It looks like letting them stay at the mud puddle for twenty extra minutes because nothing is actually on fire. It looks like turning off the podcast and listening to what they’re telling you about the spider they found on the fence. It looks like choosing the slower, messier, more inconvenient option because it’s growing something in them that really matters.

    It doesn’t have to look like us. It just has to look like you — your values, your family, your version of enough.

    That’s the whole thing, really. You already know what you want for your kids. Intentional parenting is just the daily practice of choosing it, even when it’s inconvenient. Especially when it’s inconvenient.

    You’ve got this, mama. Now go open the back door.


    📖 You Might Also Like:

    Frequently Asked Questions

    What is intentional parenting?

    Intentional parenting means making conscious, values-driven choices about how you raise your kids instead of just going along with whatever is default or convenient. It’s not about being perfect — it’s about knowing your family’s priorities and letting those guide everyday decisions, from how you spend your afternoons to what media comes into your home.

    How do you practice intentional parenting without burning out?

    The key is to keep it simple and tied to your actual values, not an idealized version of someone else’s life. Start with one or two non-negotiables — like daily outdoor time or no screens before noon — and build from there. Grace matters too. Intentional parenting is a long game, not a daily performance.

    Can intentional parenting work with a Charlotte Mason homeschool approach?

    Absolutely — in fact, Charlotte Mason’s philosophy is one of the most naturally intentional approaches to childhood education there is. The emphasis on living books, nature study, real-world skills, and unhurried learning aligns beautifully with raising kids slowly and purposefully.

    What does intentional parenting look like for young elementary kids?

    For K-5 kids, intentional parenting often looks like prioritizing free play and outdoor exploration over structured activities, giving kids real chores that make them feel needed, reading aloud together daily, and being selective about screen time. It’s less about enrichment programs and more about protecting space for boredom, creativity, and connection.

    How do I start living more intentionally as a family without overhauling everything?

    Pick one area that feels out of alignment with your values and start there. Maybe it’s mornings that feel rushed and screen-heavy, or a schedule that’s too packed to enjoy anything. Make one small shift and let it settle before adding another. Intentional living is built in small choices over time, not one big dramatic overhaul.
  • How to Make Bone Broth in a Slow Cooker (The Easy Way That Actually Tastes Like Something)

    How to Make Bone Broth in a Slow Cooker (The Easy Way That Actually Tastes Like Something)

    How to Make Bone Broth in a Slow Cooker (The Easy Way That Actually Tastes Like Something)

    🌿 The Short Version: Making bone broth in a slow cooker is easier than you think — toss in bones, vegetables, and water, and let it simmer low and slow for 12–24 hours. This post walks you through exactly how we do it, what bones to use, and why it’s become a weekly ritual in our home.

    This post contains affiliate links. I may earn a small commission at no extra cost to you.

    I’ll be honest — I put off making bone broth for way too long because I thought it was some complicated, all-day-hovering-over-the-stove kind of thing. Turns out it’s about the most hands-off thing I cook. You basically do five minutes of prep, walk away, and come back to liquid gold.

    We started making it regularly a couple years ago when I was trying to get more nourishing, real-food staples into our weekly rhythm. Our kids eat it in soups, we cook rice and grains in it, and on a chilly Northwest Florida morning (yes, we get those — all twelve of them), there’s nothing better than a warm mug of broth with a little salt and butter.

    If you’ve been curious but haven’t tried it yet, this is your sign. Let’s do it.


    Why Bone Broth Is Worth Making at Home

    Store-bought broth is fine in a pinch, but most of it is watery, over-salted, and doesn’t have anywhere near the gelatin content of a good homemade batch. When your broth gels in the fridge — and it will, if you do it right — that’s the collagen and minerals that came straight from the bones. That stuff is genuinely good for gut health, joints, skin, and immunity.

    For our family, it’s also a zero-waste win. We save bones in a zip-lock bag in the freezer all week — from roasted chickens, pork chops, whatever — and when the bag gets full, it’s broth time. Nothing gets wasted, and we’re stretching every dollar from the meat we buy.

    And yes — if you have backyard chickens like we do, the carcass from a spent hen makes the most incredibly rich broth you’ve ever tasted. I wrote more about our flock over in Best Chicken Breeds for Egg Color Variety (And Which Ones Actually Thrive in Florida), but just know — dual-purpose birds earn their keep even at the end.


    What You’ll Need

    The Bones

    You’ve got options here:

    • Chicken — whole carcass, backs, necks, and feet (feet are magic for gelatin)
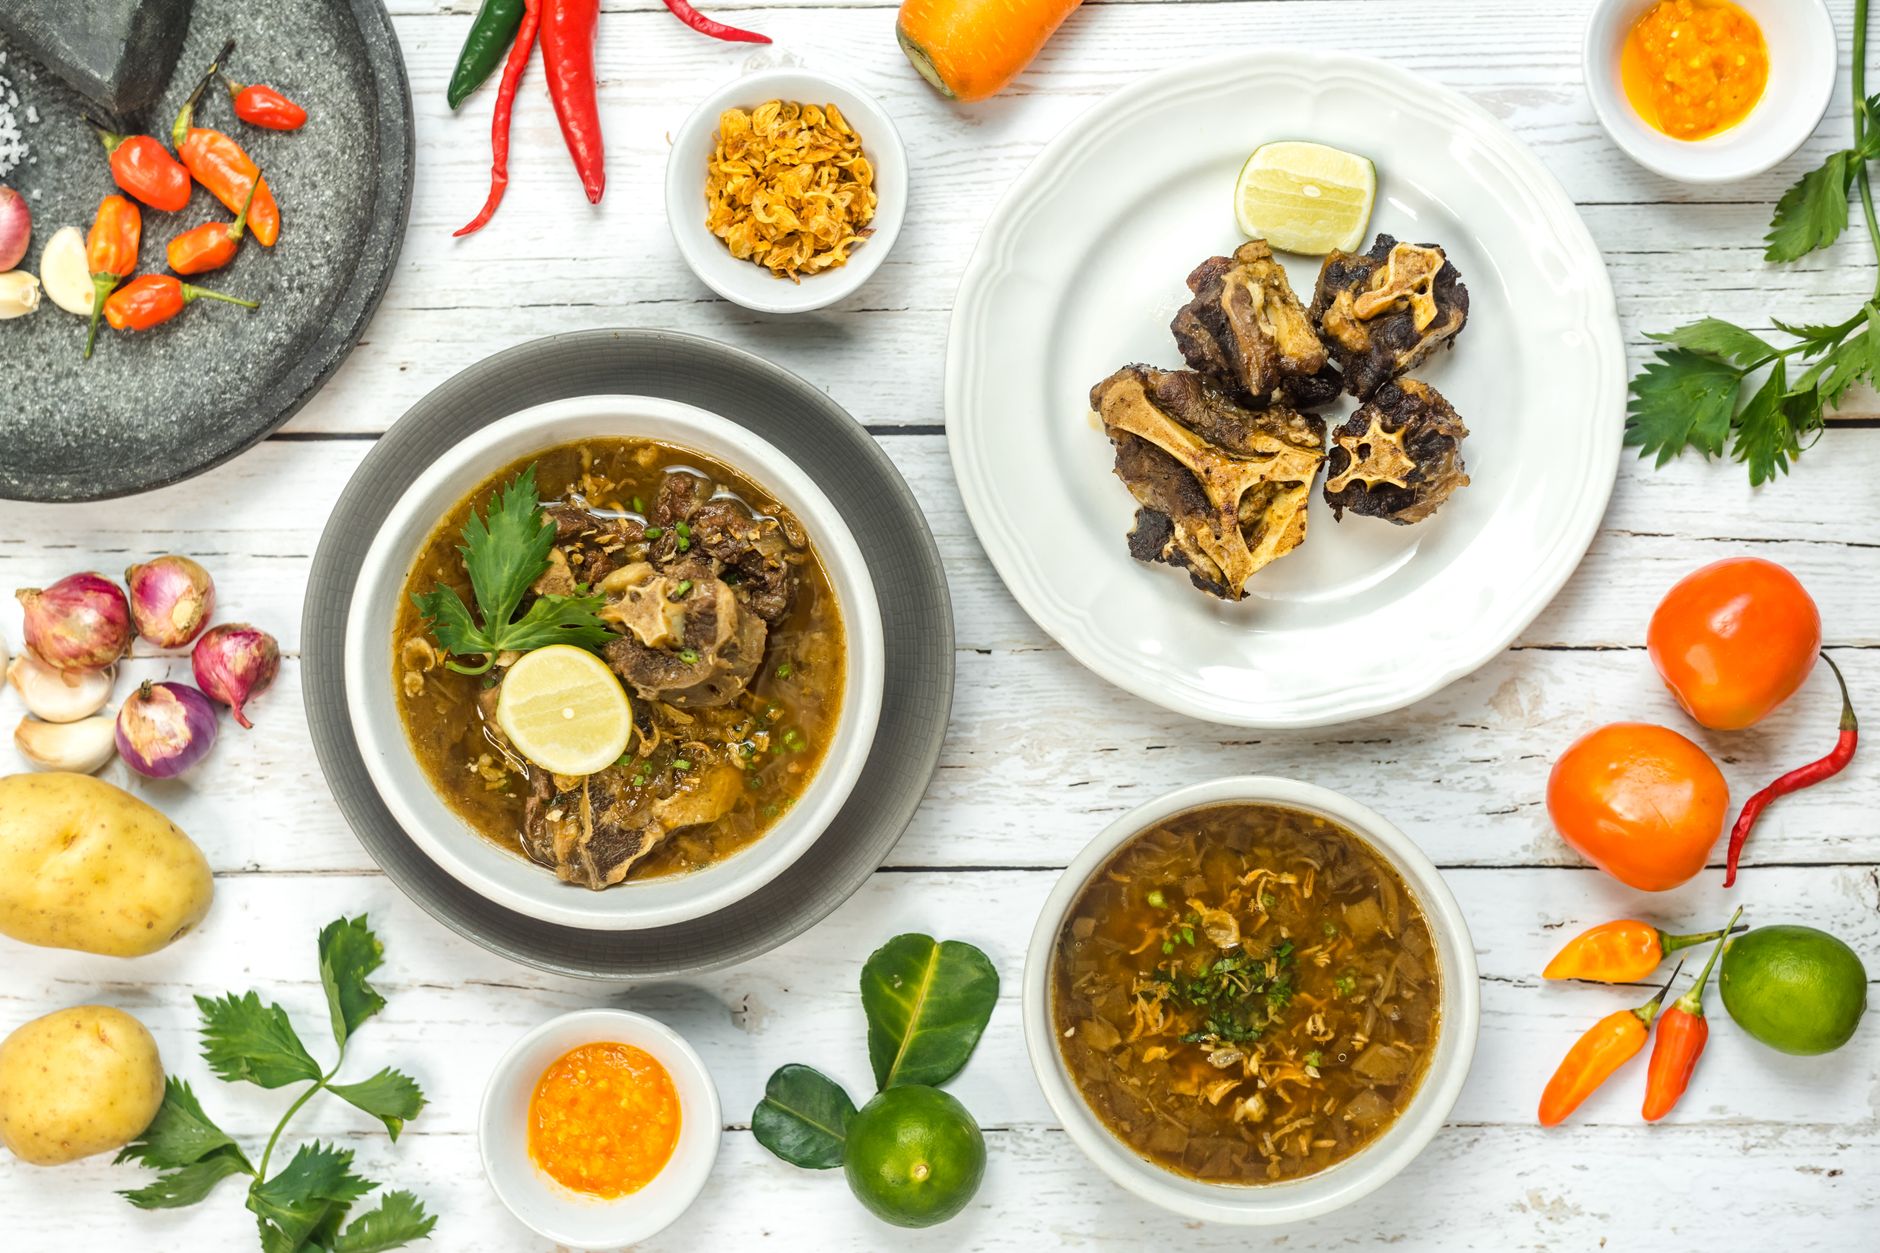
    • Beef — knuckles, oxtail, short rib bones, marrow bones
    • Pork — trotters, neck bones
    • Mixed — whatever you’ve been saving in the freezer

    For the richest flavor and most gelatin, use a mix of knuckle or joint bones (high collagen) and marrow bones (deep flavor). If you can roast the bones in the oven for 20–30 minutes at 400°F first, do it — it deepens the flavor so much. But if you’re just tossing in a leftover roasted chicken carcass, you’re already ahead.

    The Vegetables and Aromatics

    This is where you just clean out your vegetable drawer. Truly:

    • 2–3 carrots (or carrot peels)
    • 3–4 stalks of celery
    • 1 large onion, halved (skin on is fine)
    • A whole head of garlic, cut in half horizontally
    • A handful of fresh or dried herbs — thyme, parsley, bay leaves, rosemary
    • 1–2 tablespoons apple cider vinegar (this is important — it helps pull the minerals out of the bones)
    • Salt and peppercorns to taste

    The Equipment

    A slow cooker is genuinely the easiest way to do this. Set it, forget it, go do your morning basket with the kids, feed the chickens, live your life. A 6-quart works great for a chicken carcass or 2–3 pounds of beef bones.


    How to Make Bone Broth in a Slow Cooker — Step by Step

    Step 1: Add Your Bones

    Place your bones in the slow cooker. If you’re using raw bones, roasting them first is optional but recommended for beef. For chicken carcasses straight from a roasted chicken, just toss them in.

    Step 2: Add Vegetables and Aromatics

    Throw in your carrots, celery, onion, garlic, herbs, and peppercorns. Don’t overthink it — this isn’t precise cooking, it’s more like a long, slow extraction.

    Step 3: Add Apple Cider Vinegar

    Pour in 1–2 tablespoons. Let everything sit for about 20–30 minutes before turning it on if you can — the vinegar starts working on those minerals right away.

    Step 4: Cover with Cold Water

    Fill the slow cooker with cold, filtered water — leaving about an inch of headspace. Cold water helps the broth stay clear.

    Step 5: Cook Low and Long

    • Chicken broth: 12–18 hours on low
    • Beef broth: 18–24 hours on low

    That’s it. You literally just let it go. I usually start mine in the evening and strain it the next morning. The house smells incredible.

    Step 6: Strain and Store

    Strain through a fine mesh strainer into a large bowl or pot. Discard the solids. Let it cool, then portion into wide-mouth canning jars for the fridge (good for 5 days) or freeze for up to 6 months.

    When it’s cold, a good broth should look like Jell-O in the jar. That gel is everything. That’s your collagen.

    📌 Love this? Save it to Pinterest so you can find it later!


    Tips for the Best Broth Every Time

    Don’t let it boil. A hard boil makes cloudy, sometimes bitter broth. Low and slow is the whole point — that’s why the slow cooker is so perfect for this.

    Skim the foam. In the first hour or two, some grey foam may rise to the top. Skim it off with a spoon. It’s not harmful, just not pretty.

    Use cold water. Starting with cold water and a slow heat-up keeps the broth clearer.

    Add feet if you can. Chicken feet are high in collagen and make for an incredibly gelatinous broth. Our local farm store carries them — worth asking around.

    Don’t salt heavily until the end (or at all before storing). The broth concentrates as it cooks, so season when you’re ready to use it.


    How We Use Bone Broth in Our Home

    Once you have a steady supply in the fridge or freezer, you’ll start putting it in everything:

    • Cooking rice, quinoa, and lentils instead of water
    • As the base for soups and stews (our go-to slow cooker chicken soup in fall and winter)
    • Sipping warm from a mug with a pinch of salt when someone’s feeling under the weather
    • Deglazing the cast iron skillet for pan sauces
    • In the kids’ mac and cheese instead of water

    This kind of simple, intentional kitchen practice is exactly what I talk about in Simple Living with Kids: Practical Tips That Actually Work for Real Families — it doesn’t have to be complicated to be meaningful.


    Making It a Learning Moment

    If you homeschool, this is such a natural kitchen science moment. My kids have learned about:

    • Why the broth gels (collagen, gelatin, protein chains — yes, even my seven-year-old gets this now)
    • What apple cider vinegar does to the minerals in bones (basic chemistry!)
    • How traditional cultures have made broth for centuries, all over the world
    • Where our food comes from — especially when we’re using bones from our own chickens

    It connects so naturally to our Charlotte Mason approach of learning through real life and living experiences. And if your kids are into nature journaling, they can sketch the process, label the ingredients, and observe how the broth changes from liquid to gel overnight — we use a nature journal for all kinds of kitchen and garden observations like this.

    For more on that kind of seasonal, real-life learning, check out Charlotte Mason Nature Study Journal Prompts by Season (For Real Kids Who’d Rather Be Outside).


    A Note on Non-Toxic Storage

    We store our broth in glass — always. Wide-mouth mason jars are our favorite because they stack neatly and are easy to pour from. Avoid plastic containers, especially for hot liquids. If you’re freezing, leave an inch of headspace so the glass doesn’t crack as the broth expands.

    For more on swapping out plastics and choosing safer options in the kitchen, you might like my post on Non-Toxic Baby Products: What to Actually Buy (and What’s Just Marketing Hype) — a lot of those principles apply to the whole family’s kitchen, not just babies.


    You Don’t Have to Do It Perfectly

    Here’s the thing I want you to walk away with: bone broth doesn’t require a recipe in the precise sense. It’s more of a practice. The bones, the water, the time — that’s really it. Everything else is just adding flavor and nourishment.

    Our grandmothers (and their grandmothers) didn’t follow a carefully measured recipe. They just saved the bones, covered them with water, and let them simmer. It’s one of those old-fashioned kitchen habits that got lost somewhere in the convenience-food era, and bringing it back just feels right.

    If you’ve got a slow cooker, some saved bones, and a free evening to get it started — you’ve got everything you need. Give it a try this week. I think you’re going to love it.


    📖 You Might Also Like:

    Frequently Asked Questions

    How long should I cook bone broth in a slow cooker?

    For chicken bone broth, cook on low for 12–18 hours. For beef bone broth, go 18–24 hours on low. The longer it simmers, the more minerals and collagen you’ll extract from the bones. Avoid cooking on high — a gentle, slow simmer is what gives you a clear, rich broth.

    What bones are best for making bone broth?

    A mix of joint or knuckle bones (high in collagen) and marrow bones (great for flavor) gives you the best results. For chicken, a whole carcass, necks, backs, and feet work beautifully. For beef, try oxtail, knuckles, or short rib bones. Roasting raw bones in the oven first adds deeper flavor.

    Why does bone broth gel when it cools?

    That gel is collagen that’s been extracted from the connective tissue and cartilage in the bones during the long cooking process. When it cools, it solidifies into a gel — and that’s exactly what you want. A gelatinous broth is a sign of a nutrient-rich, well-made batch. It liquefies again when heated.

    Do I need to add apple cider vinegar to bone broth?

    It’s not strictly required, but it’s highly recommended. Apple cider vinegar is mildly acidic and helps break down the bone matrix so more minerals — like calcium, magnesium, and phosphorus — leach into the broth. You only need 1–2 tablespoons, and you won’t taste it in the final broth.

    How do I store homemade bone broth and how long does it last?

    Store cooled bone broth in glass jars in the refrigerator for up to 5 days, or freeze it for up to 6 months. Wide-mouth mason jars work great for both fridge and freezer storage — just leave an inch of headspace if freezing so the glass doesn’t crack as the liquid expands.

  • Simple Living with Kids: Practical Tips That Actually Work for Real Families

    Simple Living with Kids: Practical Tips That Actually Work for Real Families

    Simple Living with Kids: Practical Tips That Actually Work for Real Families

    🌿 The Short Version: Simple living with kids isn’t about being perfect or having a Pinterest-worthy home — it’s about stripping away what drains you so there’s more room for what matters. This post shares the practical, unglamorous tips our family actually uses to live slower, lighter, and with a whole lot more joy.

    This post contains affiliate links. I may earn a small commission at no extra cost to you.

    Let me tell you what simple living with kids looked like in our house last Tuesday. One child was out back checking on the chickens in her muddy rain boots, the other was belly-down in the grass trying to catch a lizard with his bare hands, and I was inside washing the same cast iron skillet I’ve washed about ten thousand times while a loaf of sourdough cooled on the counter. No apps running. No errands scheduled. No activities to rush off to.

    Was it quiet and idyllic? Kind of. Was someone also arguing with someone else over whose turn it was to collect eggs? Absolutely.

    Here’s what I want you to know: simple living with kids is not aesthetic. It’s not a curated feed or a course you buy. It’s a series of small, intentional decisions you make over and over again — and a lot of letting go. If you’re looking for practical, real-life ways to actually simplify your family’s daily life, you’re in the right place.

    Start With the Calendar, Not the Clutter

    Everyone tells you to declutter first. And yes, stuff matters — we’ll get there. But in my experience, the thing that makes family life feel the most chaotic is an overscheduled calendar, not an overstuffed closet.

    We protect our slow mornings fiercely. Our Charlotte Mason homeschool rhythm is built around a morning basket, outdoor time, and a handful of focused lessons — not a packed schedule that has us running from thing to thing before lunch. If you want to read more about how we’ve simplified our overall pace, I wrote about that in depth over here: How to Slow Down and Simplify Family Life (Without Feeling Like You’re Missing Out).

    Practical tip: Look at your weekly calendar and find one recurring commitment that drains more than it gives. Just one. See what life feels like without it for a month.

    Give Kids Less — and Watch Them Do More

    This is the one people push back on the most, but it’s the one I believe in completely. When kids have fewer toys, fewer options, and fewer structured activities, they get creative. They get bored — which is actually where the good stuff happens.

    Our kids spend huge chunks of their afternoons outside. They’ve built forts, studied ant hills, caught bugs in their bug collection kit, and spent a full hour one afternoon just watching our chickens sort out their pecking order drama. That’s science. That’s social studies. That’s the 1990s childhood I grew up having in Florida — where you went outside after breakfast and came in when the streetlights came on.

    You don’t need a lot of gear for outdoor play, but a few things genuinely help: a solid bug catcher kit keeps them occupied for ages, and if you’ve got multiple kids who like to roam the yard or neighborhood, walkie talkies are genuinely one of the best things we ever bought.

    Build Simple Rhythms Around Nature

    One of the most grounding things we do as a family is keep consistent nature rhythms — things that repeat, that anchor the day or week, that connect us to what’s actually happening outside.

    For us that looks like:

    • Checking on the chickens every morning (non-negotiable — they will tell you if you forget)
    • A nature walk at least twice a week, usually around our Pensacola neighborhood or a local preserve
    • Weekly nature journaling with our nature journal and Faber-Castell watercolors
    • Bird identification with our Sibley Birds guide — we have surprisingly fun arguments about whether something is a fish crow or an American crow

    If you’re looking for ideas on how to bring nature journaling into your homeschool in a way that actually works for real kids, check out: Charlotte Mason Nature Study Journal Prompts by Season (For Real Kids Who’d Rather Be Outside).

    Nature rhythms work because they’re free, they’re flexible, and they require no prep. You just go outside. That’s it.

    📌 Love this? Save it to Pinterest so you can find it later!

    Simplify the Stuff (Without the Overwhelm)

    Okay, now we talk about clutter — but not in a “throw everything away and live in a white room” kind of way. Just in a “does this thing actually serve our family” kind of way.

    For our homeschool, simple means choosing curriculum that’s gentle and effective without requiring me to be a project manager. We use All About Reading for our youngest and have loved how straightforward it is, and Math-U-See has been a game changer for the way my visual learner actually understands math instead of just memorizing it. The goal is always: does this make our days feel lighter, or heavier?

    For the home side of things, we’ve slowly replaced complicated products with simpler ones — non-toxic cleaners from Grove Collaborative, beeswax wrap instead of plastic wrap, wool dryer balls instead of dryer sheets full of fragrance. None of these swaps happened overnight. We just made a new choice every time something ran out.

    A Few Practical Home Swaps That Stuck

    • Replace paper towel habit → bar mop towels or old cut-up t-shirts
    • Swap plastic produce bags → reusable mesh bags
    • Ditch chemical bug spray → Wondercide (especially important in Florida, y’all — the mosquitoes are a whole personality here)
    • Toss the plastic water bottles → stainless steel water bottles the kids actually keep track of

    Let the Kids Do Real Work

    This might be the most underrated part of simple family living. Kids who do real work — actual contributing-to-the-household work — are calmer, more capable, and honestly more content than kids who are entertained all day.

    Our kids help with the chickens, help in the garden, help with meal prep, help fold laundry. Not perfectly. Not without complaint sometimes. But they do it. And the chickens have been the single best teacher in this department. When you have animals that depend on you, there’s no negotiating. The coop needs to be cleaned, the water needs to be refilled, and the eggs need to be collected. Real responsibility. Every day.

    If you’re thinking about adding backyard chickens to your simple living setup, Storey’s Guide to Raising Chickens is the book I recommend to everyone, and the Kid’s Guide to Keeping Chickens is one my kids have both read cover to cover. You can also browse the best breeds for Florida’s heat if you’re figuring out where to start.

    Stop Optimizing, Start Repeating

    The secret ingredient in simple living that nobody talks about? Repetition. Not novelty.

    We eat the same rotation of simple meals. We follow the same basic daily rhythm. We do the same Saturday morning chores before anyone gets to do anything fun. Predictability isn’t boring when you’re a kid — it’s safe. It’s grounding. It frees up mental energy for everyone because nobody’s wondering what comes next.

    Simple living isn’t something you achieve and then maintain. It’s something you keep choosing, especially when the world keeps telling you to add more, do more, sign up for more. The answer is almost always: less.


    If you’re at the beginning of simplifying your family’s life, I want you to hear this: you don’t have to do it all at once. Pick one thing. The calendar, the clutter, the curriculum, the chicken coop — whatever feels most urgent. Start there. Live with it for a while. Then pick the next thing.

    Our life looks nothing like what I thought a homeschool family would look like five years ago. It’s messier, slower, louder, and so much better. The dirt under my kids’ fingernails and the egg carton on my counter and the nature journal sitting open on the table — that’s it. That’s the whole dream, right there.


    📖 You Might Also Like:

    Frequently Asked Questions

    What does simple living with kids actually look like day to day?

    Simple living with kids looks like consistent daily rhythms, less scheduled activity and more free play, real chores that contribute to the household, and intentional choices about what comes into your home and onto your calendar. It’s not perfect — it’s just more deliberate.

    How do I get started with simple living when my life already feels overwhelming?

    Start with just one area — most people find the calendar is the highest-impact place to begin. Look for one recurring commitment that drains more than it gives, and remove it for a month. Once you feel that relief, you’ll have the motivation to simplify the next thing.

    Is simple living compatible with homeschooling?

    Absolutely — in fact, a Charlotte Mason or nature-based homeschool approach is one of the most naturally simple education styles there is. It prioritizes living books, outdoor time, and gentle daily rhythms over heavy curriculum loads and constant busyness.

    How do I get my kids on board with a simpler, less screen-focused lifestyle?

    Fill the space that screens occupied with things that are genuinely compelling — outdoor play, real tools like bug catchers or walkie talkies, animals to care for, and creative freedom. Kids don’t actually prefer screens to a rich, interesting outdoor life. They just default to screens when nothing else is available.

    What are the best first steps toward a non-toxic simple home with kids?

    The easiest way to start is by replacing things as they run out rather than overhauling everything at once. When your dish soap runs out, replace it with a non-toxic option. When dryer sheets run out, switch to wool dryer balls. Small, consistent swaps over time add up to a genuinely different home without the overwhelm.

  • How to Slow Down and Simplify Family Life (Without Feeling Like You’re Missing Out)

    How to Slow Down and Simplify Family Life (Without Feeling Like You’re Missing Out)

    How to Slow Down and Simplify Family Life (Without Feeling Like You’re Missing Out)

    🌿 The Short Version: Slowing down family life doesn’t mean doing less — it means doing what actually matters with more presence and intention. In this post, I’m sharing the real, practical shifts our family made to step off the hamster wheel and actually enjoy the life we’re building.

    This post contains affiliate links. I may earn a small commission at no extra cost to you.

    There was a season — not that long ago — where I’d look at our days and think, how are we this busy when we’re literally home all day? Homeschooling, errands, activities, commitments we said yes to because saying no felt uncomfortable. The days were full but somehow hollow. I was moving through our life instead of living it.

    If that hits close to home, pull up a chair. This one’s for you.

    Slowing down isn’t a personality type. It’s not something you either are or aren’t cut out for. It’s a series of small, deliberate choices — and honestly? The more we leaned into it, the more our kids started to thrive. Less schedule. More chickens. More mud. More of the good stuff.

    Here’s what’s actually worked for our family.


    Start by Naming What You Actually Want Your Days to Feel Like

    This sounds soft, but it’s the most practical thing I’ve done. Before you cut anything or add anything, just sit with this question: What do I want our family life to feel like?

    For us, the answer was simple. We wanted our days to feel like a long summer afternoon from the 1990s — kids outside, nobody watching the clock too hard, dinner made at home, a dog underfoot. We wanted margin. We wanted boredom, even, because boredom is where creativity lives.

    Once you name it, you have a filter. Every time someone asks you to add something to your calendar, you can hold it up to that vision and ask: does this fit, or does this crowd it out?


    Protect Morning Time Like It’s Sacred

    Our mornings used to be chaotic. Now they’re slow on purpose.

    We start with our morning basket — read-alouds, a little poetry, nature observation out the back window while coffee’s brewing. The kids feed the chickens before anything academic happens. There’s something grounding about starting the day with living things that depend on you. It sets a tone.

    If you’re a Charlotte Mason family or even just curious about the approach, protecting that unhurried morning rhythm is one of the best things you can do. Check out Charlotte Mason Nature Study Journal Prompts by Season (For Real Kids Who’d Rather Be Outside) for ideas that fit right into a slow morning.

    We keep a nature journal at the kitchen table and my kids will often sketch something before we ever crack a curriculum book. It’s become a ritual, and rituals are what hold a family together.


    Cut the Activities — I Mean Really Cut Them

    I know. This is the one that stings.

    We live in the Pensacola area, and there is no shortage of things to sign your kids up for. Sports leagues, co-ops, classes, events every weekend. And a lot of it is genuinely good. But good doesn’t mean necessary, and a full calendar isn’t the same as a full life.

    We made a rule: one outside commitment per kid at a time. That’s it. And honestly? Our kids haven’t missed out. They’ve gained something — long, wandering afternoons where they build forts, catch lizards, argue and then figure it out, dig in the dirt, and generally do exactly what kids were made to do.

    A bug collection kit has provided more genuine learning in our backyard than many organized activities we’ve paid for. Same with a pocket microscope — the kids discovered things in a single afternoon in the yard that we talked about for a week.


    Bring the Learning Back Outside

    One of the fastest ways to simplify homeschool life is to stop trying to recreate a classroom in your house. You don’t need to.

    Nature study, done the Charlotte Mason way, is inherently slow and rich. We take the Sibley Birds guide on walks. We sketch what we find. We narrate. We wonder. There are no worksheets. There’s no grade. And somehow my kids retain more from an hour in the backyard than from a lot of seat work.

    Florida is actually an incredible place for this — year-round warmth, crazy biodiversity, and something always blooming, hatching, or migrating through. We lean hard into that. In the spring we’re watching the chickens with the kid’s guide to chickens to learn about behavior and biology. In the fall we’re watching for migrating birds. In summer we’re up early to beat the heat and catch whatever’s moving.

    Slowing down academically doesn’t mean doing less — it means doing it more deeply.

    📌 Love this? Save it to Pinterest so you can find it later!


    Simplify the Home Environment Too

    A cluttered home creates a cluttered mind — for kids and for mamas. We’ve slowly been working toward a home that’s easier to manage, less toxic, and more peaceful to be in.

    That’s looked like switching to Grove Collaborative for our cleaning products, which cut down on decision fatigue and reduced the chemical load in our home. It’s looked like fewer toys and more open-ended materials. Fewer screens and more watercolor paints and Faber-Castell watercolors on the kitchen table.

    Check out DIY Natural Cleaning Products for Every Room (That Actually Work and Cost Almost Nothing) if you’re trying to simplify what’s under your sink too — we’ve been doing a lot of that kind of swapping and it genuinely makes the home feel calmer.


    Let the Kids Be Bored

    I cannot stress this enough. Boredom is not a problem to solve.

    Some of the best things that have ever happened in our backyard started with a kid saying “I’m boooored.” We’ve had elaborate chicken observation journals, homemade obstacle courses, mud pie bakeries, and one very ambitious attempt to build a bridge across the drainage ditch out back. All of it born from boredom.

    Our mini labradoodle is usually involved somehow too, which adds to the chaos and the joy in equal measure.

    Resist the urge to fill the quiet. The quiet is doing something.


    Say No to Screen Time as a Default

    This doesn’t mean no screens ever. It means screens shouldn’t be the first answer to a free moment.

    When the kids come to me bored or restless, I try to redirect to something physical first. Outside. A project. The chickens need fresh water. Go see if there are eggs. Here are some kids’ rain boots — go splash in the puddles from that afternoon storm.

    After a Florida afternoon thunderstorm, the backyard smells like earth and possibility. That is a gift. We try not to waste it.


    Simplify Doesn’t Mean Perfect

    I want to be honest: we don’t have this figured out perfectly. There are weeks where the calendar creeps back up, where we’re eating dinner in the car and I’ve said yes to three things too many.

    But we keep coming back. That’s the whole thing — not achieving some idealized simple life, but having enough clarity about what you actually want that you keep making your way back to it.

    For us, that means chickens in the backyard, kids with dirty knees, a dog who thinks he runs the place, and school that happens in between real living — not in spite of it.

    If you’re just starting to think about what this could look like for your family, I’d encourage you to start small. One morning. One afternoon with no plan. One week where you say no to something you’d normally say yes to just out of habit.

    See how it feels. I think you’ll want more of it.


    📖 You Might Also Like:

    Frequently Asked Questions

    How do I start slowing down family life when everything feels out of control?

    Start with just one part of your day — usually mornings are easiest to reclaim. Create a simple, slow morning ritual before anything scheduled begins: a read-aloud, time outside, or a quiet breakfast with no screens. Build from there rather than trying to overhaul everything at once.

    Is it okay to limit my kids’ activities even if other families are doing more?

    Absolutely. Research consistently shows that unstructured free play is essential for childhood development — and most kids today are overscheduled. Fewer activities often means more creativity, more resilience, and more genuine connection within your family. Your kids will not be behind; they’ll likely be ahead in the ways that matter most.

    How do you simplify homeschooling without feeling like you’re not doing enough?

    Shift your measure of success from ‘how much did we cover’ to ‘how deeply did we engage.’ Charlotte Mason’s approach to short lessons, living books, and nature study covers an enormous amount of ground without the frantic pace. If your child narrated back what they learned, drew it, or talked about it at dinner, that’s real learning.

    What’s the easiest way to reduce screen time for kids without constant battles?

    Make the alternative more appealing than the screen — which is easier than it sounds when kids have open-ended outdoor time, interesting materials to tinker with, and pets or animals to interact with. Set clear, consistent screen-free times (like mornings and the hour after lunch) so it becomes routine rather than a daily negotiation.

    How do you simplify a home environment to feel less chaotic?

    Start by reducing visible clutter — toys, papers, and surfaces that collect stuff create mental noise for everyone. Then look at your cleaning products, kitchen gadgets, and daily routines to see what can be simplified or consolidated. Fewer, better things almost always feels calmer than more of everything.

  • Florida Backyard Beekeeping for Beginners: What You Actually Need to Know Before You Start

    Florida Backyard Beekeeping for Beginners: What You Actually Need to Know Before You Start

    Florida Backyard Beekeeping for Beginners: What You Actually Need to Know Before You Start

    🌿 The Short Version: Florida’s warm climate makes it one of the best places in the country to keep backyard bees — but there are a few things you need to know before you dive in. This post walks you through the basics: gear, hive setup, Florida-specific rules, and how to get started without feeling completely overwhelmed.

    This post contains affiliate links. I may earn a small commission at no extra cost to you.

    I’ll be honest — beekeeping was on my “someday” list for years. Right there next to sourdough bread and raising quail. It felt a little big, a little intimidating, like maybe it was for someone more capable than me.

    And then one spring afternoon my kids and I were sitting in the backyard watching our chickens scratch around, and a big fat bumblebee landed on the rosemary bush by the fence. My oldest looked up at me and said, “Mama, why don’t we have bees?”

    Good question, kid.

    We’re in Northwest Florida — Pensacola area — and let me tell you, if you’re going to keep bees anywhere, Florida is a pretty spectacular place to do it. Our winters are mild, our bloom season is long, and there is no shortage of wildflowers, citrus, and gallberry for your girls to forage on. Once I started actually researching it, I realized beekeeping wasn’t nearly as out-of-reach as I’d made it in my head.

    Here’s what I wish someone had just sat down and told me at the beginning.


    Why Florida Is Actually a Great Place to Start Beekeeping

    Most of the country has a hard stop on beekeeping in winter — colonies have to be managed for cold, wrapped, kept alive through months with no forage. Here in Florida? Our bees are often still foraging in December. We’ve got blooms from late winter straight through fall, and the longer active season means your colony has more time to build up honey stores and population before you ever have to worry about a rough stretch.

    The flip side: Florida heat and humidity mean your hives need good ventilation, and you’ll want to be thoughtful about hive placement. Full afternoon shade is your friend down here. We put ours near our back fence line where they get morning sun and shade by 1pm, and that’s made a noticeable difference.


    What You Actually Need to Get Started

    You don’t need a barn full of equipment. Here’s the honest beginner list:

    The Hive

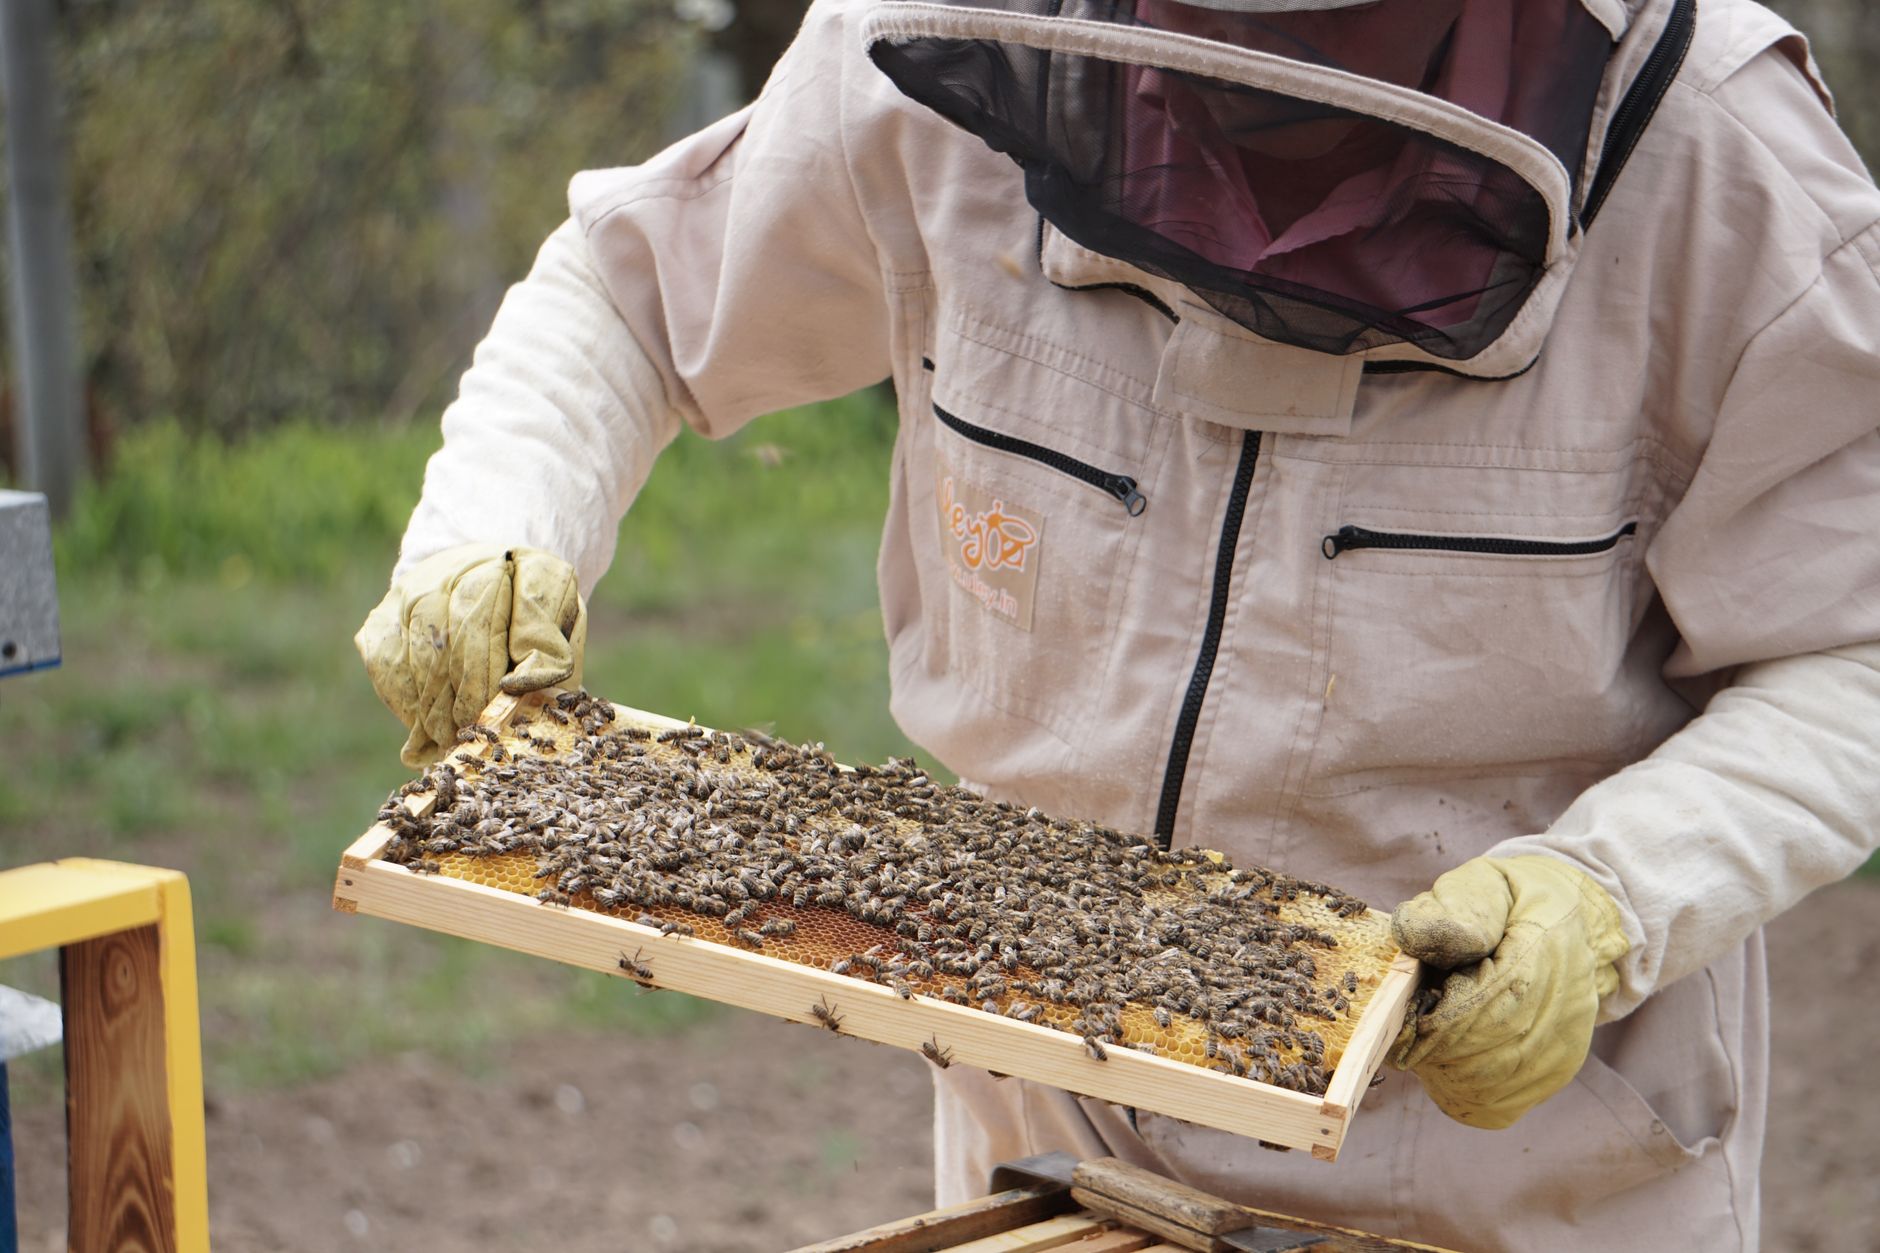
    Most Florida backyard beekeepers start with a Langstroth hive — it’s the standard stackable box style you’re probably picturing. You’ll want at minimum a bottom board, one deep brood box, a medium super, an inner cover, and a top cover. You can buy these as a kit or piece together your own setup.

    Site your hive so the entrance faces southeast if you can — bees like early morning sun to get them moving — and make sure it’s level front-to-back with a very slight forward tilt so rain doesn’t pool inside.

    Your Protective Gear

    Please don’t skip this part. A good veil and jacket are non-negotiable, especially when you’re new and your movements are still a little uncertain. Gloves too, at least at first. The beekeeping starter kit I found on Amazon had everything we needed to get suited up without spending a fortune — jacket, veil, gloves, and a hive tool all in one box.

    Your Bees

    You’ll want to order a package of bees or a nucleus colony (called a “nuc”) from a reputable local supplier. In Florida, I’d strongly recommend buying locally — Florida bees are already adapted to our heat, humidity, and specific forage. Check with your local beekeeping association (Florida has a great network of them) or your county extension office for recommended suppliers.


    Florida-Specific Rules You Need to Know

    This is the part people skip and then regret. Florida does require that beekeepers register their colonies with the Florida Department of Agriculture and Consumer Services (FDACS). It’s a simple process and costs very little, but it’s the law — and it actually works in your favor because registered beekeepers get support and resources from the state apiarist program.

    You’ll also want to check your local municipality or HOA rules. Some areas in Escambia County and surrounding areas have specific setbacks — meaning your hive needs to be a certain distance from property lines or neighbor’s homes. A quick call to your county extension office will get you straight answers fast.

    And one more Florida-specific thing: Africanized honey bees. They are present in parts of Florida. This is not a reason to panic, but it is a reason to source your bees carefully, keep calm and gentle stock, and requeen if your hive ever becomes unusually defensive. Most backyard beekeepers never have an issue, especially in the panhandle region where Africanization pressure is lower than South Florida.


    How Beekeeping Fits Into Our Homeschool

    This is honestly my favorite part to talk about. If you’re doing any kind of Charlotte Mason or nature-based learning, bees are an absolute goldmine.

    We’ve used our hive as the jumping-off point for lessons on pollination, ecosystems, geometry (hexagons!), the lifecycle of insects, and even basic economics — honey production, division of labor, the whole thing. My kids started keeping detailed observations in their nature journals, sketching bees, drawing comb cells, and writing down what they noticed each time we opened the hive.

    We also grabbed a pocket microscope so they could look at pollen up close — that was a full morning of school right there, no curriculum needed. This is exactly the kind of thing I mean when I say living books and living experiences beat a worksheet every single time.

    If you want more ideas for weaving nature observation into your days, check out our Charlotte Mason Nature Study Journal Prompts by Season — lots of it translates beautifully to bee study.

    📌 Love this? Save it to Pinterest so you can find it later!


    Managing Your Hive Through the Florida Seasons

    Spring (February–April)

    This is your big build-up season. Colonies are expanding rapidly, forage is blooming, and you’ll be doing regular inspections to watch for swarm cells and make sure your queen has room to lay. Add supers before they need them, not after.

    Summer (May–August)

    Heat management is everything. Make sure there’s always water nearby — bees need it to cool the hive, and they’ll find your neighbor’s pool if you don’t provide an alternative. A simple dish with marbles and water works great. Keep shade on the hive during peak afternoon heat.

    Fall (September–November)

    The goldenrod and wildflowers give your colony a late-season boost. This is a good time to assess honey stores and make sure they’re set up well going into the mild Florida winter.

    Winter (December–January)

    Honestly, our bees barely slow down. You’ll do fewer inspections, but there’s still activity and some foraging. This is a good time to treat for Varroa mites if needed and to plan for spring splits.


    A Word About Integrating Bees With Your Backyard Flock

    We get asked about this a lot since we have chickens too. The short answer: they mostly ignore each other. Our chickens occasionally snap at a bee that gets too close to their feed, which is not smart on the chicken’s part, but nobody’s been seriously hurt. Just don’t place your hive directly in the path your chickens travel daily, and give everyone their own space.

    If you’re still building out your backyard homestead, our post on Best Chicken Breeds for Egg Color Variety (And Which Ones Actually Thrive in Florida) is a good companion read.


    My Honest Recommendation for Getting Started

    Join a local beekeeping club before you buy a single piece of equipment. Seriously. The Escambia Beekeepers Association and neighboring county clubs offer mentorship programs, hands-on hive days, and a community of people who genuinely want to help you succeed. Go to a meeting, ask questions, and ideally get your hands in someone else’s hive before you set up your own. That alone will save you so much second-guessing.

    Then grab your beekeeping starter kit, register with FDACS, source local bees, and just begin. The bees will teach you more in one season than any book can.

    And speaking of a natural ecosystem for your whole backyard — if you’re not already collecting rainwater to keep your garden and animals watered through dry stretches, that’s worth setting up alongside your hive. We wrote all about it in Best Rain Barrel Setup for Florida Homes (What Actually Works Down Here).


    Beekeeping has been one of those things that’s made our backyard feel more alive — more connected, more purposeful. My kids talk to the bees, they watch for them on flowers during our nature walks, they understand now in this deep and instinctive way why pollinators matter. That’s the kind of education that sticks. Not because we planned a unit study around it, but because we just let them get close to something real.

    You don’t have to do everything at once. You don’t have to be an expert before you start. You just have to start.


    📖 You Might Also Like:

    Frequently Asked Questions

    Do I need a permit to keep bees in Florida?

    Yes — Florida requires all beekeepers to register their colonies with the Florida Department of Agriculture and Consumer Services (FDACS). The process is simple and inexpensive. You’ll also want to check your local county or municipality rules for any setback requirements from property lines.

    When is the best time to start a beehive in Florida?

    Late winter to early spring — roughly February through April — is ideal in Florida. Colonies installed in early spring have the entire bloom season ahead of them to build up population and honey stores before the intense summer heat sets in.

    Are Africanized bees a problem for Florida backyard beekeepers?

    Africanized honey bees are present in parts of Florida, particularly South Florida. In the Panhandle region the risk is lower, but it’s still important to source bees from reputable local suppliers, maintain gentle stock, and requeen any hive that becomes unusually defensive. Most backyard beekeepers in Northwest Florida never have a serious issue.

    How many beehives should a beginner start with?

    Most experienced beekeepers recommend starting with two hives rather than one. Having two allows you to compare colonies side by side, borrow resources like frames of brood or honey between hives if needed, and better understand what ‘normal’ looks like. It sounds like more work but it actually makes troubleshooting much easier.

    Can I keep bees if I also have backyard chickens?

    Yes, bees and chickens coexist just fine in most backyard setups. The key is to place your hive away from the main chicken traffic areas and make sure the hive entrance isn’t in a spot where chickens congregate. Chickens may occasionally snap at a passing bee, but serious conflicts are rare and both animals generally mind their own business.

  • Best Homeschool Morning Basket Books for Toddlers (What We Actually Read and Why They Work)

    Best Homeschool Morning Basket Books for Toddlers (What We Actually Read and Why They Work)

    Best Homeschool Morning Basket Books for Toddlers (What We Actually Read and Why They Work)

    🌿 The Short Version: Morning basket with a toddler underfoot doesn’t have to be chaos — the right books make them want to pull up a chair and stay. This post shares the best read-aloud and lap-friendly books for toddlers in a homeschool morning basket, organized by type so you can build one that actually works for your family.

    This post contains affiliate links. I may earn a small commission at no extra cost to you.

    If you’ve ever tried to do morning basket with a toddler in the house, you already know how that can go. One minute you’re reading a beautiful poem aloud, the next someone is sitting on the dog or unraveling an entire roll of paper towels across the living room floor. Been there. More than once.

    But here’s what I’ve learned after doing this for a few years now with kids at different stages: toddlers want to be part of morning basket. They don’t want to be entertained in another room. They want to be with you, with their big brothers and sisters, with the books and the cozy and the belonging of it all. You just have to give them something they can actually hold onto.

    The trick isn’t keeping them out of morning basket — it’s pulling them in with the right books.

    What Makes a Good Morning Basket Book for Toddlers?

    Before I share what we use, here’s the honest filter I run every book through:

    • Short enough that they don’t lose the thread halfway through
    • Beautiful enough that they want to look at the pictures even when they’re not tracking every word
    • Real enough — not dumbed down, not condescending
    • Repeatable — because toddlers want the same book seventeen times and that’s actually a feature, not a bug

    Charlotte Mason would have said that even the youngest child deserves living books — books with heart and beauty and something real to offer. I believe that. Toddlers don’t need flashcard books or skill-and-drill readers in morning basket. They need stories, art, wonder, and the rhythm of a family who reads together.

    Our Charlotte Mason Nature Study Journal Prompts by Season post talks a lot about how we weave nature into our learning rhythm — morning basket is a big part of that, even for the littles.

    The Books We Actually Use (Organized by Type)

    Picture Books Worth Reading Over and Over

    This is the heart of any toddler-friendly morning basket. You want picture books that are genuinely lovely — not just cute, but good. Books that your older kids won’t groan at either, because let’s be honest, you’re reading these to the whole room.

    Some favorites in our house:

    • The Gardener by Sarah Stewart — gentle, beautiful, deeply good
    • Miss Rumphius by Barbara Cooney — this one gets pulled out again and again, especially in spring
    • Frederick by Leo Lionni — my kids have memorized this one and still ask for it
    • Owl Moon by Jane Yolen — slow, quiet, perfect for a winter morning basket even here in Florida
    • A Chair for My Mother by Vera B. Williams — talks about family in such a real way
    • Roxaboxen by Alice McLernan — this one. THIS one. If you want a book that captures the 1990s-outside-all-day childhood we’re trying to give our kids, it’s this.

    These aren’t just good for toddlers — they’re good for people. That’s the CM standard right there.

    Nature and Animal Books That Pull Them In

    Here’s where it gets really fun for our family, because we have backyard chickens and a mini labradoodle and the kids are always noticing things outside. Connecting morning basket to what they’re seeing in real life is magic.

    We keep the Sibley Birds guide on our basket shelf year-round — yes, even for the toddler. He loves flipping to whatever bird he saw that morning and pointing. No pressure, no quiz. Just real science, real pictures, real connection.

    For toddler-level nature books:

    • National Audubon Society Field Guides (any regional one — we use the Southeast)
    • The Burgess Bird Book for Children by Thornton Burgess — older kids love the stories, toddlers love the bird names
    • In the Small, Small Pond by Denise Fleming — gorgeous and short
    • Up in the Garden and Down in the Dirt by Kate Messner — perfect when you’re also doing a garden unit

    For our little chicken lovers, Storey’s Guide to Raising Chickens lives more on my shelf, but the Kid’s Guide to Keeping Chickens is one our older kids read independently and the toddler loves flipping through for the photos.

    Poetry and Rhythm Books

    Toddlers are made for poetry. The rhyme, the rhythm, the way a good poem bounces — they lock onto it instinctively. This is not a Charlotte Mason opinion, it’s just a toddler fact.

    We rotate these through our morning basket constantly:

    • A Child’s Garden of Verses by Robert Louis Stevenson — a classic for a reason
    • Now We Are Six by A.A. Milne — Winnie the Pooh’s poet dad did not miss
    • Sing a Song of Seasons — gorgeous anthology, beautiful art
    • Any Mother Goose collection with good illustrations

    Poetry is also a wonderful bridge moment in morning basket. It takes two minutes, it settles everyone down, and the toddler usually stops whatever chaos they were causing to listen. That alone earns poetry a permanent spot.

    📌 Love this? Save it to Pinterest so you can find it later!

    Read-Alouds the Whole Family Can Share

    This is where morning basket gets really beautiful — when you find a read aloud book that works across ages. Your kindergartner is following the plot, your third grader is building vocabulary, and your toddler is snuggled in someone’s lap just soaking in the rhythm of your voice and the safety of the whole family together.

    Some of our family read-alouds that even toddlers tolerate and enjoy:

    • The Little House on the Prairie series — Laura’s descriptions of nature are so vivid even tiny ones look up
    • Beatrix Potter collections — short, illustrated, perfect
    • The Story of Ferdinand — a must-have
    • The Lion, the Witch and the Wardrobe — we started this with a two-year-old in the room and she sat through whole chapters

    Art and Observation Books

    This one might surprise you, but art books in morning basket are so good for toddlers. You don’t read them front to back — you just open to a page, look together, and talk about what you see. That’s it. That’s the whole lesson.

    We use our Faber-Castell watercolors alongside these sometimes — even a two-year-old can make a watercolor painting while the older kids do narration. And keeping a simple nature journal on the basket shelf means when something sparks their interest, we can sketch it right then.

    Art museum books, illustrated nature encyclopedias, and picture book biographies of artists all work beautifully here.

    How We Actually Structure Morning Basket With a Toddler

    Honestly? Loosely. We do:

    1. A poem (2 minutes)
    2. A picture book or nature book (5-10 minutes)
    3. A chapter from our current family read-aloud (10-15 minutes)
    4. Whatever else the older kids need that day

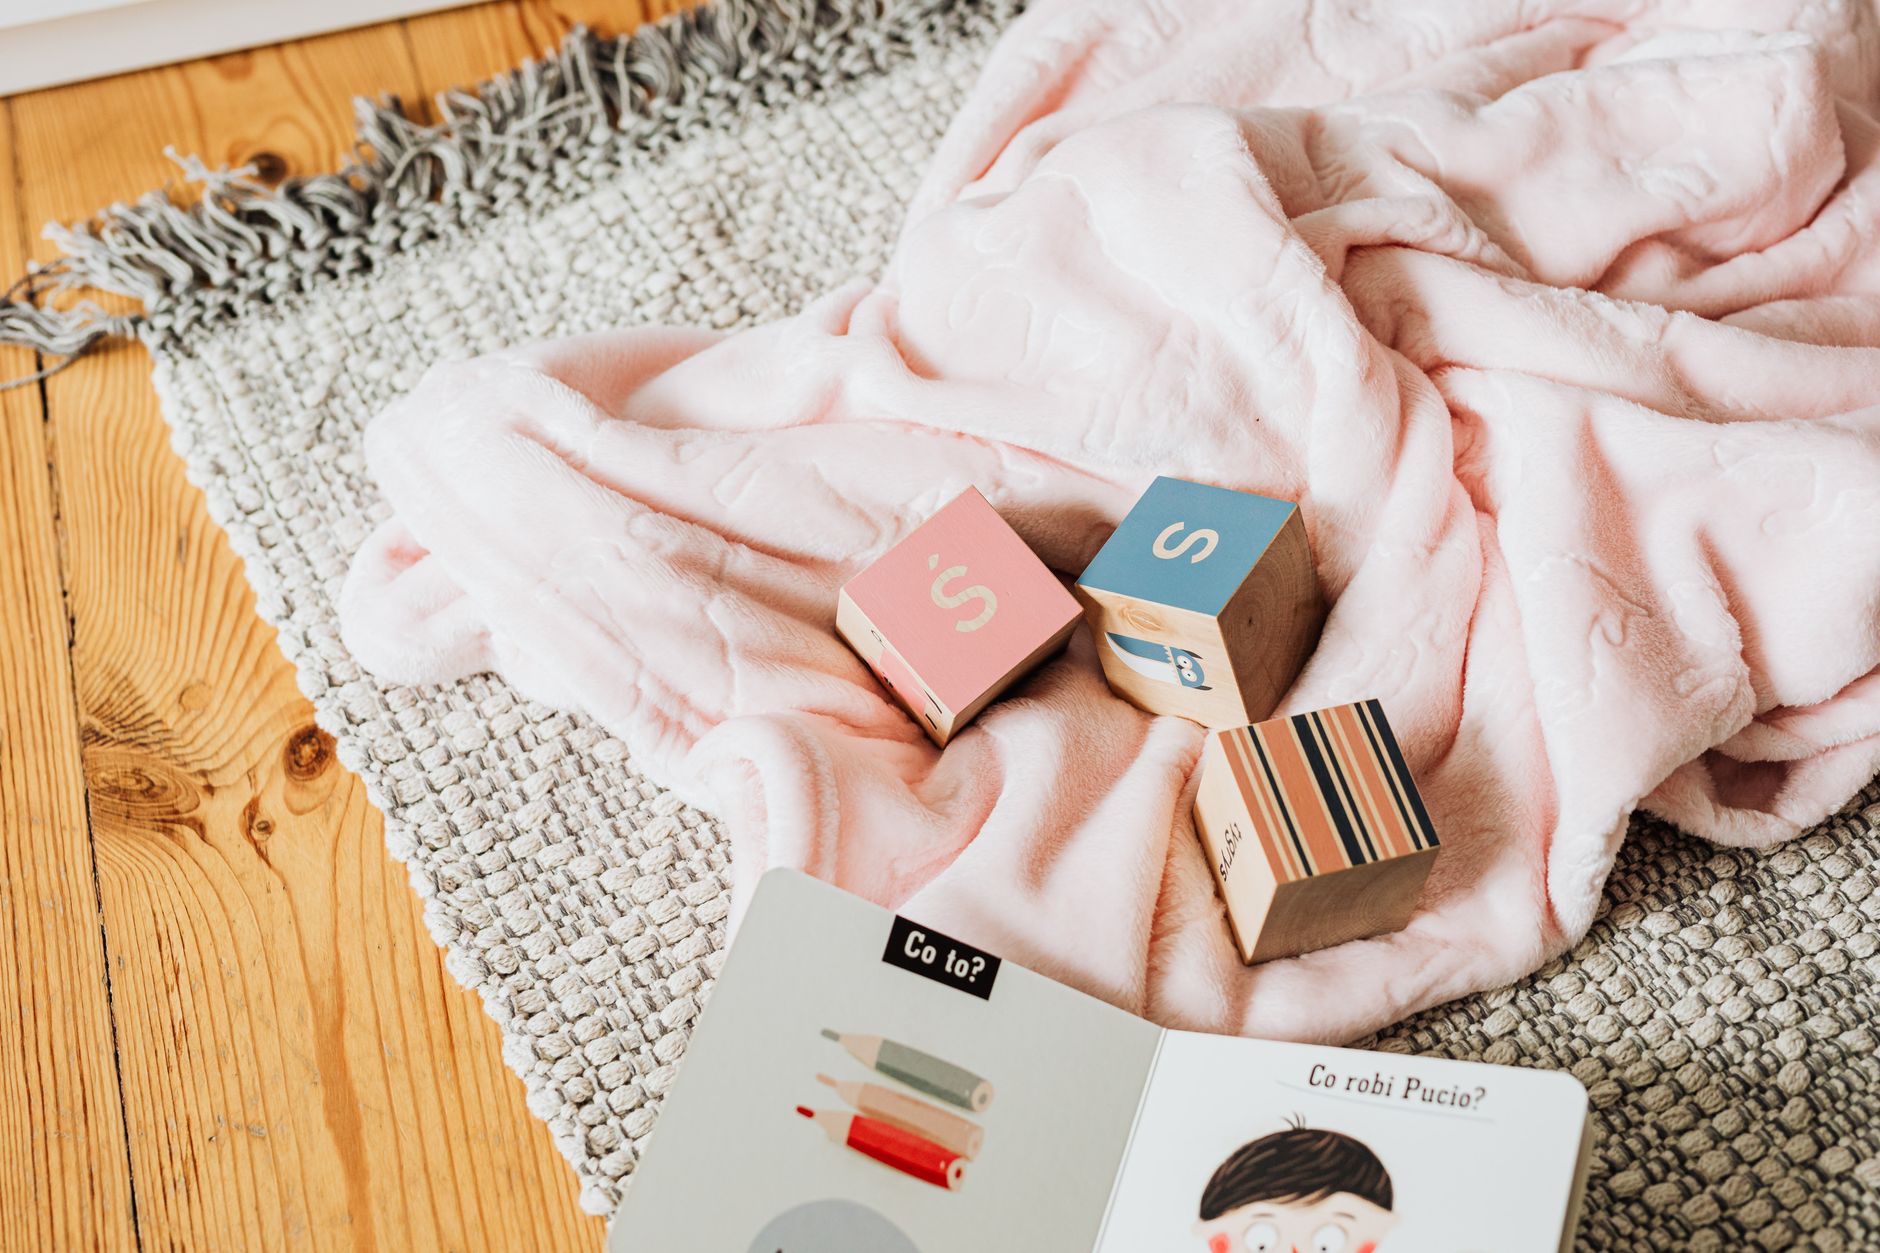
    The toddler has a small basket of his own with board books, a fabric quiet book, and a few wooden figures. He can dip in and out. Some days he sits the whole time. Some days he wanders off and comes back. Both are fine.

    The goal isn’t perfect attention — it’s a rhythm. It’s morning, it’s books, it’s together. He’s learning what learning looks like, and that might be the most important thing happening in that whole basket.

    If you’re also navigating the Florida PEP scholarship and trying to figure out how this all fits into your documentation and evaluation process, our post on Florida Homeschool Testing Requirements: Evaluation vs Portfolio is worth a read.

    A Few Practical Tips Before You Go

    • Rotate your basket. Keeping the same 10 books out for a month means everyone knows what’s coming. Surprise them.
    • Let the toddler pick sometimes. Yes, you’ll read The Very Hungry Caterpillar for the fortieth time. Read it like it’s the first time. That matters to them.
    • Don’t stress about the chaos. A toddler climbing in your lap mid-poem is not failure. That’s the whole point.
    • Quality over quantity. Five really beautiful books beats twenty mediocre ones every single time.

    This Is the Season, Mama

    I know mornings with a toddler and multiple school-age kids can feel like organized chaos at best. But morning basket — even an imperfect, interrupted, someone-knocked-over-the-tea version of morning basket — is one of the most important things we do in our homeschool. It sets the tone. It says: we are a family who reads together, who slows down together, who learns together.

    Your toddler won’t remember every book. But they will remember the lap, the voice, the feeling of being included. And one day — I promise you this — they’ll be the one pulling the poetry book off the shelf and asking you to read.

    That’s worth every chaotic morning between here and there.


    📖 You Might Also Like:

    Frequently Asked Questions

    What is a morning basket in homeschooling?

    A morning basket (sometimes called a morning time) is a shared learning time at the start of the homeschool day where the whole family gathers together for read-alouds, poetry, art, music, and other enriching content. It’s a Charlotte Mason-inspired tradition that works beautifully across multiple ages, including toddlers.

    Can toddlers participate in homeschool morning basket?

    Absolutely. Toddlers don’t need their own formal curriculum to benefit from morning basket — they absorb language, rhythm, story, and connection just by being present. The key is choosing books with beautiful illustrations and short enough text that they stay engaged, and giving them a small activity basket of their own for when they need a break.

    How long should morning basket be for families with toddlers?

    For families with toddlers, 20-30 minutes is a realistic and effective morning basket length. You can include a short poem, one picture book, and a chapter from a family read-aloud in that window. Keep it flexible — some days will be shorter, and that’s perfectly okay.

    What types of books work best for toddlers in a Charlotte Mason morning basket?

    Charlotte Mason-style morning baskets for toddlers work best with living picture books (stories with heart and beauty), poetry collections, nature and animal books with real illustrations, and family read-alouds with vivid storytelling. Avoid flashcard-style or skill-drill books in the basket — save those for other parts of your school day.

    How do I keep a toddler occupied during morning basket without screens?

    A small ‘toddler basket’ placed near the family reading spot works really well. Fill it with a few board books, a fabric quiet book, beeswax crayons, wooden figures, or a simple felt board. The goal isn’t to keep them perfectly still — it’s to give them something to do while staying in the room so they absorb the rhythm and atmosphere of learning.

  • Best Cloth Diapering System for Beginners (What Actually Works and Where to Start)

    Best Cloth Diapering System for Beginners (What Actually Works and Where to Start)

    Best Cloth Diapering System for Beginners (What Actually Works and Where to Start)

    🌿 The Short Version: Cloth diapering doesn’t have to be complicated or overwhelming — the right system depends on your lifestyle, your budget, and how much laundry you’re willing to do. This guide breaks down the most beginner-friendly options so you can pick one and actually stick with it.

    This post contains affiliate links. I may earn a small commission at no extra cost to you.

    I remember standing in a Facebook group when my youngest was about six weeks old, staring at a comment thread about cloth diapers that had like forty-seven replies and approximately nine different opinions about what kind of insert goes in what shell. I closed the app and went back to disposables for another three weeks.

    If that’s you right now — I get it. The cloth diapering world has a way of making something totally doable feel incredibly complicated. But here’s what I wish someone had told me: you don’t have to master every system. You just have to find one that works for your life and your baby, and go from there.

    We’ve been a mostly-cloth family for years now, and it genuinely fits right into our non-toxic, low-waste lifestyle here in Northwest Florida. It’s the same reason we grind our own grain, keep backyard chickens, and try to buy fewer things made of plastic. Less stuff, more intention. And honestly? Once you’re past the learning curve, cloth diapering is one of the easiest swaps we’ve made.

    So let’s break it down in plain language.


    Why Cloth Diapers in the First Place?

    For our family, it came down to a few things:

    • Fewer chemicals near baby’s skin. Conventional disposables contain things like dioxins, fragrances, and SAP (sodium polyacrylate) gel. If you’re already thinking carefully about what goes on and around your baby — like the folks who read my post on Non-Toxic Baby Products: What to Actually Buy (and What’s Just Marketing Hype) — cloth is a natural next step.
    • Long-term cost savings. A decent stash runs $200–$400 upfront and can last through multiple kids.
    • Less waste. A baby in disposables generates roughly 2,000 diapers in the first year alone. That number bothers me.

    That said — this isn’t a judgment post. We still use disposables for travel and sick days. Real life is not all-or-nothing.


    The Main Types of Cloth Diapers (Explained Simply)

    This is where most beginners get lost, so let’s slow down here.

    Pocket Diapers

    This is probably the most popular starter option. It’s a waterproof outer shell with a pocket opening — you stuff an absorbent insert inside before use, then pull it out before washing. Brands like Rumparooz and BumGenius are well-known.

    Good for: Families who want something that works similarly to a disposable. Partners and grandparents who are helping out tend to find these least intimidating.

    Downside: You have to stuff them all after laundry, which takes time.

    All-in-Ones (AIOs)

    Exactly what it sounds like — the absorbent layer is sewn into the diaper. Put it on, take it off, wash it. That’s it.

    Good for: Ultimate simplicity. Daycare situations. Anyone who can’t be bothered with extra steps.

    Downside: They take longer to dry, and they tend to cost more per diaper.

    Prefolds + Covers

    This is the old-school system — rectangular layers of fabric (prefolds) that you fold and secure, then cover with a waterproof shell. It’s what a lot of our mamas’ generation actually used (before disposables took over).

    Good for: Budget-friendly stashes. Prefolds are cheap, durable, and incredibly absorbent. Covers can be reused between changes if they stay clean.

    Downside: More of a learning curve on the folding technique.

    Fitted Diapers + Covers

    Fitted diapers are shaped like a regular diaper but are fully absorbent with no waterproofing — so you always need a cover over them. They’re fantastic for heavy wetters and overnight.

    Good for: Night use, chunky babies, anyone who deals with leaks.

    Hybrid / AI2 (All-in-Two)

    A shell that snaps or lays in an absorbent insert. The shell can often be reused if it didn’t get soiled — you just swap the insert.

    Good for: Families who want the flexibility of reusing covers without full prefold folding.


    So Which System Is Actually Best for Beginners?

    Honest answer: pocket diapers or AI2s. They have the least learning curve, work well from the newborn stage onward, and most come in one-size adjustable designs that fit babies from roughly 8–35 pounds.

    If you’re just starting out, I’d suggest grabbing a small trial stash — maybe 6–10 diapers — before you commit to buying twenty-four of anything. Preferences are personal, baby shapes are wildly different, and what works for your friend’s chunky-thighed baby might not work for yours.

    For nighttime or heavy wetters, layer in some fitted diapers and a good wool or PUL cover. That combo handles nights at our house way better than anything else we’ve tried.


    What You Actually Need to Get Started

    Here’s a simple starter list:

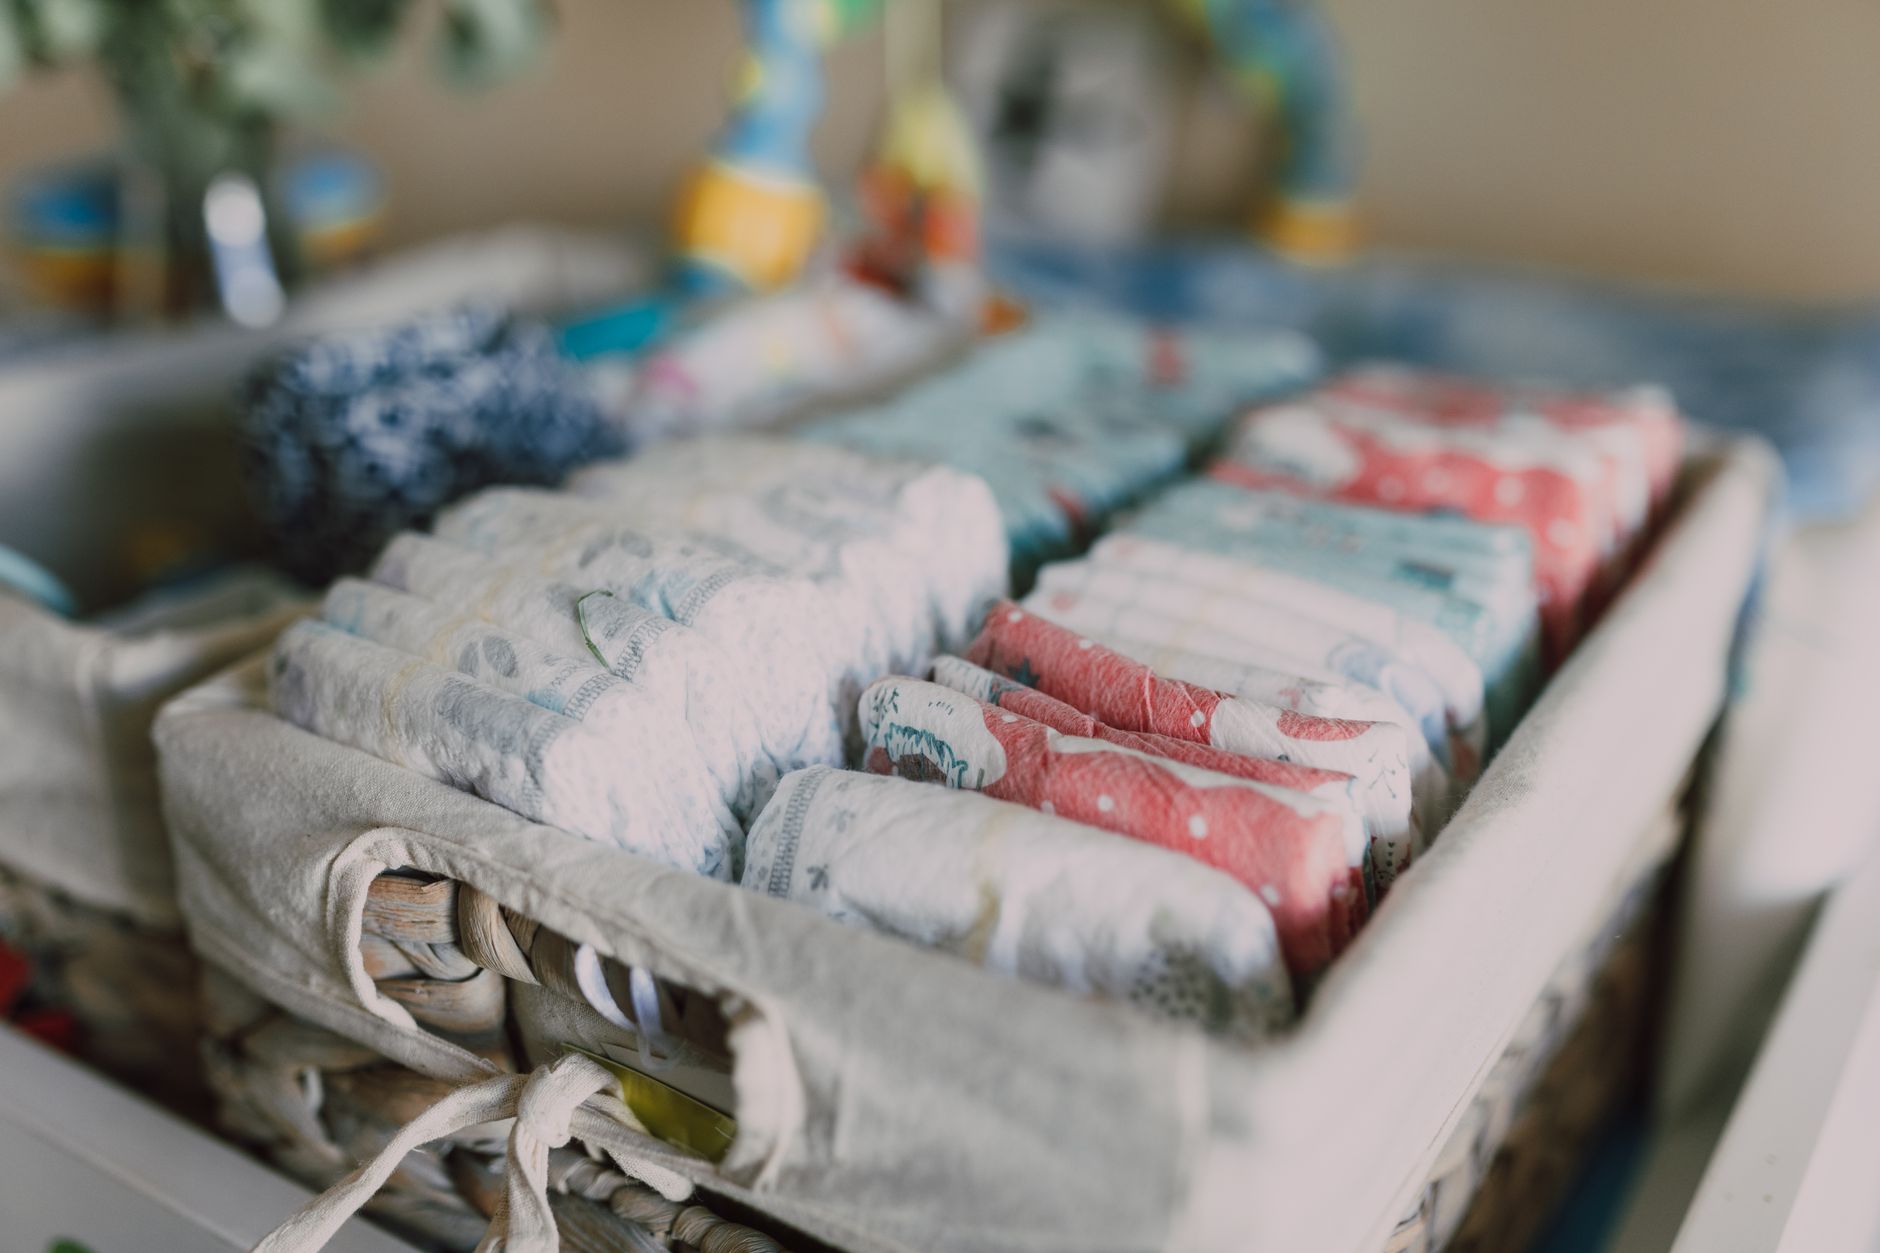
    • 12–24 diapers (more if you want to wash every 2–3 days, fewer if you’re washing daily)
    • A wet bag for storing dirties when you’re out
    • A diaper pail or hanging wet bag at home
    • Cloth-safe diaper cream — most zinc-based creams will ruin the absorbency of cloth; look for ones that are cloth-safe or use a liner
    • A good wash routine — this matters more than almost anything else

    For non-toxic laundry in general, we use simple, clean detergents. You can check out our How to Make Homemade Laundry Detergent (Non-Toxic, Actually Works, and Costs Almost Nothing) post — though for cloth diapers specifically, you’ll want a detergent with enough surfactant power to actually strip the soiling. Homemade can work, but check that your recipe is approved for cloth.


    📌 Love this? Save it to Pinterest so you can find it later!


    Washing Cloth Diapers Without Losing Your Mind

    The wash routine is the thing that trips most people up, but it’s really not complicated once you get it down:

    1. Cold pre-wash — short cycle, no detergent or half dose. This rinses out the bulk of the soil.
    2. Hot main wash — full detergent, longest cycle your machine offers.
    3. Extra rinse if needed — especially in Florida’s heat and humidity, which can encourage mildew if diapers aren’t fully rinsed.
    4. Dry on low or line dry — sun-drying is genuinely magic for stain removal. Florida sun does in one afternoon what OxiClean takes two days to do.

    For a clean, non-toxic home environment overall, we love Grove Collaborative for stocking up on laundry and cleaning supplies that actually work without the junk ingredients.


    A Word on Non-Toxic Living and Cloth Diapers

    If you’re already reading labels on your dish soap (hey, if you haven’t checked out Non-Toxic Dish Soap That Actually Cuts Grease, that post is worth a read), then cloth diapering fits naturally into that mindset. It’s about reducing the synthetic inputs around your baby’s body and your home.

    And honestly? It’s very much in line with that 1990s-style parenting philosophy we try to live out — doing things a little more slowly, a little more intentionally, and with a lot less plastic. My kids see cloth diapers as just part of how our house runs, the same way they know we compost our kitchen scraps and collect eggs from the coop every morning.

    For keeping things fresh and pest-free without harsh chemicals — in the diaper pail and everywhere else — we rely on Wondercide for natural pest control around the house and yard. Worth mentioning if you’re ever dealing with gnats near your pail in a Florida summer. (And you will. It’s Florida.)


    Quick Tips Before You Dive In

    • Don’t overbuy before you know what works for your baby. Seriously. A trial stash first.
    • Prep your diapers before first use — most need 3–5 washes to reach full absorbency.
    • Leaks are almost always a fit issue or an absorbency issue, not a reason to give up entirely.
    • Give yourself a grace period. The first two weeks feel weird. By week four, it’s just laundry.
    • If you’re also navigating a non-toxic nursery from the ground up, my post on Non-Toxic Baby Products: What to Actually Buy (and What’s Just Marketing Hype) covers a lot of the other pieces.

    You’ve Got This

    Cloth diapering is one of those things that sounds harder than it is. Once it’s part of your rhythm — toss them in the wash, hang them on the line, stuff the pockets while you’re watching your kids run around the backyard — it genuinely stops feeling like extra work and starts feeling like just life.

    We’re big believers around here that simple, intentional living isn’t about being perfect. It’s about making thoughtful choices where you can, then letting the rest go. Cloth diapers are one of those choices our family is really glad we made. I hope this gave you enough clarity to take that first step without feeling like you need a PhD in diaper science to do it.

    Start small. Try one system. Adjust from there. You’ve got this, mama.


    📖 You Might Also Like:

    Frequently Asked Questions

    What is the easiest cloth diaper system for beginners?

    Pocket diapers and all-in-two (AI2) systems are generally considered the easiest for beginners. They work similarly to disposables in terms of how you put them on and take them off, and most come in adjustable one-size designs that grow with your baby. All-in-ones (AIOs) are even simpler but take longer to dry.

    How many cloth diapers do I need to start?

    A good starter stash is 12–24 diapers, depending on how often you plan to do laundry. If you want to wash every two to three days, aim for 20–24. If you’re okay washing daily, 12–15 can work. It’s best to start with a small trial stash of 6–10 diapers before committing to a full set, since fit and preference vary by baby.

    Can I use cloth diapers from birth?

    Yes, but most standard one-size cloth diapers don’t fit well until babies are around 10–12 pounds. For the newborn stage, you can buy newborn-specific cloth diapers, use prefolds with a small cover, or use disposables for the first few weeks and transition to cloth once baby has grown a bit.

    How do you wash cloth diapers without ruining them?

    The basic wash routine is: a cold pre-wash to rinse out soiling, followed by a hot main wash with a full dose of a cloth-safe detergent, then an extra rinse if needed. Avoid fabric softeners and dryer sheets — they coat the fibers and ruin absorbency. Line drying in the sun is ideal and naturally removes stains. In Florida’s heat, sunning diapers works incredibly fast.

    Are cloth diapers really worth it financially?

    For most families, yes. A full cloth diaper stash typically costs $200–$400 upfront and can be used for multiple children. Families who use disposables full-time spend an estimated $1,500–$3,000 per child over the diapering years. Even if you only use cloth part-time, the savings add up significantly, especially when you reuse the same stash for a second or third baby.

  • How to Start Seed Saving for Your Garden (A Beginner’s Guide That Actually Makes Sense)

    How to Start Seed Saving for Your Garden (A Beginner’s Guide That Actually Makes Sense)

    How to Start Seed Saving for Your Garden (A Beginner’s Guide That Actually Makes Sense)

    🌿 The Short Version: Seed saving is easier than most people think — you just need to know which seeds to start with and how to dry and store them properly. This guide walks you through everything, from choosing the right plants to labeling and storing seeds so next season’s garden basically pays for itself.

    This post contains affiliate links. I may earn a small commission at no extra cost to you.

    Somewhere between buying yet another packet of tomato seeds at the garden center and watching my kids crack open a dried pepper pod on the back porch, it clicked for me: we can just… keep the seeds. Like people have always done. Like our grandmothers did without even thinking about it.

    That’s honestly where seed saving started for us — not with a big plan, but with a moment of oh, wait, this is actually simple. And now, a couple of seasons in, our seed saving setup has become one of those quiet, satisfying things that makes our whole homestead feel a little more self-sufficient and a lot more intentional.

    If you’ve been curious about how to start seed saving for your garden but assumed it was complicated or required special equipment, I want to reassure you: it’s not, and it doesn’t. Here’s how we do it, what we’ve learned, and how we’ve made it a real part of our homeschool and home life.


    Why Seed Saving Is Worth It (Especially Down Here in Florida)

    First, the practical stuff. Seeds add up fast. If you’re planting a real kitchen garden — tomatoes, peppers, squash, herbs — you can easily spend $30–$50 on seed packets before you’ve even touched the soil. Saving your own seeds cuts that cost dramatically over time.

    But beyond the money, there’s something else: when you save seeds from plants that thrived in your yard, in your specific microclimate, you’re slowly selecting for plants that are adapted to your conditions. Here in Northwest Florida, that means heat tolerance, humidity resilience, and the ability to survive our weird late-summer rainstorms. Over time, your saved seeds genuinely outperform store-bought ones for your specific garden.

    And then there’s the homeschool angle, because of course there is. Seed saving is living science. It covers plant biology, life cycles, classification, botany — all the things Charlotte Mason said children should learn through direct experience with living things, not through a textbook. My kids are way more invested in a plant they watched go from seed to seed than anything we’ve ever read about.

    We use our nature journals to sketch and record seeds as we harvest them — what plant they came from, what the seed looks like up close, when we collected them. Pair that with a pocket microscope and suddenly you’ve got a full nature study lesson happening over a bowl of dried beans on the kitchen table.


    Start Here: Which Seeds Are Easiest to Save

    Not all seeds are created equal when it comes to saving. Some require isolation or special processing. Others practically save themselves. If you’re just starting out, stick to these:

    Open-Pollinated and Heirloom Varieties

    This is the big one. You must start with open-pollinated or heirloom seeds — not hybrids. Hybrid seeds (labeled F1 on the packet) won’t reliably reproduce the parent plant. Open-pollinated varieties will. Look for “heirloom” or “OP” on the seed packet, or source from a seed company that specializes in them.

    The Easiest Beginner Seeds

    Tomatoes — Tomatoes are self-pollinating, which means you don’t have to worry much about cross-pollination. They’re one of the most forgiving seeds to save. More on processing below.

    Peppers — Let a pepper fully ripen (past the stage you’d normally eat it) until it’s deeply red, orange, or yellow. Then scoop the seeds, dry them on a paper plate, and store.

    Beans and peas — Honestly the easiest. Just let the pods dry on the plant, then shell them out. Done.

    Squash and zucchini — Let one fruit go well past eating stage — it’ll get huge and almost waxy. Scoop seeds, rinse, dry.

    Herbs — Basil, cilantro, dill, and fennel will literally drop seeds on their own if you let them bolt. You’re just collecting what nature’s already doing.


    How to Actually Process and Dry Seeds

    The Wet Method (For Tomatoes)

    Tomatoes have a gel coating around each seed that inhibits germination — you need to remove it. Here’s the quick version:

    1. Squeeze seeds and pulp into a jar with a little water.
    2. Let it sit on the counter for 2–3 days, stirring daily. A layer of mold will form on top — that’s normal and good. It breaks down the gel.
    3. After fermentation, pour off the moldy top layer. Viable seeds will sink.
    4. Rinse seeds well, then spread on a ceramic plate or parchment paper to dry completely — at least 1–2 weeks in a warm, ventilated spot.

    Do NOT use paper towels for drying tomato seeds — they stick and you’ll lose half of them trying to peel them off. Ask me how I know.

    The Dry Method (For Everything Else)

    For peppers, beans, squash, and herbs, it’s much simpler:

    1. Harvest when fully mature and dry on the plant if possible.
    2. Spread seeds in a single layer on a plate or screen.
    3. Dry in a warm, low-humidity spot for 1–2 weeks.
    4. Seeds should snap, not bend, when fully dry.

    Here in Florida, our humidity makes this trickier in summer. I run a fan near them or dry them inside with the AC on.

    📌 Love this? Save it to Pinterest so you can find it later!


    Storing Seeds the Right Way

    Once your seeds are bone dry, storage is simple. The enemies of seed viability are heat, humidity, and light — so you want cool, dark, and dry.

    We use canning jars with tight-fitting lids for our seed storage. A small silica gel packet inside helps with any residual moisture (save the ones that come in shoe boxes — they work perfectly).

    Label everything with:

    • Plant variety name
    • Date harvested
    • Any notes (“best producer,” “grew huge,” “resistant to that weird wilt we had”)

    We use a seed saving kit for smaller quantities — little envelopes that fit neatly inside a jar or a small box. My kids love writing the labels. It becomes part of our fall rhythm, right alongside canning and putting the garden to bed.

    Store your jars somewhere cool — a pantry shelf works fine. If you want maximum longevity, the fridge or freezer works for many types of seeds, though for most home gardeners, a cool pantry is plenty.


    Making It Part of Your Homeschool (And Your Kids’ Actual Childhood)

    This is the part I love most about seed saving — it connects kids to something real. Not a worksheet about plant life cycles, but actual plant life cycles playing out in their hands.

    We’ve made seed saving part of our Charlotte Mason nature study in a few ways:

    • Sketching and journaling seeds at harvest time (the Faber-Castell watercolors are perfect for painting detailed botanical sketches)
    • Examining seeds under the microscope — even simple bean seeds look incredible up close
    • Keeping a seed inventory as a practical math and record-keeping exercise
    • Reading about where our food comes from and why seed diversity matters

    This is the 1990s-kid way of learning, honestly. You go outside, you do a thing, you pay attention to what’s happening. My kids are learning more about biology through seed saving and our backyard chickens than any curriculum could teach them sitting at a table. (And if you want more ideas for weaving nature into your days, check out Charlotte Mason Nature Study Journal Prompts by Season — it’s one of my most-used posts.)

    We also tie our composting and garden cycles together — kitchen scraps go to the compost bin, compost feeds the garden, the garden produces seeds, seeds start next year’s garden. The kids see the whole loop. That’s real education.

    And if you’re growing vegetables to eventually preserve — we’re big on putting things up in Florida’s brief cool-season harvest windows — check out how to start composting with kids and cover crops for a Florida summer garden to round out your whole-garden approach.


    One More Thing: Grow More Than You Need

    Here’s the simple rule for seed saving: always grow a little extra with the intention of letting some plants go to seed. You can’t save seeds from produce you’ve already eaten — at least not for most vegetables. So plant a few extra tomatoes, let one zucchini get away from you (honestly, that’s not hard), and leave a few pepper plants to fully ripen past eating stage.

    Once you get into the rhythm, it becomes second nature. You start looking at your garden differently — not just as food, but as a living seed bank that belongs to your family.


    Seed saving is one of those practices that sounds like it requires more than it does. The truth is it’s just attention and a little patience — two things our kids are building every day they spend time outside, in the garden, watching things grow. If our great-grandmothers could do this with a paper envelope and a cool cellar, we can absolutely do it with a mason jar and a Florida pantry.

    Start small. Save a few tomato seeds this season. Label them, put them away, and pull them out next spring. That one small act connects you to generations of people who fed their families the same way — and it’ll mean more to your kids than you expect.


    📖 You Might Also Like:

    Frequently Asked Questions

    What seeds are easiest to save for beginners?

    Beans, peas, peppers, and tomatoes are the best starting points for beginner seed savers. Beans and peas are the simplest — just let the pods dry on the plant and shell them out. Tomatoes require a short fermentation process but are very forgiving. Stick to open-pollinated or heirloom varieties, not hybrids, or your saved seeds won’t reliably reproduce the parent plant.

    Can I save seeds from grocery store vegetables?

    Sometimes, but it’s hit or miss. Most grocery store produce comes from hybrid varieties, which means the seeds won’t reliably grow true to the parent plant. Your best bet is to save seeds from heirloom or open-pollinated varieties you’ve grown yourself from a reputable seed source. The exception is things like dried beans from the bulk aisle — many of those will actually sprout just fine.

    How long do saved seeds last?

    It depends on the type of seed and how you store them. Most vegetable seeds stored in a cool, dry, dark place will remain viable for 2–5 years. Onions and parsnips tend to lose viability faster (1–2 years), while tomatoes and squash can last 4–5 years if stored well. Always do a simple germination test — lay 10 seeds on a damp paper towel and count how many sprout in a week — before planting a large amount of older seeds.

    Do I need to worry about cross-pollination when saving seeds?

    For some plants, yes. Corn, squash, melons, and brassicas (like kale, broccoli, and cabbage) cross-pollinate easily with other varieties of the same species, which can give you unpredictable results. Tomatoes and beans are largely self-pollinating and much easier to save without worrying about isolation. If you’re growing multiple varieties of squash, for example, you’d need to hand-pollinate and cover flowers, or grow only one variety if you want to save true seeds.

    How do I know if my saved seeds are still good?

    Do a simple germination test before planting season. Place 10 seeds on a damp paper towel, fold it over, seal it in a zip-lock bag, and put it somewhere warm (on top of the fridge works great). Check after 5–10 days and count how many have sprouted. If 7 or more germinate, you’re in great shape. If fewer than 5 sprout, either plant more densely to compensate or start fresh with new seeds.

  • Non-Toxic Dish Soap That Actually Cuts Grease (What We Use and Why It Matters)

    Non-Toxic Dish Soap That Actually Cuts Grease (What We Use and Why It Matters)

    Non-Toxic Dish Soap That Actually Cuts Grease (What We Use and Why It Matters)

    🌿 The Short Version: Most “natural” dish soaps are either full of hidden junk or too weak to actually clean a cast iron skillet. We’ll break down what ingredients to avoid, which brands hold up to real family messes, and what our family actually keeps at the sink.

    This post contains affiliate links. I may earn a small commission at no extra cost to you.

    If you’ve ever grabbed a bottle of dish soap off the grocery store shelf because it had a leaf on the label and the word “plant-based” in big green letters — and then stood there scrubbing dried scrambled eggs off a pan wondering why it wasn’t working — you are not alone. That was me, more times than I care to admit.

    We cook a lot from scratch in this house. Cast iron every morning, a slow cooker running a few times a week, roasting pans, soup pots, and approximately one million snack bowls per day courtesy of my kids. Greasy dishes are just part of the deal. And when I made the switch to a non-toxic home, dish soap was one of those things I kept going back and forth on — because so many of the “clean” options just didn’t perform.

    So I want to share what I’ve learned, what we actually use now, and how to read a label so you’re not getting greenwashed at the store.

    Why Dish Soap Ingredients Actually Matter

    I know it can feel like dish soap is low on the priority list. It rinses off, right? But here’s the thing — we use it multiple times a day, every single day. Our kids help wash dishes. It goes down our drain and into the water supply. And a lot of conventional dish soaps contain ingredients that are worth knowing about.

    Here are a few to watch for:

    Fragrance (or “parfum”) — This is a catch-all term that can legally hide hundreds of undisclosed chemicals, including known hormone disruptors. Even if a soap smells like lavender, “fragrance” on the label is a red flag.

    Triclosan — An antibacterial agent that’s been linked to hormone disruption and antibiotic resistance. It’s been banned in hand soaps but still appears in some dish products.

    SLS (Sodium Lauryl Sulfate) — It’s what makes soap foam up. It’s not the worst thing on the planet, but it can be a skin irritant, especially for kids with sensitive skin. Some people are fine with it; others aren’t.

    Methylisothiazolinone (MIT) and Benzisothiazolinone — These are preservatives that show up in a lot of “green” soaps too. They’re skin sensitizers and can be problematic with repeated exposure.

    Synthetic dyes — Completely unnecessary and just added for aesthetics. No thanks.

    A good resource for checking your current soap is the EWG Healthy Living app — you can scan the barcode right there in the store aisle. We also love Grove Collaborative for sourcing cleaner home products — they vet their brands and make it easy to find things that actually work without the ingredient guessing game.

    What “Plant-Based” Actually Means (and Doesn’t)

    Here’s the greenwashing part. “Plant-based” doesn’t mean non-toxic, and it doesn’t mean effective. It just means the surfactants (the cleaning agents) were derived from plants at some point in the process. The rest of the formula can still be full of synthetic preservatives, fragrance, and dyes.

    Same goes for “biodegradable.” Most dish soaps biodegrade eventually. That word alone tells you almost nothing about whether it’s safe for your family.

    What you actually want to look for is a full ingredient list you can read and recognize, a fragrance-free or essential-oil-scented option, and ideally third-party certifications like EPA Safer Choice or EWG Verified.

    📌 Love this? Save it to Pinterest so you can find it later!

    Brands That Actually Work

    Okay, here’s what you actually came for. I’m going to be honest — I’ve tried a lot of these, and some were disappointing. Here’s what has held up in our kitchen.

    Branch Basics

    This is my current favorite and what we keep at the sink. It’s a concentrate you dilute yourself, the ingredient list is genuinely clean and transparent, and it actually cuts through grease. Like, real grease — the kind left behind after frying chicken thighs in a cast iron skillet. It’s not cheap upfront, but because you dilute it, one bottle lasts a long time. We also use it for other cleaning tasks around the house, which makes it even more economical.

    If you’re interested in making more of your own cleaning products from scratch, I’ve got a whole post on DIY Natural Cleaning Products for Every Room (That Actually Work and Cost Almost Nothing) that walks through what we make ourselves versus what we buy.

    Seventh Generation Free & Clear

    This is my budget-friendly backup and honestly it does a solid job. The Free & Clear version specifically avoids fragrance and dye, which is the version I’d recommend over their scented lines. It’s widely available — I can grab it at Walmart or order through Grove Collaborative when I’m stocking up. It’s EPA Safer Choice certified, which gives me extra confidence.

    Dr. Bronner’s Castile Soap

    Pure castile soap is a great option, especially if you’re already using Dr. Bronner’s for other things in the house. It’s simple, the ingredient list is about as clean as it gets, and it works. The one caveat — if you have hard water (and a lot of us in Florida do), castile soap can leave a film. Adding a small splash of white vinegar to your rinse water helps with this.

    Ecover Zero

    Another solid EWG-rated option that’s fragrance-free and performs well. I’ve used this one in a pinch and been happy with it.

    Tips for Getting Dishes Actually Clean Without Toxic Soap

    Switching soaps is sometimes only half the battle. Here are a few things that made a real difference for us:

    • Hot water matters more than you think. The hotter the water, the less you need to rely on strong surfactants. This is especially true for greasy pots.
    • Don’t dilute your soap before it hits the dish. Squirt it directly on your sponge or brush, not into a water-filled sink, for maximum cleaning power.
    • Baking soda as a booster. For really stubborn baked-on food, a sprinkle of baking soda with your dish soap works great — no harsh chemicals needed.
    • Good tools help. A quality dish brush or a natural fiber scrubber makes a real difference.

    We also keep beeswax wrap in heavy rotation in our kitchen — it means fewer dishes overall, since we’re not going through as much plastic wrap or foil to cover things.

    What This Has to Do With Raising Kids Intentionally

    I know dish soap might seem like a small thing. But I think about it this way — when my kids help wash dishes (which they do, because that’s just part of life around here), they’re putting their hands in that water. When I’m rinsing out their stainless steel water bottles and their snack containers, that soap is touching everything they eat from.

    And there’s something bigger too. Teaching kids to pay attention to what goes into and onto their bodies, to ask questions about labels, to care about what goes down the drain and into the earth — that’s part of raising a thoughtful human. My kids have started noticing ingredient labels on their own. My oldest will pick up a bottle at the store and say “Mom, it has fragrance in it” before I even say a word. That’s the win, honestly.

    For more on navigating non-toxic products for your family, my post on Non-Toxic Baby Products: What to Actually Buy (and What’s Just Marketing Hype) covers a lot of the same greenwashing traps across a wider range of products.

    Our Current Sink Setup

    In case you just want to know what we literally have right now:

    • Branch Basics dish soap concentrate in a glass pump bottle
    • A natural fiber dish brush (ours is bamboo)
    • White vinegar in a small jar nearby for hard water rinse situations
    • Wool dryer balls — okay, those aren’t at the sink, but they’re part of our overall swap-out-the-synthetics life

    It took some trial and error to get here, and I don’t think there’s one perfect answer for every family. But I hope this saves you some of the back-and-forth I went through.

    If you’re on a similar journey of cleaning up your home without losing your mind (or your budget), you might also love my post on How to Make Homemade Laundry Detergent (Non-Toxic, Actually Works, and Costs Almost Nothing) — it’s one of the easiest swaps we’ve made.

    Here’s to clean dishes and a cleaner home — for real this time. 🌿


    📖 You Might Also Like:

    Frequently Asked Questions

    What is the safest non-toxic dish soap for families with kids?

    Some of the safest options are Branch Basics, Seventh Generation Free & Clear, and Ecover Zero. Look for soaps that are fragrance-free, dye-free, and ideally EPA Safer Choice or EWG Verified. Avoid anything with “fragrance” listed as an ingredient, synthetic dyes, or preservatives like methylisothiazolinone.

    Does non-toxic dish soap actually cut grease?

    Yes — but not all of them are equal. Branch Basics concentrate and Seventh Generation Free & Clear both perform well on greasy dishes. Using hot water and applying soap directly to your brush rather than into a full sink also makes a big difference in cleaning power.

    Is Dawn dish soap non-toxic?

    Dawn is effective but it’s not considered a non-toxic option. It contains synthetic fragrances, dyes, and surfactants that score poorly on the EWG database. If you’re trying to reduce chemical exposure in your home, there are cleaner alternatives that work just as well for everyday use.

    What should I avoid in dish soap ingredients?

    The main ingredients to avoid are synthetic fragrance (listed as ‘fragrance’ or ‘parfum’), artificial dyes (like Blue 1 or Yellow 5), triclosan, SLS if your family has sensitive skin, and preservatives like methylisothiazolinone (MIT) or benzisothiazolinone. These show up in many conventional and even some ‘green’ brands.

    Is castile soap good for washing dishes?

    Castile soap like Dr. Bronner’s can work well for dishes and has a very clean ingredient list. The main drawback is that in hard water areas — which is common in many parts of Florida — it can leave a white film or residue. Adding a small splash of white vinegar to your rinse water helps counteract this.

  • Non-Toxic Baby Products: What to Actually Buy (and What’s Just Marketing Hype)

    Non-Toxic Baby Products: What to Actually Buy (and What’s Just Marketing Hype)

    Non-Toxic Baby Products: What to Actually Buy (and What’s Just Marketing Hype)

    🌿 The Short Version: Not every “natural” baby product is worth your money — and the non-toxic world can get overwhelming fast. This post cuts through the noise and tells you exactly what our family prioritizes, what we’ve skipped, and how to make practical swaps without losing your mind.

    This post contains affiliate links. I may earn a small commission at no extra cost to you.

    When I was pregnant with my first, I fell deep down the rabbit hole. You know the one. You start Googling “safe baby shampoo” at 11pm and three hours later you’re reading studies about endocrine disruptors in diaper cream and questioning every product under your bathroom sink. It’s a lot.

    Here’s what I wish someone had told me back then: you don’t have to overhaul everything at once. Non-toxic living isn’t about perfection. It’s about making better choices where it matters most — especially for the tiniest, most vulnerable people in your home.

    We’ve been doing this intentional-home thing for years now here in Northwest Florida, and I’ve learned which swaps are genuinely worth it and which ones are mostly green-washed marketing. Let me share what we actually use and recommend.


    Why “Non-Toxic” Baby Products Actually Matter

    Babies aren’t just small adults. Their skin is thinner, their organs are still developing, and they spend a lot of time on the floor touching things and putting everything in their mouths. What goes on them gets absorbed more readily than it would for us.

    Down here in Florida, we’re also dealing with extra sun exposure, high humidity, and year-round outdoor time — which means sunscreen, bug protection, and sweat are just part of daily life even with little ones. The toxic load adds up fast if you’re not paying attention.

    The good news? The swaps are genuinely simple once you know where to focus.


    Start Here: The Highest-Priority Swaps

    Sunscreen

    This one is non-negotiable for us. We’re outside constantly — nature walks, chicken chores, garden time — and the Florida sun is no joke. Most conventional sunscreens contain oxybenzone and other chemical filters that have raised real flags in recent research.

    We look for mineral-based sunscreens with zinc oxide as the active ingredient. I did a full honest breakdown of what we actually reach for in our Non-Toxic Kids Sunscreen Stick Honest Review (What We Actually Use in the Florida Sun) — that post will save you a lot of trial and error. You can also search for non-toxic sunscreen on Amazon and filter by mineral-only formulas.

    Skincare and Bath Products

    Baby wash, lotion, and diaper cream are daily products — meaning daily exposure. Fragrance is the big one to avoid here. “Fragrance” on a label is a catch-all term that can hide hundreds of undisclosed chemicals, and it’s one of the leading causes of skin sensitization in babies.

    Look for short ingredient lists. If you can’t pronounce half of it, keep looking. We love ordering through Grove Collaborative for our personal care and cleaning staples — they’ve done a lot of the vetting work for you and I’ve been happy with their standards.

    Cleaning Products

    This might not feel like a “baby product” category, but think about it — whatever you clean their highchair with, their toys with, their sheets with — that’s what they’re touching and mouthing. We made this swap a few years ago and honestly haven’t looked back. If you want to go the DIY route, I’ve got a whole guide on DIY Natural Cleaning Products for Every Room (That Actually Work and Cost Almost Nothing) that is genuinely easy and cheap.

    Laundry Detergent

    Same idea — their clothes and bedding are against their skin all day and all night. Synthetic fragrances and optical brighteners in conventional detergents are common irritants. We make our own, and it costs almost nothing. Here’s exactly how: How to Make Homemade Laundry Detergent (Non-Toxic, Actually Works, and Costs Almost Nothing). Throw some wool dryer balls in instead of dryer sheets and you’re done.


    📌 Love this? Save it to Pinterest so you can find it later!

    Feeding: What We Actually Use

    Bottles and Food Storage

    If you’re bottle feeding or pumping, glass or stainless steel is the way to go. No plastic with heat — ever. I went deep on this in Non-Toxic Baby Bottles: What to Actually Buy (and What to Skip), so head there for the full breakdown.

    For food storage and packing snacks, we use beeswax wrap instead of plastic wrap and stainless steel water bottles for the kids. These are simple swaps that last for years.

    Cooking

    Once they’re on solids, what you cook in matters too. Non-stick pans leach chemicals when heated — especially if the coating is scratched. We cook everything in a cast iron skillet. Lodge is affordable, lasts forever, and adds a little iron to your food as a bonus. It’s one of those swaps you make once and never think about again.


    What I’d Skip (Or At Least Deprioritize)

    Honestly? The “non-toxic nursery paint” rabbit hole stressed me out way more than it needed to. Yes, low-VOC paint is better. But if you’re not actively repainting, it’s not your most urgent issue.

    Same with organic crib mattresses. If you can afford it, great. But if it’s between that and non-toxic sunscreen you’ll use every single day for the next decade — prioritize the daily-use stuff first.

    Not everything labeled “natural” or “clean” is worth the premium price tag either. Read the actual ingredient list. Trust the Environmental Working Group’s Skin Deep database. And don’t let perfect be the enemy of good.


    A Word on the 1990s Approach

    Here’s the thing — our parents weren’t obsessing over ingredient labels, and most of us turned out okay. But we also played outside more, ate less processed food, and weren’t slathered in twenty products a day before age two.

    The goal isn’t to live in a sterile bubble. It’s to reduce the unnecessary toxic load while letting your kid dig in the garden, chase the chickens, and get good and dirty. Dirt is actually good for them. The chemicals in their diaper cream every night? Maybe worth a closer look.

    We raise our kids the way kids were raised before everything got so complicated — more outside time, less stuff, real food, and intentional choices about what does come inside our home.


    The Quick Reference List: What We Actually Buy


    You Don’t Have to Do It All at Once

    I started this journey one swap at a time. When something ran out, I replaced it with a better version. That’s still the approach I’d recommend. Pick the highest daily-exposure items first — sunscreen, bath products, laundry detergent — and go from there.

    You’re already asking the right questions just by being here. That counts for a lot. Our kids are growing up in a home where we think carefully about what we bring in, what we put on their skin, and what we feed them — and that’s genuinely one of the best things we can do for them, right alongside letting them run barefoot in the backyard and name the chickens.

    You’ve got this, mama.


    📖 You Might Also Like:

    Frequently Asked Questions

    What non-toxic baby products should I buy first?

    Start with the highest daily-exposure items: sunscreen, baby wash and lotion, and laundry detergent. These are used every single day and have the most impact on your baby’s overall toxic load. Once those are swapped, move on to food storage and cookware.

    Is “natural” on a baby product label the same as non-toxic?

    No — “natural” is not a regulated term and can be used on products that still contain synthetic fragrances, preservatives, or other questionable ingredients. Always read the actual ingredient list and cross-reference with the Environmental Working Group’s Skin Deep database for the most reliable information.

    What sunscreen is safe for babies and toddlers?

    Look for mineral sunscreens with non-nano zinc oxide as the only active ingredient. Avoid oxybenzone, octinoxate, and synthetic fragrance. Many clean beauty brands offer baby-specific formulas, and you can find a good selection of non-toxic mineral sunscreens on Amazon or through retailers like Grove Collaborative.

    Are wool dryer balls really a good substitute for dryer sheets?

    Yes! Wool dryer balls reduce static, soften clothes naturally, and cut drying time — without the synthetic fragrances and chemicals found in conventional dryer sheets. They last for years, making them a cost-effective swap too. You can add a drop of essential oil to the ball if you want a light scent.

    Do I need to replace all my baby products at once to go non-toxic?

    Absolutely not — and trying to do it all at once is usually what leads to burnout. The most practical approach is to replace products with a cleaner version as they run out. Prioritize daily-use items first (sunscreen, bath products, laundry detergent) and work your way through the rest over time. Small, consistent changes add up significantly.