Category: Homesteading & Simple Living

  • How to Preserve Your Summer Harvest: Canning, Freezing, and Fermenting for Beginners

    How to Preserve Your Summer Harvest: Canning, Freezing, and Fermenting for Beginners

    How to Preserve Your Summer Harvest: Canning, Freezing, and Fermenting for Beginners

    🌿 The Short Version: Whether you’re drowning in tomatoes, zucchini, or cucumbers, there are three solid ways to preserve your summer harvest — canning, freezing, and fermenting — and none of them require you to be a homestead expert. This post walks you through all three so you can pick what works for your family and actually use what you grew.

    This post contains affiliate links. I may earn a small commission at no extra cost to you.

    If you’ve ever stood in your backyard in late June, staring at a pile of cucumbers the size of a small toddler, wondering how on earth you’re going to use all of this before it goes bad — hi, same. Florida summer gardens don’t mess around. One week you’re nursing tiny seedlings, and the next week you’re texting neighbors asking if they want squash because you genuinely cannot keep up.

    We’ve been there more times than I can count. And somewhere between my third batch of zucchini bread and leaving a bag of tomatoes on the church welcome table, I decided it was time to actually learn how to preserve food — not just survive the harvest.

    The good news? Canning, freezing, and fermenting are all very learnable. You don’t need a farmhouse kitchen or a grandmother who canned every summer (though if you have one of those, call her immediately). You just need a little know-how and the willingness to try.

    And honestly? Getting your kids involved in this is one of the most Charlotte Mason, 1990s-childhood things you can do. Real food. Real skills. Real life. Let’s get into it.


    Why Preserving Your Harvest Matters (Even If Your Garden Is Small)

    Even a modest backyard garden — or a haul from the farmers market or a local u-pick — produces more than most families can eat fresh. When you learn to preserve that food, a few really good things happen:

    • You reduce waste (which matters if you’re trying to live intentionally)
    • You stretch your grocery budget through the winter months
    • You know exactly what’s in your food
    • Your kids watch you do something genuinely useful with your hands

    That last one is underrated. When my kids see me filling jars or packing the freezer, they’re watching real-life home economics in action. It’s living education, and it sticks in a way that a worksheet never could.

    If you want more ideas for weaving this kind of learning into everyday life, Seasonal Living Ideas for Families: Simple Ways to Celebrate Every Season All Year Long is a great place to start.


    Method 1: Freezing (The Easiest Starting Point)

    If you’ve never preserved food before, start here. Freezing is forgiving, fast, and doesn’t require a lot of equipment.

    What Freezes Well from a Summer Garden

    • Corn (blanch first, then freeze off the cob or on)
    • Tomatoes (roast them first for the best flavor)
    • Squash and zucchini (blanch, slice, freeze flat on a tray)
    • Blueberries and other berries (freeze in a single layer, then bag)
    • Peppers (dice and freeze raw — no blanching needed)
    • Herbs like basil (blend with olive oil and freeze in ice cube trays)

    A Few Freezing Tips

    Blanching — briefly boiling vegetables and then dunking them in ice water — stops the enzymes that cause food to lose flavor and texture in the freezer. It takes an extra five minutes and it’s worth it for most vegetables.

    Freeze things flat on a sheet pan first before bagging them. This keeps your berries and sliced veggies from turning into one giant frozen brick. Label everything with the date. Future you will be grateful.

    This is a perfect job for kids, by the way. Mine love spreading berries on the tray, dunking things in ice water, and writing on the bag labels with a Sharpie. It’s hands-on, low-stakes, and genuinely useful.


    Method 2: Canning (Worth the Learning Curve)

    Canning has a bit more of a learning curve, but once you’ve done it a few times, it becomes second nature. There are two types — water bath canning and pressure canning — and knowing which one to use matters for safety.

    Water Bath Canning

    This method works for high-acid foods: tomatoes, pickles, jams, jellies, salsa, and most fruit preserves. The acidity prevents the growth of harmful bacteria, so a simple boiling water bath is sufficient.

    You’ll need: canning jars, lids, a large pot deep enough to submerge the jars, and a jar lifter. That’s really it to start.

    Our family makes big batches of tomato sauce and salsa every summer. There is something deeply satisfying about lining up a dozen jars of red sauce on the counter, hearing them ping as they seal, and knowing those jars will carry us through January.

    Pressure Canning

    This method is for low-acid foods — green beans, corn, soups, meats. Low-acid foods need higher temperatures than boiling water can reach, which is why you need a pressure canner. If you’re just starting out, I’d honestly save pressure canning for year two after you’ve got the basics down.

    Canning Safety Note

    Please use tested recipes from the USDA, Ball, or the National Center for Home Food Preservation. I know it’s tempting to wing it, but canning ratios matter for safety. Stick to proven recipes until you really know what you’re doing.

    📌 Love this? Save it to Pinterest so you can find it later!


    Method 3: Fermenting (The One That Surprised Me Most)

    I was intimidated by fermentation for way longer than I should have been. It sounds scientific and fussy. But here’s the truth: humans have been fermenting food for thousands of years without a single YouTube tutorial, and it is genuinely one of the simplest preservation methods once you understand the basic idea.

    Fermentation uses salt and naturally occurring bacteria to preserve food and develop flavor. No canning equipment. No heat. Just vegetables, salt, water, and time.

    What to Ferment from Your Summer Garden

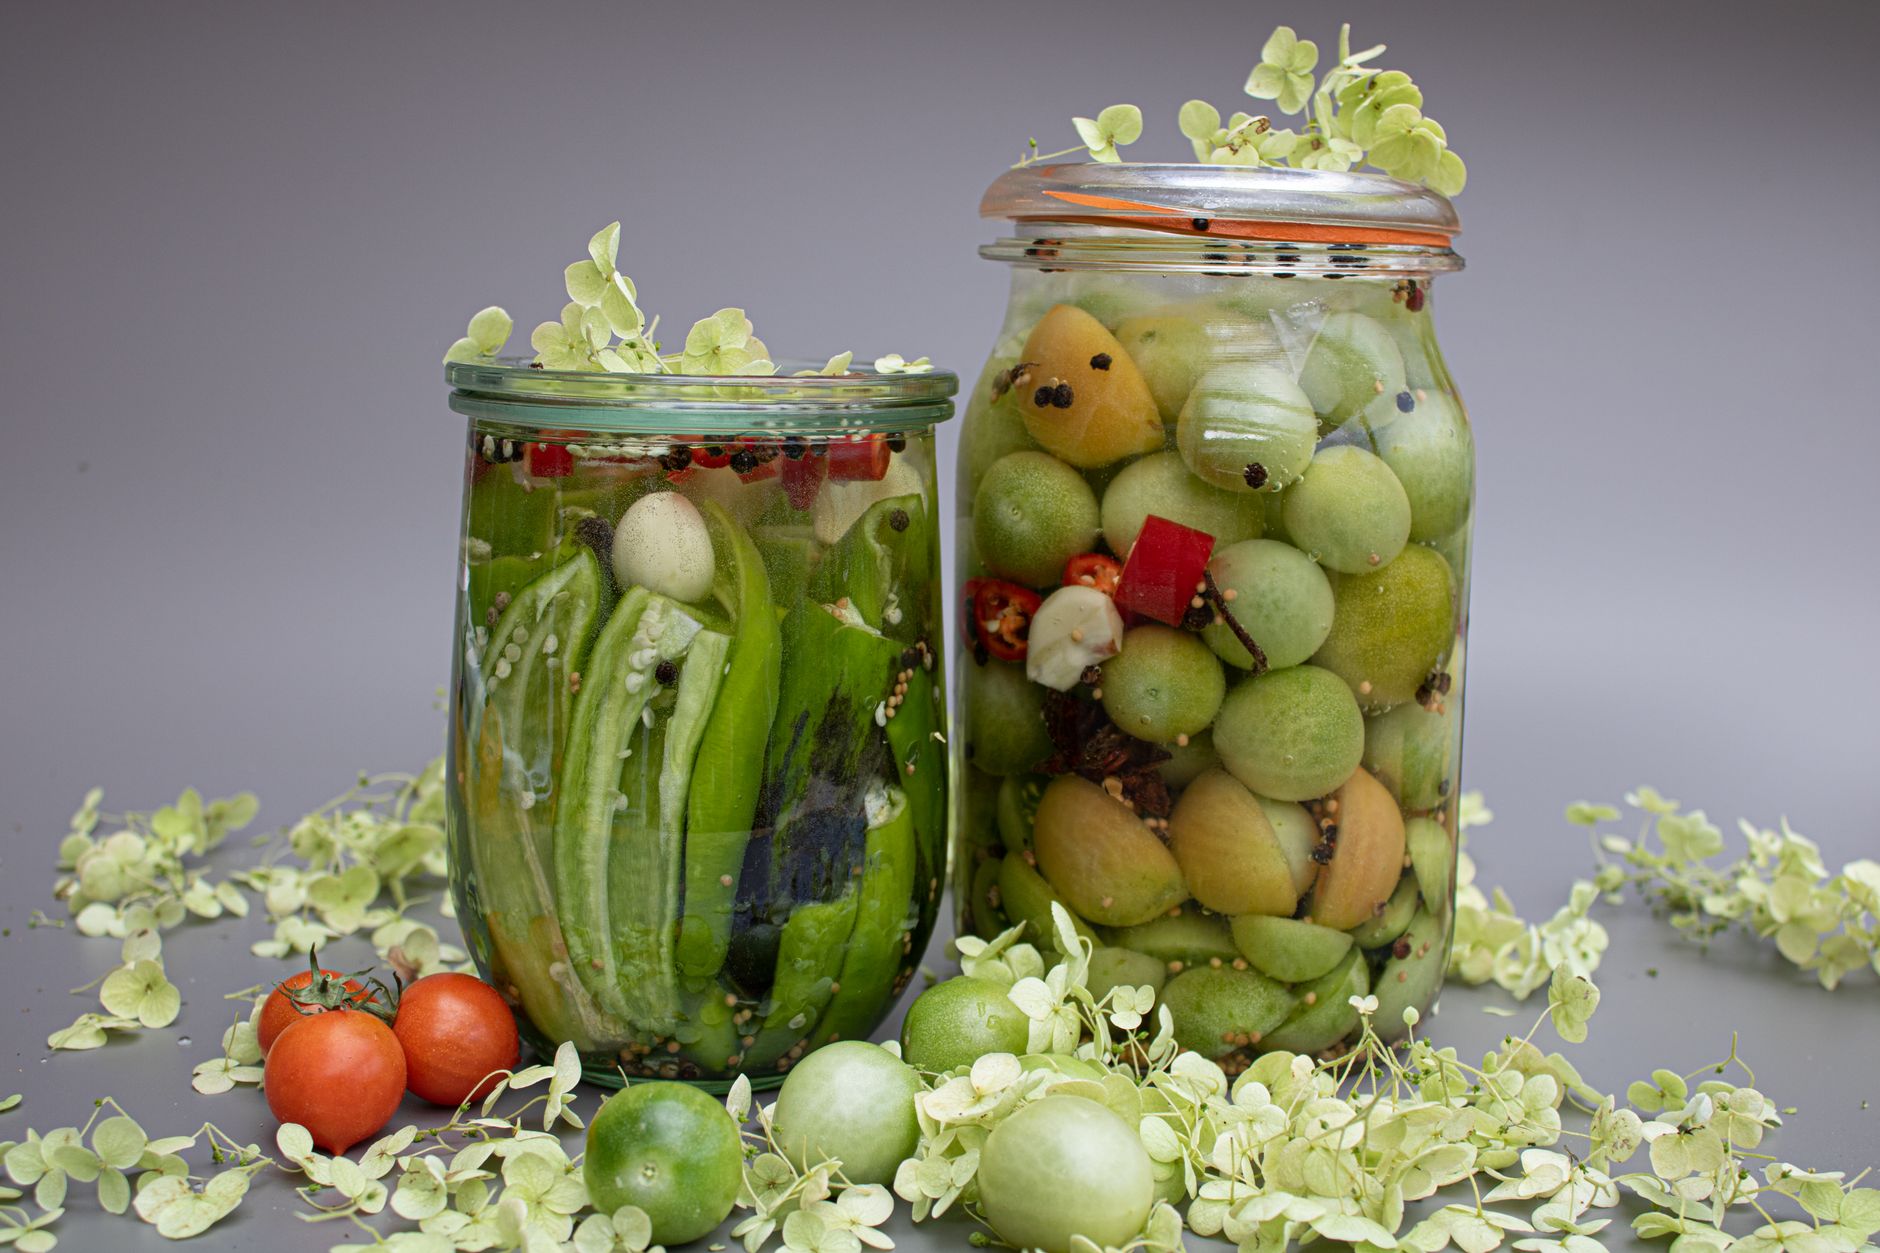
    • Cucumbers → Fermented pickles — crunchier and more probiotic-rich than vinegar pickles
    • Cabbage → Sauerkraut — slice thin, salt, massage, pack in a jar
    • Peppers → Fermented hot sauce — a game changer if your family likes heat
    • Green beans → Lacto-fermented dilly beans — a Southern classic
    • Mixed vegetables → Curtido or veggie kraut — great for using up odds and ends

    Getting Started with Fermentation

    You don’t need special equipment to start. A wide-mouth mason jar, some non-iodized salt, and filtered water will get you going. The general rule for brine is about 2% salt by weight, but most simple recipes will give you the exact measurements.

    Fermented foods are also incredibly good for gut health — something our family thinks about a lot as we try to eat more intentionally. And kids are often fascinated by fermentation when you frame it as a science experiment: living bacteria, CO2 bubbles, flavor changing over time. It’s legit nature study right in your kitchen.

    If your kids love hands-on learning like mine do, pairing this with a nature journal where they can sketch the process, record observations, and track the days is a beautiful way to make it a real Charlotte Mason study. Draw the jar. Write the date. Note what it smells like on day 3. That’s science.


    Making It a Family Rhythm

    Here in Northwest Florida, our summer garden typically winds down by August when the heat just becomes relentless — but we try to do our big preserving push in June and July when the tomatoes, cucumbers, and peppers are going strong.

    We’ve built it into our weekly rhythm: harvest in the morning before it gets hot, sort and wash together at the kitchen table, and then decide what’s getting frozen, canned, or fermented. My older kids can handle blanching and bagging. My younger ones wash produce and pack jars. Even the little one can drop herbs into an ice cube tray.

    If you want ideas for getting kids meaningfully involved in homestead-style tasks at different ages, How to Involve Kids in Homestead Chores by Age (Without the Whining or the Burnout) is one of my most-read posts for good reason.

    Our chickens get any scraps and trimmings, which they absolutely love — so nothing really goes to waste. It all circles back.

    For the actual gardening side of things, Best Kids Garden Tools That Actually Work (And Won’t Fall Apart After One Season) is worth a read if you’re just getting your kids out in the garden.

    A few things that make our preservation days easier and more intentional:


    You Don’t Have to Do All Three

    I want to say this clearly: you do not have to become a canning-fermenting-freezing powerhouse overnight. Pick one method. Try it with one thing you actually grew or bought in abundance. See how it feels.

    Most families I know start with freezing, add canning after a season or two, and stumble into fermentation when they have more cucumbers than they know what to do with. That’s a perfectly fine path.

    The goal isn’t to preserve everything perfectly. The goal is to waste less, eat better, and give your kids a picture of what it looks like to take care of your family with your own two hands. That image — mama at the stove, jars lining the counter, kids underfoot — is one they’ll carry with them for the rest of their lives. And honestly, that’s worth more than any Pinterest-perfect homestead aesthetic.

    Start simple. Start with what you have. You’ve got this.


    📖 You Might Also Like:

    Frequently Asked Questions

    What is the easiest method for preserving a summer harvest for beginners?

    Freezing is the easiest place to start. Most vegetables just need to be blanched briefly, cooled, and packed into freezer bags or containers. No special equipment required beyond a large pot and freezer-safe bags. Berries and peppers don’t even need blanching — they can go straight in.

    Is fermenting vegetables safe to do at home?

    Yes — lacto-fermentation is one of the oldest and safest food preservation methods in the world. The salt creates an environment where beneficial bacteria thrive and harmful bacteria cannot survive. As long as you keep vegetables submerged below the brine and use clean equipment, fermentation is very safe for home use.

    Do I need special equipment to start canning at home?

    For water bath canning (which covers tomatoes, jams, pickles, and salsa), you need mason jars with new lids, a large stockpot deep enough to submerge the jars by at least an inch, and a jar lifter. A canning rack is helpful but not strictly necessary. Pressure canning requires a pressure canner and is recommended for low-acid foods like green beans and corn.

    What vegetables can I freeze without blanching?

    Peppers (diced or sliced), onions, tomatoes, herbs blended into oil, and most berries can all be frozen without blanching. Most other vegetables — like green beans, squash, corn, and broccoli — benefit from a quick blanch before freezing to preserve color, texture, and flavor over time.

    How can I get my kids involved in food preservation?

    There are great jobs at every age level. Younger kids can wash produce, pack items into bags, write labels, or drop herbs into ice cube trays. Older kids can handle blanching with supervision, mashing fruit for jam, or stirring and packing fermentation jars. Turning preservation days into a family rhythm — especially with the harvest coming straight from your own garden — makes it feel like real life education rather than a chore.
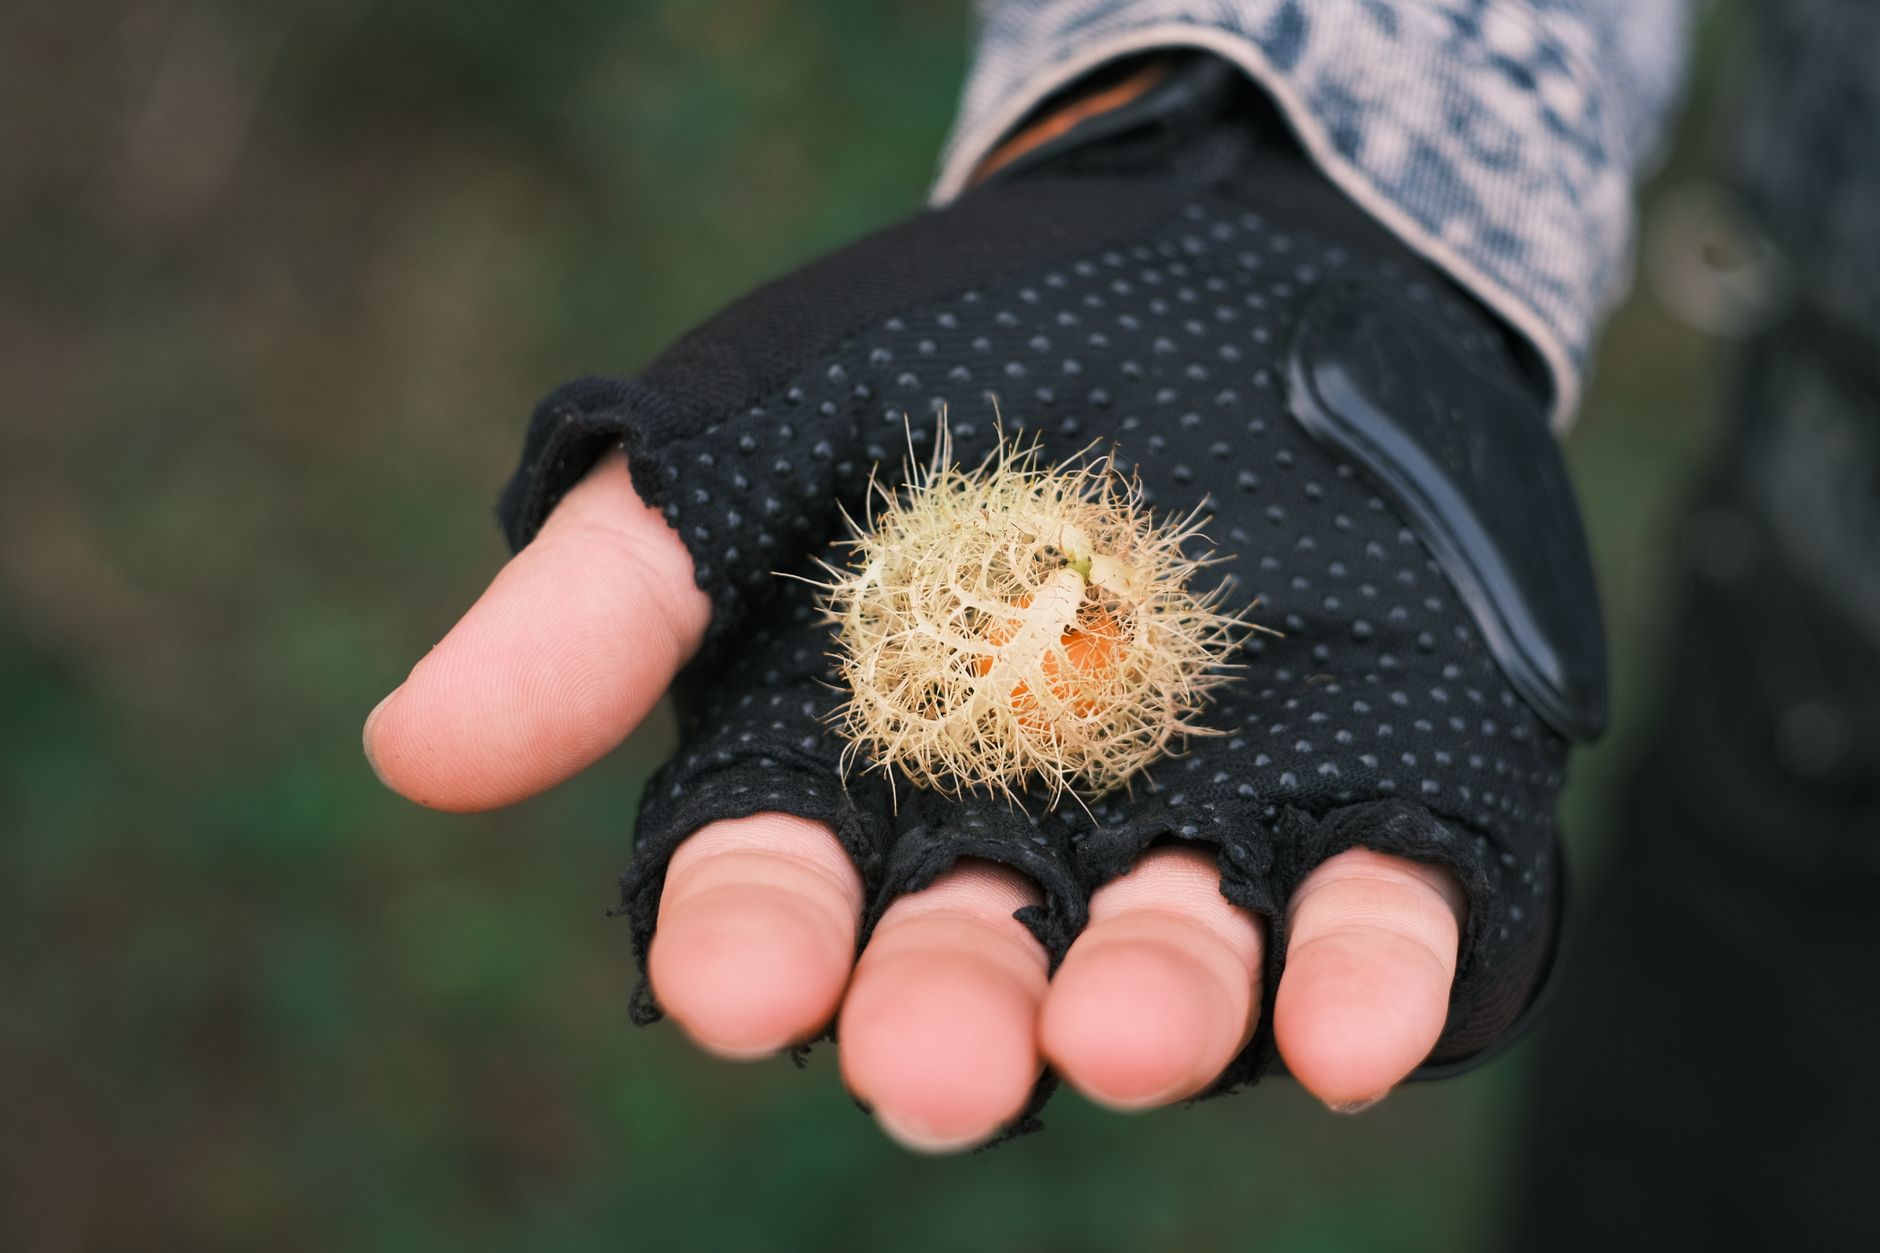
  • Wild Edibles in Florida: What to Look For on Your Next Family Walk

    Wild Edibles in Florida: What to Look For on Your Next Family Walk

    Wild Edibles in Florida: What to Look For on Your Next Family Walk

    🌿 The Short Version: Florida’s roadsides, parks, and backyards are full of safe, edible wild plants your family can learn to identify on everyday walks. This guide covers the most beginner-friendly wild edibles in Northwest Florida, how to teach your kids to spot them safely, and how to turn it into a real Charlotte Mason nature study your kids will actually remember.

    This post contains affiliate links. I may earn a small commission at no extra cost to you.

    We were walking the trail behind our neighborhood last spring — the usual loop we do about three times a week — when my oldest stopped dead in her tracks and pointed at a patch of plants along the fence line. “Mama, is that one of the ones we can eat?”

    And y’all. She was right. It was wood sorrel, and we’d walked past it a hundred times without ever seeing it.

    That’s kind of the magic of teaching kids about wild edibles. Once their eyes are trained to look, they see the world completely differently. A regular old neighborhood walk becomes a scavenger hunt, a science lesson, a little bit of living history — all at once. Very Charlotte Mason. Very 1990s-kid energy. Zero screens required.

    If you’re in the Pensacola area or anywhere in Northwest Florida, you are sitting on a goldmine of wild edibles. Our climate means things grow year-round, and a lot of the most beginner-friendly edible plants are growing right alongside your walking path, in your yard, or at the edge of the woods. Here’s how we approach it with our kids, and what to actually look for.


    Start Here: The Ground Rules Before You Pick Anything

    Before we ever pick or taste anything, we have a family rule: identify three times before you touch, and never eat without a grown-up confirming. This isn’t meant to scare kids away from the process — it’s meant to build the habit of careful observation, which is exactly what good naturalists do.

    We also keep a nature journal for sketching what we find. Drawing a plant forces you to really look at it — the leaf edges, stem color, how it attaches, whether there’s a smell. My kids have learned more from sketching a wood sorrel leaf than from any worksheet I could hand them.

    For bird ID we love the Sibley Birds guide, and I treat our foraging walk the same way — bring a good reference, slow down, and observe before you conclude.

    For a deeper dive into building this habit with your kids, check out my Florida Foraging Guide: Safe Plants for Beginners (And How to Turn It Into a Real Nature Study) — that post is a great companion to this one.


    Wild Edibles in Florida That Are Beginner-Friendly

    1. Wood Sorrel (Oxalis spp.)

    This is the one my daughter spotted, and honestly it’s my favorite starter plant for kids because it looks like a clover with heart-shaped leaves and tastes like a tiny sour lemon drop. Kids lose their minds over it.

    Look for the three-part heart-shaped leaves — usually bright green, sometimes with a purple tinge depending on the species. It grows in lawns, along paths, in cracks in pavement. You’ll find it everywhere once you start looking. The leaves, flowers, and seed pods are all edible. Eat in small amounts (like most wild greens) because of the oxalic acid content.

    2. Chickweed (Stellaria media)

    Chickweed is a cool-weather plant here in Northwest Florida, so look for it in late fall through early spring. It forms low, lush mats of tiny oval leaves with a single line of fine hairs running up the stem — that hair line is a key ID feature. It’s mild, a little grassy, and great tossed fresh into a salad.

    Fun fact: our chickens go absolutely bonkers for chickweed. If I pull a handful on our walk home and toss it into the run, it’s gone in thirty seconds. A little tip from Storey’s Guide to Raising Chickens — chickweed is actually mentioned as a great supplemental green for flocks. Win-win.

    3. Dandelion (Taraxacum officinale)

    Yes, the classic. And yes, they do grow in Florida — just not as abundantly as up north. But you’ll find them in lawns and fields, especially in the cooler months. Every single part is edible: leaves (best young and tender), flowers, and roots. Leaves are bitter but nutritious, and kids think it’s hilarious to eat a “weed.”

    4. Florida Betony (Stachys floridana)

    This one is a Florida specialty and honestly underrated. It’s considered a lawn pest by most people, but the little white segmented tubers at the root are edible — crisp, mild, a little like water chestnuts. Kids can dig them up like a treasure hunt. Look for the square stem (a mint family giveaway), scalloped leaves, and pinkish-white flowers.

    5. Muscadine Grape (Vitis rotundifolia)

    In late summer and early fall, muscadines ripen along fence lines and at the edges of wooded areas all over Northwest Florida. The thick-skinned purple grapes are unmistakable once you know what you’re looking for. My kids can now spot the vine by its bark and leaf shape even when there’s no fruit. This is exactly the kind of seasonal, place-based knowledge I want them to carry into adulthood.

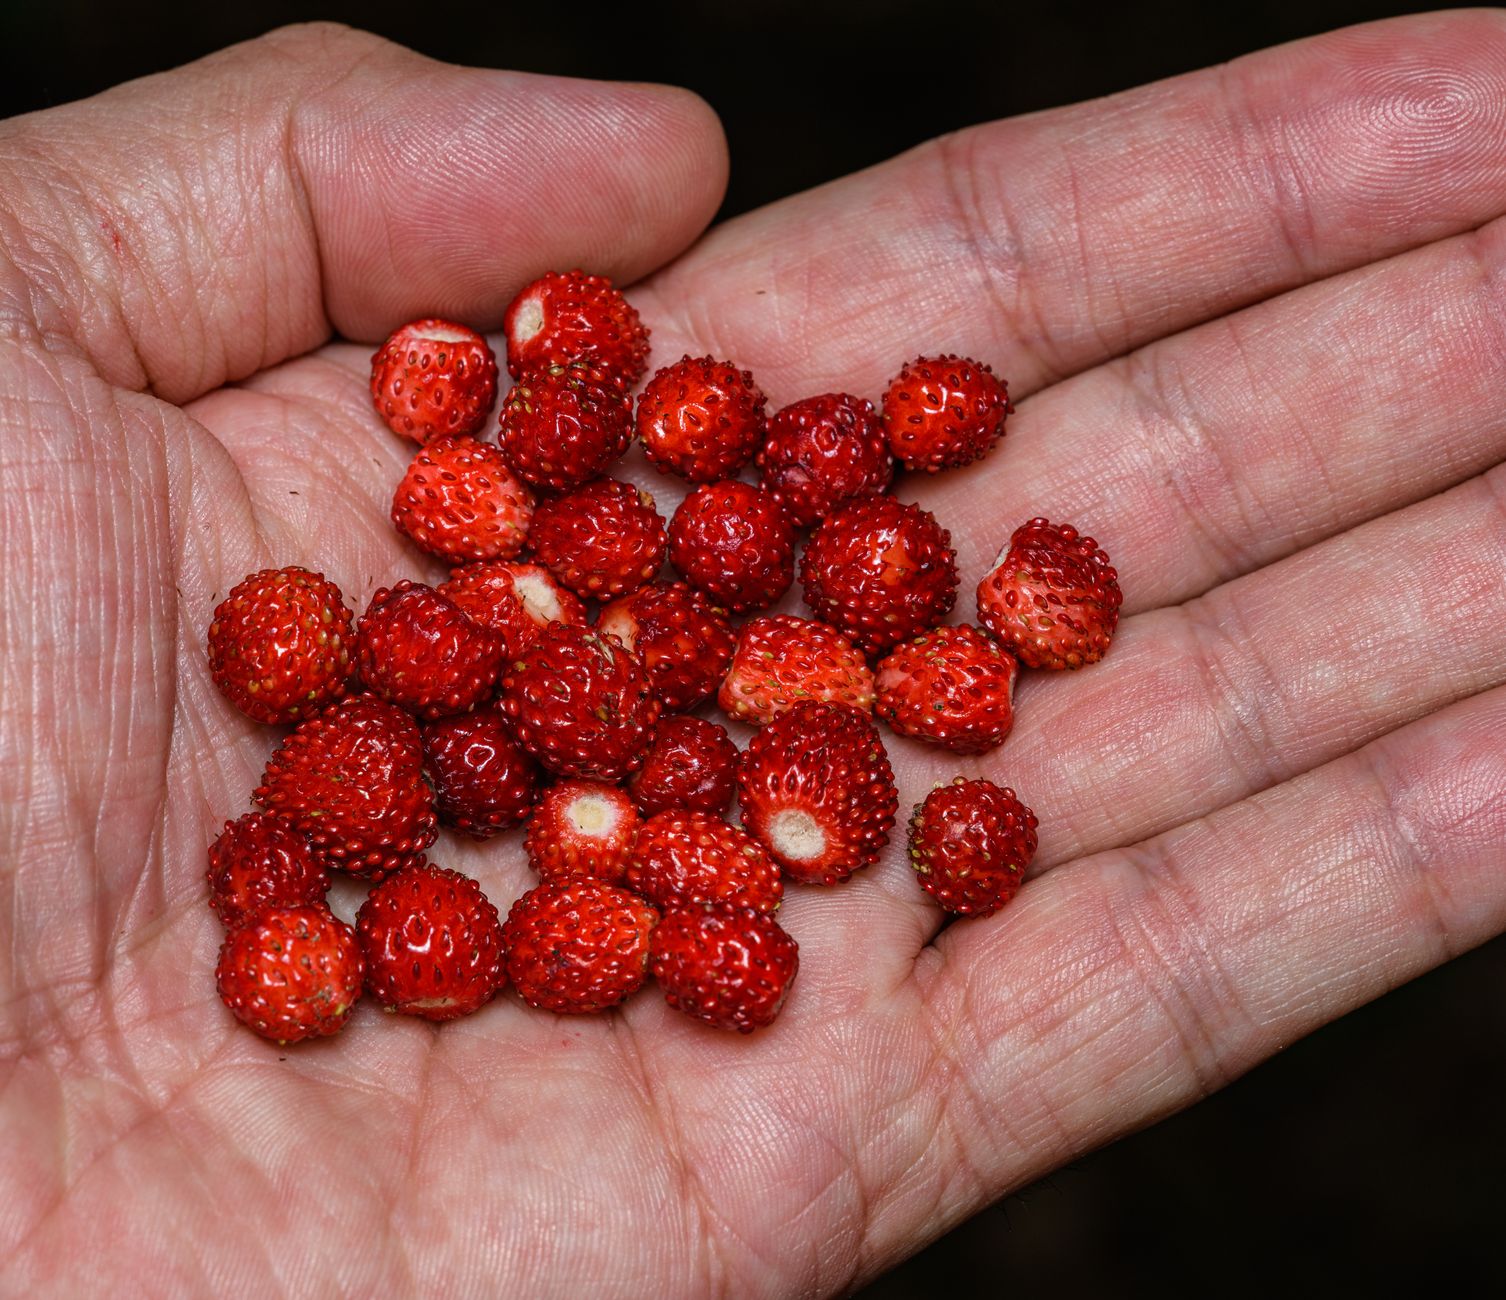
    6. Blackberries (Rubus spp.)

    Spring in North Florida means wild blackberries, and if you have a good patch near your walking trail, you already know it. The thorny canes, the white flowers in late winter, the dark berries — this one the kids already know without being taught. We pick them straight off the vine and call it science.


    📌 Love this? Save it to Pinterest so you can find it later!

    How We Turn a Foraging Walk Into a Full Nature Study

    Charlotte Mason would have loved this, y’all. The whole idea of living education is that the world itself is the curriculum. Here’s how we make a simple walk into a real lesson:

    Before the walk: Look at pictures of two or three target plants. Talk about the ID features. What shape are the leaves? Does it have a smell? What does the stem look like?

    On the walk: Kids carry their nature journals and Faber-Castell watercolors for sketching on the spot. We also bring a pocket microscope for looking at leaf texture up close — it turns even the most “I don’t wanna go” kid into a scientist real fast.

    After the walk: We paste in any pressed specimens, finish sketches, and look up anything we couldn’t identify. Sometimes we bring something home to taste, cook, or feed to the chickens.

    This kind of unhurried, sensory, curiosity-driven learning is exactly what I mean when I say we’re raising our kids the 1990s way. No app. No worksheet. Just the real world doing the teaching.

    If you want to build on this kind of outdoor rhythm, I wrote about how we structure our days in Family Rhythm vs Routine: What Actually Works and it ties in really well with this kind of natural learning.


    What to Bring on a Foraging Walk With Kids

    Keep it simple. We don’t need much:

    • Nature journals and pencils
    • Faber-Castell watercolors for field sketching
    • A small bug collection kit (because one thing always leads to another)
    • A good field guide or the iNaturalist app as backup
    • Kids’ rain boots — because Florida and mud and mystery puddles
    • A small bag for bringing home specimens to sketch or share with the chickens
    • Non-toxic sunscreen because this is Florida and the sun does not play

    A Word on What NOT to Touch

    Florida has some beautifully toxic plants and we don’t skip over this with the kids. Pokeweed, Carolina jessamine, rosary pea, and water hemlock are all in our area and all dangerous. We teach the same way we teach about stranger danger — not fear, but awareness and a clear rule: if you don’t know it, you don’t touch it, and you definitely don’t eat it.

    That rule has held up well for us. The goal isn’t to make kids scared of the natural world. It’s to give them the knowledge and the habit of caution so they can move through it confidently.


    This Is the Kind of Education That Sticks

    My kids will not remember every worksheet. But they will remember the first time they ate a wild blackberry off the vine on a Tuesday morning in April when we were supposed to be doing math. They’ll remember squatting down on the trail to sketch a wood sorrel leaf. They’ll remember feeding chickweed to the hens and watching them scramble for it.

    That’s the whole thing, really. Get outside. Go slow. Look at what’s actually there. Florida gives us so much to work with — we might as well use it.

    If you’re just starting to build this kind of outdoor nature study life with your family, my Florida Foraging Guide: Safe Plants for Beginners and the post on creating a nature play yard in your backyard are both great places to keep going. We’re in this together, friend. Now go take a walk.


    📖 You Might Also Like:

    Frequently Asked Questions

    What wild edibles are safe for kids to eat in Florida?

    Several beginner-friendly wild edibles grow throughout Florida including wood sorrel, chickweed, dandelion, Florida betony, wild blackberries, and muscadine grapes. Always make a positive ID before eating anything, and involve an adult in every step — especially with young children.

    How do I teach my kids to identify wild edible plants safely?

    Start with just two or three easily identifiable plants and study photos before your walk. Teach kids to look for multiple identifying features — leaf shape, stem color, smell, and growth habit — and establish a rule that nothing gets eaten without adult confirmation. Nature journaling and sketching plants on-site is a great way to build careful observation habits.

    Are there poisonous plants I should watch out for in Northwest Florida?

    Yes. Pokeweed, Carolina jessamine, rosary pea, and water hemlock are all found in the Pensacola and Northwest Florida area and are dangerous if ingested. Teach children the rule: if you don’t know it with certainty, don’t touch it and never eat it.

    What is Florida betony and can you really eat it?

    Florida betony (Stachys floridana) is a common Florida lawn weed with square stems, scalloped leaves, and small white tubers underground. The tubers are edible — mild and crunchy, similar to water chestnuts. Kids love digging them up like buried treasure. It’s one of Florida’s most overlooked edible plants.

    What’s the best time of year to forage for wild edibles in Florida?

    Florida is unique because something is almost always growing. Cool-season edibles like chickweed and dandelion peak from fall through early spring. Wild blackberries ripen in spring. Muscadine grapes come in late summer to early fall. Wood sorrel and Florida betony are findable year-round in most parts of North Florida.

  • Florida Foraging Guide: Safe Plants for Beginners (And How to Turn It Into a Real Nature Study)

    Florida Foraging Guide: Safe Plants for Beginners (And How to Turn It Into a Real Nature Study)

    Florida Foraging Guide: Safe Plants for Beginners (And How to Turn It Into a Real Nature Study)

    🌿 The Short Version: Florida is absolutely packed with wild edibles that are safe, easy to identify, and perfect for beginners — especially families with kids. This guide walks you through the most approachable plants to start with in Northwest Florida, plus how to make foraging a real, living nature study your kids will actually remember.

    This post contains affiliate links. I may earn a small commission at no extra cost to you.

    Something shifted for me the first time my daughter crouched down in our backyard, pointed at a patch of something growing along the fence line, and asked, “Mama, can we eat that?”

    Honestly? I had no idea. And that bothered me more than I expected it to.

    Here we were doing this whole nature-based homeschool thing, spending hours outside, keeping chickens, trying to live close to the land — and I couldn’t tell a wood sorrel from a weed. There’s something a little humbling about that. My grandmother would have known. Most people fifty years ago would have known.

    So I started learning. Slowly, carefully, with a lot of cross-referencing and zero rushing. And what I found is that Florida — especially up here in the Panhandle — is genuinely one of the most abundant foraging landscapes in the country. Once you know what you’re looking for, it’s everywhere.

    This guide is for families like ours who are just getting started. We’re going to keep it simple, keep it safe, and keep it fun.

    Before You Pick Anything: The Golden Rules of Beginner Foraging

    Let me say this plainly before we dive into plant lists: never eat anything you aren’t 100% certain of. That rule is non-negotiable, especially when kids are involved.

    Here’s how we approach it in our family:

    • Identify three ways before you eat. Leaf shape, growth pattern, smell, habitat — the more boxes you can check, the better.
    • Use a trusted field guide alongside any app. Apps like iNaturalist are helpful, but they’re not infallible. A physical guide like the Sibley field guide series is a great complement (and yes, Sibley is birds, but the habit of using a proper field guide applies here too — look for a regional edible plants guide as your primary reference).
    • Start with plants that have no dangerous look-alikes. This is the real key for beginners.
    • Make it a nature study, not a snack run. Observation first, harvest second. Always.

    We keep a dedicated nature journal just for plant sketches and foraging notes. My kids draw what they find, write down where they found it, and we press samples when we can. It is such good Charlotte Mason nature study work — living, real, and memorable.

    Safe Plants for Beginner Foragers in Florida

    Wood Sorrel (Oxalis spp.)

    This one is absolutely everywhere in Northwest Florida yards, fields, and forest edges — and it’s one of the most beginner-friendly plants out there. Look for small, clover-shaped leaves with three heart-shaped leaflets, often with tiny yellow or pink flowers. The whole plant is edible and has a bright, lemony flavor that kids genuinely love.

    Wood sorrel has no dangerous look-alikes when you know what you’re looking for, which makes it a great first forage. We nibble on it during our outdoor school time regularly.

    Elderberry (Sambucus nigra / canadensis)

    If you’ve been around this blog for any time, you know we are big elderberry people. We make homemade elderberry gummies every fall, and knowing how to identify the wild shrubs is a skill I consider genuinely useful.

    Elderberry grows in moist, partly shaded areas throughout the Florida Panhandle. Look for the distinctive compound leaves with serrated leaflets and flat-topped clusters of small white flowers in spring, followed by deep purple-black berries in late summer. Important note: the raw berries, bark, and leaves contain compounds that can cause nausea — always cook the berries before eating. And do not confuse with pokeweed, which has a similar berry color but a very different growth habit.

    Blackberries (Rubus spp.)

    Wild blackberries are one of the easiest and most rewarding forages in the Florida Panhandle. They fruit in spring — usually April through May — and the canes are hard to miss once you know the thorny, arching stems and familiar leaf shape. The berries look exactly like what you’d buy at the store because, well, they are the same thing.

    Kids go absolutely wild for blackberry picking. Grab a pair of kids’ garden gloves because those thorns are no joke, and pack a bucket. We’ve made cobblers, jams, and smoothies from wild-foraged blackberries and it never gets old.

    Muscadine Grapes (Vitis rotundifolia)

    Another Florida Panhandle classic. Muscadine vines grow all over the place here — along fences, climbing trees at the edge of the woods, scrambling over brush piles. The grapes are round and thick-skinned, ripening in late summer to fall in shades of bronze, purple, or almost black depending on the variety.

    This is a wonderful one to harvest with kids because the identification is easy once you’ve seen the vine a few times, and the yields can be genuinely impressive. We’ve made juice, jelly, and even grape leaves stuffed with rice.

    Purslane (Portulaca oleracea)

    Purslane is one of those weeds that most people pull up without realizing they’re throwing away dinner. It’s low-growing with thick, succulent-like stems and small, paddle-shaped leaves. It tends to pop up in garden beds, sidewalk cracks, and disturbed soil — which in Florida means it’s basically everywhere from spring through fall.

    The flavor is mild and slightly tangy. It’s wonderful raw in salads, sautéed with garlic, or stirred into eggs. Fun fact: purslane is one of the highest plant-based sources of omega-3 fatty acids. We also toss some to our chickens — they go crazy for it.

    Saw Palmetto Berries (Serenoa repens)

    Saw palmetto is the quintessential Florida plant, and while the berries are most famous for supplements, they are edible. Taste-wise they’re an acquired thing — oily and a little funky — but knowing how to identify them is a great nature study exercise. The fan-shaped fronds with saw-toothed stems are completely iconic and unmistakable.

    📌 Love this? Save it to Pinterest so you can find it later!

    How We Make Foraging Part of Our Homeschool Nature Study

    This is honestly my favorite part of the whole thing. Foraging is such a natural fit for Charlotte Mason education because it is observation-driven, place-based, and genuinely engaging for kids.

    Here’s how we weave it in:

    Nature journaling. Every time we find a new plant, we sketch it, label its parts, and note the date and location. A pocket microscope is great for looking at leaf structure up close, and Faber-Castell watercolors make botanical illustration feel like real art, not just schoolwork.

    Plant identification as a slow skill. We don’t rush. We might spend two weeks observing the same plant before we ever taste it. That patience is a lesson in itself.

    Connecting to the chickens. Many wild plants are also excellent chicken forage — chickweed, purslane, wood sorrel, dandelion. My kids love gathering handfuls of “chicken salad” from the yard and watching the flock go after it. If you’re curious about what plants to offer and which to avoid, Storey’s Guide to Raising Chickens has a solid section on this.

    Taking it into the kitchen. Foraging becomes real when something you found ends up on the dinner table. Check out how we teach kids to cook basic skills by age — foraged ingredients are a perfect way to make those lessons feel meaningful.

    If you want to expand your backyard into a more intentional nature learning space, I also have a whole post on how to create a nature play yard without spending a fortune that ties in beautifully with foraging goals.

    A Note on Safety and Seasonal Rhythms

    Foraging in Florida is a year-round possibility, which is one of the genuine gifts of living here. But it also means the plants you encounter shift through the seasons, and learning those rhythms takes time. We tie our foraging walks into our seasonal living rhythm — blackberries in spring, muscadines in fall, wood sorrel and purslane all summer long.

    One practical tip: always forage away from roadsides, treated lawns, or any area that might have been sprayed. We stick to our own property, conservation land, and the edges of wooded areas we know well.

    And when we head out for longer foraging walks, the kids are always in their rain boots — Florida’s afternoon rains make soggy ground a given — and I keep non-toxic sunscreen in my bag because the Florida sun doesn’t take a day off.

    You Don’t Have to Know Everything to Start

    I think the biggest thing holding people back from foraging is the fear of getting it wrong. And yes, that fear deserves some respect — you should be careful. But careful doesn’t mean paralyzed.

    Start with one plant. Learn it thoroughly. Find it in your yard, your neighborhood, your local park. Sketch it. Taste it. Teach your kids its name. Then learn another one.

    That’s how our grandmothers learned. That’s how kids learned for thousands of years before the internet — by following someone who knew, walking slowly, and paying attention.

    We can still do it that way. And honestly? It’s one of the most grounding things we do as a family.

    Happy foraging, friends. Go slow, stay curious, and don’t pick anything you can’t name three times over.


    📖 You Might Also Like:

    Frequently Asked Questions

    What are the easiest wild plants to forage in Florida for beginners?

    Some of the easiest and safest plants for beginner foragers in Florida include wood sorrel, wild blackberries, muscadine grapes, purslane, and elderberry. These plants are relatively easy to identify, widely available across the state, and have strong distinguishing features that make them good starting points for learning.

    Is it safe to forage with kids in Florida?

    Yes, foraging with kids can be very safe when you follow a few key rules: only harvest plants you are 100% certain of, never eat anything with look-alikes you haven’t ruled out, start with beginner-friendly plants, and teach kids to observe before they touch or taste. Treating foraging as a slow nature study — rather than a snack hunt — is the safest and most educational approach.

    When is the best season to forage in Florida?

    Florida’s mild climate means you can forage almost year-round. Wild blackberries typically ripen in spring (April–May), muscadine grapes in late summer to fall, and plants like wood sorrel and purslane are available through most of the warmer months. Learning to notice what’s in season where you live is one of the best parts of getting started.

    Are there any dangerous plants to watch out for while foraging in Florida?

    Yes, a few plants require particular caution in Florida. Pokeweed (which can be confused with elderberry by beginners), water hemlock, and castor bean are among the toxic plants found in the region. This is why proper identification using multiple features — not just one characteristic — is so important. Never rely on a single app or a single source, and when in doubt, don’t eat it.

    Can I use foraging as part of a Charlotte Mason homeschool curriculum?

    Absolutely — foraging is a natural fit for Charlotte Mason education. It involves careful observation, nature journaling, botanical illustration, and place-based learning, all of which are core Charlotte Mason principles. Sketching plants in a nature journal, pressing specimens, and learning to identify species slowly over time aligns perfectly with the living, outdoor-focused education Charlotte Mason advocates.

  • How to Teach Kids to Cook Basic Skills by Age (Without Losing Your Mind or Your Kitchen)

    How to Teach Kids to Cook Basic Skills by Age (Without Losing Your Mind or Your Kitchen)

    How to Teach Kids to Cook Basic Skills by Age (Without Losing Your Mind or Your Kitchen)

    🌿 The Short Version: Teaching kids to cook doesn’t have to be a Pinterest-perfect production — it just takes starting small, matching tasks to their age and ability, and letting them actually do the thing even when it’s messy. This guide breaks down real, practical cooking skills by age so you can raise capable kids who aren’t helpless in a kitchen.

    This post contains affiliate links. I may earn a small commission at no extra cost to you.

    Somewhere along the way, we stopped teaching kids how to feed themselves. I don’t mean snacks out of a bag — I mean actually cook. Crack an egg. Stir a pot. Know what it smells like when butter is about to burn. My grandmother could make biscuits from scratch at nine years old. My mom could debone a chicken by middle school. And here we are, handing our kids a tablet and telling them dinner’s ready.

    I’m not here to be preachy about it — because honestly, I had to work at this too. Getting kids into the kitchen is chaotic. It takes longer. Things get spilled. But somewhere between the flour cloud and the scrambled eggs that are a little too brown, something real is happening. They’re learning to feed people they love. And that matters.

    We’ve been weaving cooking into our homeschool days for years now, and it fits naturally into our Charlotte Mason approach — real life is the curriculum. The kitchen is just another classroom.

    Why the Kitchen Is One of the Best Places to Homeschool

    Seriously. Before we even get into the age-by-age breakdown, I want to say this: cooking with kids covers so many subjects at once. Fractions in measuring cups. Reading through a recipe. Science in how yeast works or why eggs bind. History when you make a dish from another culture. And for my kiddos, it ties directly into what we do outside — gathering eggs from our backyard flock, using herbs from the garden, understanding where food actually comes from.

    If you’re looking for ways to make your days feel more connected and less like you’re checking boxes, the kitchen is it. (And if you want more ideas like that, I wrote about this in Intentional Parenting: What It Actually Looks Like Day to Day — it’s one of my favorite posts.)

    Teaching Kids to Cook Basic Skills by Age

    Ages 3–5: The Helper Stage

    At this age, the goal isn’t a finished product. The goal is familiarity. You want them comfortable in the kitchen, not scared of it.

    What they can do:

    • Rinse fruits and vegetables
    • Tear lettuce or herbs
    • Stir batter (with help holding the bowl)
    • Pour pre-measured ingredients
    • Use a kid-safe spreader on toast or muffins
    • Wash hands (this one takes a thousand reminders, but still)

    Keep it low-stakes. Give them a job every single time you’re in the kitchen, even if it’s just handing you things. The repetition is the teaching. And yes, it’s slower. Yes, there will be a puddle of something on the floor. That’s fine.

    This is also the age we start talking about where food comes from. We walk out to the coop together in the morning to collect eggs — my little one carries the basket now, very seriously — and that connection between animal care and breakfast is something a worksheet never could have taught.

    Ages 6–8: The Real Skills Start

    This is where it gets good. Kids this age are capable of so much more than we give them credit for. They want to do real things, not pretend things.

    What they can do:

    • Crack eggs (yes, for real — just expect some shells at first)
    • Measure dry and wet ingredients accurately
    • Use a vegetable peeler with supervision
    • Make simple salad dressings or dips
    • Operate a toaster or microwave with basic safety rules
    • Make a simple sandwich or wrap start to finish
    • Help set and understand a kitchen timer
    • Scramble eggs on the stovetop with you right there

    We started letting our oldest crack eggs for breakfast around age six, and now at eight she can make the whole scramble herself. The eggs from our girls out back make it feel even more meaningful — she knows those hens by name.

    This is also a great time to pair kitchen time with a little nature journaling. If you’re making something with herbs or seasonal produce, have them sketch it first in a nature journal before you cook it. Charlotte Mason would absolutely approve.

    📌 Love this? Save it to Pinterest so you can find it later!

    Ages 9–11: Building Real Independence

    By this age, we’re aiming for a kid who can make a simple meal with minimal hand-holding. Not every night, not perfectly — but genuinely. This is the stage where the 1990s kid in me kicks in hardest. We were doing things at this age. Real things.

    What they can do:

    • Follow a simple recipe independently from start to finish
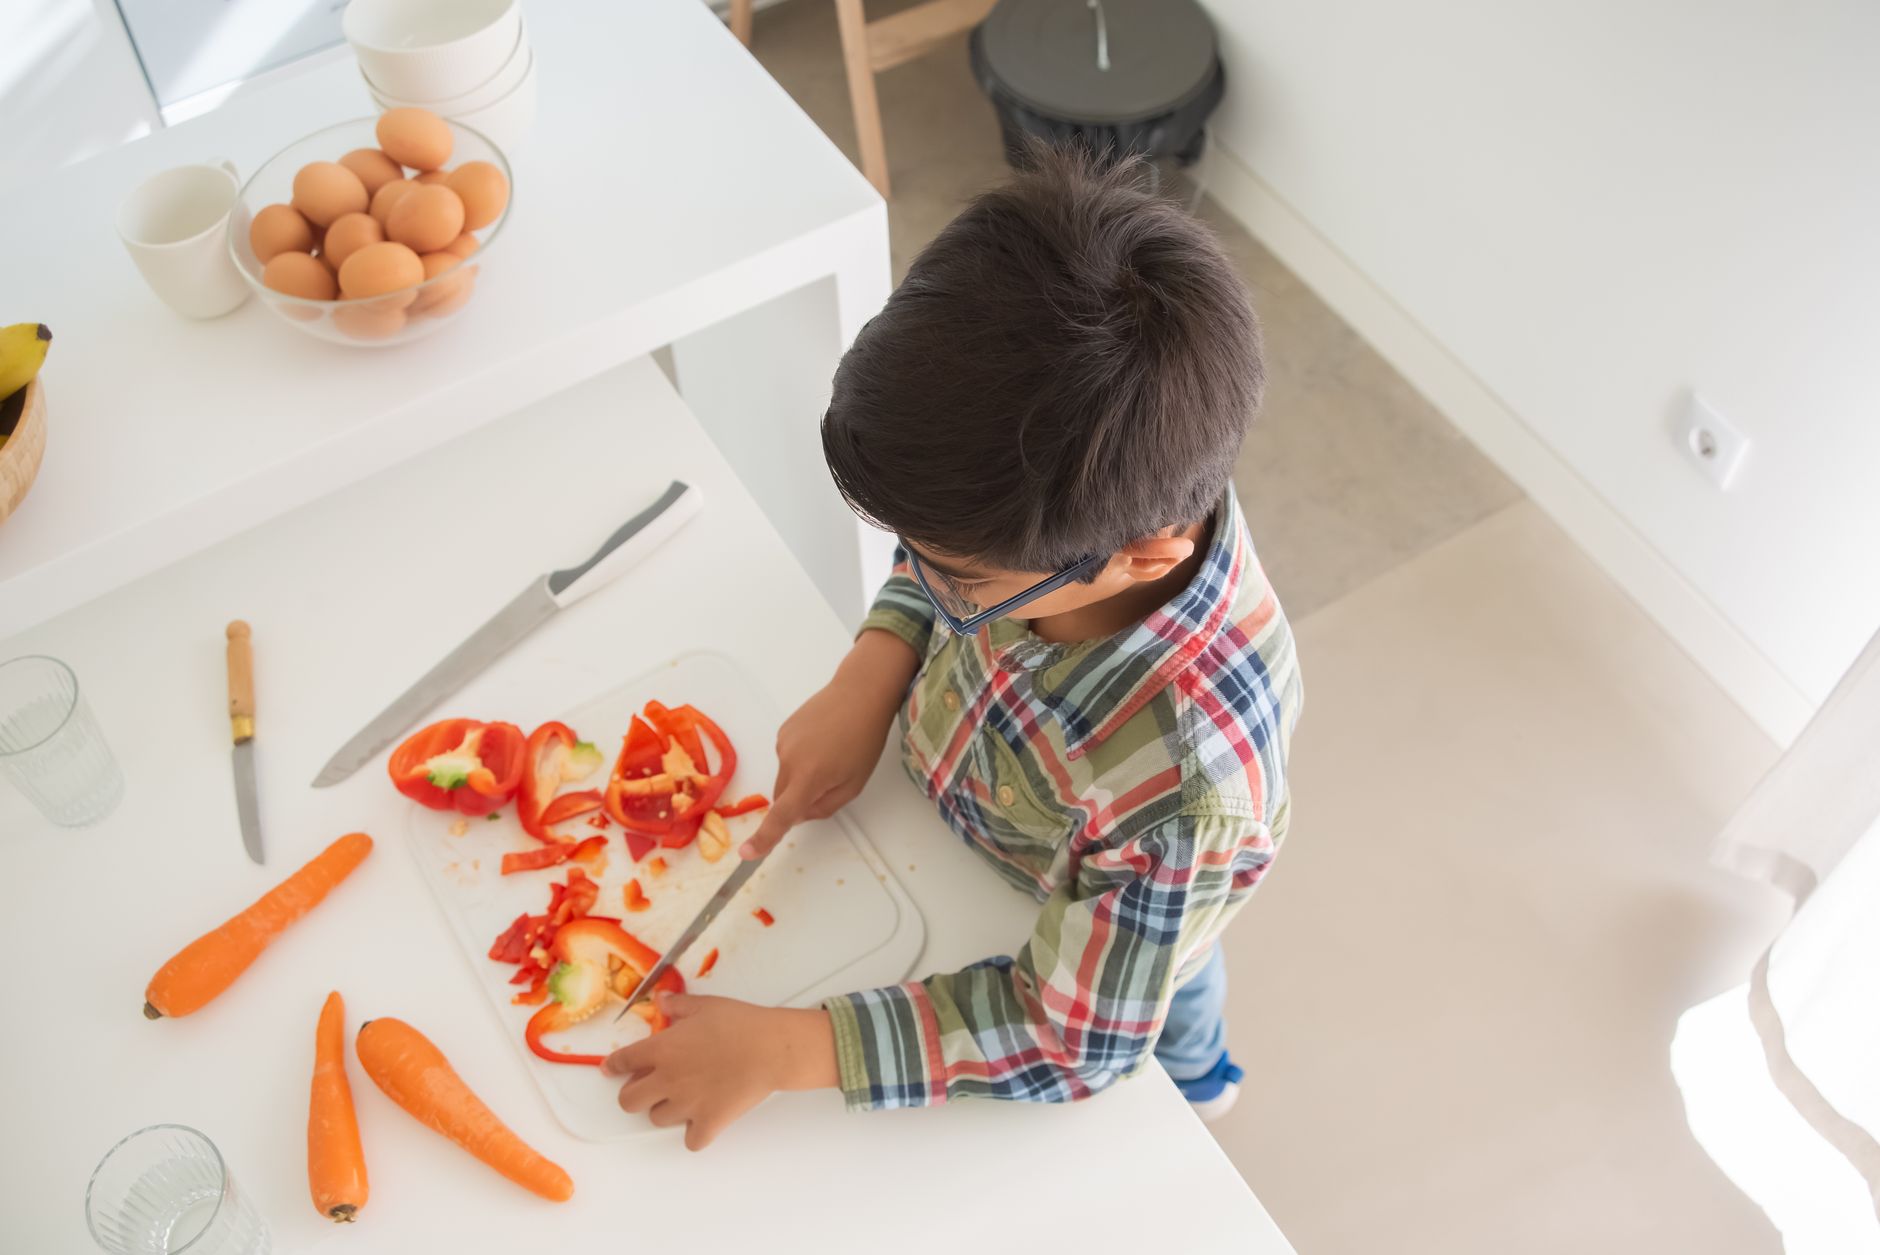
    • Use a sharp knife with proper training (start with the pinch grip and a soft vegetable like a banana, then work up)
    • Cook pasta, rice, or oatmeal on the stovetop
    • Make a basic soup or stew with supervision
    • Bake muffins, cornbread, or simple cookies from scratch
    • Understand food safety basics — temps, cross-contamination, handwashing
    • Help plan a simple family meal
    • Fry an egg or make French toast

    Here in Northwest Florida, we do a lot of cooking with what’s in season or what the garden gives us. Getting kids involved in that whole cycle — from planting to harvesting to cooking — is one of the most grounding things we do as a family. If you want to bring that piece in too, check out How to Involve Kids in Homestead Chores by Age — it pairs really well with what we’re talking about here.

    Practical Tips That Actually Make This Work

    Start with breakfast. It’s the lowest-pressure meal. No one’s starving and stressed waiting on it (usually). Eggs, toast, oatmeal, smoothies — all totally doable for elementary kids.

    Give them ownership over one meal a week. Even if it’s just Saturday lunch. Let them pick it, help you shop for it (or plan from what we have), and make it. The pride on their face when the family eats something they made is worth every spilled measuring cup.

    Don’t rescue them too fast. If they drop an egg, hand them a paper towel and let them clean it up. That’s part of it. If the pancakes are a little flat, eat them anyway and figure out together why that happened. The troubleshooting is the lesson.

    Keep good tools accessible. Kids need tools that actually fit their hands. Kids garden gloves for garden-to-kitchen tasks, a small cutting board that doesn’t slide, a whisk they can actually grip. Set them up to succeed.

    Use a cast iron skillet. I know that sounds like a hill, but cooking on a cast iron skillet teaches kids so much about heat management — and it’s non-toxic, which matters to me. No weird coatings flaking into our food.

    Talk about the food. Where did this chicken come from? What makes bread rise? Why do we salt pasta water? The conversation is the Charlotte Mason piece. It’s narration. It’s living education.

    Connecting Cooking to the Bigger Picture

    One of the reasons I love teaching cooking as part of our homeschool is that it’s inherently connected to everything else we value. It ties into our chickens and the eggs they give us. It ties into our garden and what we grow. It connects to simple living, seasonal rhythms, and the kind of capable, grounded childhood I want my kids to have.

    If you’re building out more of those rhythms in your home, Seasonal Living Ideas for Families is a post I come back to constantly — it’s full of simple ways to anchor your year around real, meaningful things instead of busyness.

    And when they’re cooking those backyard eggs, it doesn’t hurt to have good information on hand. Storey’s Guide to Raising Chickens is still my go-to flock reference, and the Kids’ Guide to Keeping Chickens is one my kids actually read on their own — it’s approachable and detailed without being overwhelming.

    You Don’t Have to Have It All Figured Out

    I’m going to be honest with you: our kitchen is not always peaceful. Sometimes someone cries because the eggs broke. Sometimes I forget to be patient and I jump in too fast and do it for them, and then I have to apologize for that. This is a practice, not a performance.

    But we keep showing up in the kitchen together, and slowly, surely, my kids are becoming people who know how to feed themselves and others. That’s the goal. Not Instagram-worthy cooking videos. Just capable, confident kids who know their way around a kitchen.

    That’s a life skill that will outlast any worksheet we ever did.


    📖 You Might Also Like:

    Frequently Asked Questions

    What age should kids start learning to cook?

    Kids can start participating in the kitchen as young as 2-3 years old with simple tasks like rinsing vegetables or stirring batter. By age 6-8 they can crack eggs and follow simple steps, and by 9-11 many kids can make a basic meal from start to finish with minimal supervision. The key is matching the task to what they’re developmentally ready for and letting them actually do it — not just watch.

    Is it safe for young kids to use the stove?

    With proper supervision and teaching, yes. Most kids around age 7-8 can begin learning basic stovetop skills like scrambling eggs or stirring oatmeal with a parent right there guiding them. Teach them about burner heat, what handles to watch, and never leaving something unattended. Starting on low heat with simple foods builds confidence safely.

    What are the most important cooking skills to teach elementary-age kids?

    The basics that matter most are: cracking and cooking eggs, measuring ingredients accurately, using a knife safely, reading and following a recipe, understanding basic food safety (handwashing, temperatures, cross-contamination), and making at least one simple meal from start to finish. These cover the foundations everything else builds on.

    How do I get my kids interested in cooking if they don’t want to help?

    Give them real ownership instead of just asking them to help you. Let them pick a recipe, choose a meal for the week, or be in charge of one specific dish. Kids disengage when they feel like a sous chef for your vision. When it’s genuinely theirs — including the failures — they stay invested. Tying cooking to something they already love (animals, gardening, a favorite food) helps too.

    Can cooking count as part of our homeschool curriculum?

    Absolutely. Cooking naturally covers math (fractions, measurement, timing), reading (following recipes), science (chemistry of baking, food safety), and practical life skills. In a Charlotte Mason approach especially, real-life tasks like cooking are core to the philosophy of living education. Many families using the Florida PEP scholarship incorporate cooking as part of their documented homeschool activities.

  • Best Kids Garden Tools That Actually Work (And Won’t Fall Apart After One Season)

    Best Kids Garden Tools That Actually Work (And Won’t Fall Apart After One Season)

    Best Kids Garden Tools That Actually Work (And Won’t Fall Apart After One Season)

    🌿 The Short Version: Most kids’ garden tools are flimsy plastic that break before the seeds even sprout — but a few brands actually get it right. This post covers what to look for, what to skip, and the specific tools our family uses to get real garden work done with elementary-age kids.

    This post contains affiliate links. I may earn a small commission at no extra cost to you.

    If you’ve ever handed your kid a cheap plastic trowel from the dollar section and watched it snap in half before they even hit dirt — you already know the problem. Most tools marketed to children are basically toys dressed up as garden tools. They’re sized small, sure. But they’re also so flimsy and poorly made that they can’t actually do anything useful, which means your kid gets frustrated, you get frustrated, and everybody ends up just standing there.

    We garden here in Northwest Florida pretty much year-round. I’m talking fall tomatoes, winter greens, spring herbs, summer okra in the blazing Pensacola heat. My kids are out there with me because that’s part of how we learn — Charlotte Mason called it “living education” and I just call it Tuesday. But for that to actually work, they need tools that function. Real tools, just appropriately sized.

    Here’s what we’ve learned after a few seasons of trial and error (and one very sad broken rake incident).


    What to Look For in Kids Garden Tools

    Before I get into specific picks, let me save you some money with a few quick guidelines.

    Skip the all-plastic sets. If it comes in a pastel gift box and costs $8 for four pieces, it’s going to break. Those tools can’t penetrate Florida’s sandy soil (or worse, our clay-heavy patches) with any kind of force.

    Look for metal heads with wooden or sturdy composite handles. These are real tools made small. They’ll last multiple seasons and actually do the job.

    Size matters — but not the way you think. The tool should be sized so your child can use it comfortably without bending awkwardly, but it should still be heavy enough to work. Lightweight doesn’t always mean better for kids — sometimes a little weight behind a trowel is what makes it dig.

    Involve them in picking. When kids have a say in their tools, they take ownership. We use our nature journal to sketch and plan the garden before we even start, and letting the kids pick their own gloves is part of that buy-in.


    The Kids Garden Tools We Actually Use

    1. A Good Trowel — The Non-Negotiable

    This is the workhorse of the garden. We look for a trowel with a stainless steel or carbon steel head and a handle that fits smaller hands without being so short it’s awkward. Radius Garden makes a great one, and DeWit offers scaled-down versions of their adult tools that are genuinely excellent.

    What we use ours for: transplanting seedlings (especially from our indoor seed starting kit), dividing herbs, and general digging. My second grader can actually transplant a pepper start without me doing it for her. That’s the goal.

    2. A Hand Cultivator / Claw

    Three-pronged hand cultivators are fantastic for kids because they can break up soil and pull weeds without needing a lot of force. Even my kindergartner can use one independently. We do most of our weeding this way in the cooler months when the garden beds are active.

    This is also great for aerating around established plants — something we do regularly in our beds because Florida soil compacts fast, especially after our afternoon thunderstorms all summer.

    3. A Small Garden Rake

    Not the leaf rake — the bow rake style, just smaller. Great for smoothing out beds before planting, which is something even a five-year-old can do with confidence. One job they can own start to finish. Pair this with some kids garden gloves and they’re ready to go.

    4. A Watering Can with a Removable Rose Head

    This sounds boring but it matters. The rose head (the sprinkle attachment) lets kids water seedlings without blasting them out of the soil. Without it, my son once watered a newly planted bed into a small flood. We still talk about it.

    Look for a one-gallon or smaller metal watering can. The metal ones hold up way better than plastic, and honestly they look better too. We hang ours on a hook in the garden shed.

    5. Rain Boots — Yes, This Counts

    Okay, not technically a tool, but absolutely essential equipment. We are outside in the rain, in the mud, stomping through the chicken area before heading to the garden beds. Proper kids rain boots that fit well and don’t let water in are non-negotiable in this family. My kids have learned to grab their boots before they grab their tools — and that’s a life skill I’m proud of.

    6. A Bug Catcher for the Inevitable Discoveries

    I know, I know — but hear me out. The second you turn over a shovelful of soil in a Florida garden, someone is finding a worm, a pillbug, a beetle larvae, or something completely unidentified. That is a nature study moment, and I’m not going to rush past it.

    We keep a bug catcher right in the garden basket so we can pause, observe, maybe sketch in the nature journal, and then return the critter to the soil where it belongs. This is the 1990s way of doing it — you don’t scroll past the interesting thing, you stop for it.

    📌 Love this? Save it to Pinterest so you can find it later!


    How We Use the Garden as a Classroom

    Gardening isn’t separate from homeschool in our house — it is homeschool, at least part of it. We track planting dates in our nature journals. We observe and sketch what’s growing. We measure plant height for math. We read seed packets for reading comprehension. We talk about the water cycle when it rains. We compost our kitchen scraps (if you want to start, check out my post on how to build a simple compost bin for beginners) and watch what happens over time.

    The chickens are part of this ecosystem too — they scratch through finished compost, eat garden pests, and produce the manure that feeds the soil. We use Storey’s Guide to Raising Chickens as a reference, and my older kids can now explain the nitrogen cycle using chickens and compost. That’s real science.

    For nature journaling in the garden specifically, Faber-Castell watercolors are our go-to. The colors are gorgeous, they’re easy to use outside, and they make the whole experience feel more like art than a worksheet — because it is.

    If you’re building out a more intentional outdoor learning space, my post on how to create a nature play yard in your backyard has a lot of overlap with what we’ve done in the garden area.


    Tips for Actually Getting Kids to Garden (Without It Becoming a Battle)

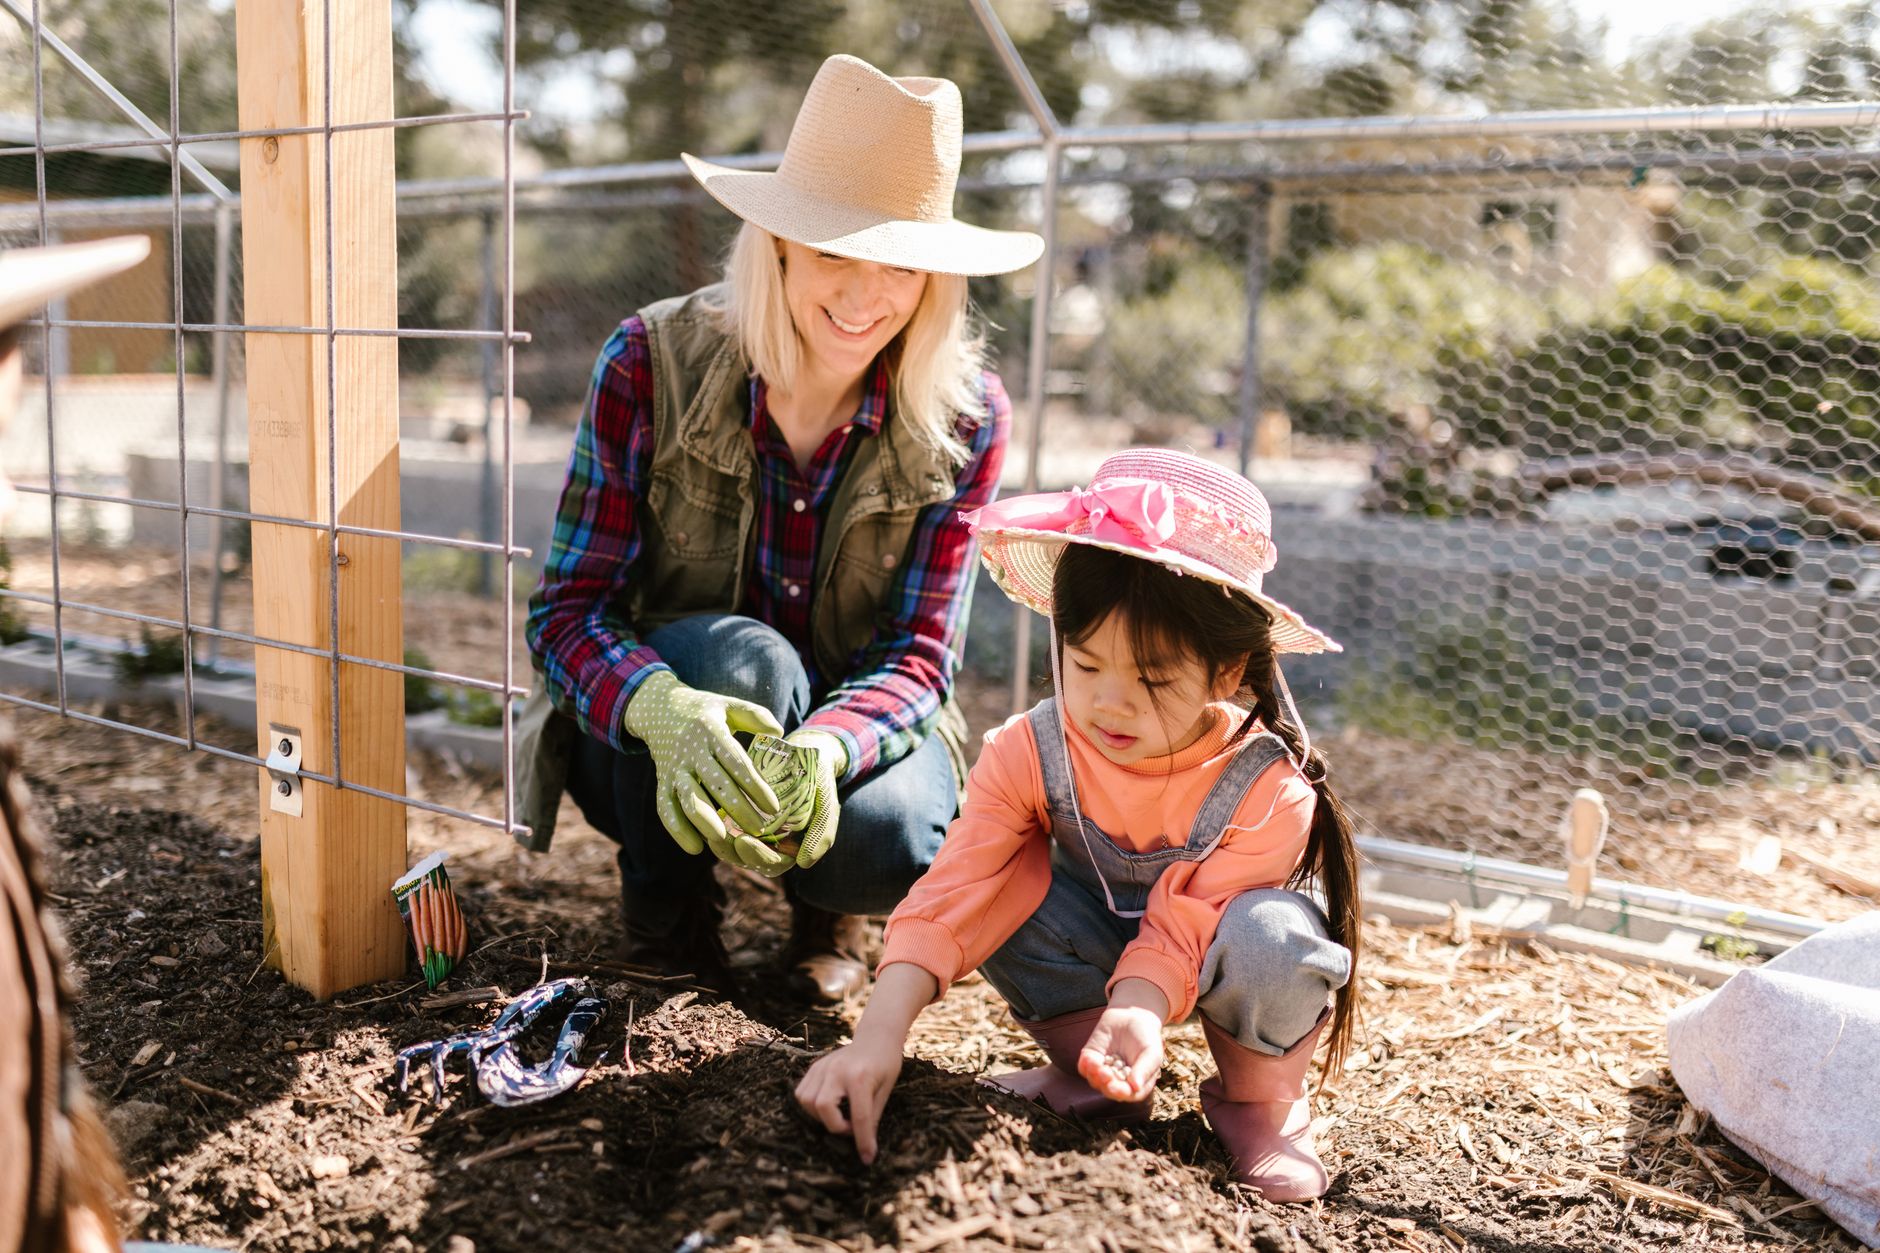
    • Give them their own space. Even if it’s one raised bed or two square feet, ownership changes everything. My daughter’s bed is hers to plant and tend as she chooses (within reason).
    • Let it get messy. Florida soil in July is wet and heavy and wonderful. Mud is not the enemy.
    • Don’t hover. Let them make mistakes — plant too close together, overwater, forget to weed. Natural consequences are the best teacher, and you can talk through what happened without any lecture required.
    • Connect it to real life. When they eat something they grew, it matters in a way nothing else can replicate. My pickiest eater will eat a tomato straight off the vine that he wouldn’t touch if I put it on his plate.

    For more on weaving these kinds of hands-on chores and skills into daily life, I really recommend reading through my post on how to involve kids in homestead chores by age — it’s one of the most practical things I’ve written.


    A Simple Starter Kit If You’re Just Beginning

    If you’re just setting up a kid-friendly garden and want a simple shopping list, here’s what I’d start with:

    That’s genuinely all you need to get started. You don’t need a fancy raised bed system or a Pinterest-perfect potting bench. You need good tools, some good soil, seeds, and a kid who’s allowed to get dirty.


    Honestly, some of my favorite homeschool moments have happened in the garden with muddy knees and nobody knowing what time it is. That’s the magic of it. When kids have tools that actually work, they feel capable — and that feeling carries way beyond the garden. We want to raise kids who know how to do real things in the real world. Gardening is one of the most grounding, literal ways to do exactly that. So get them good tools. Let them dig. See what grows.


    📖 You Might Also Like:

    Frequently Asked Questions

    What are the best garden tools for young kids ages 4-7?

    For young kids in the 4-7 range, the most useful tools are a sturdy metal-head trowel, a hand cultivator, and a small watering can with a removable rose head. Skip all-plastic sets — they break fast and can’t actually penetrate real soil. Look for scaled-down versions of real garden tools with wooden or composite handles. Adding a pair of kids garden gloves and rain boots makes them feel like real gardeners, which matters more than you’d think at that age.

    Are plastic kids garden tools worth buying?

    Most cheap plastic kids garden tool sets are not worth buying — they’re essentially toys and will snap under any real use. If you want tools your kids can actually garden with, look for metal heads (stainless or carbon steel) on appropriately sized handles. A few dollars more upfront means tools that last multiple seasons instead of one afternoon.

    What size garden tools should I get for a 6-year-old?

    For a 6-year-old, look for tools with handles around 10-14 inches long — short enough to control comfortably but not so short that they have to crouch awkwardly. The tool head should be proportionally smaller than an adult version but still made of metal so it can do real work. Brands like Radius Garden and DeWit make genuinely child-appropriate tools in this range.

    How do I get my kids interested in gardening?

    Give them ownership — their own small bed or even just a container they’re responsible for. Let them choose what to plant. Use a nature journal to sketch plants and track growth. Involve them in the full cycle from seed to table. The biggest thing is to step back and let them do it themselves, even imperfectly. Kids who feel capable in the garden come back to it. Kids who feel micromanaged don’t.

    Can gardening count as homeschool learning?

    Absolutely — and it covers more subjects than you’d expect. Gardening naturally incorporates science (plant biology, soil health, ecosystems, water cycle), math (measuring, counting, spacing), reading (seed packets, garden journals, nature books), and even art through nature journaling and sketching. For Charlotte Mason homeschoolers especially, the garden is one of the most natural extensions of a living education approach.

  • Outdoor Play Ideas for Kids That Need Zero Equipment (And Why That’s Actually the Point)

    Outdoor Play Ideas for Kids That Need Zero Equipment (And Why That’s Actually the Point)

    Outdoor Play Ideas for Kids That Need Zero Equipment (And Why That’s Actually the Point)

    🌿 The Short Version: You don’t need a single piece of plastic to give your kids a rich, memorable outdoor childhood. This post is packed with no-equipment outdoor play ideas that build creativity, resilience, and connection — the same way kids played in the 1990s, and honestly, the way they were always meant to.

    This post contains affiliate links. I may earn a small commission at no extra cost to you.

    Somewhere along the way, we got sold the idea that kids need stuff to play outside. A water table. A playset. A specific kit with a specific purpose. And listen — I’m not knocking any of that. We have some of it too. But some of our best summer afternoons here in Northwest Florida have looked like this: kids barefoot in the backyard, chasing lizards along the fence line, making up elaborate stories about kingdoms and caves, completely unbothered by the heat and completely unaware that I was watching from the porch with my coffee going cold.

    That’s the play I grew up with. And it’s the play I’m fighting for my kids to have.

    If you’ve got a yard, a sidewalk, a patch of woods, a stretch of beach, or even just a driveway — you have everything you need. Here’s how we make it work.


    Why No-Equipment Play Is Actually Better

    This isn’t just a budget thing (though hey, saving money is never bad). It’s a brain thing. When kids don’t have a predetermined toy telling them what to do, they have to invent it themselves. That’s the whole Charlotte Mason idea of letting children be the narrators of their own experience — giving them space and time to observe, wonder, and create without adult direction.

    Unstructured outdoor play builds problem-solving, negotiation skills, physical coordination, and emotional regulation in ways that structured activities simply can’t replicate. And here in Florida, where we have gorgeous outdoor weather about nine months of the year — and survivable weather the other three if you head out early enough — we really have no excuse not to use it.


    No-Equipment Outdoor Play Ideas by Category

    Imaginative and Pretend Play

    Build a fort from sticks and leaves. This is a perennial favorite at our house. The kids spend more time building it than playing in it, and that’s fine — building is the play. They argue, negotiate, problem-solve, and eventually come up with something they’re genuinely proud of.

    Create a mud kitchen. Find a shady corner of the yard, add water from the hose, and let them cook. Mud pies, acorn soup, leaf salad — the whole menu. Messy? Yes. Worth it? Absolutely.

    Pretend the yard is a wilderness survival camp. This one goes well with nature study. Who can find the most different types of leaves? Who can identify a bird by sound? We keep a nature journal and a copy of the Sibley bird guide on the back porch for exactly this reason — so when curiosity strikes, we can chase it.

    Set up an outdoor “school” or market. My daughter has run a full pretend farmers market in our backyard using sticks, rocks, leaves, and pinecones as currency. Zero dollars. Maximum engagement.


    Nature Study and Discovery

    Go on a bug hunt. Flip over logs, check under rocks, dig in the soil. Florida has bugs — that is not a secret — and kids who grow up handling roly-polies and learning the names of beetles are kids who aren’t afraid of the natural world. If you want to take it up a notch, a pocket microscope or a simple bug collection kit turns a casual hunt into a full-on science lesson.

    Track the chickens. If you have backyard hens, you basically have a built-in nature study curriculum. My kids have learned more about animal behavior, biology, and responsibility from our flock than from any textbook. They watch the pecking order shift, notice when someone’s molting, and ask questions I genuinely have to look up. If you’re newer to chickens and want your kids more involved, Storey’s Guide to Raising Chickens and the kid-specific guide are both great for making it a real learning experience. (See also: How to Involve Kids in Homestead Chores by Age — that post has completely changed how we approach morning chores around here.)

    Cloud watching and weather journaling. Lay on a blanket and just look up. Name the clouds. Sketch them. Notice if the wind has shifted. In Florida, afternoon storm watching is basically a sport — we get the most dramatic skies, and the kids have learned to read them pretty well.

    Start a nature collection. Feathers, shells, interesting rocks, seed pods. No equipment required. Just curiosity and maybe an egg carton or jar from the recycling bin to display it all.

    📌 Love this? Save it to Pinterest so you can find it later!


    Classic 1990s Outdoor Games

    This is my love language, honestly. These are the games I played until the streetlights came on, and they translate perfectly to our backyard right now.

    Freeze tag, TV tag, shadow tag. No equipment. Needs at least two kids. Produces a lot of laughter and a lot of grass-stained knees.

    Red Light Green Light and Simon Says. Great for littles and big kids together — we play these across a big age range and everyone has fun.

    SPUD. If you have a soft ball, great. If not, a rolled-up sock works fine. Classic game, teaches so many things.

    Capture the Flag. Perfect for the late afternoon when the Florida heat finally backs off a little. Use old bandanas or dish towels as flags. Kids will play this for hours.

    Chalk obstacle courses. Even if it’s just your driveway, a piece of sidewalk chalk can create an entire world. Hopscotch, balance beams, mazes — let the kids design it themselves.

    Follow the leader on the nature trail. Whether you have a wooded lot or a neighborhood park nearby, this game gets surprisingly complex when kids are leading each other over logs and under branches.


    Sensory and Creative Play Outside

    Water play with just a hose and containers. Repurpose old pots, cups, and bottles. Give them a hose and a mission — fill the big pot without touching the small one, create a water canal, see how high they can build a mud dam. Engineering in action.

    Outdoor art with found materials. Arrange leaves, sticks, and rocks into mandalas or patterns on the ground. Take a photo of it. Let it go. This is a beautiful mindfulness practice for kids who don’t even know that’s what it is. Add some watercolor paints and a nature journal for a Charlotte Mason nature study moment that feels completely natural and not at all like school.

    Barefoot sensory walks. Grass, dirt, sand, mud, pinecones — take a walk and name every texture. This sounds simple, but for little ones it’s genuinely rich.

    For more ideas on how we weave this kind of play into our family’s rhythms throughout the year, check out our post on Seasonal Living Ideas for Families — it’s one of my favorites I’ve written.


    A Few Practical Notes for Florida Families

    If you’re in the Panhandle like us, you know that outdoor time in July and August means early morning or after 5pm, period. We do our big outdoor play blocks right after morning chores — usually 8 to 10am — and then again in the evening before dinner. Slathering on some non-toxic sunscreen is just part of the morning routine at this point.

    Also: kids’ rain boots are genuinely the best investment for outdoor play in Florida. After-storm puddles and muddy garden beds are some of our kids’ favorite play spaces, and the right boots mean I’m not stressed about shoes.

    And if your kids are heading into the woods or brushy areas, we love Wondercide as our go-to non-toxic bug spray — safe for kids, safe for our dog, and it actually works on Florida mosquitoes, which feel like they were designed to be invincible.


    The Real Point

    I think a lot of us — myself included, in weaker moments — reach for stuff when what our kids actually need is time. Time outside, time to be bored, time to figure out what to do when there’s nothing to do. That boredom is the starting point for almost every creative, memorable outdoor adventure they’ll ever have.

    You don’t need to buy anything to give your kids a rich outdoor childhood. You just have to open the back door and let them go. That’s what our parents did for us, and honestly? We turned out okay.

    If you’re looking for more ways to build that kind of intentional, simple family life, I think you’ll love our post on Intentional Parenting: What It Actually Looks Like Day to Day — it’s the heart behind everything we do here.

    Now go kick your kids outside. 🌿


    📖 You Might Also Like:

    Frequently Asked Questions

    What are some outdoor play ideas for kids with no equipment?

    Some of the best no-equipment outdoor play ideas include building stick forts, playing classic games like freeze tag and capture the flag, going on bug hunts, making mud kitchens, cloud watching, and creating nature mandalas from leaves and rocks. Kids don’t need purchased toys to play richly — they need time, space, and permission to explore.

    How do I get my kids to play outside without screens or toys?

    Start by simply sending them out with no agenda. If they complain of boredom, resist the urge to fix it — boredom is actually the starting point for creative play. You can also give them a loose prompt like ‘find five different bugs’ or ‘build something using only what you find in the yard’ to spark imagination without over-directing them.

    What outdoor games did kids play in the 1990s?

    Classic 1990s outdoor games include freeze tag, shadow tag, TV tag, SPUD, Red Light Green Light, Simon Says, Capture the Flag, hopscotch, and kick the can. These games require little to no equipment and work across a range of ages, making them perfect for families with multiple kids.

    How can I make outdoor play part of our homeschool day?

    Outdoor play integrates naturally into a Charlotte Mason homeschool through nature journaling, bug hunts, bird watching, cloud study, and gardening. Even unstructured outdoor time counts as physical education, sensory development, and social learning. Try scheduling a dedicated outdoor block each morning before the Florida heat peaks.

    What can kids do outside in Florida during the summer heat?

    In Florida summers, the best outdoor play happens early morning (before 10am) or in the evening after 5pm when temperatures drop a little. Great hot-weather options include water play with a hose and containers, shady stick fort building, early morning nature walks, and evening games like capture the flag or freeze tag. Always apply non-toxic sunscreen and keep water bottles handy.

  • Family Rhythm vs Routine: What Actually Works (and Why the Difference Matters More Than You Think)

    Family Rhythm vs Routine: What Actually Works (and Why the Difference Matters More Than You Think)

    Family Rhythm vs Routine: What Actually Works (and Why the Difference Matters More Than You Think)

    🌿 The Short Version: A routine tells you what time things happen. A rhythm tells you what happens next — and for most families, especially homeschool families, rhythm wins. Here’s how we found ours and how you can too.

    This post contains affiliate links. I may earn a small commission at no extra cost to you.

    If you’ve ever made a beautiful color-coded schedule for your homeschool day — you know, the one you laminated and everything — and then watched it fall apart by 9:15 a.m. because someone let the chickens out early and now there’s a dog covered in mud and a kid crying over math… you’re in good company.

    That was us. More than once.

    For the longest time I thought the answer was a better routine. A tighter one. More specific. More structure. But every time I tried to force our days into a rigid timetable, I ended up frustrated, the kids ended up resentful, and nobody was actually learning anything meaningful.

    Then I stumbled onto this idea — mostly through Charlotte Mason reading and a whole lot of trial and error — that what we actually needed wasn’t a routine at all. We needed a rhythm.

    And y’all, it changed everything.

    So What’s the Actual Difference?

    A routine is clock-based. Math at 9:00. Read-aloud at 10:30. Lunch at noon. It sounds organized, and honestly, for some families it works great. But when you’re homeschooling elementary kids in Florida where the weather shifts in twenty minutes, you have backyard animals that don’t care about your schedule, and your kids have wildly different attention spans depending on the day? Rigid routines tend to create more stress than they solve.

    A rhythm is sequence-based. Instead of math at 9:00, it’s we do morning chores, then we do lessons, then we go outside. Instead of a time on a clock telling you what comes next, it’s the natural flow of the day. You move through it together, and the kids start to internalize what comes next without being told — because they’ve lived it enough times that it feels natural.

    Charlotte Mason talked about this. The idea that children thrive when life has a gentle, predictable cadence — not because every minute is accounted for, but because the day has a shape they can feel.

    That’s the difference. Routines are imposed. Rhythms are lived.

    Why Rhythm Works Better for Homeschool Families

    Here’s what I notice when our days have a good rhythm going: my kids wake up and already know what we’re doing. They’re not asking “what are we doing today?” every five minutes. They’re not anxious. They just… move into the day.

    We start with morning chores — feeding the chickens, collecting eggs, letting the dog out, making beds. That physical movement first thing in the morning grounds everybody. Then we come in for breakfast and our morning basket time. Then lessons. Then outside time, which honestly in the Pensacola heat means either early morning or late afternoon depending on the season.

    Nobody’s watching a clock. But everybody knows what comes next.

    That sense of what comes next is actually what kids are craving when they seem clingy or whiny or dysregulated. They’re not always asking for more screen time or less school — sometimes they’re just asking for predictability. Rhythm gives them that without locking you into something that breaks down the moment life happens.

    Building a Rhythm That’s Actually Yours

    Here’s the thing — I can’t hand you our rhythm and tell you to copy it. Your family’s rhythm has to fit your actual life. But I can tell you how we built ours.

    Start with anchors, not a full schedule

    Instead of planning every hour, pick 3-4 anchor points that stay consistent every day:

    • Morning (wake up, chores, breakfast)
    • Learning time (whatever that looks like for your curriculum)
    • Outdoor/free time
    • Evening wind-down

    Everything else flows between those anchors. You’re not scheduling every minute — you’re just making sure the big beats of the day are reliable.

    Let the outdoors shape your rhythm

    If you’re in Northwest Florida, you already know — you do NOT go outside at 2:00 p.m. in July unless someone’s getting paid for it. We plan our nature study, garden time, and chicken chores for early morning or around 5 p.m. when things cool down. Let the Florida seasons actually shape when you go outside instead of fighting it.

    This is also where nature journaling becomes part of the rhythm rather than a scheduled subject. We bring our nature journals outside during those cooler windows and just… sit and observe. Some days that’s ten minutes. Some days it turns into an hour. A good rhythm holds space for that.

    Tie learning to natural transitions

    Read-aloud works great right after lunch when everyone’s a little sleepy and nobody wants to do math. Nature study works after outdoor time because they’re already keyed in. Handwriting and focused work — we use Handwriting Without Tears — happens in the morning when brains are fresh.

    You’re not forcing learning into arbitrary time slots. You’re finding where it fits naturally in your family’s energy flow.

    📌 Love this? Save it to Pinterest so you can find it later!

    What About Actual Curriculum and Accountability?

    If you’re on the Florida PEP scholarship like we are, you still have to get things done and document them. A rhythm doesn’t mean unschooling or winging it — it means the structure serves you instead of the other way around.

    We still use real curriculum. Math-U-See is a great example of something that fits naturally into a rhythm because it’s mastery-based — you work on a concept until it clicks, not until Tuesday at 10:00 says you’re done. Same with All About Reading — it’s sequential and self-pacing, which means it meets your kid where they are instead of where the clock says they should be.

    If you’re still sorting out your homeschool structure in Florida, I wrote about Florida Homeschool Umbrella School Options Explained — worth a read if you’re newer to navigating PEP.

    The 1990s Secret We Keep Forgetting

    Here’s something I think about a lot. Kids who grew up in the 80s and 90s? They didn’t have scheduled playdates and enrichment activities every afternoon. They went outside. They came home when the streetlights came on. They were bored — and they figured out what to do with it.

    That boredom, that unstructured time? It wasn’t wasted. It was doing something really important. It was teaching kids to regulate themselves, to be creative, to make their own fun.

    A good family rhythm builds that in. When kids know that free time comes after the work is done, and that free time is genuinely free — no screens, go find something to do — they start to fill it in ways that surprise you. My kids have built elaborate stick forts, started a worm farm, named every chicken individually, and turned the bug catcher kit into a whole scientific study involving a hand-drawn field guide.

    None of that was scheduled. All of it was made possible because the rhythm of our day created space for it.

    For more on building this kind of intentional daily life, I really loved writing Intentional Parenting: What It Actually Looks Like Day to Day — it goes hand in hand with everything we’re talking about here.

    When the Rhythm Breaks (And It Will)

    Chickens get sick. Storms roll in off the Gulf. Kids have bad days. Someone needs a slow morning. The rhythm will break — and that’s okay. The beauty of rhythm over routine is that it’s resilient. You don’t have to restart a whole color-coded schedule. You just find your way back to the next anchor point and keep going.

    We also do a loose seasonal rhythm adjustment. Summer in Florida looks different than fall. We lean into Charlotte Mason Nature Study Journal Prompts by Season to help us shift what we’re paying attention to outdoors as the year moves. It keeps things feeling fresh without blowing up the whole structure.

    You Don’t Need a Perfect System

    You need one that fits your people. That’s it.

    If you’ve been white-knuckling a routine that isn’t working, give yourself permission to let it go. Try anchors. Try sequence. Try asking your kids what part of the day feels the most like home to them — you might be surprised what they say.

    Our rhythm isn’t pretty. It involves muddy boots and missed lessons and some days where school happens in the car on the way to pick up chicken feed. But it’s ours. And most days, it works — not because it’s perfect, but because it’s predictable enough that everyone feels safe and free enough that everyone feels like themselves.

    That’s the goal, mama. Not a perfect schedule. A rhythm your family can actually live.


    📖 You Might Also Like:

    Frequently Asked Questions

    What is the difference between a family rhythm and a family routine?

    A routine is clock-based — specific activities are tied to specific times. A rhythm is sequence-based — you move through the day in a predictable order, but not on a strict timetable. Rhythms tend to be more flexible and sustainable, especially for homeschool families with young children.

    How do I create a daily rhythm for homeschooling?

    Start by identifying 3-4 anchor points in your day — morning chores, learning time, outdoor time, and evening wind-down. Let everything else flow naturally between those anchors. Over time, your kids will internalize the sequence and move through the day without needing constant reminders or a strict clock.

    Can a Charlotte Mason homeschool have a structured schedule?

    Absolutely — Charlotte Mason actually emphasized the importance of regular habits and a gentle structure to the day. The key is that structure serves the child rather than stressing them. A Charlotte Mason rhythm often includes morning basket time, nature study, living books, and plenty of unstructured outdoor play woven together naturally.

    What if our daily rhythm keeps falling apart?

    That’s normal, especially at first. The advantage of rhythm over strict routine is that it’s more resilient — when things go sideways, you just return to the next anchor point and keep going. You don’t have to restart a whole schedule. Give yourself grace and remember that building a rhythm takes several weeks of consistent repetition before it feels natural.

    Is a daily rhythm enough structure for Florida PEP scholarship requirements?

    Yes — a rhythm absolutely supports meeting Florida PEP homeschool requirements. You still use real curriculum and document learning; the rhythm just determines how and when your day flows rather than locking you into rigid time blocks. Many Florida PEP families use mastery-based curriculum like Math-U-See or All About Reading specifically because it fits naturally into a flexible rhythm-based day.

  • Simple Living with Kids: Practical Tips That Actually Work for Real Families

    Simple Living with Kids: Practical Tips That Actually Work for Real Families

    Simple Living with Kids: Practical Tips That Actually Work for Real Families

    🌿 The Short Version: Simple living with kids isn’t about being perfect or having a Pinterest-worthy home — it’s about stripping away what drains you so there’s more room for what matters. This post shares the practical, unglamorous tips our family actually uses to live slower, lighter, and with a whole lot more joy.

    This post contains affiliate links. I may earn a small commission at no extra cost to you.

    Let me tell you what simple living with kids looked like in our house last Tuesday. One child was out back checking on the chickens in her muddy rain boots, the other was belly-down in the grass trying to catch a lizard with his bare hands, and I was inside washing the same cast iron skillet I’ve washed about ten thousand times while a loaf of sourdough cooled on the counter. No apps running. No errands scheduled. No activities to rush off to.

    Was it quiet and idyllic? Kind of. Was someone also arguing with someone else over whose turn it was to collect eggs? Absolutely.

    Here’s what I want you to know: simple living with kids is not aesthetic. It’s not a curated feed or a course you buy. It’s a series of small, intentional decisions you make over and over again — and a lot of letting go. If you’re looking for practical, real-life ways to actually simplify your family’s daily life, you’re in the right place.

    Start With the Calendar, Not the Clutter

    Everyone tells you to declutter first. And yes, stuff matters — we’ll get there. But in my experience, the thing that makes family life feel the most chaotic is an overscheduled calendar, not an overstuffed closet.

    We protect our slow mornings fiercely. Our Charlotte Mason homeschool rhythm is built around a morning basket, outdoor time, and a handful of focused lessons — not a packed schedule that has us running from thing to thing before lunch. If you want to read more about how we’ve simplified our overall pace, I wrote about that in depth over here: How to Slow Down and Simplify Family Life (Without Feeling Like You’re Missing Out).

    Practical tip: Look at your weekly calendar and find one recurring commitment that drains more than it gives. Just one. See what life feels like without it for a month.

    Give Kids Less — and Watch Them Do More

    This is the one people push back on the most, but it’s the one I believe in completely. When kids have fewer toys, fewer options, and fewer structured activities, they get creative. They get bored — which is actually where the good stuff happens.

    Our kids spend huge chunks of their afternoons outside. They’ve built forts, studied ant hills, caught bugs in their bug collection kit, and spent a full hour one afternoon just watching our chickens sort out their pecking order drama. That’s science. That’s social studies. That’s the 1990s childhood I grew up having in Florida — where you went outside after breakfast and came in when the streetlights came on.

    You don’t need a lot of gear for outdoor play, but a few things genuinely help: a solid bug catcher kit keeps them occupied for ages, and if you’ve got multiple kids who like to roam the yard or neighborhood, walkie talkies are genuinely one of the best things we ever bought.

    Build Simple Rhythms Around Nature

    One of the most grounding things we do as a family is keep consistent nature rhythms — things that repeat, that anchor the day or week, that connect us to what’s actually happening outside.

    For us that looks like:

    • Checking on the chickens every morning (non-negotiable — they will tell you if you forget)
    • A nature walk at least twice a week, usually around our Pensacola neighborhood or a local preserve
    • Weekly nature journaling with our nature journal and Faber-Castell watercolors
    • Bird identification with our Sibley Birds guide — we have surprisingly fun arguments about whether something is a fish crow or an American crow

    If you’re looking for ideas on how to bring nature journaling into your homeschool in a way that actually works for real kids, check out: Charlotte Mason Nature Study Journal Prompts by Season (For Real Kids Who’d Rather Be Outside).

    Nature rhythms work because they’re free, they’re flexible, and they require no prep. You just go outside. That’s it.

    📌 Love this? Save it to Pinterest so you can find it later!

    Simplify the Stuff (Without the Overwhelm)

    Okay, now we talk about clutter — but not in a “throw everything away and live in a white room” kind of way. Just in a “does this thing actually serve our family” kind of way.

    For our homeschool, simple means choosing curriculum that’s gentle and effective without requiring me to be a project manager. We use All About Reading for our youngest and have loved how straightforward it is, and Math-U-See has been a game changer for the way my visual learner actually understands math instead of just memorizing it. The goal is always: does this make our days feel lighter, or heavier?

    For the home side of things, we’ve slowly replaced complicated products with simpler ones — non-toxic cleaners from Grove Collaborative, beeswax wrap instead of plastic wrap, wool dryer balls instead of dryer sheets full of fragrance. None of these swaps happened overnight. We just made a new choice every time something ran out.

    A Few Practical Home Swaps That Stuck

    • Replace paper towel habit → bar mop towels or old cut-up t-shirts
    • Swap plastic produce bags → reusable mesh bags
    • Ditch chemical bug spray → Wondercide (especially important in Florida, y’all — the mosquitoes are a whole personality here)
    • Toss the plastic water bottles → stainless steel water bottles the kids actually keep track of

    Let the Kids Do Real Work

    This might be the most underrated part of simple family living. Kids who do real work — actual contributing-to-the-household work — are calmer, more capable, and honestly more content than kids who are entertained all day.

    Our kids help with the chickens, help in the garden, help with meal prep, help fold laundry. Not perfectly. Not without complaint sometimes. But they do it. And the chickens have been the single best teacher in this department. When you have animals that depend on you, there’s no negotiating. The coop needs to be cleaned, the water needs to be refilled, and the eggs need to be collected. Real responsibility. Every day.

    If you’re thinking about adding backyard chickens to your simple living setup, Storey’s Guide to Raising Chickens is the book I recommend to everyone, and the Kid’s Guide to Keeping Chickens is one my kids have both read cover to cover. You can also browse the best breeds for Florida’s heat if you’re figuring out where to start.

    Stop Optimizing, Start Repeating

    The secret ingredient in simple living that nobody talks about? Repetition. Not novelty.

    We eat the same rotation of simple meals. We follow the same basic daily rhythm. We do the same Saturday morning chores before anyone gets to do anything fun. Predictability isn’t boring when you’re a kid — it’s safe. It’s grounding. It frees up mental energy for everyone because nobody’s wondering what comes next.

    Simple living isn’t something you achieve and then maintain. It’s something you keep choosing, especially when the world keeps telling you to add more, do more, sign up for more. The answer is almost always: less.


    If you’re at the beginning of simplifying your family’s life, I want you to hear this: you don’t have to do it all at once. Pick one thing. The calendar, the clutter, the curriculum, the chicken coop — whatever feels most urgent. Start there. Live with it for a while. Then pick the next thing.

    Our life looks nothing like what I thought a homeschool family would look like five years ago. It’s messier, slower, louder, and so much better. The dirt under my kids’ fingernails and the egg carton on my counter and the nature journal sitting open on the table — that’s it. That’s the whole dream, right there.


    📖 You Might Also Like:

    Frequently Asked Questions

    What does simple living with kids actually look like day to day?

    Simple living with kids looks like consistent daily rhythms, less scheduled activity and more free play, real chores that contribute to the household, and intentional choices about what comes into your home and onto your calendar. It’s not perfect — it’s just more deliberate.

    How do I get started with simple living when my life already feels overwhelming?

    Start with just one area — most people find the calendar is the highest-impact place to begin. Look for one recurring commitment that drains more than it gives, and remove it for a month. Once you feel that relief, you’ll have the motivation to simplify the next thing.

    Is simple living compatible with homeschooling?

    Absolutely — in fact, a Charlotte Mason or nature-based homeschool approach is one of the most naturally simple education styles there is. It prioritizes living books, outdoor time, and gentle daily rhythms over heavy curriculum loads and constant busyness.

    How do I get my kids on board with a simpler, less screen-focused lifestyle?

    Fill the space that screens occupied with things that are genuinely compelling — outdoor play, real tools like bug catchers or walkie talkies, animals to care for, and creative freedom. Kids don’t actually prefer screens to a rich, interesting outdoor life. They just default to screens when nothing else is available.

    What are the best first steps toward a non-toxic simple home with kids?

    The easiest way to start is by replacing things as they run out rather than overhauling everything at once. When your dish soap runs out, replace it with a non-toxic option. When dryer sheets run out, switch to wool dryer balls. Small, consistent swaps over time add up to a genuinely different home without the overwhelm.

  • How to Slow Down and Simplify Family Life (Without Feeling Like You’re Missing Out)

    How to Slow Down and Simplify Family Life (Without Feeling Like You’re Missing Out)

    How to Slow Down and Simplify Family Life (Without Feeling Like You’re Missing Out)

    🌿 The Short Version: Slowing down family life doesn’t mean doing less — it means doing what actually matters with more presence and intention. In this post, I’m sharing the real, practical shifts our family made to step off the hamster wheel and actually enjoy the life we’re building.

    This post contains affiliate links. I may earn a small commission at no extra cost to you.

    There was a season — not that long ago — where I’d look at our days and think, how are we this busy when we’re literally home all day? Homeschooling, errands, activities, commitments we said yes to because saying no felt uncomfortable. The days were full but somehow hollow. I was moving through our life instead of living it.

    If that hits close to home, pull up a chair. This one’s for you.

    Slowing down isn’t a personality type. It’s not something you either are or aren’t cut out for. It’s a series of small, deliberate choices — and honestly? The more we leaned into it, the more our kids started to thrive. Less schedule. More chickens. More mud. More of the good stuff.

    Here’s what’s actually worked for our family.


    Start by Naming What You Actually Want Your Days to Feel Like

    This sounds soft, but it’s the most practical thing I’ve done. Before you cut anything or add anything, just sit with this question: What do I want our family life to feel like?

    For us, the answer was simple. We wanted our days to feel like a long summer afternoon from the 1990s — kids outside, nobody watching the clock too hard, dinner made at home, a dog underfoot. We wanted margin. We wanted boredom, even, because boredom is where creativity lives.

    Once you name it, you have a filter. Every time someone asks you to add something to your calendar, you can hold it up to that vision and ask: does this fit, or does this crowd it out?


    Protect Morning Time Like It’s Sacred

    Our mornings used to be chaotic. Now they’re slow on purpose.

    We start with our morning basket — read-alouds, a little poetry, nature observation out the back window while coffee’s brewing. The kids feed the chickens before anything academic happens. There’s something grounding about starting the day with living things that depend on you. It sets a tone.

    If you’re a Charlotte Mason family or even just curious about the approach, protecting that unhurried morning rhythm is one of the best things you can do. Check out Charlotte Mason Nature Study Journal Prompts by Season (For Real Kids Who’d Rather Be Outside) for ideas that fit right into a slow morning.

    We keep a nature journal at the kitchen table and my kids will often sketch something before we ever crack a curriculum book. It’s become a ritual, and rituals are what hold a family together.


    Cut the Activities — I Mean Really Cut Them

    I know. This is the one that stings.

    We live in the Pensacola area, and there is no shortage of things to sign your kids up for. Sports leagues, co-ops, classes, events every weekend. And a lot of it is genuinely good. But good doesn’t mean necessary, and a full calendar isn’t the same as a full life.

    We made a rule: one outside commitment per kid at a time. That’s it. And honestly? Our kids haven’t missed out. They’ve gained something — long, wandering afternoons where they build forts, catch lizards, argue and then figure it out, dig in the dirt, and generally do exactly what kids were made to do.

    A bug collection kit has provided more genuine learning in our backyard than many organized activities we’ve paid for. Same with a pocket microscope — the kids discovered things in a single afternoon in the yard that we talked about for a week.


    Bring the Learning Back Outside

    One of the fastest ways to simplify homeschool life is to stop trying to recreate a classroom in your house. You don’t need to.

    Nature study, done the Charlotte Mason way, is inherently slow and rich. We take the Sibley Birds guide on walks. We sketch what we find. We narrate. We wonder. There are no worksheets. There’s no grade. And somehow my kids retain more from an hour in the backyard than from a lot of seat work.

    Florida is actually an incredible place for this — year-round warmth, crazy biodiversity, and something always blooming, hatching, or migrating through. We lean hard into that. In the spring we’re watching the chickens with the kid’s guide to chickens to learn about behavior and biology. In the fall we’re watching for migrating birds. In summer we’re up early to beat the heat and catch whatever’s moving.

    Slowing down academically doesn’t mean doing less — it means doing it more deeply.

    📌 Love this? Save it to Pinterest so you can find it later!


    Simplify the Home Environment Too

    A cluttered home creates a cluttered mind — for kids and for mamas. We’ve slowly been working toward a home that’s easier to manage, less toxic, and more peaceful to be in.

    That’s looked like switching to Grove Collaborative for our cleaning products, which cut down on decision fatigue and reduced the chemical load in our home. It’s looked like fewer toys and more open-ended materials. Fewer screens and more watercolor paints and Faber-Castell watercolors on the kitchen table.

    Check out DIY Natural Cleaning Products for Every Room (That Actually Work and Cost Almost Nothing) if you’re trying to simplify what’s under your sink too — we’ve been doing a lot of that kind of swapping and it genuinely makes the home feel calmer.


    Let the Kids Be Bored

    I cannot stress this enough. Boredom is not a problem to solve.

    Some of the best things that have ever happened in our backyard started with a kid saying “I’m boooored.” We’ve had elaborate chicken observation journals, homemade obstacle courses, mud pie bakeries, and one very ambitious attempt to build a bridge across the drainage ditch out back. All of it born from boredom.

    Our mini labradoodle is usually involved somehow too, which adds to the chaos and the joy in equal measure.

    Resist the urge to fill the quiet. The quiet is doing something.


    Say No to Screen Time as a Default

    This doesn’t mean no screens ever. It means screens shouldn’t be the first answer to a free moment.

    When the kids come to me bored or restless, I try to redirect to something physical first. Outside. A project. The chickens need fresh water. Go see if there are eggs. Here are some kids’ rain boots — go splash in the puddles from that afternoon storm.

    After a Florida afternoon thunderstorm, the backyard smells like earth and possibility. That is a gift. We try not to waste it.


    Simplify Doesn’t Mean Perfect

    I want to be honest: we don’t have this figured out perfectly. There are weeks where the calendar creeps back up, where we’re eating dinner in the car and I’ve said yes to three things too many.

    But we keep coming back. That’s the whole thing — not achieving some idealized simple life, but having enough clarity about what you actually want that you keep making your way back to it.

    For us, that means chickens in the backyard, kids with dirty knees, a dog who thinks he runs the place, and school that happens in between real living — not in spite of it.

    If you’re just starting to think about what this could look like for your family, I’d encourage you to start small. One morning. One afternoon with no plan. One week where you say no to something you’d normally say yes to just out of habit.

    See how it feels. I think you’ll want more of it.


    📖 You Might Also Like:

    Frequently Asked Questions

    How do I start slowing down family life when everything feels out of control?

    Start with just one part of your day — usually mornings are easiest to reclaim. Create a simple, slow morning ritual before anything scheduled begins: a read-aloud, time outside, or a quiet breakfast with no screens. Build from there rather than trying to overhaul everything at once.

    Is it okay to limit my kids’ activities even if other families are doing more?

    Absolutely. Research consistently shows that unstructured free play is essential for childhood development — and most kids today are overscheduled. Fewer activities often means more creativity, more resilience, and more genuine connection within your family. Your kids will not be behind; they’ll likely be ahead in the ways that matter most.

    How do you simplify homeschooling without feeling like you’re not doing enough?

    Shift your measure of success from ‘how much did we cover’ to ‘how deeply did we engage.’ Charlotte Mason’s approach to short lessons, living books, and nature study covers an enormous amount of ground without the frantic pace. If your child narrated back what they learned, drew it, or talked about it at dinner, that’s real learning.

    What’s the easiest way to reduce screen time for kids without constant battles?

    Make the alternative more appealing than the screen — which is easier than it sounds when kids have open-ended outdoor time, interesting materials to tinker with, and pets or animals to interact with. Set clear, consistent screen-free times (like mornings and the hour after lunch) so it becomes routine rather than a daily negotiation.

    How do you simplify a home environment to feel less chaotic?

    Start by reducing visible clutter — toys, papers, and surfaces that collect stuff create mental noise for everyone. Then look at your cleaning products, kitchen gadgets, and daily routines to see what can be simplified or consolidated. Fewer, better things almost always feels calmer than more of everything.

  • Best Cloth Diapering System for Beginners (What Actually Works and Where to Start)

    Best Cloth Diapering System for Beginners (What Actually Works and Where to Start)

    Best Cloth Diapering System for Beginners (What Actually Works and Where to Start)

    🌿 The Short Version: Cloth diapering doesn’t have to be complicated or overwhelming — the right system depends on your lifestyle, your budget, and how much laundry you’re willing to do. This guide breaks down the most beginner-friendly options so you can pick one and actually stick with it.

    This post contains affiliate links. I may earn a small commission at no extra cost to you.

    I remember standing in a Facebook group when my youngest was about six weeks old, staring at a comment thread about cloth diapers that had like forty-seven replies and approximately nine different opinions about what kind of insert goes in what shell. I closed the app and went back to disposables for another three weeks.

    If that’s you right now — I get it. The cloth diapering world has a way of making something totally doable feel incredibly complicated. But here’s what I wish someone had told me: you don’t have to master every system. You just have to find one that works for your life and your baby, and go from there.

    We’ve been a mostly-cloth family for years now, and it genuinely fits right into our non-toxic, low-waste lifestyle here in Northwest Florida. It’s the same reason we grind our own grain, keep backyard chickens, and try to buy fewer things made of plastic. Less stuff, more intention. And honestly? Once you’re past the learning curve, cloth diapering is one of the easiest swaps we’ve made.

    So let’s break it down in plain language.


    Why Cloth Diapers in the First Place?

    For our family, it came down to a few things:

    • Fewer chemicals near baby’s skin. Conventional disposables contain things like dioxins, fragrances, and SAP (sodium polyacrylate) gel. If you’re already thinking carefully about what goes on and around your baby — like the folks who read my post on Non-Toxic Baby Products: What to Actually Buy (and What’s Just Marketing Hype) — cloth is a natural next step.
    • Long-term cost savings. A decent stash runs $200–$400 upfront and can last through multiple kids.
    • Less waste. A baby in disposables generates roughly 2,000 diapers in the first year alone. That number bothers me.

    That said — this isn’t a judgment post. We still use disposables for travel and sick days. Real life is not all-or-nothing.


    The Main Types of Cloth Diapers (Explained Simply)

    This is where most beginners get lost, so let’s slow down here.

    Pocket Diapers

    This is probably the most popular starter option. It’s a waterproof outer shell with a pocket opening — you stuff an absorbent insert inside before use, then pull it out before washing. Brands like Rumparooz and BumGenius are well-known.

    Good for: Families who want something that works similarly to a disposable. Partners and grandparents who are helping out tend to find these least intimidating.

    Downside: You have to stuff them all after laundry, which takes time.

    All-in-Ones (AIOs)

    Exactly what it sounds like — the absorbent layer is sewn into the diaper. Put it on, take it off, wash it. That’s it.

    Good for: Ultimate simplicity. Daycare situations. Anyone who can’t be bothered with extra steps.

    Downside: They take longer to dry, and they tend to cost more per diaper.

    Prefolds + Covers

    This is the old-school system — rectangular layers of fabric (prefolds) that you fold and secure, then cover with a waterproof shell. It’s what a lot of our mamas’ generation actually used (before disposables took over).

    Good for: Budget-friendly stashes. Prefolds are cheap, durable, and incredibly absorbent. Covers can be reused between changes if they stay clean.

    Downside: More of a learning curve on the folding technique.

    Fitted Diapers + Covers

    Fitted diapers are shaped like a regular diaper but are fully absorbent with no waterproofing — so you always need a cover over them. They’re fantastic for heavy wetters and overnight.

    Good for: Night use, chunky babies, anyone who deals with leaks.

    Hybrid / AI2 (All-in-Two)

    A shell that snaps or lays in an absorbent insert. The shell can often be reused if it didn’t get soiled — you just swap the insert.

    Good for: Families who want the flexibility of reusing covers without full prefold folding.


    So Which System Is Actually Best for Beginners?

    Honest answer: pocket diapers or AI2s. They have the least learning curve, work well from the newborn stage onward, and most come in one-size adjustable designs that fit babies from roughly 8–35 pounds.

    If you’re just starting out, I’d suggest grabbing a small trial stash — maybe 6–10 diapers — before you commit to buying twenty-four of anything. Preferences are personal, baby shapes are wildly different, and what works for your friend’s chunky-thighed baby might not work for yours.

    For nighttime or heavy wetters, layer in some fitted diapers and a good wool or PUL cover. That combo handles nights at our house way better than anything else we’ve tried.


    What You Actually Need to Get Started

    Here’s a simple starter list:

    • 12–24 diapers (more if you want to wash every 2–3 days, fewer if you’re washing daily)
    • A wet bag for storing dirties when you’re out
    • A diaper pail or hanging wet bag at home
    • Cloth-safe diaper cream — most zinc-based creams will ruin the absorbency of cloth; look for ones that are cloth-safe or use a liner
    • A good wash routine — this matters more than almost anything else

    For non-toxic laundry in general, we use simple, clean detergents. You can check out our How to Make Homemade Laundry Detergent (Non-Toxic, Actually Works, and Costs Almost Nothing) post — though for cloth diapers specifically, you’ll want a detergent with enough surfactant power to actually strip the soiling. Homemade can work, but check that your recipe is approved for cloth.


    📌 Love this? Save it to Pinterest so you can find it later!


    Washing Cloth Diapers Without Losing Your Mind

    The wash routine is the thing that trips most people up, but it’s really not complicated once you get it down:

    1. Cold pre-wash — short cycle, no detergent or half dose. This rinses out the bulk of the soil.
    2. Hot main wash — full detergent, longest cycle your machine offers.
    3. Extra rinse if needed — especially in Florida’s heat and humidity, which can encourage mildew if diapers aren’t fully rinsed.
    4. Dry on low or line dry — sun-drying is genuinely magic for stain removal. Florida sun does in one afternoon what OxiClean takes two days to do.

    For a clean, non-toxic home environment overall, we love Grove Collaborative for stocking up on laundry and cleaning supplies that actually work without the junk ingredients.


    A Word on Non-Toxic Living and Cloth Diapers

    If you’re already reading labels on your dish soap (hey, if you haven’t checked out Non-Toxic Dish Soap That Actually Cuts Grease, that post is worth a read), then cloth diapering fits naturally into that mindset. It’s about reducing the synthetic inputs around your baby’s body and your home.

    And honestly? It’s very much in line with that 1990s-style parenting philosophy we try to live out — doing things a little more slowly, a little more intentionally, and with a lot less plastic. My kids see cloth diapers as just part of how our house runs, the same way they know we compost our kitchen scraps and collect eggs from the coop every morning.

    For keeping things fresh and pest-free without harsh chemicals — in the diaper pail and everywhere else — we rely on Wondercide for natural pest control around the house and yard. Worth mentioning if you’re ever dealing with gnats near your pail in a Florida summer. (And you will. It’s Florida.)


    Quick Tips Before You Dive In

    • Don’t overbuy before you know what works for your baby. Seriously. A trial stash first.
    • Prep your diapers before first use — most need 3–5 washes to reach full absorbency.
    • Leaks are almost always a fit issue or an absorbency issue, not a reason to give up entirely.
    • Give yourself a grace period. The first two weeks feel weird. By week four, it’s just laundry.
    • If you’re also navigating a non-toxic nursery from the ground up, my post on Non-Toxic Baby Products: What to Actually Buy (and What’s Just Marketing Hype) covers a lot of the other pieces.

    You’ve Got This

    Cloth diapering is one of those things that sounds harder than it is. Once it’s part of your rhythm — toss them in the wash, hang them on the line, stuff the pockets while you’re watching your kids run around the backyard — it genuinely stops feeling like extra work and starts feeling like just life.

    We’re big believers around here that simple, intentional living isn’t about being perfect. It’s about making thoughtful choices where you can, then letting the rest go. Cloth diapers are one of those choices our family is really glad we made. I hope this gave you enough clarity to take that first step without feeling like you need a PhD in diaper science to do it.

    Start small. Try one system. Adjust from there. You’ve got this, mama.


    📖 You Might Also Like:

    Frequently Asked Questions

    What is the easiest cloth diaper system for beginners?

    Pocket diapers and all-in-two (AI2) systems are generally considered the easiest for beginners. They work similarly to disposables in terms of how you put them on and take them off, and most come in adjustable one-size designs that grow with your baby. All-in-ones (AIOs) are even simpler but take longer to dry.

    How many cloth diapers do I need to start?

    A good starter stash is 12–24 diapers, depending on how often you plan to do laundry. If you want to wash every two to three days, aim for 20–24. If you’re okay washing daily, 12–15 can work. It’s best to start with a small trial stash of 6–10 diapers before committing to a full set, since fit and preference vary by baby.

    Can I use cloth diapers from birth?

    Yes, but most standard one-size cloth diapers don’t fit well until babies are around 10–12 pounds. For the newborn stage, you can buy newborn-specific cloth diapers, use prefolds with a small cover, or use disposables for the first few weeks and transition to cloth once baby has grown a bit.

    How do you wash cloth diapers without ruining them?

    The basic wash routine is: a cold pre-wash to rinse out soiling, followed by a hot main wash with a full dose of a cloth-safe detergent, then an extra rinse if needed. Avoid fabric softeners and dryer sheets — they coat the fibers and ruin absorbency. Line drying in the sun is ideal and naturally removes stains. In Florida’s heat, sunning diapers works incredibly fast.

    Are cloth diapers really worth it financially?

    For most families, yes. A full cloth diaper stash typically costs $200–$400 upfront and can be used for multiple children. Families who use disposables full-time spend an estimated $1,500–$3,000 per child over the diapering years. Even if you only use cloth part-time, the savings add up significantly, especially when you reuse the same stash for a second or third baby.