Category: Homesteading & Simple Living

  • Non-Toxic Baby Products: What to Actually Buy (and What’s Just Marketing Hype)

    Non-Toxic Baby Products: What to Actually Buy (and What’s Just Marketing Hype)

    Non-Toxic Baby Products: What to Actually Buy (and What’s Just Marketing Hype)

    🌿 The Short Version: Not every “natural” baby product is worth your money — and the non-toxic world can get overwhelming fast. This post cuts through the noise and tells you exactly what our family prioritizes, what we’ve skipped, and how to make practical swaps without losing your mind.

    This post contains affiliate links. I may earn a small commission at no extra cost to you.

    When I was pregnant with my first, I fell deep down the rabbit hole. You know the one. You start Googling “safe baby shampoo” at 11pm and three hours later you’re reading studies about endocrine disruptors in diaper cream and questioning every product under your bathroom sink. It’s a lot.

    Here’s what I wish someone had told me back then: you don’t have to overhaul everything at once. Non-toxic living isn’t about perfection. It’s about making better choices where it matters most — especially for the tiniest, most vulnerable people in your home.

    We’ve been doing this intentional-home thing for years now here in Northwest Florida, and I’ve learned which swaps are genuinely worth it and which ones are mostly green-washed marketing. Let me share what we actually use and recommend.


    Why “Non-Toxic” Baby Products Actually Matter

    Babies aren’t just small adults. Their skin is thinner, their organs are still developing, and they spend a lot of time on the floor touching things and putting everything in their mouths. What goes on them gets absorbed more readily than it would for us.

    Down here in Florida, we’re also dealing with extra sun exposure, high humidity, and year-round outdoor time — which means sunscreen, bug protection, and sweat are just part of daily life even with little ones. The toxic load adds up fast if you’re not paying attention.

    The good news? The swaps are genuinely simple once you know where to focus.


    Start Here: The Highest-Priority Swaps

    Sunscreen

    This one is non-negotiable for us. We’re outside constantly — nature walks, chicken chores, garden time — and the Florida sun is no joke. Most conventional sunscreens contain oxybenzone and other chemical filters that have raised real flags in recent research.

    We look for mineral-based sunscreens with zinc oxide as the active ingredient. I did a full honest breakdown of what we actually reach for in our Non-Toxic Kids Sunscreen Stick Honest Review (What We Actually Use in the Florida Sun) — that post will save you a lot of trial and error. You can also search for non-toxic sunscreen on Amazon and filter by mineral-only formulas.

    Skincare and Bath Products

    Baby wash, lotion, and diaper cream are daily products — meaning daily exposure. Fragrance is the big one to avoid here. “Fragrance” on a label is a catch-all term that can hide hundreds of undisclosed chemicals, and it’s one of the leading causes of skin sensitization in babies.

    Look for short ingredient lists. If you can’t pronounce half of it, keep looking. We love ordering through Grove Collaborative for our personal care and cleaning staples — they’ve done a lot of the vetting work for you and I’ve been happy with their standards.

    Cleaning Products

    This might not feel like a “baby product” category, but think about it — whatever you clean their highchair with, their toys with, their sheets with — that’s what they’re touching and mouthing. We made this swap a few years ago and honestly haven’t looked back. If you want to go the DIY route, I’ve got a whole guide on DIY Natural Cleaning Products for Every Room (That Actually Work and Cost Almost Nothing) that is genuinely easy and cheap.

    Laundry Detergent

    Same idea — their clothes and bedding are against their skin all day and all night. Synthetic fragrances and optical brighteners in conventional detergents are common irritants. We make our own, and it costs almost nothing. Here’s exactly how: How to Make Homemade Laundry Detergent (Non-Toxic, Actually Works, and Costs Almost Nothing). Throw some wool dryer balls in instead of dryer sheets and you’re done.


    📌 Love this? Save it to Pinterest so you can find it later!

    Feeding: What We Actually Use

    Bottles and Food Storage

    If you’re bottle feeding or pumping, glass or stainless steel is the way to go. No plastic with heat — ever. I went deep on this in Non-Toxic Baby Bottles: What to Actually Buy (and What to Skip), so head there for the full breakdown.

    For food storage and packing snacks, we use beeswax wrap instead of plastic wrap and stainless steel water bottles for the kids. These are simple swaps that last for years.

    Cooking

    Once they’re on solids, what you cook in matters too. Non-stick pans leach chemicals when heated — especially if the coating is scratched. We cook everything in a cast iron skillet. Lodge is affordable, lasts forever, and adds a little iron to your food as a bonus. It’s one of those swaps you make once and never think about again.


    What I’d Skip (Or At Least Deprioritize)

    Honestly? The “non-toxic nursery paint” rabbit hole stressed me out way more than it needed to. Yes, low-VOC paint is better. But if you’re not actively repainting, it’s not your most urgent issue.

    Same with organic crib mattresses. If you can afford it, great. But if it’s between that and non-toxic sunscreen you’ll use every single day for the next decade — prioritize the daily-use stuff first.

    Not everything labeled “natural” or “clean” is worth the premium price tag either. Read the actual ingredient list. Trust the Environmental Working Group’s Skin Deep database. And don’t let perfect be the enemy of good.


    A Word on the 1990s Approach

    Here’s the thing — our parents weren’t obsessing over ingredient labels, and most of us turned out okay. But we also played outside more, ate less processed food, and weren’t slathered in twenty products a day before age two.

    The goal isn’t to live in a sterile bubble. It’s to reduce the unnecessary toxic load while letting your kid dig in the garden, chase the chickens, and get good and dirty. Dirt is actually good for them. The chemicals in their diaper cream every night? Maybe worth a closer look.

    We raise our kids the way kids were raised before everything got so complicated — more outside time, less stuff, real food, and intentional choices about what does come inside our home.


    The Quick Reference List: What We Actually Buy


    You Don’t Have to Do It All at Once

    I started this journey one swap at a time. When something ran out, I replaced it with a better version. That’s still the approach I’d recommend. Pick the highest daily-exposure items first — sunscreen, bath products, laundry detergent — and go from there.

    You’re already asking the right questions just by being here. That counts for a lot. Our kids are growing up in a home where we think carefully about what we bring in, what we put on their skin, and what we feed them — and that’s genuinely one of the best things we can do for them, right alongside letting them run barefoot in the backyard and name the chickens.

    You’ve got this, mama.


    📖 You Might Also Like:

    Frequently Asked Questions

    What non-toxic baby products should I buy first?

    Start with the highest daily-exposure items: sunscreen, baby wash and lotion, and laundry detergent. These are used every single day and have the most impact on your baby’s overall toxic load. Once those are swapped, move on to food storage and cookware.

    Is “natural” on a baby product label the same as non-toxic?

    No — “natural” is not a regulated term and can be used on products that still contain synthetic fragrances, preservatives, or other questionable ingredients. Always read the actual ingredient list and cross-reference with the Environmental Working Group’s Skin Deep database for the most reliable information.

    What sunscreen is safe for babies and toddlers?

    Look for mineral sunscreens with non-nano zinc oxide as the only active ingredient. Avoid oxybenzone, octinoxate, and synthetic fragrance. Many clean beauty brands offer baby-specific formulas, and you can find a good selection of non-toxic mineral sunscreens on Amazon or through retailers like Grove Collaborative.

    Are wool dryer balls really a good substitute for dryer sheets?

    Yes! Wool dryer balls reduce static, soften clothes naturally, and cut drying time — without the synthetic fragrances and chemicals found in conventional dryer sheets. They last for years, making them a cost-effective swap too. You can add a drop of essential oil to the ball if you want a light scent.

    Do I need to replace all my baby products at once to go non-toxic?

    Absolutely not — and trying to do it all at once is usually what leads to burnout. The most practical approach is to replace products with a cleaner version as they run out. Prioritize daily-use items first (sunscreen, bath products, laundry detergent) and work your way through the rest over time. Small, consistent changes add up significantly.
  • DIY Natural Cleaning Products for Every Room (That Actually Work and Cost Almost Nothing)

    DIY Natural Cleaning Products for Every Room (That Actually Work and Cost Almost Nothing)

    DIY Natural Cleaning Products for Every Room (That Actually Work and Cost Almost Nothing)

    🌿 The Short Version: You can clean your entire home — kitchen, bathrooms, floors, and more — with just a handful of simple, non-toxic ingredients you probably already have. This post walks you through real recipes our family actually uses, room by room, so you can ditch the harsh chemicals without making it complicated.

    This post contains affiliate links. I may earn a small commission at no extra cost to you.

    I remember the first time I really read the label on a bottle of conventional bathroom cleaner. I was standing there in the cleaning aisle at Walmart, kids in the cart, and something made me flip it over. I couldn’t pronounce half of it. The warnings alone — keep away from children, avoid skin contact, do not inhale — made me set it back on the shelf and walk away.

    That was a few years ago now. We haven’t bought a single bottle of conventional cleaner since.

    Here’s the thing: switching to DIY natural cleaning products sounds like a big lifestyle overhaul. It’s really not. You need maybe five ingredients, some glass spray bottles, and fifteen minutes. And once you make the switch, you’ll wonder why you ever paid $4.99 for something that required ventilation.

    This is especially important to me because our kids are in this house all day. We homeschool. They’re crawling on the floors, eating at the table I just wiped down, sticking their faces in everything. I want clean — I just want clean without a side of mystery chemicals.

    Let me walk you through what we actually use, room by room.

    The Basics You’ll Need First

    Before we get into the recipes, let me give you the short shopping list. Almost everything stems from these:

    • White distilled vinegar — degreaser, disinfectant, deodorizer
    • Baking soda — gentle abrasive, odor absorber
    • Castile soap (Dr. Bronner’s is our go-to) — all-purpose cleaning base
    • Hydrogen peroxide (3%) — natural disinfectant
    • Essential oils — tea tree, lavender, lemon for antimicrobial properties and actual good smells
    • Distilled water — extends shelf life of sprays

    You’ll also want a few glass spray bottles. I pick mine up from Grove Collaborative — they have great non-toxic starter kits that come with everything you need.

    That’s honestly it. Everything below comes from those six things.

    Kitchen: The Room That Needs It Most

    All-Purpose Counter Spray

    This is the one I make most often because we go through it fast.

    • 1 cup distilled water
    • 1 cup white vinegar
    • 15 drops lemon essential oil
    • 10 drops tea tree oil

    Shake and spray. Wipe with a clean cloth. Done.

    Note: Skip vinegar on natural stone countertops — it can etch the surface. Use just castile soap and water instead.

    Dish Soap Boost

    We use castile soap as our dish soap base, but when things get greasy (hello, cast iron cleanup night), I add a few drops of lemon oil. Speaking of cast iron — if you’re still using non-stick pans with their questionable coatings, our family made the switch to a Lodge cast iron skillet and never looked back. Genuinely non-toxic, lasts forever, and you clean it with barely anything.

    Refrigerator and Appliance Wipe-Down

    Equal parts water and white vinegar in a spray bottle. That’s it. Wipe down the fridge shelves, the microwave interior, the stovetop. It cuts through grime without leaving any residue or smell once it dries.

    Drain Freshener

    Pour 1/2 cup baking soda down the drain, followed by 1/2 cup vinegar. Let it fizz for 5-10 minutes, then flush with hot water. The kids think this is basically a science experiment, which, honestly, it is — and we talk about it that way.

    Bathrooms: Where the Worst Products Usually Live

    Toilet Bowl Cleaner

    • 1/2 cup baking soda
    • 1/4 cup castile soap
    • 10 drops tea tree oil

    Stir it into a paste. Spread it around the bowl with the brush, let it sit for 5 minutes, scrub, flush. That’s a clean toilet with nothing scary in it.

    Tile and Tub Scrub

    Sprinkle baking soda directly onto the wet surface, add a few drops of castile soap, scrub with a brush or cloth. Rinse well. This works so well on grout — I was genuinely shocked the first time I tried it.

    Mirror and Glass Spray

    • 1 cup distilled water
    • 1 cup white vinegar
    • Optional: a tiny drop of dish soap if there’s toothpaste splatter

    Spray and wipe with a microfiber cloth for streak-free mirrors. My daughter does the bathroom mirrors now as part of her morning chores. At seven years old, I feel completely fine with her handling this.

    📌 Love this? Save it to Pinterest so you can find it later!

    Living Areas and Floors

    All-Purpose Floor Cleaner

    For our tile and wood floors (we have mostly tile here in the Florida heat because, same, every Florida home):

    • 1 gallon warm water
    • 1/2 cup white vinegar
    • 5 drops lavender or lemon essential oil

    Mop as usual. It dries clean, no residue, and smells like a spa for about ten minutes, which I fully enjoy.

    Skip vinegar on hardwood — use just a few drops of castile soap in warm water instead.

    Fabric and Upholstery Freshener

    • 1 cup distilled water
    • 1 tablespoon baking soda (shake to dissolve)
    • 10 drops lavender oil

    Spray lightly on couches, curtains, rugs. Especially helpful with a labradoodle who thinks the couch is her couch. (Looking at you, Biscuit.)

    Dusting Spray

    A tiny amount of olive oil mixed with a few drops of lemon essential oil on a microfiber cloth works beautifully on wood surfaces. It cleans, conditions, and leaves a gentle shine.

    Laundry Room

    If you haven’t already made the switch to homemade laundry detergent, I’ve already written all about it over here — How to Make Homemade Laundry Detergent (Non-Toxic, Actually Works, and Costs Almost Nothing). It is genuinely the best switch we ever made.

    We also use wool dryer balls instead of dryer sheets — no synthetic fragrance, no fabric softener chemicals, and they cut dry time down too.

    For tough stains on kids’ clothes (and it is always muddy kids’ clothes here in Northwest Florida), I spray hydrogen peroxide directly on the stain, let it sit 10 minutes, then wash. Works on grass, food, and chicken coop adventure aftermath.

    The Chicken Coop (Because Yes, That Counts)

    Okay, this one is specific to those of us with backyard flocks — but it matters. Conventional coop cleaning products can be harsh on chickens’ sensitive respiratory systems.

    We use:

    • White vinegar diluted 50/50 with water as a general coop spray between deep cleans
    • Diatomaceous earth (food-grade only!) dusted in nest boxes and along roost bars for mites
    • Wondercide for pest control around the coop perimeter

    I’ve got a whole detailed post on our routine — Natural Chicken Coop Deodorizer and Cleaning Routine (What Actually Works for a Backyard Flock) — if you want to go deeper on that.

    Making It a Learning Moment (Because Charlotte Mason Said So)

    One thing I love about making our own cleaners is how naturally it turns into a real lesson. My kids have learned fractions measuring out ingredients. They’ve learned chemistry watching the vinegar and baking soda react. They understand why tea tree oil works — we’ve talked about plant compounds and antimicrobial properties in the most basic, kid-friendly way.

    This is exactly the kind of living, hands-on education that Charlotte Mason was talking about. It’s not a worksheet. It’s real life. They help me make a batch of counter spray, they label the bottle, and they use it. That’s science, handwriting, and home economics wrapped into one afternoon.

    If you want more of this kind of nature-and-life-integrated learning, check out my Charlotte Mason Nature Study Journal Prompts by Season — it’s the same spirit, just outside.

    A Note on Making This Sustainable

    The goal here isn’t perfection. It’s just better. We didn’t switch everything overnight, and honestly, there are still a couple of things we haven’t fully replaced yet. That’s okay. Start with one room, one spray bottle. See how it goes.

    And if you want to simplify your non-toxic shopping even more, Grove Collaborative delivers clean, simple household products and refills on a schedule — so you’re not running out of castile soap mid-mopping session on a Tuesday.

    Sweet friend, your home doesn’t have to be a chemistry lab of warnings and fumes to be clean. A few simple ingredients, some glass bottles, and a little intention goes a long way. Your kids are watching everything — how you clean, what you choose, what you decide matters. And this? This is one of those small, quiet things that adds up to something really good over time.


    📖 You Might Also Like:

    Frequently Asked Questions

    What are the best natural ingredients for DIY cleaning products?

    The five you really need are white distilled vinegar, baking soda, castile soap, hydrogen peroxide (3%), and essential oils like tea tree and lemon. From just those ingredients, you can make effective cleaners for every room in your home.

    Are DIY natural cleaners actually effective, or do I still need commercial products?

    For everyday cleaning — counters, toilets, floors, glass, laundry, and more — DIY natural cleaners work extremely well. Vinegar disinfects, baking soda scrubs, tea tree oil has real antimicrobial properties, and castile soap cuts grease. They may take an extra minute of dwell time compared to harsh chemical formulas, but they genuinely get the job done.

    Is it safe to mix vinegar and baking soda in a cleaning recipe?

    You can use them together (like for a drain cleanse where the fizzing action is the point), but you generally shouldn’t pre-mix them in a spray bottle as a cleaner. They neutralize each other, reducing the effectiveness of both. Use them separately for best results.

    Can I use vinegar to clean all surfaces?

    Vinegar is great for most surfaces — tile, glass, laminate counters, appliances, and floors — but you should avoid using it on natural stone (like marble or granite) because the acidity can etch and damage the surface. Also avoid it on hardwood floors and cast iron. Use plain castile soap and water for those instead.

    How long do homemade natural cleaning products last?

    Most DIY spray cleaners made with vinegar, water, and essential oils will last 2–4 weeks when stored in a cool, dark spot in glass bottles. Avoid direct sunlight, which can break down the essential oils faster. Recipes that include fresh citrus (like citrus peels infused in vinegar) should be used within a few weeks as well.

  • How to Make Homemade Laundry Detergent (Non-Toxic, Actually Works, and Costs Almost Nothing)

    How to Make Homemade Laundry Detergent (Non-Toxic, Actually Works, and Costs Almost Nothing)

    How to Make Homemade Laundry Detergent (Non-Toxic, Actually Works, and Costs Almost Nothing)

    🌿 The Short Version: You only need three basic ingredients to make a non-toxic laundry detergent that actually cleans — even sweaty Florida kid clothes and muddy chicken-chasing outfits. This post walks you through exactly what we use, how we make it, and why we switched for good.

    This post contains affiliate links. I may earn a small commission at no extra cost to you.

    Okay, real talk. If you have kids who spend any amount of time outside — which, if you’re here, yours probably do — laundry is not a small thing. We’re talking grass-stained knees, red Florida dirt ground into white socks, and whatever mystery substance ends up on a shirt after an afternoon in the backyard with the chickens. Our laundry pile is basically a nature journal in fabric form.

    For a long time I just bought whatever detergent was on sale, told myself it was fine, and moved on. But the more I started paying attention to what we were bringing into our home — the cleaners, the food, the personal care stuff — the harder it was to ignore what was in that giant plastic jug sitting on my laundry shelf. Synthetic fragrances, optical brighteners, stabilizers with names I can’t pronounce. All going into our kids’ clothes. All sitting against their skin all day.

    So I started making our own, and honestly? I wish I’d done it years ago. It’s cheaper, it’s simple, and it works. Let me show you exactly what we do.


    Why We Switched to Homemade Non-Toxic Laundry Detergent

    I’m not here to scare you. But I do think it’s worth knowing that a lot of conventional laundry detergents contain ingredients that aren’t fully disclosed (thanks to fragrance loophole laws), and some of those ingredients are linked to skin irritation, hormone disruption, and respiratory issues. For kids who are outside in the heat all day — which is basically nine months of the year down here in the Pensacola area — their skin is sweating and absorbing things constantly.

    Making your own detergent means you know exactly what’s in it. Three ingredients. That’s it.

    And the cost? I spend maybe $15-20 a year on laundry detergent now. For our whole family. It’s almost embarrassing how much I used to spend.


    What You Need to Make Non-Toxic Laundry Detergent

    Here’s the base recipe we’ve used for over two years now:

    The Ingredients

    • Washing soda (sodium carbonate — not baking soda, different thing)
    • Borax (naturally occurring mineral, not the same as boric acid)
    • Pure castile soap bar, grated — Dr. Bronner’s unscented is our go-to

    That’s genuinely it.

    Optional add-ins that we love:

    • A few drops of essential oil (lavender or tea tree work well)
    • Food grade diatomaceous earth — yes, the same stuff we use in the chicken coop! A small amount can boost cleaning power and works as a natural deodorizer
    • Wool dryer balls in the dryer instead of dryer sheets (this isn’t in the detergent but it completes the whole non-toxic laundry routine beautifully)

    Basic Supplies

    • Box grater or food processor
    • Large mixing bowl
    • Airtight container for storage
    • Measuring scoop

    The Recipe (Step by Step)

    Step 1: Grate Your Soap

    Grate one bar of castile soap using a fine cheese grater. This is honestly the most annoying step and it takes about five minutes. My kids fight over who gets to do it now — same kids who fought over who got to hold the baby chicks, so you know the bar for excitement is different around here. You can also pulse it in a food processor until it’s fine crumbles.

    Step 2: Mix Your Dry Ingredients

    Combine:

    • 1 cup washing soda
    • 1 cup borax
    • 1 cup grated castile soap

    Stir it all together until it’s evenly mixed. Add essential oils now if you’re using them — just drizzle them in and stir.

    Step 3: Store It

    Pour into an airtight container. A mason jar works great. A repurposed glass jar works great. Whatever you’ve got.

    How Much to Use

    • Standard load: 1–2 tablespoons
    • Heavily soiled (hi, farm kids): 2–3 tablespoons
    • HE machines: 1 tablespoon is usually plenty — less suds is actually better for HE washers

    This recipe makes about 3 cups of detergent, which lasts our family of four roughly 2–3 months depending on the season. (Summer in Florida = more laundry. Always.)


    📌 Love this? Save it to Pinterest so you can find it later!


    Tips for Florida Families Specifically

    A few things I’ve learned making this down here in the humidity and heat:

    The clumping issue is real. Humidity can cause powdered detergent to clump in storage. Keep your container in a cool, dry spot — a cabinet away from your washer (which generates steam) works best. Tossing a food-safe silica packet in the container helps too. Give it a quick stir before each use and you’re good.

    Hard water matters. Parts of Northwest Florida have pretty hard water, and that can affect how well soap rinses out. If you’re noticing residue, bump up your washing soda slightly — it’s a water softener and helps with that.

    Sun is your friend. Line drying in the Florida sun is a free, chemical-free stain fighter. Sun naturally bleaches and deodorizes. We hang everything we can outside, and I’m convinced sunlight does more for our whites than anything in a bottle ever did.


    What About Tough Stains?

    I’ll be honest — this detergent handles everyday dirt, sweat, and general kid grime really well. For tougher stains (chicken coop adventures, berry picking, that one time someone sat in the mulch pile), I pre-treat with a paste of washing soda and water, or I use a small spray of Grove Collaborative’s stain remover, which fits right into our non-toxic routine.

    For our natural coop cleaning routine (which absolutely generates its own laundry situation), I’ve written more over at Natural Chicken Coop Deodorizer and Cleaning Routine (What Actually Works for a Backyard Flock) — same philosophy, different space.


    Making This a Homeschool Moment (Because Of Course We Do)

    This is one of those practical life skills that fits right into our Charlotte Mason approach — learning by doing, learning things that matter. When we make a batch of detergent, we talk about what each ingredient does. Washing soda cuts through grease. Borax is a naturally occurring mineral found in the earth. Soap molecules surround dirt and lift it away from fabric.

    That’s chemistry. That’s practical science. And it sticks way better than a worksheet.

    If your kids are into nature journaling, this kind of observation — watching how things clean, what works and what doesn’t — fits beautifully into the kind of real-world learning we talk about in Charlotte Mason Nature Study Journal Prompts by Season (For Real Kids Who’d Rather Be Outside). Same curious, hands-on spirit.

    This is also just the kind of thing kids in the 1990s watched their parents do without thinking twice — making do, using simple things, not everything coming from a plastic bottle with a cartoon character on it. I love giving my kids that same experience. There’s something grounding about knowing how to make the things you use.


    The Full Non-Toxic Laundry Routine (What We Actually Do)

    In case you want the whole picture:

    • Detergent: Homemade powder (recipe above)
    • Fabric softener: White vinegar in the rinse cycle (about ½ cup — no, your clothes don’t smell like vinegar, I promise)
    • Dryer: Wool dryer balls with a drop of lavender essential oil if I’m feeling fancy
    • Stain treatment: Washing soda paste or Grove Collaborative spray
    • Sunlight: Whenever possible — free, effective, zero packaging

    Simple. Cheap. Clean.


    One More Thing on the Non-Toxic Front

    If you’re in the process of cleaning up your home products overall, laundry is a great place to start because it touches everything your family wears. But it doesn’t have to happen all at once. We’ve slowly swapped things out over a couple of years — cleaning supplies, personal care, food storage. If you’re looking for a good next step after laundry, Grove Collaborative is where I order a lot of our refillable cleaning stuff and it’s been a game changer for reducing plastic and keeping things simple.


    You’ve Got This

    If you’d told me five years ago I’d be grating soap bars and mixing up laundry detergent in my kitchen, I’d have laughed. But here we are, and honestly it’s one of those small changes that just makes me feel good every time I do it. It’s not about being perfect. It’s about making intentional choices where you can, one batch at a time.

    Your kids’ clothes are going to get dirty. That’s a feature, not a bug. Let them play. Let them dig. Let them chase the chickens and come in smelling like Florida sunshine and adventure. We’ll handle the laundry.


    📖 You Might Also Like:

    Frequently Asked Questions

    Is homemade laundry detergent actually effective on heavily soiled clothes?

    Yes — especially with this three-ingredient recipe. Washing soda is a powerful cleaning booster, borax softens water and lifts grime, and castile soap does the actual scrubbing work. For extra-dirty loads (think: kids who spend real time outside), use 2–3 tablespoons and consider pre-treating stains with a washing soda paste. Sun-drying after washing also helps lift any remaining residue and naturally deodorizes fabric.

    Is borax safe to use in laundry detergent for kids?

    Borax is a naturally occurring mineral that has been used in household cleaning for over 100 years. When used in laundry (not ingested or applied directly to skin), it is widely considered safe. That said, if you have concerns, you can simply omit it and double your washing soda — the detergent will still work well. As with all cleaning products, store it out of reach of young children.

    Can I use homemade powdered laundry detergent in an HE (high-efficiency) washing machine?

    Yes! HE machines actually do better with low-suds detergents, and homemade powder creates far less sudsing than commercial detergents. Use just 1 tablespoon per load in an HE machine. If you notice any residue over time, you can run an occasional empty hot water cycle to rinse the drum.

    How do I keep homemade powdered laundry detergent from clumping in humid climates like Florida?

    Humidity is the main enemy of powdered detergent — especially in Florida! Store your detergent in an airtight container away from the steam your washer generates. A cabinet across the room or in a closet works well. You can also toss a food-safe silica gel packet into the container to absorb moisture, and just give the powder a quick stir before scooping. It’s a minor inconvenience for a product that costs almost nothing and works great.

    How much does it cost to make homemade laundry detergent compared to buying it?

    Significantly less. A box of washing soda, a box of borax, and a bar of castile soap together cost roughly $10–14 and will make multiple batches of detergent — enough to last a family of four several months. Compared to $15–25 for a name-brand detergent that lasts just a few weeks, the savings add up fast. Many families report spending $15–25 per year total on laundry once they switch to making their own.

  • Rainwater Harvesting in Florida: What’s Actually Legal and How to Set It Up

    Rainwater Harvesting in Florida: What’s Actually Legal and How to Set It Up

    Rainwater Harvesting in Florida: What’s Actually Legal and How to Set It Up

    🌿 The Short Version: Rainwater harvesting is completely legal in Florida — and actually encouraged by the state. This guide covers the current laws, the simplest way to set up a rain barrel or cistern system, and how we use ours for the garden and chicken yard without overcomplicating it.

    This post contains affiliate links. I may earn a small commission at no extra cost to you.

    If you’ve ever stood on your back porch watching a Florida summer storm drop what feels like a thousand gallons of water in twenty minutes — while simultaneously dragging a hose to your garden beds and chicken waterers — you’ve probably thought: there has to be a better way.

    There is. And it’s called rainwater harvesting. It sounds fancier than it is, honestly. At its core, it’s just collecting the rain that falls on your roof and putting it to use instead of letting it run off into the storm drain. We’ve been doing it at our place here in the Pensacola area for a couple of years now, and it’s become one of those homestead wins I genuinely wish we’d started sooner.

    But before I get into the how, let me answer the question I get asked most often: is this even legal in Florida?

    Is Rainwater Harvesting Legal in Florida?

    Yes — and not just legal, but actually encouraged. Florida is one of the more progressive states when it comes to rainwater collection. The Florida Legislature passed laws (specifically under Florida Statute 373.185) that require water management districts to promote rainwater harvesting as a water conservation strategy. Some districts even offer rebates for installing rain barrel systems.

    You do not need a permit to collect rainwater off your own roof for non-potable uses (that means irrigation, flushing toilets, watering animals, etc.). If you want to drink it or run it through your home plumbing, that gets more complicated and requires filtration systems and, in some cases, permits — but for garden and livestock use? You’re good to go.

    A few Florida-specific things to know:

    • Your HOA might have rules. Florida law actually limits HOAs from outright banning rain barrels, but they can regulate placement and aesthetics. If your barrel is visible from the street, check your HOA docs just to be safe.
    • Your county may have resources. Many Florida counties — including Escambia County — have partnered with local water management districts to offer low-cost or subsidized rain barrels. It’s worth a quick Google search for your county name + “rain barrel rebate.”
    • Non-potable use is the key phrase. Everything I’m covering here falls under non-potable: watering gardens, rinsing boots, topping off the chicken waterers, washing the dog (our labradoodle Biscuit is a frequent recipient).

    For a deeper dive into setting up a complete barrel system step by step, I wrote a whole post on the Best Rain Barrel Setup for Florida Homes (What Actually Works Down Here) that goes into the hardware side in more detail.

    What You Actually Need to Get Started

    The beauty of a basic rain barrel setup is that it doesn’t have to be complicated or expensive. Here’s what we use and what I’d recommend for most backyard homesteads.

    The Barrel Itself

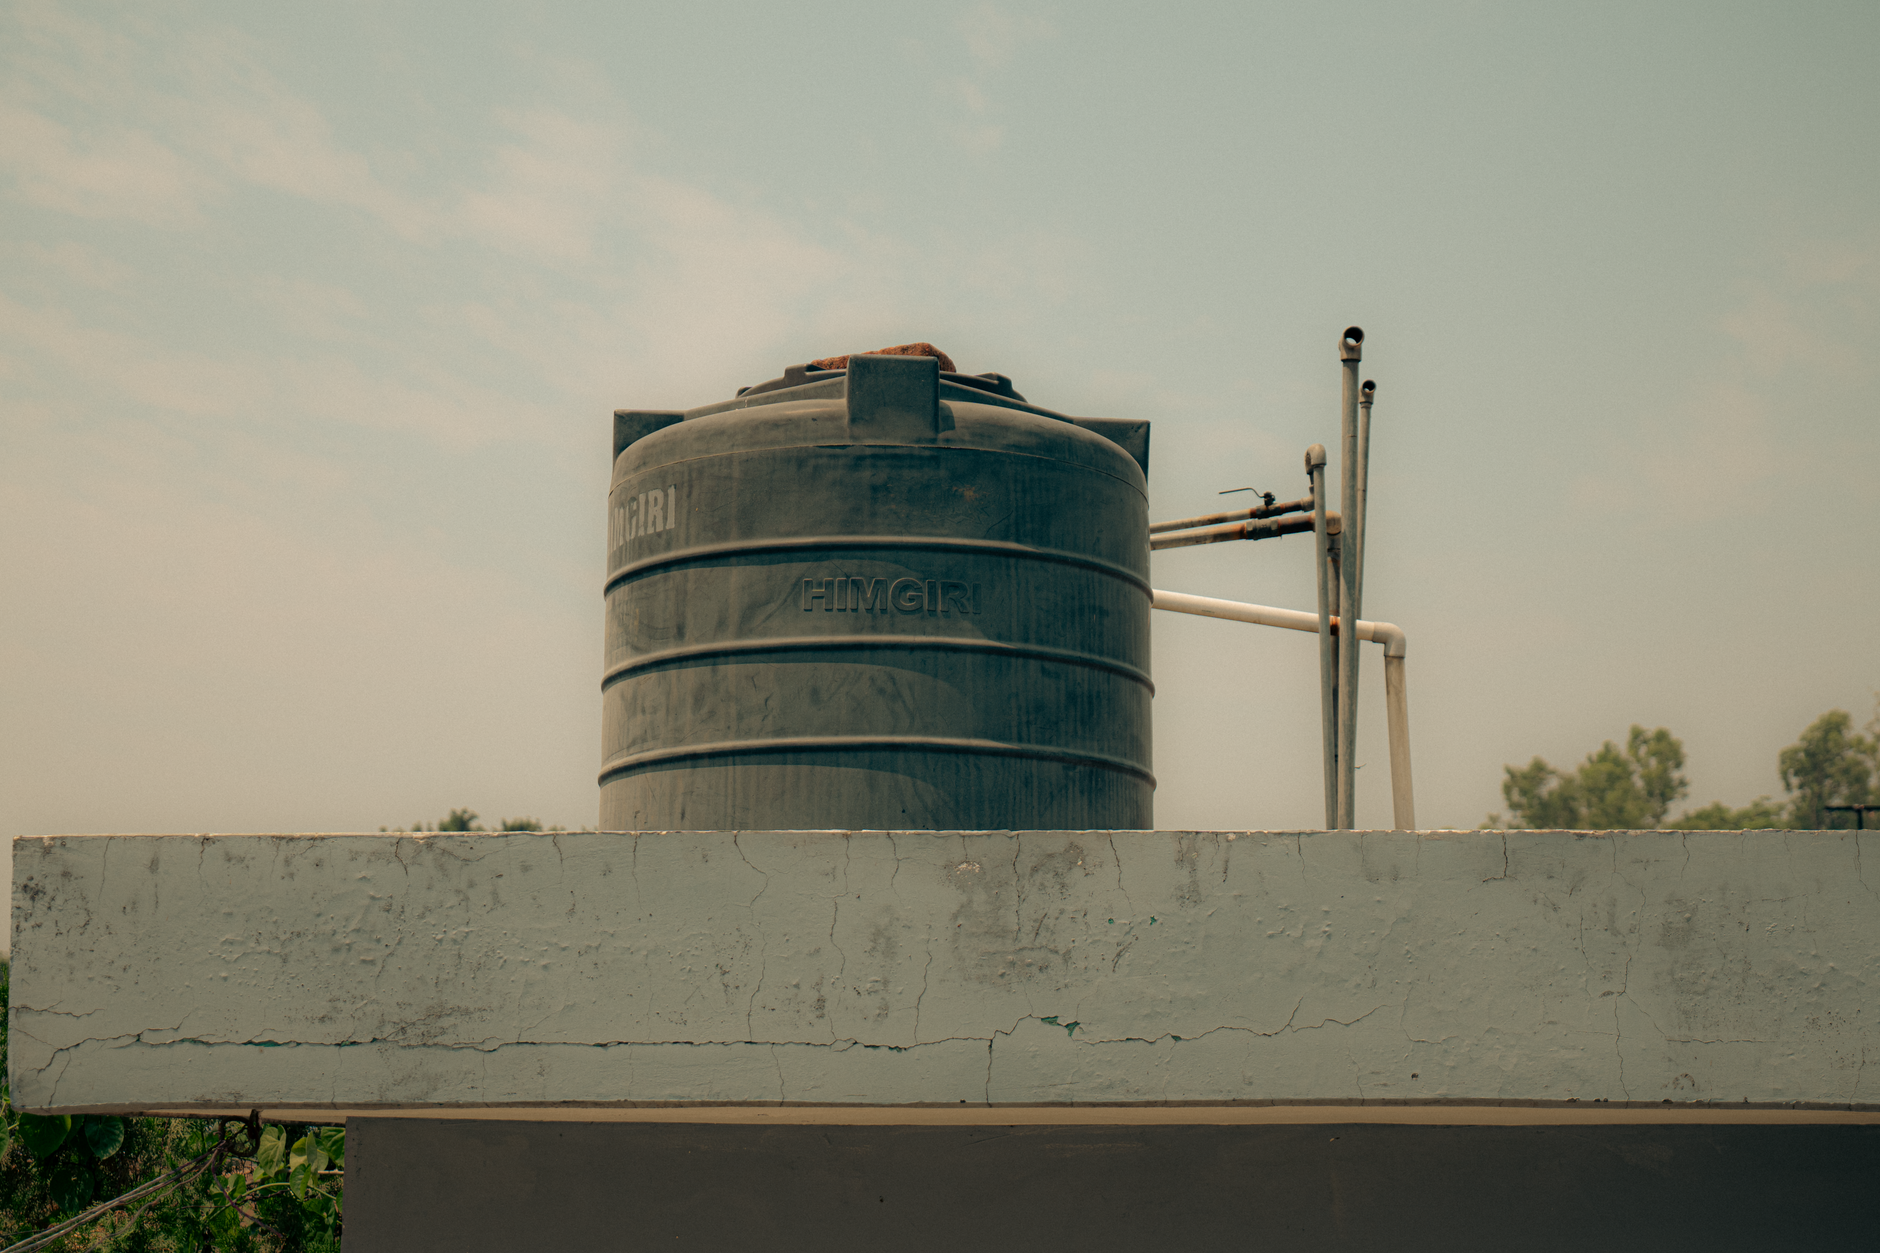
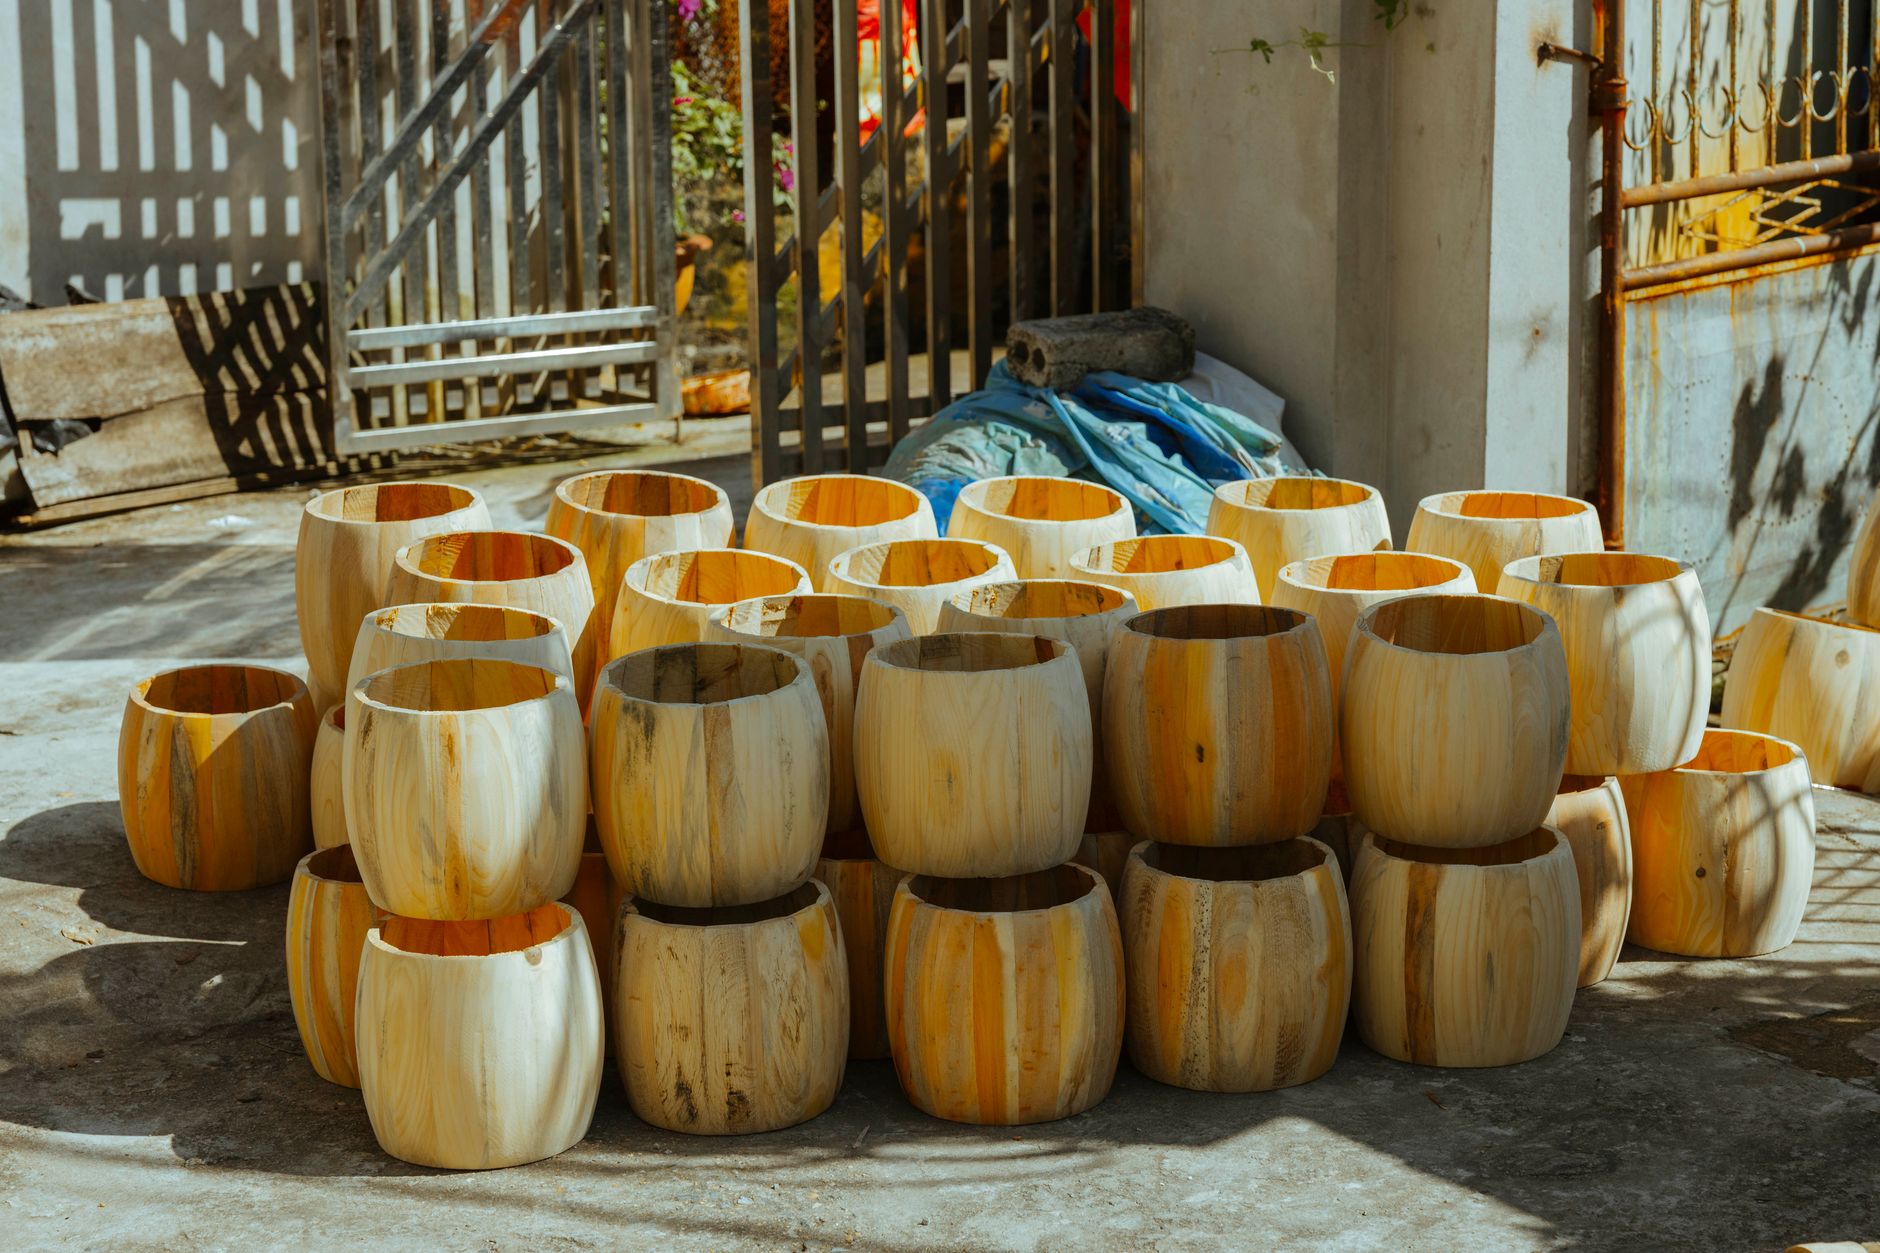
    You can buy a dedicated rain barrel with a spigot and overflow port already built in, or you can DIY one from a food-grade 55-gallon drum. Both work. I’ve seen people get really cute decorative barrels that look like urns or wooden planters — totally valid if curb appeal matters to you. We went the utilitarian route because ours is behind the coop and nobody’s judging.

    What matters most:

    • A tight-fitting lid or screen to keep out mosquitoes (this is non-negotiable in Florida, y’all)
    • An overflow port that directs excess water away from your foundation
    • A spigot near the bottom for easy access

    Positioning and Downspout Diversion

    You’ll connect your barrel to an existing downspout using a diverter kit — these are inexpensive and easy to install without any plumbing experience. We placed ours at the corner of our coop overhang, which means every big storm fills it right up. During our rainy season (roughly June through September), we rarely have to run a hose to the garden at all.

    Scaling Up: Cisterns and Larger Systems

    If you’ve got more garden space, a bigger flock, or just want to go deeper into water independence, you can chain multiple barrels together or invest in a larger cistern (250–500 gallons). This gets into more territory, but the principles are the same. The Best Rain Barrel Setup for Florida Homes post breaks down those options too.

    📌 Love this? Save it to Pinterest so you can find it later!

    How We Use Harvested Rainwater

    Okay, here’s the practical day-to-day. Our rainwater goes toward three main things:

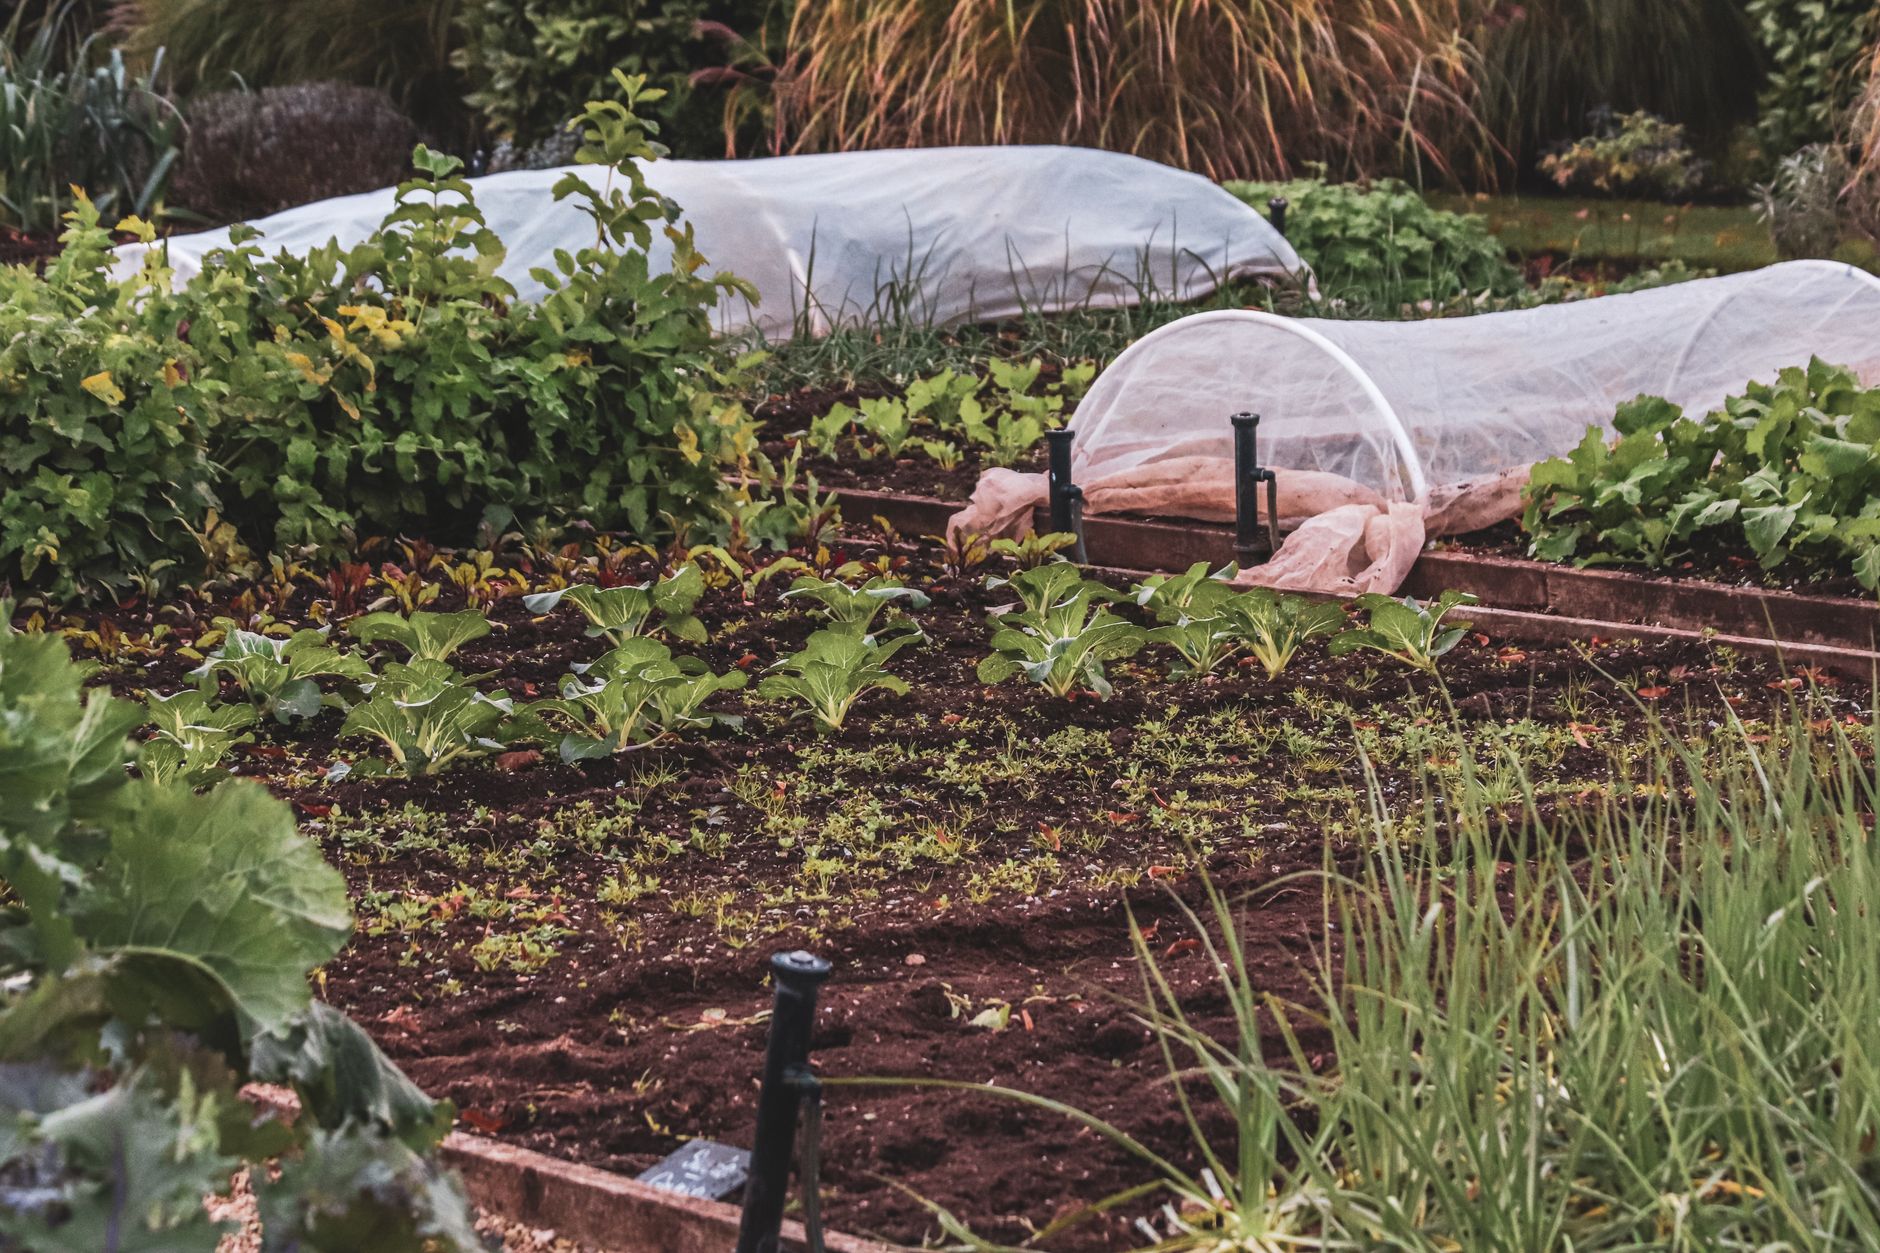
    1. The garden. We run a simple gravity-fed drip line from our barrel to the raised beds during dry stretches. Our summer garden especially benefits — if you’ve been following along, you know we’re big on growing through the heat, and I’ve written about Best Cover Crops for a Florida Garden in Summer which pairs beautifully with a rainwater setup because those crops need consistent moisture without running up your water bill.

    2. The chickens. We top off our chicken waterer with harvested water regularly. Chickens are not picky, and clean collected rainwater is perfectly fine for them. If you’re new to keeping a flock and wondering what else goes into coop care, our Natural Chicken Coop Deodorizer and Cleaning Routine is a good starting point.

    3. General outdoor rinsing. Muddy boots, dirty garden tools, rinsing out the compost bin — harvested water handles all of that. We try to be intentional about not letting clean drinking water do jobs that collected rainwater can handle just as well.

    Rainwater Harvesting as a Nature Study Lesson

    This is one of those homestead practices that doubles beautifully as a Charlotte Mason-style living lesson. Our kids helped us set up the barrel, and now they check the water level after every rain and record it in their nature journals. We’ve turned it into an ongoing study of the water cycle — not from a workbook, but from watching it actually happen in our own backyard.

    We’ve talked about where rain comes from, how it moves through a watershed, what happens when impervious surfaces (like roofs and driveways) change where water goes, and why that matters for local streams and wetlands. For kids who are growing up in the Florida panhandle where water is such a defining part of the landscape — the bays, the creeks, the aquifer — this stuff isn’t abstract. It’s alive.

    A pocket microscope is a fun add-on here too — we’ve looked at collected rainwater up close to see what’s in it (spoiler: before filtering, quite a bit). Great conversation starter.

    A Few Common Questions I Get

    Can I use harvested rainwater to water vegetables? Generally yes, though if you’re harvesting off an older roof with heavy metal flashing or treated shingles, there can be some runoff concerns. For most standard asphalt shingle roofs, using it on garden soil (rather than directly on edible leaves) is the common-sense approach. Many people do it without issue.

    Won’t standing water attract mosquitoes? Only if your barrel isn’t sealed properly. That’s why a tight mesh screen or solid lid is essential. Florida mosquitoes are not playing around and neither are we.

    What about hurricane season? Great question. If a big storm is coming, you’ll want your overflow routes to be clear and functional. Some folks empty their barrels before a major storm to reduce pressure on the system — worth considering.

    Starting Small Is Still Starting

    You don’t have to have a whole homestead operation going to benefit from rainwater harvesting. Even one 55-gallon barrel under a downspout makes a difference — in your water bill, in your garden’s health, and honestly in how connected you feel to the land you’re living on.

    There’s something quietly satisfying about using what falls from the sky instead of pulling from the tap for every single thing. It’s the same instinct that drives us toward raising our own food, keeping chickens, and teaching our kids to notice the world around them. Less dependency. More intention. A little more like how things used to be done before we outsourced everything.

    If you’re thinking about expanding your water resilience beyond rain barrels, composting at home is another piece of that same puzzle — and one the kids can get just as involved in.

    We’re all figuring this out one small step at a time over here. But step by step, it adds up to something really good.


    📖 You Might Also Like:

    Frequently Asked Questions

    Is rainwater harvesting legal in Florida?

    Yes, rainwater harvesting is not only legal in Florida but actively encouraged by state law. Florida Statute 373.185 requires water management districts to promote rainwater collection as a conservation strategy. You do not need a permit to collect rainwater for non-potable uses like irrigation, garden watering, or livestock use. Some counties even offer rebates on rain barrel systems.

    Can you drink harvested rainwater in Florida?

    Technically rainwater can be made potable with the right filtration and treatment systems, but that process is more complex and may require permits depending on how it’s integrated into your home plumbing. For most homeowners, harvested rainwater is best used for non-potable purposes like watering gardens, filling chicken waterers, and outdoor rinsing. Always filter and test before considering any drinking use.

    How much rainwater can you collect in Florida?

    Florida averages 50–60 inches of rainfall per year depending on the region, with the heaviest rain falling during the June–September rainy season. A standard 1,000 square foot roof can yield roughly 600 gallons of water per inch of rain. A basic 55-gallon barrel will fill quickly during a typical summer storm — many homesteaders daisy-chain multiple barrels or use cisterns to capture more.

    Do I need a permit for a rain barrel in Florida?

    No permit is required to install a rain barrel for non-potable outdoor use in Florida. If your neighborhood has an HOA, Florida law prevents them from outright banning rain barrels, though they may regulate placement and appearance. Larger cistern systems over a certain size may have different requirements depending on your county, so it’s worth checking locally if you’re going beyond a basic barrel setup.

    How do I keep mosquitoes out of my rain barrel in Florida?

    This is critical in Florida. Every rain barrel should have a tight-fitting lid or fine mesh screen that covers any openings, including the inlet where water enters from the downspout diverter. Make sure your overflow port is also screened. Mosquitoes only need a small amount of standing water to breed, so a properly sealed barrel eliminates the risk entirely. Never leave a barrel open or partially covered.

  • Best Cover Crops for a Florida Garden in Summer (What Actually Works in the Heat)

    Best Cover Crops for a Florida Garden in Summer (What Actually Works in the Heat)

    Best Cover Crops for a Florida Garden in Summer (What Actually Works in the Heat)

    🌿 The Short Version: Most cover crops die in Florida’s brutal summer heat — but a handful actually thrive and do serious good for your soil. This post breaks down the best warm-season cover crops for Northwest Florida gardens, how to use them, and how to turn the whole thing into a living nature lesson for your kids.

    This post contains affiliate links. I may earn a small commission at no extra cost to you.

    If you’ve ever stood in your Florida garden in late May, looked at your exhausted raised beds after spring harvest, and thought now what — I have been exactly there. The heat rolls in hard here in the Panhandle, and most of the vegetables we want to grow just tap out by June. But leaving those beds bare all summer? That’s leaving money — and soil health — on the table.

    Cover crops changed everything for us. And honestly? They’ve become one of my favorite low-key homeschool units too. There’s something so satisfying about planting something for the soil instead of for the dinner table, and watching kids get curious about why that even matters.

    Let’s talk about what actually grows here, what it does for your garden, and how to make it work even if you’re juggling chickens, curriculum, and a dog underfoot.


    Why Cover Crops Matter in a Florida Summer Garden

    Florida summer soil has a rough life. We get pounded by afternoon thunderstorms that compact and erode bare earth, baked by triple-digit heat indexes that kill off beneficial microbial life, and then the weeds just take over if you leave a bed empty for two weeks. Cover crops solve all three problems at once.

    They:

    • Protect soil from erosion and compaction during heavy rains
    • Shade out weeds naturally
    • Add organic matter and nutrients back into depleted beds
    • Some fix nitrogen right back into the soil (huge deal after heavy spring production)
    • Give you something to chop and drop before fall planting

    And if you have backyard chickens like we do, some cover crops double as a cut-and-come-again fodder source. Our girls go absolutely wild for fresh cowpea leaves. It’s a win all the way around.


    The Best Cover Crops for Florida Gardens in Summer

    1. Iron & Clay Cowpeas (Southern Peas)

    This is the number one cover crop I recommend for Northwest Florida summers, full stop. Cowpeas are incredibly heat and drought tolerant once established, they fix nitrogen like champions, and they grow fast — we’re talking lush, knee-high vines within a few weeks.

    Plant them any time from late April through July. They’ll thrive even in poor, sandy soil (hello, Florida). Let them flower and set pods if you want seeds, or chop and till them before fall planting to add nitrogen and organic matter. We do a combination — I let the chickens forage in the spent beds before we till, and they clean up every last bit.

    2. Sunn Hemp

    Sunn hemp is another Florida summer superstar. It’s a fast-growing legume that can hit 6 feet tall in about 60 days. It fixes nitrogen aggressively, shades out weeds better than almost anything, and adds a huge amount of biomass when you chop it down.

    One thing to note: chop it before it gets too woody and definitely before it sets seed, or it becomes harder to manage. We usually cut ours around 4-5 feet and let it decompose in place for a few weeks before fall bed prep. It breaks down quickly in Florida heat.

    3. Buckwheat

    Buckwheat is a non-legume cover crop that works beautifully in Florida summer, especially if you’re trying to attract pollinators and beneficial insects. It grows fast — ready to flower in about 30-40 days — and those little white flowers are covered in bees, wasps, and beneficial insects that will stick around when you plant your fall garden.

    It doesn’t fix nitrogen, but it does break up compacted soil with its root system and adds good organic matter. It can reseed itself aggressively, so chop it before the seeds dry out if you don’t want a surprise buckwheat patch in October.

    This one is wonderful for nature study. My kids have spent whole mornings watching the pollinators work those tiny flowers — we sketch them in our nature journals and it turns into a full-on Charlotte Mason nature observation lesson without me planning a thing.

    4. Sorghum-Sudangrass

    If you’ve got a large area you’re trying to rehabilitate — or a new garden bed that’s mostly weeds and compacted clay — sorghum-sudangrass is your summer weapon. It grows tall and dense, outcompetes almost any weed, and its deep roots break up hard soil. It also releases a natural compound that suppresses weed germination after you cut it.

    This isn’t the prettiest cover crop, but it is one of the most hardworking. Chop and drop before fall planting or let the chickens scratch around in the residue.

    5. Velvet Bean (Mucuna)

    Velvet bean is a powerhouse nitrogen fixer that’s well-suited to Florida’s long, hot summers. It’s a vining legume that can produce 200+ pounds of nitrogen per acre in ideal conditions — obviously we’re working on a smaller scale, but even in a few beds it makes a meaningful difference.

    Fair warning: the pods are itchy to handle at harvest, so this one isn’t a great pick for younger kids to manage hands-on. But from a soil-building standpoint, it’s impressive.


    📌 Love this? Save it to Pinterest so you can find it later!

    How We Use Cover Crops as a Homeschool Unit

    Honestly, this is one of my favorite sneaky nature study units because it doesn’t feel like school at all. We plant the cover crop beds together, and then we observe them through the summer. My kids check on them during our morning outdoor time, and we talk about what they’re noticing — how fast is it growing? What insects are visiting? What does the soil look like underneath?

    We use our pocket microscope to look at soil samples before and after, and the kids sketch what they find in their nature journals with Faber-Castell watercolors. It ties in beautifully to living science without me needing a separate curriculum.

    If your kids are really into bugs (mine absolutely are), a bug collection kit is perfect for documenting all the beneficial insects that show up to a blooming cover crop bed. We’ve identified hover flies, parasitic wasps, and native bees we’d never noticed before.

    For the chicken connection — once we’re ready to till cover crops under, we let our flock into the beds first. They scratch, eat seeds and bugs, and add their own nitrogen back into the mix. It’s a full closed loop and my kids love being part of that process. If you’re thinking about starting a flock and want breed recommendations for our area, I wrote a whole post on best egg laying chickens for Florida heat that might help.


    Practical Tips for Getting Started

    Seed directly into the bed. No transplanting needed. Most of these cover crops are direct-sown and pretty forgiving. Loosen the top few inches of soil, scatter seed, and water in.

    Water consistently for the first two weeks. After that, most of these crops are tough enough to handle Florida summer rainfall on their own.

    Chop 3-4 weeks before you want to plant your fall garden. Give the organic matter time to start breaking down before you put your fall seedlings in. We usually target early September to flip our beds so they’re ready for October planting.

    Compost what you can’t till in. If you have extra biomass, run it to your compost pile. We’ve been doing this for years and it’s dramatically improved our beds — if composting with kids is new to you, I shared how we got started in Composting at Home for Beginners.

    Pair cover cropping with good watering practices. Those summer rains are precious. If you’re not capturing them yet, our post on the best rain barrel setup for Florida homes walks through exactly what we set up and why it matters.


    What We Actually Plant Each Summer

    In our Pensacola-area garden, we typically do:

    • Cowpeas in the main vegetable beds — they’re easy, kid-friendly, and the chickens love them
    • Buckwheat in the pollinator border near our herb garden
    • Sunn hemp in any new or struggling beds that need serious soil work

    That combination keeps our beds covered, our soil fed, and gives us plenty of nature observation material through the long, hot summer months when it’d be easy to just let the garden go dormant.


    You Can Do This

    I know summer gardening in Florida can feel pointless. The heat is no joke, and it’s hard to stay motivated when your spring tomatoes gave up in May. But cover crops are one of those small investments that pay you back every single fall in better soil, fewer weeds, and healthier harvests.

    And honestly? There is something quietly beautiful about tending a garden that’s resting and rebuilding. Teaching our kids that the quiet seasons matter as much as the harvest ones — that feels like exactly the kind of lesson I want woven into our days.

    If you try cover crops this summer, come tell me about it. I love hearing what’s working in other Florida yards.


    📖 You Might Also Like:

    Frequently Asked Questions

    What is the best cover crop to plant in Florida in summer?

    Iron and clay cowpeas are the top choice for Florida summer cover cropping. They tolerate extreme heat and humidity, fix nitrogen in the soil, grow quickly, and are easy for beginners. Sunn hemp is a close second for fast biomass and nitrogen production.

    When should I plant cover crops in Florida?

    For summer cover cropping in Florida, plant between late April and mid-July. This gives your cover crop enough time to establish and do its soil-building work before you need to flip the beds for fall planting, which typically starts in late September or October in North Florida.

    How do I kill or remove cover crops before planting vegetables?

    The easiest method is to chop cover crops at the base with a string trimmer or garden shears and let them decompose in place for 2-4 weeks. You can also till them in, or let chickens scratch through spent beds before your final soil prep. Either way, give yourself 3-4 weeks between chopping and planting.

    Can I let my chickens graze on cover crops?

    Yes! Chickens love to forage in cover crop beds, especially cowpeas and legume vines. We let our flock into spent beds before tilling — they eat seeds, scratch up bugs, and add their own manure nitrogen back into the soil. Just don’t let them graze young seedlings or they’ll eat everything down to the roots before the plants establish.

    Do cover crops really help Florida’s sandy soil?

    Absolutely. Florida’s sandy, nutrient-poor soil is one of the main reasons cover cropping is so valuable here. Legume cover crops like cowpeas and sunn hemp fix atmospheric nitrogen directly into the soil. The organic matter from decomposing cover crop biomass also improves water retention and feeds the beneficial microbial life that makes nutrients available to your vegetable plants.

  • How to Grow Sweet Potatoes in Your Florida Backyard (What Actually Works Down Here)

    How to Grow Sweet Potatoes in Your Florida Backyard (What Actually Works Down Here)

    How to Grow Sweet Potatoes in Your Florida Backyard (What Actually Works Down Here)

    🌿 The Short Version: Sweet potatoes are one of the easiest, most rewarding crops you can grow in a Florida backyard — and they’re a perfect family garden project. This post walks you through exactly how we do it, from starting slips to harvesting a pile of gorgeous roots the kids can dig up themselves.

    This post contains affiliate links. I may earn a small commission at no extra cost to you.

    If you’ve ever stood in the produce section paying $3 for a single sweet potato and thought I bet I could just grow these myself — you’re right. You absolutely can. And if you’re in Northwest Florida or anywhere in the Panhandle, you’re sitting in one of the most ideal sweet potato climates in the entire country. Our long, hot summers that make everything else feel like a battle? Sweet potatoes are living for it.

    We started growing sweet potatoes a couple of years ago as part of our summer garden, and honestly it’s become one of our favorite homeschool projects. The kids get to start the slips, watch them vine out like crazy across the bed, and then — best part — do a full-on treasure hunt at harvest time. My kids talk about sweet potato digging day the way some kids talk about Christmas morning. That’s not an exaggeration.

    Let me walk you through what we actually do, what works in our sandy Florida soil, and how to turn this into a real learning moment for your kids.


    Why Sweet Potatoes Are Perfect for Florida Backyards

    Sweet potatoes (Ipomoea batatas) are a warm-season crop that thrives in heat, tolerates our humidity, and doesn’t ask for much once it gets going. They’re also one of the few vegetables that does great in Florida’s sandy, well-draining soil — which is actually their preferred growing medium. They hate waterlogged roots, and since our soil drains quickly, that’s a feature, not a bug.

    The Florida growing window for sweet potatoes is late spring through summer — typically April through June for planting, with harvest coming around 90 to 120 days later. Here in the Pensacola area, we usually get our slips in the ground in early May and harvest sometime in August or September before it starts to cool off.

    Another reason I love this crop: the vines are beautiful and lush, the flowers look like morning glories (they’re in the same family!), and the whole plant becomes a living nature study. We’ve sketched the leaves and flowers in our nature journals more than once.


    Starting Your Own Slips (This Is the Fun Part)

    You can buy sweet potato slips from a local nursery or garden center, but starting your own from a grocery store sweet potato is genuinely easy — and it’s a fantastic project to do with kids.

    What you need:

    • 1-2 organic sweet potatoes (organic matters here — conventional ones are sometimes treated to prevent sprouting)
    • Toothpicks
    • A jar of water
    • A sunny windowsill

    How to do it:

    Jab 3-4 toothpicks into the middle of the sweet potato and suspend it halfway in a jar of water — pointy end down, if there is one. Set it in a warm, sunny spot. Within a couple of weeks, you’ll see purple shoots emerging from the top and roots growing into the water.

    Once those slips are about 6 inches long, you twist them off and set them in a separate jar of water to develop their own roots — usually takes another week or so. When you see good root development, they’re ready to go in the ground.

    This whole process takes about 4-6 weeks, so we usually start ours in late March or early April. It becomes its own little Charlotte Mason nature study — we sketch the sweet potato at different stages, note changes in our journals, and it naturally leads to conversations about root systems, plant propagation, and why plants grow toward light.


    Planting Sweet Potatoes in Florida Soil

    Bed Prep

    Sweet potatoes need loose, well-draining soil to form big, smooth roots. In our sandy Northwest Florida soil, this is actually pretty natural — but I still like to mound the soil up into raised rows about 8-10 inches high. This gives the roots room to expand without running into compacted ground.

    We skip synthetic fertilizers entirely. A layer of finished compost worked in before planting is all they really need. If you’re not already composting at home, it’s worth starting — I wrote about how we do it with the kids in Composting at Home for Beginners: How to Start with Kids (and Actually Keep It Going).

    Our chickens also help us here — their composted manure goes into the garden beds and the results speak for themselves.

    Planting the Slips

    Plant slips about 12-18 inches apart in your mounded rows, burying the stem and leaving just the top leaves above ground. Water them in well and then — mostly leave them alone. Sweet potatoes are not a high-maintenance crop. They’ll spread, they’ll vine, they’ll do their thing.

    Make sure your kids have a good pair of kids’ garden gloves for planting day. My kids take garden work much more seriously when they have their own gear.

    Watering

    Water regularly for the first couple of weeks while they establish. After that, sweet potatoes are surprisingly drought-tolerant. In the middle of a Florida summer, we water about once a week unless we’ve had good rain — which in July and August, we usually have. The afternoon thunderstorm season basically waters our sweet potatoes for us.


    📌 Love this? Save it to Pinterest so you can find it later!

    Keeping Things Natural (Pests and Weeds)

    Sweet potato vines spread fast and wide — which is actually great because they shade out weeds on their own. Once the vines get going, you’ll barely have to weed at all.

    For pests, we deal mainly with sweet potato weevils and the occasional caterpillar. We keep things non-toxic — Wondercide is our go-to for pest control around the garden and the chicken yard. We also use food grade diatomaceous earth around the base of plants when we’re dealing with crawling insects. It’s the same stuff we use in the chicken coop — you can read more about our coop routine in Natural Chicken Coop Deodorizer and Cleaning Routine (What Actually Works for a Backyard Flock).

    Our chickens free-range near the garden in the evenings and help with bug control too — though we make sure the vines are protected because those girls will absolutely munch them if given the chance.


    Harvest Day — The Best Homeschool Field Trip Ever

    Here’s how you know sweet potatoes are ready: the leaves start yellowing, the vines die back a little, and if you peek under the soil near the base of the plant, you can see the tops of roots peeking up. Around the 90-110 day mark, we do a test dig.

    Harvest day in our family looks like this: everyone goes out in the morning before it gets too hot, the kids get their kids’ rain boots on (because the soil is always a little damp from morning dew), and we dig. I use a garden fork to loosen the soil a couple feet away from the base and then the kids get in there with their hands.

    The gasps when a huge sweet potato comes out of the ground — every single time. It genuinely never gets old. They’re always amazed that something that big was hiding under there the whole time. That’s the 1990s childhood magic right there. No screen is going to replicate that.

    Curing Your Harvest

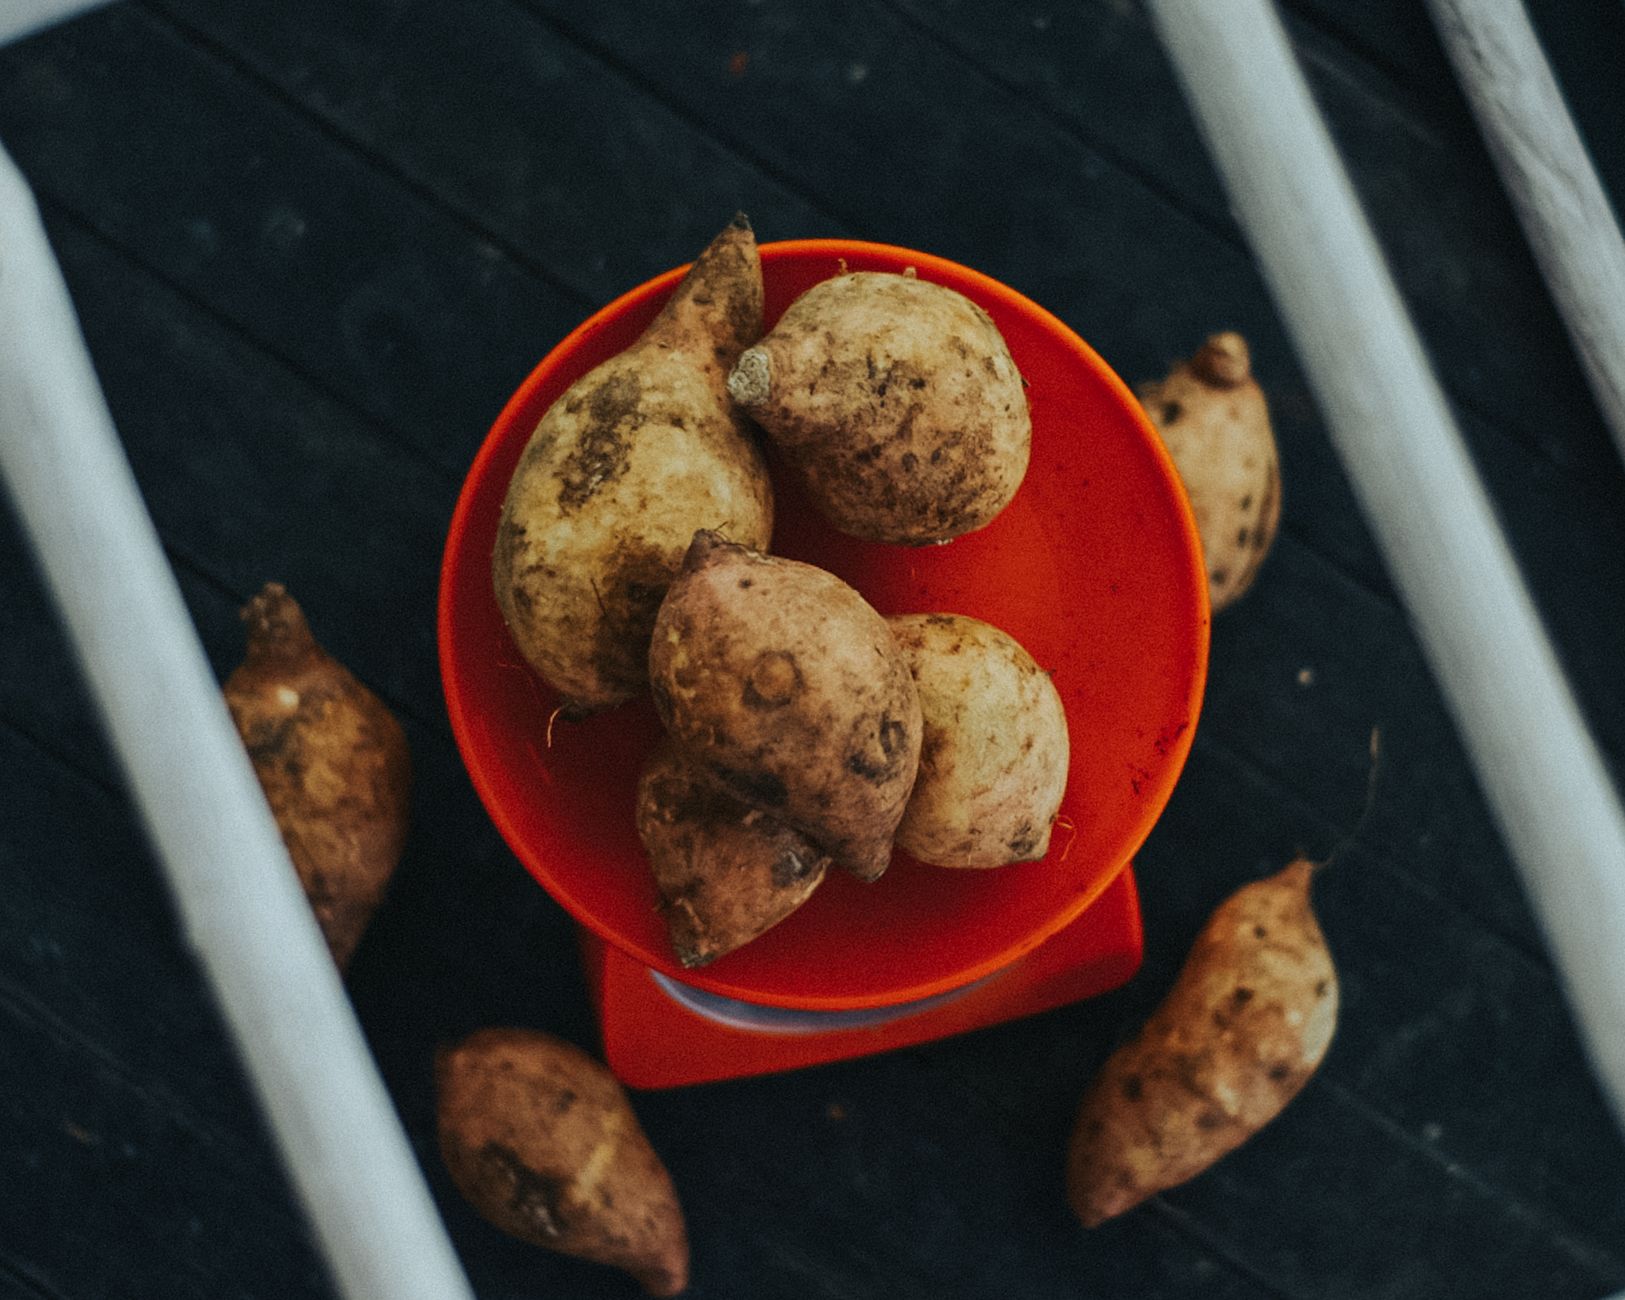
    Before you cook them, sweet potatoes need to cure. Spread them in a single layer somewhere warm (80-85°F) with good airflow for 10-14 days. This hardens the skin, heals any nicks from digging, and actually makes them sweeter. We usually cure ours in the garage. After curing, they’ll store for several months in a cool, dark spot.


    Turning It Into a Real Homeschool Unit

    This is where it gets fun if you’re a CM family. Sweet potatoes can anchor a whole unit study:

    • Botany: Draw and label the plant at different growth stages in your nature journal
    • History: Learn about how sweet potatoes moved around the world — they have a fascinating history with indigenous cultures and global trade routes
    • Math: Weigh and measure the harvest, calculate how many pounds per plant, graph it
    • Life skills: Cook with your harvest — sweet potato soup, roasted sweet potatoes, sweet potato muffins

    If you want to extend the nature study even further, a pocket microscope lets kids look at the root structure and soil up close. My kids have spent a good hour looking at what comes up on a magnified sweet potato skin. It’s more interesting than it sounds, I promise.


    A Few Quick Tips Specific to Florida

    • Don’t plant too late. If you’re in the Panhandle, anything in the ground after mid-June is pushing it. You want a full 90-120 days before temps drop in the fall.
    • Mulch matters. A layer of straw mulch around the vines helps retain moisture during dry spells and keeps soil temperatures more stable.
    • Sandy soil is your friend — don’t try to amend it into clay. The natural drainage is exactly what sweet potatoes want.
    • Save a sweet potato from your harvest to start next year’s slips. It’s free, it’s fun, and the kids feel proud that they’re continuing the cycle.

    There’s something really grounding about growing food that your family actually eats. My kids helped plant those slips, they watched the vines spread across the bed all summer, they dug up the harvest with their bare hands — and then they ate sweet potato soup at dinner and they knew where it came from. That kind of connection to food and to the earth is exactly what we’re going for with this whole homeschool, backyard-farm, intentional-family life we’re building. It doesn’t have to be complicated. You just need a little space, a sunny window, and a sweet potato from the grocery store. That’s really all it takes to get started.

    Go try it. I think you’ll love it.


    📖 You Might Also Like:

    Frequently Asked Questions

    When should I plant sweet potatoes in Florida?

    In North and Northwest Florida (including the Pensacola area), the best time to plant sweet potato slips is late April through mid-June. You want at least 90-120 frost-free days for the roots to fully develop before fall arrives. Starting your slips indoors in March or April gives you a nice head start.

    Do sweet potatoes grow well in Florida’s sandy soil?

    Yes — actually better than in heavier soils. Sweet potatoes prefer loose, well-draining soil so the roots can expand without resistance. Florida’s naturally sandy soil is close to ideal. Just mound your rows up 8-10 inches high, work in some compost, and you’re in great shape.

    How do I start sweet potato slips at home?

    Suspend an organic sweet potato halfway in a jar of water using toothpicks (pointy end down). Set it on a warm, sunny windowsill. In 2-4 weeks, sprouts will emerge from the top. Once they’re about 6 inches long, twist them off and place them in a fresh jar of water to develop roots. When the roots are an inch or two long, they’re ready to plant. The whole process takes about 4-6 weeks.

    How long does it take to grow sweet potatoes in Florida?

    Sweet potatoes typically take 90-120 days from planting slips to harvest. In Florida’s warm climate, they can sometimes be ready closer to the 90-day mark. Start checking around day 85-90 by doing a test dig near the base of one plant to see how the roots are developing.

    Do I need to cure sweet potatoes after harvesting?

    Yes, and it makes a big difference! After harvest, lay your sweet potatoes in a single layer somewhere warm (around 80-85°F) with good airflow for 10-14 days. Curing hardens the skin, heals any cuts from digging, converts starches to sugars (making them sweeter), and dramatically extends their shelf life. After curing, they’ll keep for several months in a cool, dark location.

  • Best Rain Barrel Setup for Florida Homes (What Actually Works Down Here)

    Best Rain Barrel Setup for Florida Homes (What Actually Works Down Here)

    Best Rain Barrel Setup for Florida Homes (What Actually Works Down Here)

    🌿 The Short Version: Florida gets plenty of rain — but most of it runs right off your roof and into the street. A simple rain barrel setup can capture that free water for your garden, your chickens, and your flower beds, and we’ll walk you through exactly what works in our humid, subtropical climate so you don’t waste money on the wrong setup.

    This post contains affiliate links. I may earn a small commission at no extra cost to you.

    If you’ve lived in Northwest Florida for more than five minutes, you know the drill. It’s bone dry for three weeks, your garden looks like it’s auditioning for a drought documentary, and then — boom — six inches of rain in two hours on a random Tuesday afternoon. The water rushes off the roof, floods the chicken run, and disappears into the ground before you can blink.

    That used to drive me absolutely crazy. We were hauling the hose out to water the raised beds every evening during dry stretches, and then watching perfectly good rainwater pour off the gutters and go nowhere during our summer storms. Once we set up a rain barrel — and figured out how to do it right for Florida’s specific conditions — it genuinely changed the way we manage water around our little homestead. It’s one of those simple things that feels almost too obvious once you’ve done it.

    So let me share what we actually use, what didn’t work, and what you need to know if you’re setting one up here in the Florida heat and humidity.


    Why Rain Barrels Make So Much Sense in Florida (and Why Most People Give Up on Them)

    Florida gets somewhere between 50 and 65 inches of rain per year depending on where you are. Pensacola is actually one of the rainiest cities in the continental U.S. We are not lacking for water from the sky. What we’re lacking is a way to hold onto it between those summer deluges and the dry stretches that can hit hard in the spring and early fall.

    The problem most people run into is that they grab a barrel that’s not sized right, don’t account for overflow, or end up with a stagnant mosquito breeding situation that makes them want to rip the whole thing out. All totally avoidable with a little planning upfront.


    What to Look for in a Rain Barrel for Florida

    Size Matters More Than You Think

    A single 50-gallon barrel sounds decent until you realize your roof can shed 600 gallons of water in a one-inch rainstorm. If you’re just watering a small container garden, one barrel might be enough. But if you’re watering raised beds, a chicken run, and some fruit trees like we are, you’ll want to think bigger — either a larger tank or a linked barrel system.

    For most backyard homesteads, I’d suggest starting with at least a 50–75 gallon rain barrel and adding a second one linked to it if you have the space. Two linked 50-gallon barrels gives you a solid buffer without being overwhelming to set up.

    Mosquito-Proofing Is Non-Negotiable in Florida

    This is the big one. Standing water + Florida = mosquitoes. Your barrel needs to have a tight-fitting mesh screen over the inlet, a sealed lid, and all openings (overflow spout, spigot) need to be mosquito-proof. Don’t skip this step. A barrel with a loose-fitting top will become a mosquito nursery within days during summer. Look for barrels that are specifically designed with sealed lids and screened inflow, or add your own screen if needed.

    Material and Color

    Dark-colored barrels (dark green, brown, black) discourage algae growth, which matters a lot in our sunny climate. Avoid clear or light-colored containers — algae will bloom fast. Food-grade plastic or UV-stabilized HDPE is ideal since it won’t break down in the Florida sun.


    How We Set Ours Up: A Simple, Working System

    Step 1: Pick Your Downspout Location

    Look at your gutters and think about where water needs to go most — usually closest to the garden or the chicken area. Our barrel sits right off the back corner of the house, about 30 feet from our raised beds and even closer to the chicken run. Gravity does most of the work.

    Step 2: Elevate the Barrel

    This is something a lot of people skip, and then they wonder why the water pressure is so low. Raise your barrel up on cinder blocks, a sturdy wooden platform, or a purpose-built stand — at least 12 to 18 inches off the ground. The higher it sits, the more water pressure you’ll get from the spigot. Even a little elevation makes a meaningful difference when you’re filling a watering can.

    Step 3: Modify the Downspout

    You’ll divert your downspout directly into the barrel’s inlet. Most rain barrel kits come with a diverter that keeps water flowing to the original downspout once the barrel is full, which is exactly what you want — you don’t want overflow flooding your foundation. Make sure your overflow hose is directed well away from the house.

    Step 4: Link a Second Barrel (Optional but Worth It)

    If you want more capacity, link two barrels together with a short piece of vinyl tubing and a bulkhead fitting near the base of the first barrel. The water level equalizes between them and you’ve effectively doubled your storage for very little extra cost or effort.


    📌 Love this? Save it to Pinterest so you can find it later!

    How We Use the Rainwater Around Our Property

    For the Chickens

    Our girls go through a surprising amount of water, especially in the summer when temperatures sit in the high 90s for weeks on end. We run a hose from the rain barrel spigot to refill the chicken waterer without dragging the garden hose across the yard every time. It’s one of those small conveniences that adds up to a lot of saved time over the course of a summer. If you’re managing your coop naturally and want to keep things low-effort, also take a peek at our post on Natural Chicken Coop Deodorizer and Cleaning Routine (What Actually Works for a Backyard Flock) — keeping the coop clean and the water flowing are two sides of the same coin.

    For the Garden and Raised Beds

    Rainwater is genuinely better for your plants than municipal tap water. It’s slightly acidic, free of chlorine and fluoride, and your plants just do better with it. During dry spells, we water our raised beds and herb garden straight from the barrel. If you’re still getting your Florida garden rhythm figured out, our post on How to Start an Herb Garden in Florida Heat (What Actually Grows and When to Plant It) covers which herbs actually survive our summers — and they definitely appreciate the soft rainwater.

    For Nature Study and the Kids

    Here’s the thing I didn’t expect: the rain barrel has become part of our nature study. My kids watch the water level rise after storms, we’ve talked about the water cycle in a very hands-on way, and we even used the overflow area to create a small mud kitchen zone that has provided approximately one million hours of entertainment. Very 1990s. Very wonderful.

    If your kids are into outdoor observation, a pocket microscope is great for examining water samples, insects, and whatever else they scoop out of the garden after a good rain. Pair that with a nature journal and you’ve got a full-on Charlotte Mason water science lesson happening in your backyard.


    A Few Florida-Specific Tips to Save You Trouble

    Empty or use your barrel before a hurricane. I know this sounds counterintuitive, but a full barrel can become a projectile or a structural liability in high winds. Use the water down before a major storm and lay the barrel on its side if you have to evacuate or prep for a direct hit.

    Check your county regulations. Most Florida counties allow and even encourage rain barrel use, and some offer rebates or even free barrels through local water management programs. Escambia County and Santa Rosa County have both had programs like this in the past — it’s worth checking before you buy anything.

    Flush your first roof wash. The first heavy rain after a dry spell washes off a lot of debris, bird droppings, and residue from your roof. Some people use a first-flush diverter to route that initial dirty water away from the barrel. It’s a nice upgrade if you’re using the water for anything edible.

    Clean your barrel once or twice a year. Rinse it out with a mix of water and a small amount of white vinegar to prevent algae and sediment buildup. Easy, non-toxic, and keeps everything running clean — very much in line with how we approach the rest of our home. For our other non-toxic cleaning go-tos, we love Grove Collaborative for restocking the basics.


    Is It Worth It?

    Honestly, yes — and not just for the water savings, though those are real. It’s the shift in mindset that I appreciate most. Catching rainwater is one of those small, intentional things that connects your household back to natural rhythms. You start paying attention to how much it rained, when the barrel’s getting low, whether the plants need a drink. It’s the same reason we keep chickens and do nature journaling and grow things from seed. It slows us down in the best possible way.

    If you’re already composting (if not, here’s Composting at Home for Beginners: How to Start with Kids and Actually Keep It Going), a rain barrel is the natural next step toward closing the loop on your backyard ecosystem. Start simple, see how you use it, and expand from there. You don’t have to go all-in on day one.

    One barrel, a solid spot near a downspout, and a little elevation — that’s really all it takes to get started.


    📖 You Might Also Like:

    Frequently Asked Questions

    Is it legal to collect rainwater in Florida?

    Yes, rainwater collection is legal in Florida and is actually encouraged by state water management districts. Florida Statute 570.07 specifically supports the use of rain barrels for residential water conservation. Some counties even offer rebates or free rain barrels through local programs, so it’s worth checking with your county water authority before you buy.

    How do I keep mosquitoes out of my rain barrel in Florida?

    This is the most important thing to get right in Florida’s climate. Use a barrel with a tightly sealed, screened lid and make sure all openings — including the overflow outlet and spigot — are fully sealed or screened. Never leave an uncovered barrel sitting open. You can also add a mosquito dunk (a natural Bti tablet) inside the barrel if you’re ever concerned, though a properly sealed barrel shouldn’t need one.

    What size rain barrel do I need for a Florida home?

    For a small container garden, a single 50-gallon barrel may be enough. But Florida storms can dump a lot of water quickly — a one-inch rainfall on a 1,000 square foot roof area can generate over 600 gallons of runoff. If you have a larger garden, fruit trees, or backyard chickens to water, consider linking two 50-gallon barrels or starting with a 75–100 gallon tank for better coverage during dry spells.

    Can I use rain barrel water for my vegetable garden and chickens?

    Yes, and it’s actually great for both. Rainwater is naturally soft, slightly acidic, and free of the chlorine and fluoride found in municipal tap water — plants and chickens tend to do well with it. Just make sure your barrel is clean, well-screened, and that you’re not collecting from a roof treated with certain chemical coatings. For edible gardens, avoid using water from roofs with old lead flashing or heavy moss-killer treatments.

    How do I set up a rain barrel without tools or plumbing experience?

    Most rain barrel kits are genuinely beginner-friendly. The basic setup involves placing the barrel under a downspout (elevated on cinder blocks for better pressure), attaching a downspout diverter to route water into the barrel’s screened inlet, and making sure the overflow hose is directed away from your foundation. No special plumbing skills needed — most setups can be done in an afternoon with basic hand tools.

  • Composting at Home for Beginners: How to Start with Kids (and Actually Keep It Going)

    Composting at Home for Beginners: How to Start with Kids (and Actually Keep It Going)

    Composting at Home for Beginners: How to Start with Kids (and Actually Keep It Going)

    🌿 The Short Version: Composting at home doesn’t have to be complicated or messy — even with young kids. This guide walks you through exactly how to start a simple compost system, what to toss in, how to get your kids genuinely excited about it, and how the whole thing connects to a more intentional, nature-rooted family life.

    This post contains affiliate links. I may earn a small commission at no extra cost to you.

    Honestly, I put off composting for way longer than I should have. I figured it would be smelly, confusing, or just one more thing on my plate that I’d eventually abandon next to the sourdough starter I gave up on in 2021. But then one of my kids dragged a banana peel outside, dropped it next to a fire ant mound, and said, “Mama, is this how dirt gets made?”

    And I thought — yeah, actually. Kind of.

    That question turned into a whole afternoon of digging around in the backyard, talking about decomposition, watching pill bugs do their thing, and eventually pulling out a book to look it up properly. It was one of those completely unplanned Charlotte Mason moments that ended up being better than anything I could have scheduled. And it lit a fire under me to finally just start composting.

    If you’ve been curious but haven’t taken the leap yet, let me make it easier. This is the beginner guide I wish someone had handed me — simple, real, and absolutely doable with kids underfoot.


    Why Composting Is Worth Starting (Even If You’re Busy)

    Here’s the thing: composting isn’t just good for the planet in a vague, abstract way. For families like ours — with a backyard flock, a small garden, and a real commitment to a non-toxic, intentional home — it’s genuinely practical.

    • It gives your kitchen scraps somewhere to go instead of the trash
    • It produces free, rich amendment for your garden and flower beds
    • It feeds your chickens indirectly (healthy compost = healthy soil = healthy bugs and greens)
    • It’s one of the easiest, most concrete ways to teach kids about nature’s cycles

    Down here in Northwest Florida, our growing season is long and our soil is sandy and nutrient-poor. Homemade compost is honestly one of the best things we’ve added to our garden — way better than anything bagged from the hardware store.

    And if you’ve already got chickens, this whole system starts to feel beautifully connected. Scraps feed the compost. Compost feeds the garden. The garden (and the bugs in it) feed the chickens. The chickens feed us. It’s the kind of closed loop that makes total sense to kids once they see it in action. If you’re just getting started with backyard hens, our post on Best Egg Laying Chickens for Florida Heat (What Actually Thrives in Our Southern Backyard) is a good place to start.


    What You Actually Need to Start Composting

    Not much. Truly.

    A bin: You can build one from pallets, buy a basic tumbler, or even just designate a corner of your yard. We started with a simple kitchen compost bin on the counter for daily scraps, then walk them out to a larger outdoor pile every few days. That’s it.

    A system for collecting scraps indoors: A small countertop bin with a lid keeps things tidy between outdoor trips. Nothing fancy required.

    The right mix of stuff to put in it: This is where most beginners get tripped up, so let’s break it down.


    Greens vs. Browns: The Only Rule You Really Need

    Composting is basically a balancing act between two types of material:

    Greens (nitrogen-rich):

    • Fruit and veggie scraps
    • Coffee grounds and filters
    • Fresh grass clippings
    • Eggshells (technically neutral but we toss ours in)
    • Fresh plant trimmings

    Browns (carbon-rich):

    • Cardboard and paper (torn up)
    • Dried leaves
    • Paper bags
    • Straw or hay
    • Paper egg cartons

    You want roughly 2-3 parts browns to 1 part greens. If your pile smells bad, add more browns. If it’s not breaking down, add more greens and a little water. That’s genuinely most of the troubleshooting you’ll ever need to do.

    What NOT to compost: Meat, dairy, oils, and cooked food with seasoning. We also skip anything we’ve treated with conventional pesticides.


    Getting Kids Involved (This Is the Best Part)

    My kids were into this way faster than I expected, because composting is basically just sanctioned dirt science. Here’s how we made it part of our regular rhythm:

    Make Them the Official Scrap Collectors

    Give your kids a job with a title. “Scrap collector” or “compost keeper” sounds way more exciting than “please throw the apple core outside.” Our youngest takes this role very seriously and will remind me if I accidentally throw something in the trash that should have gone in the bin.

    Connect It to Nature Study

    This is where it becomes living, breathing Charlotte Mason material. Once your compost pile has been going for a few weeks, dig into it with your kids and see what you find. Pill bugs, earthworms, and all manner of tiny decomposers will be working away in there. Pull out a pocket microscope and look at the material up close. Have them sketch what they find in a nature journal. Talk about why things break down and what role each creature plays.

    This is the kind of hands-on science that sticks. Way more memorable than a worksheet.

    Give Them Their Own Garden Patch

    When you finally have finished compost — dark, crumbly, earthy-smelling stuff — let your kids dig it into their own little garden plot. There is something deeply satisfying about watching a child understand that the banana peel they threw in a pile six weeks ago is now helping their sunflower grow.

    If you want to kick off a little planting project alongside composting, a seed starting kit is a great way to get them invested from seed to soil.

    📌 Love this? Save it to Pinterest so you can find it later!


    A Few Florida-Specific Composting Tips

    If you’re down here in the Panhandle or anywhere in Florida, a few things work a little differently:

    It heats up fast. Our summers are brutal, and that actually speeds up decomposition significantly. A pile that might take six months up north can break down in 8-10 weeks here in peak summer. This is a good thing — just make sure to keep it moist, because it can dry out quickly too.

    Watch for fire ants. They love a compost pile. We’ve had luck keeping ants at bay by not adding any sugary scraps to the top layer without covering them, and by occasionally sprinkling food grade diatomaceous earth around the base of our outdoor pile. Same stuff we use in our coop — you can read more about our natural chicken coop cleaning routine if you’re curious how we use it there.

    Leaves are gold. If you have live oak trees (and if you’re in Northwest Florida, you definitely do), rake those leaves and pile them up. They’re one of the best browns you can add, and we have more than we’ll ever run out of from October through March.


    How This Connects to the Bigger Picture

    I think about composting the same way I think about a lot of what we do around here — it’s just the old way. Kids in the 1990s watched their grandmothers throw scraps in a pile behind the garden shed. It wasn’t called “intentional living,” it was just called Tuesday.

    When my kids dig in the compost pile, collect kitchen scraps, and watch a pile of banana peels and cardboard transform into something that feeds their tomatoes, they’re learning something that can’t come from a screen. They’re learning that nothing is really wasted. That small, daily actions add up. That they are part of a bigger system.

    That is exactly the kind of education I’m trying to give them — and it didn’t cost me anything except a kitchen compost bin and a willingness to get a little dirty. If you’re looking for more ways to connect your daily home rhythms to your homeschool, our Morning Basket Ideas for Charlotte Mason Homeschool Families post has a lot of practical ideas for weaving that kind of thing in.


    Ready to Start? Keep It Simple

    You don’t need a perfect system. You don’t need the fanciest bin or a detailed spreadsheet of your green-to-brown ratio. You just need to start. Toss those veggie scraps in a pile, add some cardboard, keep it a little damp, and let your kids poke around in it. The rest figures itself out.

    This is one of those things that sounds harder than it is — and once it’s part of your family’s routine, you won’t be able to imagine life without it. Promise.


    📖 You Might Also Like:

    Frequently Asked Questions

    How do I start composting at home as a complete beginner?

    Start with a small countertop bin to collect kitchen scraps like fruit and veggie peels, coffee grounds, and eggshells. Every few days, transfer those scraps to an outdoor pile or bin and layer them with ‘browns’ like torn cardboard, dried leaves, or paper. Keep the pile slightly moist and turn it occasionally. That’s really all there is to it — no fancy equipment required.

    What can kids do to help with composting?

    Kids can collect and sort kitchen scraps, carry the compost bin outside, help layer browns and greens, stir or turn the pile, and observe the decomposition process over time. Giving them a dedicated role — like ‘compost keeper’ — makes it feel special and builds real responsibility and science skills at the same time.

    Does composting smell bad?

    A well-balanced compost pile should smell earthy, not offensive. If yours smells bad, it usually means there are too many greens (nitrogen-rich materials) and not enough browns (carbon-rich materials) like cardboard or dried leaves. Add more browns and turn the pile to introduce airflow, and the smell should improve quickly.

    Can I compost if I have backyard chickens?

    Absolutely — chickens and composting go hand in hand. You can give certain kitchen scraps directly to your chickens before the rest goes to the pile. Finished compost enriches your garden soil, which supports healthier plants and bugs that chickens love to forage. Just avoid adding chicken manure from your coop directly to a pile that’s still actively breaking down near food gardens without letting it fully cure first.

    How long does it take for compost to be ready to use?

    It depends on your climate and how actively you manage the pile, but most backyard compost is ready in 2-6 months. In Florida’s hot summers, it can break down even faster — sometimes in 8-10 weeks if the pile is moist and turned regularly. Finished compost looks dark, crumbly, and smells like fresh earth, not like rotting food.

  • How to Make Homemade Yogurt from Scratch (The Simple Way Our Family Actually Does It)

    How to Make Homemade Yogurt from Scratch (The Simple Way Our Family Actually Does It)

    How to Make Homemade Yogurt from Scratch (The Simple Way Our Family Actually Does It)

    🌿 The Short Version: Homemade yogurt takes just two ingredients — milk and a little starter culture — and most of the “work” is just waiting. This post walks you through exactly how we do it, including the method that works every single time even in a Florida summer kitchen.

    This post contains affiliate links. I may earn a small commission at no extra cost to you.

    I honestly cannot tell you how many years I bought those little plastic tubs of yogurt at the grocery store before I finally just… made it myself. And when I did, I stood there in my kitchen thinking why did I wait so long? It is genuinely one of the simplest real-food swaps we’ve made in this house, and it costs a fraction of what we used to spend.

    With a family that goes through yogurt like it’s a competitive sport — on granola, in smoothies, in my oldest’s lunchbox, mixed with a drizzle of honey for an after-outdoor-school snack — making it at home just made sense. Plus, it fits right into what we’re already doing: teaching our kids that real food isn’t complicated, and that they can make most things from scratch if they slow down enough to try.

    If you’ve been curious about how to make homemade yogurt but felt like it was some fancy fermented-food thing that required special equipment and a culinary degree, I promise you — it is not that. Come sit down. Let me walk you through it.

    What You Actually Need

    This is the part where I want to reassure you: the ingredient list is two items long.

    • Whole milk (we use a half-gallon at a time — full fat gives you the best texture)
    • Plain yogurt with live active cultures (store-bought is fine to start; after your first batch, you’ll use your own yogurt as the starter)

    That’s it. For equipment, you need a heavy-bottomed pot, a thermometer, and something to incubate the yogurt in while it sets. We use our slow cooker method most of the time, but I’ll share a few options below.

    One thing that helps us stay consistent: a good kitchen scale for measuring out our starter culture when we’re scaling up the batch. Not strictly necessary, but if you’re the kind of person who likes a little precision in your kitchen experiments, it’s worth having around.

    The Basic Method (Step by Step)

    Step 1: Heat the Milk

    Pour your milk into a heavy-bottomed pot and heat it over medium heat, stirring occasionally, until it reaches 180°F. This step is important — it denatures the proteins in the milk so your yogurt sets up thick instead of thin and weepy. Use a thermometer. Don’t skip this.

    Once it hits 180°F, take it off the heat.

    Step 2: Cool It Down

    Let the milk cool to between 110°F and 115°F. This is the sweet spot where the cultures will thrive without being killed off by heat. In the summer here in Northwest Florida, our kitchen stays warm enough that this happens faster than you’d think. In the winter? Give it a little longer.

    You can speed things up by setting the pot in a sink of cold water and stirring gently.

    Step 3: Add Your Starter

    Scoop out about a cup of the warm milk into a separate bowl. Whisk in 2–3 tablespoons of your plain yogurt (with live active cultures) until it’s smooth, then pour that back into the main pot and stir everything together gently.

    Step 4: Incubate

    This is where the magic happens, and you do basically nothing. You just need to keep your yogurt warm (around 110°F) for 6–10 hours. Here are the methods that work for us:

    • Slow cooker method: Turn your slow cooker on low for 2–3 hours, then off. Wrap it in a big towel and leave it overnight. This is our most-used method.
    • Oven method: Turn your oven on its lowest setting for a minute or two, then turn it off. Leave the light on. Set your yogurt in there, covered, and walk away.
    • Instant Pot: If you have one with a yogurt function, use it. It’s foolproof.

    After 6–8 hours, you’ll have yogurt. Check it — it should be set and slightly tangy. The longer you let it go, the tangier it gets. We usually aim for 8 hours overnight.

    Step 5: Strain (Optional, But Highly Recommended)

    If you like thick Greek-style yogurt — which we absolutely do — pour your finished yogurt into a cheesecloth-lined colander set over a bowl and let it drain in the fridge for another couple of hours. The liquid that drips out is whey, and it’s gold. We save it for smoothies, sourdough bread, or give it to the chickens. (Yes, they love it.)

    📌 Love this? Save it to Pinterest so you can find it later!

    Making It a Homeschool Moment

    Okay, this is one of my favorite things about this recipe — it is a living science lesson. We talk about bacteria (the good kind), fermentation, and why temperature matters. My kids have started using words like cultures and incubate in casual conversation, and that genuinely delights me.

    If you’re doing any kind of Charlotte Mason-style nature study or living books approach, connecting food to science is so natural here. We’ve used our yogurt days as a jumping-off point for talking about how fermentation works — and if your kids are already into that kind of thing, check out our post on How to Ferment Chicken Feed (Benefits, Method, and What We Actually Do) because it’s the same basic idea, just applied to the backyard flock.

    My kids also love having a notebook to record their observations — what the yogurt looked like before, the smell after incubation, the texture changes. It’s simple living science that doesn’t need a curriculum. That said, if your kids love to document things, a good nature journal works great for kitchen science observations too, not just outdoor study.

    Flavoring and Using Your Yogurt

    Once you’ve got plain yogurt, the world is yours. We keep ours plain and let everyone sweeten their own bowls — raw honey, fresh fruit, a little vanilla. My youngest loves stirring in some homemade jam. During strawberry season (hello, March in Florida), we’ll make a simple strawberry sauce and swirl it right in.

    We also use plain yogurt in:

    • Smoothies (instead of store-bought kefir sometimes)
    • As a sour cream substitute
    • Mixed into muffin or pancake batter
    • As a marinade base for grilled chicken

    And yes, we save a couple tablespoons every batch to use as next week’s starter. You can keep this going indefinitely — we’ve been running the same culture chain for months.

    A Note on Non-Toxic Kitchen Choices

    One of the small things I feel good about with homemade yogurt is knowing exactly what’s in it. No thickeners, no added sugars, no preservatives. For a family that’s worked hard to simplify our ingredient lists and reduce what we’re bringing into the house, this is just one more win.

    If you’re on a similar journey of cleaning up your kitchen and home, Grove Collaborative has been a staple around here for non-toxic cleaning and household supplies — I order from them regularly and it pairs really well with this whole “know what’s in your stuff” approach we try to live by.

    For storing your yogurt, we use wide-mouth canning jars — quart-sized for the big batch, pint-sized for grab-and-go portions during the week. They stack neatly in the fridge, they’re easy to see through, and there’s no plastic involved. Win-win-win.

    And if you’re into the whole batch-cooking, real-food, intentional kitchen world, our post on How to Make Elderberry Syrup at Home (The Simple Way Our Family Actually Does It) follows the same kind of rhythm — low effort, big reward, and the kids can help.

    Troubleshooting (Because It Doesn’t Always Go Perfectly)

    Yogurt didn’t set? Your temperature was probably too hot when you added the starter (you killed the cultures) or too cold during incubation. Thermometer check on both ends.

    Too thin? Strain it longer, or try using whole milk next time instead of 2%.

    Too sour? Reduce incubation time by an hour or two. Eight hours is usually our sweet spot.

    Separated and watery? That’s just whey. Stir it back in or pour it off — totally normal.

    You’ve Got This

    If you are a real-food mama trying to do right by your family without losing your mind in the process, homemade yogurt is one of those things that just clicks once you do it the first time. It becomes part of the rhythm of your week — like feeding the chickens in the morning or doing a nature walk before lunch. Low effort, high reward, and genuinely good for your people.

    I hope you give it a try this week. And when you do — report back. I love hearing when this stuff actually works for other families. That’s the whole point of sharing it.


    📖 You Might Also Like:

    Frequently Asked Questions

    How long does homemade yogurt last in the refrigerator?

    Homemade yogurt will keep well in the fridge for up to 2 weeks when stored in a clean, sealed container. We use wide-mouth mason jars and they work perfectly. The yogurt may get a little tangier as the days go on, but it’s still totally good.

    Can I use ultra-pasteurized milk to make homemade yogurt?

    Technically yes, but the results are often thinner and less reliable. Ultra-pasteurized milk (UHT) has been heated at such high temperatures that it can interfere with how the cultures set. Whole, regular pasteurized milk gives you the best, thickest results.

    Do I need a yogurt maker to make yogurt at home?

    Nope! A yogurt maker is a nice convenience but absolutely not required. We’ve made yogurt successfully using a slow cooker wrapped in a towel, an oven with just the light on, and even a well-insulated cooler with warm water. The key is just maintaining a steady warm temperature around 110°F during incubation.

    What is whey and what can I do with it after straining yogurt?

    Whey is the thin, yellowish liquid that drains off when you strain yogurt to make it thicker. It’s full of protein and probiotics — don’t throw it away! We use it in smoothies, add it to sourdough bread, use it as a base for fermenting grains, or give it to our backyard chickens as a probiotic boost.

    How much yogurt starter do I need per batch?

    For a half-gallon of milk, you need about 2–3 tablespoons of plain yogurt with live active cultures. Make sure your store-bought starter (or saved yogurt from your last batch) actually says ‘live and active cultures’ on the label — that’s what does the work of culturing your fresh milk into yogurt.

  • Raising Kids Without Screens: What We Actually Do Every Day

    Raising Kids Without Screens: What We Actually Do Every Day

    Raising Kids Without Screens: What We Actually Do Every Day

    🌿 The Short Version: Raising kids with less screen time isn’t about being strict or perfect — it’s about filling the day with things worth doing. We’re sharing the real, practical rhythms our Florida homeschool family uses to keep kids busy, curious, and genuinely happy without defaulting to a device.

    This post contains affiliate links. I may earn a small commission at no extra cost to you.

    Somebody asked me the other day how we keep our kids off screens all day. And honestly, my first instinct was to laugh — because it’s not some complicated system we engineered. It’s more like… we just rebuilt what a normal childhood used to look like before everyone had a glowing rectangle in their pocket.

    I grew up in the ’90s. I spent summers outside until the streetlights came on. I caught bugs, dug in the dirt, built forts out of whatever I could find, and read books because there was nothing else to do after 8 p.m. That wasn’t deprivation. That was childhood. And I want that for my kids more than just about anything.

    Now, are we screen-free? No. I’m not going to sit here and tell you we’ve never turned on a movie or handed someone an iPad during a long car ride. But screens are genuinely rare in our house, and our kids — honestly — don’t miss them that much. Here’s why, and here’s what we actually do instead.


    The Real Reason Kids Reach for Screens

    Before I get into our day-to-day rhythms, I want to say this: kids reach for screens when they’re bored and nothing better has been set up for them. That’s it. It’s not a character flaw. It’s not laziness. It’s just that screens are the path of least resistance when there’s nothing else pulling at their attention.

    So the shift for us wasn’t about removing screens. It was about filling the environment with so many interesting, hands-on, real-life things that screens became… kind of boring by comparison. Which sounds impossible, but I promise you it works.


    What Our Days Actually Look Like

    Morning: Nature Study Before Anything Else

    We start most mornings outside. Even in the Florida heat, the early hours are magic — cool enough to enjoy, and the backyard is full of things to notice. Our kids check on the chickens first thing, which has become this grounding little ritual. They count eggs, freshen the chicken waterer, and just observe. Who’s broody. Who’s acting funny. What bugs are scratching around in the run.

    That naturally flows into nature journaling. We keep nature journals on the back porch table, and the kids sketch what they see — a spider web, a feather, a weird mushroom that showed up overnight. My older one has started identifying birds with the Sibley Birds guide, which has turned into a genuine obsession. I wrote more about this in our post on Charlotte Mason Nature Journal Ideas for Kids (What We Actually Do Year-Round in Florida) if you want the full breakdown.

    Midmorning: Actual School Time

    Our structured homeschool time runs about two to three hours, tops. Charlotte Mason-style means short lessons, living books, real conversations — not workbook after workbook. The kids stay engaged because the lessons are short enough to hold their attention without a screen in sight.

    We weave in watercolor nature illustrations using Faber-Castell watercolors, copywork, and read-alouds. When math feels abstract, we take it outside — counting chicken eggs, measuring garden beds, sorting seeds. Concrete and real beats digital every single time for this age.

    After Lunch: Free Play (For Real)

    This is the part people ask about most. After lunch, we have a chunk of unstructured time. No agenda, no organized activity, no screens. And in the beginning? Yes, my kids were bored. They wandered around and told me there was nothing to do. I’d point at the backyard and say, go figure it out.

    Within about a week, they stopped asking. Now they:

    • Dig in the garden with their kids’ garden gloves and actually help plant things
    • Use their bug catcher kit to find and identify whatever’s crawling around out there (Florida has plenty of material)
    • Run around the yard with walkie talkies playing whatever game they invented that week
    • Splash through puddles in their rain boots after a Florida afternoon storm — which is approximately every day in summer
    • Build, draw, make up stories, bother the dog, argue, make up, and generally just exist like kids are supposed to

    The boredom is the point. Boredom is where creativity lives.

    📌 Love this? Save it to Pinterest so you can find it later!

    Late Afternoon: Chores, Cooking, Real Life

    This is where I think we’ve made one of the biggest differences. Our kids have real responsibilities, and those responsibilities eat up time that might otherwise go to screens.

    The chickens get checked again in the evening — locked up safe, coop checked over, diatomaceous earth dusted around if needed. My older one can reference our copy of Storey’s Guide to Raising Chickens when she has questions, and my younger one has his own kid-friendly chicken guide that he loves. Caring for animals is one of the most grounding, screen-replacing things I know.

    We also cook together most evenings. Not every night — I’m not a saint — but most nights. Kids who are stirring something on the stove or kneading bread dough are not thinking about YouTube. And they’re learning something that will actually matter for their whole lives.


    What We Do When They’re Restless Indoors

    Florida summer afternoons get hot, and there are absolutely days when we’re stuck inside during a downpour or just hiding from the heat. Here’s what we reach for before we’d ever reach for a screen:

    • Art projects — loose parts, watercolor paints, chalk pastels, or whatever’s on the art shelf
    • Pocket microscope with things they collected outside — feathers, leaves, pieces of eggshell from the coop
    • Board games, card games, LEGOs, audiobooks
    • Read-aloud time — I’m always in the middle of a chapter book with each kid
    • Baking something, even if it’s just muffins

    None of this is fancy. Almost all of it is stuff that existed in 1993.


    A Word About Imperfect Days

    I want to be real with you: there are days this doesn’t go smoothly. Days someone is sick, or I’m underwater with work, or everyone is just off. On those days, yes — sometimes the TV goes on. I don’t spiral about it.

    The goal isn’t perfection. The goal is that screens are the exception, not the default. When your baseline is outdoor play, real books, hands-on work, and living creatures to care for, a movie afternoon here and there doesn’t undo any of it.

    And truly — if you’re building a homeschool rhythm that keeps kids genuinely engaged, you might be surprised how little they actually miss it. Check out our Morning Basket Ideas for Charlotte Mason Homeschool Families for more on how we start our school days in a way that sets a good tone before lunch.


    If You’re Just Starting Out

    If you’re reading this because you want this but don’t know where to begin, start small. You don’t have to overhaul everything at once.

    Pick one thing from this list. Get outside for 30 minutes before anyone touches a device. Set up a simple nature journal and let your kids sketch whatever catches their eye. Put a bug collection kit in the backyard and see what happens.

    Kids want to be outside. They want to do real things. They want your attention more than any screen. Sometimes we just have to make it easier for them to choose the better thing.


    I don’t think we’re doing anything radical. I think we’re just doing what families did for generations before the internet arrived and rearranged everything. Dirt under fingernails, eggs in a basket, a chapter book at bedtime, and kids who know how to be bored and survive it. That’s the whole plan, really. And most days, it works beautifully.


    📖 You Might Also Like:

    Frequently Asked Questions

    How do I get my kids to stop asking for screens all the time?

    The most effective thing is to fill their environment with better options before boredom hits. Set up an outdoor space with tools they can actually use — a bug catcher, garden gloves, a nature journal — and establish a rhythm where outside time comes first before any device is even on the table. Most kids stop asking within a week or two once there are genuinely interesting things competing for their attention.

    Is it realistic to raise kids without screens in today’s world?

    Completely screen-free is a personal choice, but significantly reducing screen time is very realistic. Many families find that screens become much less appealing when kids have real responsibilities (like backyard chickens), unstructured outdoor play, hands-on crafts, and a homeschool rhythm that keeps them genuinely engaged. The goal for most intentional families isn’t zero screens — it’s making screens the exception rather than the default.

    What do kids actually do all day without screens?

    More than you’d expect. Kids who are given the chance tend to fill their time with outdoor exploration, imaginative play, art, reading, helping with animals or gardening, building things, and inventing games. The key is resisting the urge to fill every quiet moment for them — boredom is the engine of creativity, and kids who learn to sit in it come out the other side with something they made up themselves.

    How do I handle screen-free time when it’s too hot to go outside in Florida?

    Florida heat is real, and indoor screen-free time is absolutely manageable. Watercolor painting, board games, audiobooks, LEGOs, baking together, and using a pocket microscope to examine things collected outside are all great indoor options. Afternoon indoor time can also be a great opportunity for quiet reading or a longer read-aloud, which naturally replaces the screen without anyone feeling like they’re missing out.

    Does less screen time actually help kids focus better for homeschool?

    Many homeschool families — including those using the Charlotte Mason approach — find that kids who aren’t overstimulated by screens come to lessons with longer attention spans and more genuine curiosity. Short, engaging lessons are easier to hold attention through when a child’s nervous system isn’t already flooded from hours of fast-paced media. The results aren’t always immediate, but most families notice a real shift within a few weeks of reducing screens consistently.