Category: Backyard Chickens

  • Best Duck Breeds for a Florida Backyard Flock (What Actually Thrives Down Here)

    Best Duck Breeds for a Florida Backyard Flock (What Actually Thrives Down Here)

    Best Duck Breeds for a Florida Backyard Flock (What Actually Thrives Down Here)

    🌿 The Short Version: Not all duck breeds handle Florida’s heat and humidity equally well. This guide breaks down the best duck breeds for a Florida backyard flock — covering egg production, temperament, heat tolerance, and which ones our kids actually love spending time with.

    This post contains affiliate links. I may earn a small commission at no extra cost to you.

    So you’ve got chickens. Maybe a little garden going. And now someone in your house (possibly someone under four feet tall) has decided that ducks need to happen.

    Same.

    We’ve been raising backyard chickens for a few years now, and adding ducks to our little Northwest Florida homestead was honestly one of the best decisions we made. But I’ll be upfront — ducks are different. They’re messier, louder (depending on the breed), and they have very strong opinions about water. And when you’re living in Pensacola where it’s 90 degrees and sticky by 9am from May through October, breed selection actually matters a lot.

    I did a ton of research before we brought our first ducklings home, and I want to save you some of the legwork. Here’s what we’ve learned about the best duck breeds for a Florida backyard flock — from heat tolerance to personality to how well they work for a homeschool family that wants kids genuinely involved in the process.

    Why Ducks Work So Well in Florida

    Here’s the thing about Florida — it’s wet. Like, persistently, enthusiastically wet. We get afternoon thunderstorms half the year, standing puddles in the yard, and humidity that would make a duck feel right at home. And honestly? Ducks are right at home here.

    They’re also surprisingly good for pest control. Our girls go absolutely wild over slugs, mosquito larvae, and all the creepy-crawlies that thrive in a Florida yard. If you’re already doing nature study with your kids — keeping a nature journal and watching backyard wildlife — ducks add a whole new layer of observation and wonder. My kids have learned more about animal behavior from watching our ducks figure out a puddle than from any curriculum page.

    If you’re also raising chickens, check out our post on Raising Meat Chickens at Home — a lot of the same beginner mindset applies to ducks.

    What to Look for in a Florida Duck Breed

    Before we get into specific breeds, here’s what I was evaluating:

    • Heat tolerance — This is non-negotiable. If a breed struggles above 85°F, it’s not the right fit for us.
    • Temperament — We have kids K through 5th grade helping with chores. We need calm, handleable birds.
    • Egg production — We’re not running a farm, but we do want eggs. Duck eggs are incredible for baking.
    • Noise level — We’re in a neighborhood. Enough said.
    • Water needs — All ducks need water, but some are far more demanding than others.

    The Best Duck Breeds for Florida Backyards

    1. Khaki Campbell

    If you want eggs — and I mean a lot of eggs — Khaki Campbells are your bird. They can out-lay most chickens, regularly producing 250-340 eggs per year. They’re medium-sized, active, and handle Florida heat reasonably well as long as they have shade and fresh water.

    The one thing I’ll warn you about: Khaki Campbell females can be loud. Not aggressive, just vocal. If you’ve got close neighbors, that’s worth knowing upfront. That said, they are wonderful for kids who want to observe genuinely busy, interesting birds.

    2. Pekin

    Pekins are the classic white fluffy duck that most kids picture when they think “duck.” They’re big, friendly, calm, and surprisingly good-natured with children. Our kids can sit near them without the ducks running off in a panic, which matters when you’re trying to make morning chores feel like a pleasure instead of a battle.

    Pekins aren’t the highest egg producers, but they’re solid — and they’re excellent meat birds if that’s part of your homestead plan. They do need extra attention to shade and cool water in peak Florida summer heat because of their size, but nothing a good setup can’t handle. A reliable chicken waterer works great for ducks too, especially the nipple-style ones that stay cleaner.

    3. Muscovy

    Okay, Muscovies are a little polarizing because of the red caruncles on their face — they’re not the prettiest bird at first glance. But hear me out: Muscovies are made for Florida. They are one of the most heat-tolerant domestic ducks you can find, they’re actually native to South and Central America, and they’re genuinely quiet. The females make a soft hissing sound instead of a quack. Neighbors will never know.

    They’re also excellent foragers, great mothers if you want to hatch eggs, and their meat is considered the best of any domestic duck — leaner and more flavorful than Pekin. We have a soft spot for our Muscovies. They’re a little wild, a little independent, and very Florida.

    📌 Love this? Save it to Pinterest so you can find it later!

    4. Welsh Harlequin

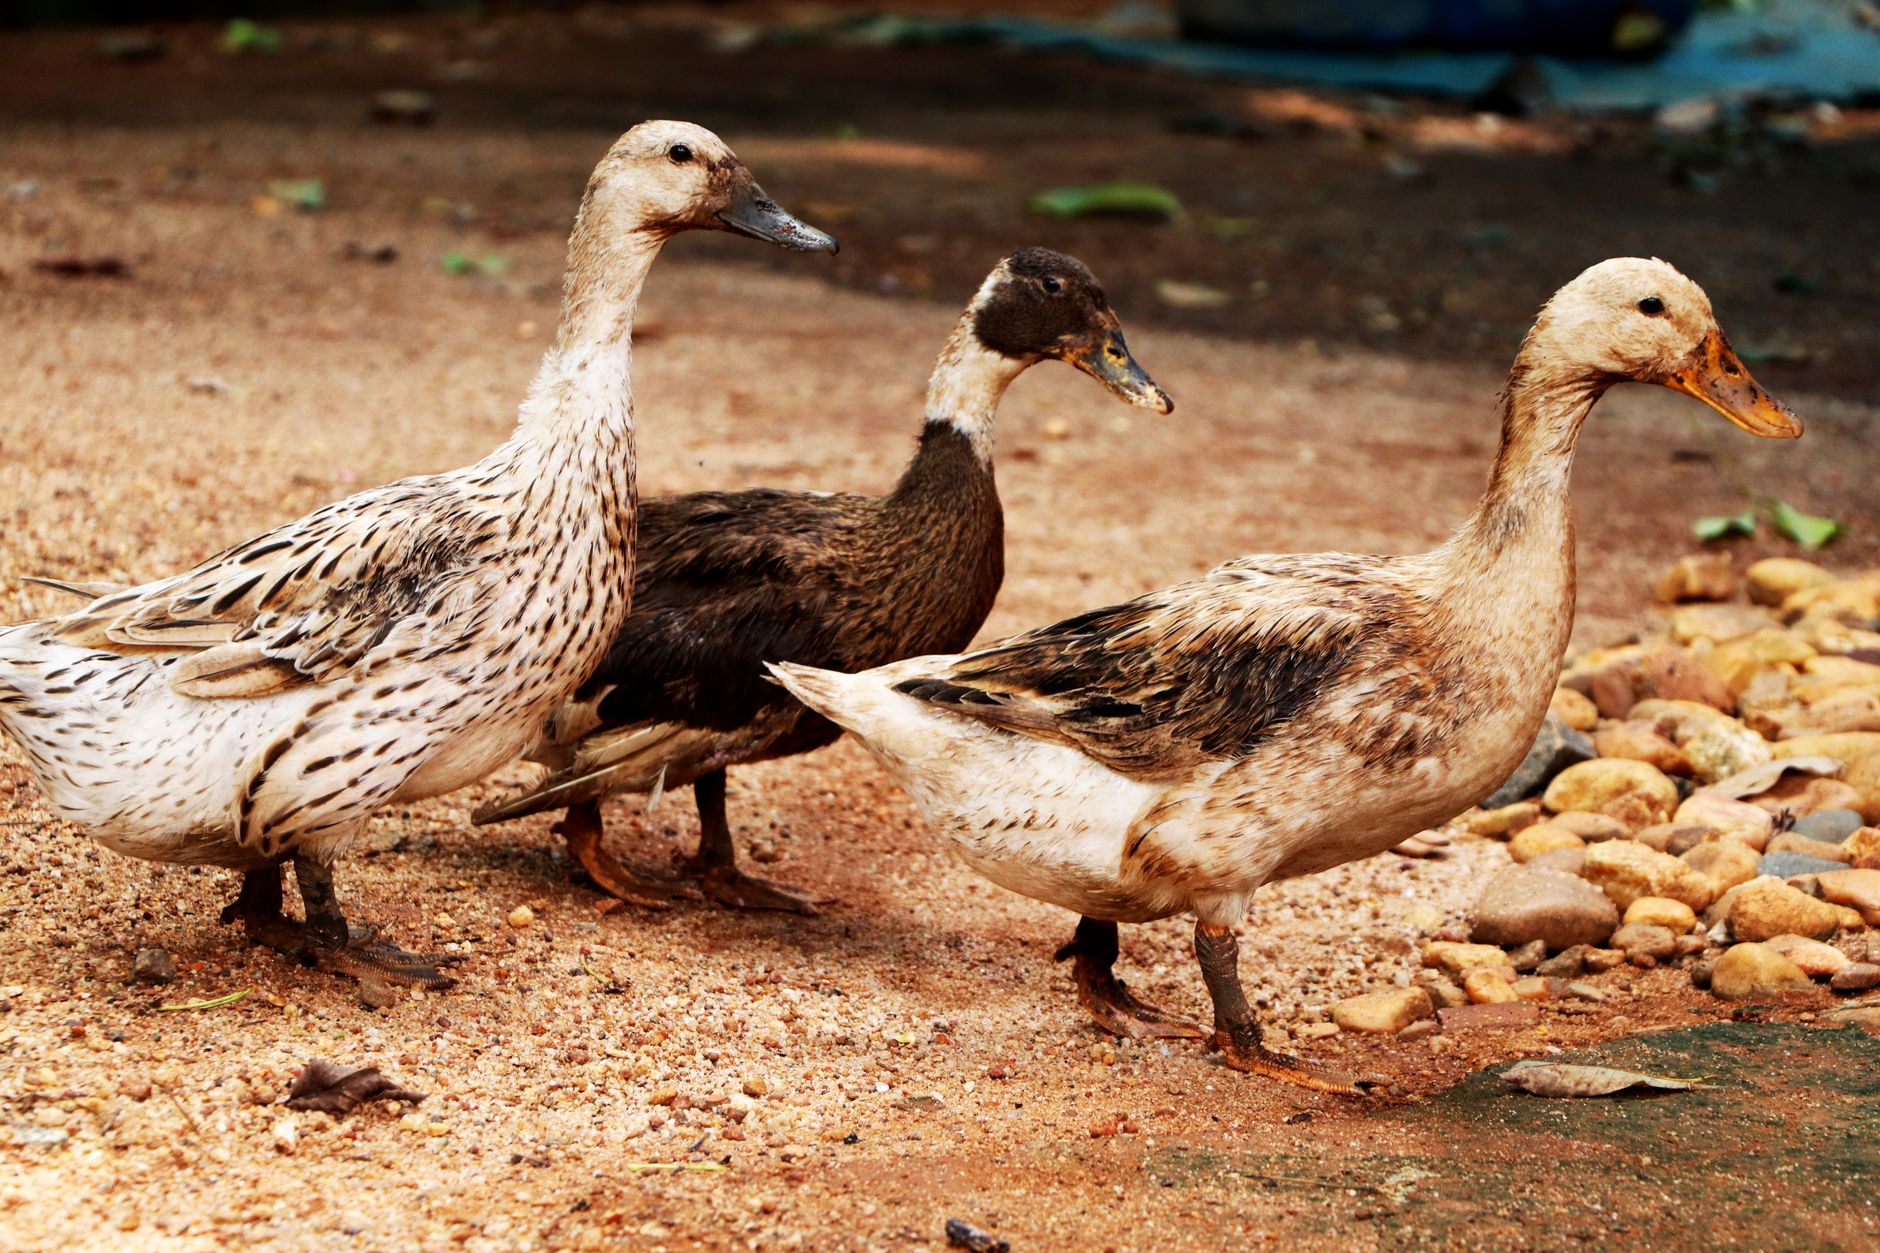
    This is my personal favorite for a family-focused flock. Welsh Harlequins are calm, beautiful (they have this lovely mottled brown and cream coloring), excellent layers, and genuinely friendly. They’re not as common as Pekins or Khaki Campbells, but they’re worth seeking out.

    They handle heat well, they’re not overly loud, and because they’re lighter-weight than Pekins, they stay a little more comfortable in humidity. For a Charlotte Mason-style nature study approach, Welsh Harlequins are stunning to sketch and observe — my daughter has filled half her nature journal with duck drawings this year alone.

    5. Swedish (Blue or Black)

    Swedish ducks are calm, sturdy, good layers, and wonderfully docile. They’re considered a heritage breed, which I appreciate from a small-homestead perspective. They do fine in Florida heat with proper shade and water, and they’re a good middle ground if you want a dual-purpose bird that’s also just genuinely pleasant to be around.

    Kids love Swedish ducks because they’re not flighty or aggressive. My kindergartner has sat next to ours during quiet reading time without the ducks batting an eye.

    Setting Up Your Florida Duck Space

    A few quick notes on setup, because Florida throws some curveballs:

    Predators are real. We’ve got raccoons, possums, hawks, and the occasional coyote in our area. An automatic coop door has been a game-changer for us — it locks up at dusk without us having to remember every night.

    Mites and lice love the humidity. We use food-grade diatomaceous earth in our coop bedding, and Wondercide for yard pest control around the perimeter. Keeping it non-toxic matters to us, especially with kids and a dog out there daily.

    Water management is the big one. Ducks will make a mud pit out of anything. We keep their water station in a designated area with gravel or pavers underneath, and we change it out daily. In our Florida heat, standing water gets nasty fast and can become a mosquito situation quickly.

    For more reading on managing a backyard flock, Storey’s Guide to Raising Chickens has a solid duck chapter, and the Kid’s Guide to Keeping Chickens is great for getting your children bought in and understanding animal care at their level.

    Ducks as Living Nature Study

    One of the things I love most about raising ducks in a homeschool context is how much natural learning happens without any planning on my part. My kids have watched clutches of eggs, observed preening behavior, tracked molting seasons, and noticed how ducks respond to barometric pressure changes before a storm rolls in (they go absolutely bonkers — it’s like a free weather forecast).

    Pair duck keeping with a good field guide like Sibley Birds and a pocket microscope for examining feathers and eggs up close, and you’ve got weeks of Charlotte Mason nature study without cracking a single textbook. That’s the kind of 1990s-style outdoor education I grew up with and want for my own kids.

    Also — How to Involve Kids in Homestead Chores by Age is a post I come back to constantly when I’m figuring out what my kids can realistically take ownership of. Duck chores fit right in.

    Our Honest Recommendation

    If I had to pick just one breed to recommend for a Florida family just getting started? Muscovy for heat tolerance and quiet, Welsh Harlequin for beauty and temperament, Khaki Campbell if eggs are your priority. We have a mix, and honestly, I wouldn’t change it.

    Ducks have added so much to our backyard — the sounds, the silliness, the way they make even the most ordinary Tuesday morning feel like something worth paying attention to. In a world that’s constantly pulling our kids toward screens, there is nothing quite like a flock of ducks to make a child stop, crouch down, and just watch.

    That’s the whole point, isn’t it?


    📖 You Might Also Like:

    Frequently Asked Questions

    What is the best duck breed for Florida’s heat and humidity?

    Muscovy ducks are widely considered the best duck breed for Florida because they are native to tropical climates, incredibly heat-tolerant, quiet, and excellent foragers. Khaki Campbells and Welsh Harlequins are also solid choices that handle Florida’s heat well with proper shade and fresh water.

    Can ducks and chickens live together in the same backyard?

    Yes, ducks and chickens can share a yard and even a coop, but there are a few things to watch. Ducks make a mess of water sources, which can create muddy, unsanitary conditions for chickens. It’s best to keep their water stations separate and ensure the coop has good ventilation. Most backyard keepers find the two get along fine with minimal management.

    How many eggs do backyard ducks lay?

    It depends on the breed. Khaki Campbells are egg-laying powerhouses, producing up to 300+ eggs per year. Welsh Harlequins and Swedish ducks lay a respectable 150-200+ eggs annually. Muscovies lay fewer eggs (around 60-120 per year) but are excellent mothers and valued more for meat. Duck eggs are larger than chicken eggs and prized by bakers for their rich yolks.

    Do ducks need a pond or pool in Florida?

    Ducks don’t require a full pond, but they do need access to enough water to submerge their heads and splash around — it’s essential for their eye and nostril health. A large rubber tub or small kiddie pool works perfectly for a backyard flock. In Florida’s heat, you’ll want to change the water daily since it gets warm and can become a mosquito breeding ground quickly.

    Are ducks good for kids and family homesteads?

    Absolutely. Ducks — especially calm breeds like Pekins, Welsh Harlequins, and Swedish ducks — are wonderful with children. They’re entertaining, curious, and relatively easy to care for once their setup is established. For homeschool families, ducks offer incredible hands-on nature study opportunities: observing behavior, tracking egg production, learning animal husbandry, and simply spending time outdoors in meaningful, screen-free ways.
  • Raising Meat Chickens at Home: A Beginner’s Guide to Getting Started (And Actually Following Through)

    Raising Meat Chickens at Home: A Beginner’s Guide to Getting Started (And Actually Following Through)

    Raising Meat Chickens at Home: A Beginner’s Guide to Getting Started (And Actually Following Through)

    🌿 The Short Version: Raising meat chickens at home is one of the most tangible ways to connect your family to real food — and it’s more doable than you think. This guide covers everything a beginner needs: which breed to start with, how to set up a brooder, what to feed them, and how to handle processing day without completely losing your mind.

    This post contains affiliate links. I may earn a small commission at no extra cost to you.

    I’ll be honest with you — the first time I floated the idea of raising meat chickens, my husband looked at me like I’d suggested we move into a yurt. We already had our laying hens and our goofy labradoodle tearing through the backyard. Adding birds we were actually going to eat felt like a whole different level of homestead commitment.

    But here’s what happened: we did it, it was hard in a few places, and it was one of the most grounding things our family has ever done together. My kids understood where their food came from in a way no book or documentary could have taught them. And honestly? That chicken tasted better than anything we’ve ever bought at the store.

    If you’ve been curious about raising meat chickens at home but don’t know where to start, this is the post I wish I’d had.


    Why Raise Your Own Meat Chickens?

    This isn’t about being extreme or off-grid. For our family, it came down to a few things:

    • Knowing what our food ate. When you raise your own broilers, you control the feed. No mystery ingredients, no hormones, no wondering.
    • Real-life education. We have a Charlotte Mason homeschool, and living books are great — but living life is better. This checked every nature study box and then some.
    • Teaching kids the full picture. We talk a lot about raising grateful kids in a consumer culture, and nothing builds that gratitude faster than understanding the actual work behind a meal.
    • The freezer. A batch of 25 Cornish Cross birds fills a chest freezer and feeds a family for months.

    What Kind of Chickens Are We Talking About?

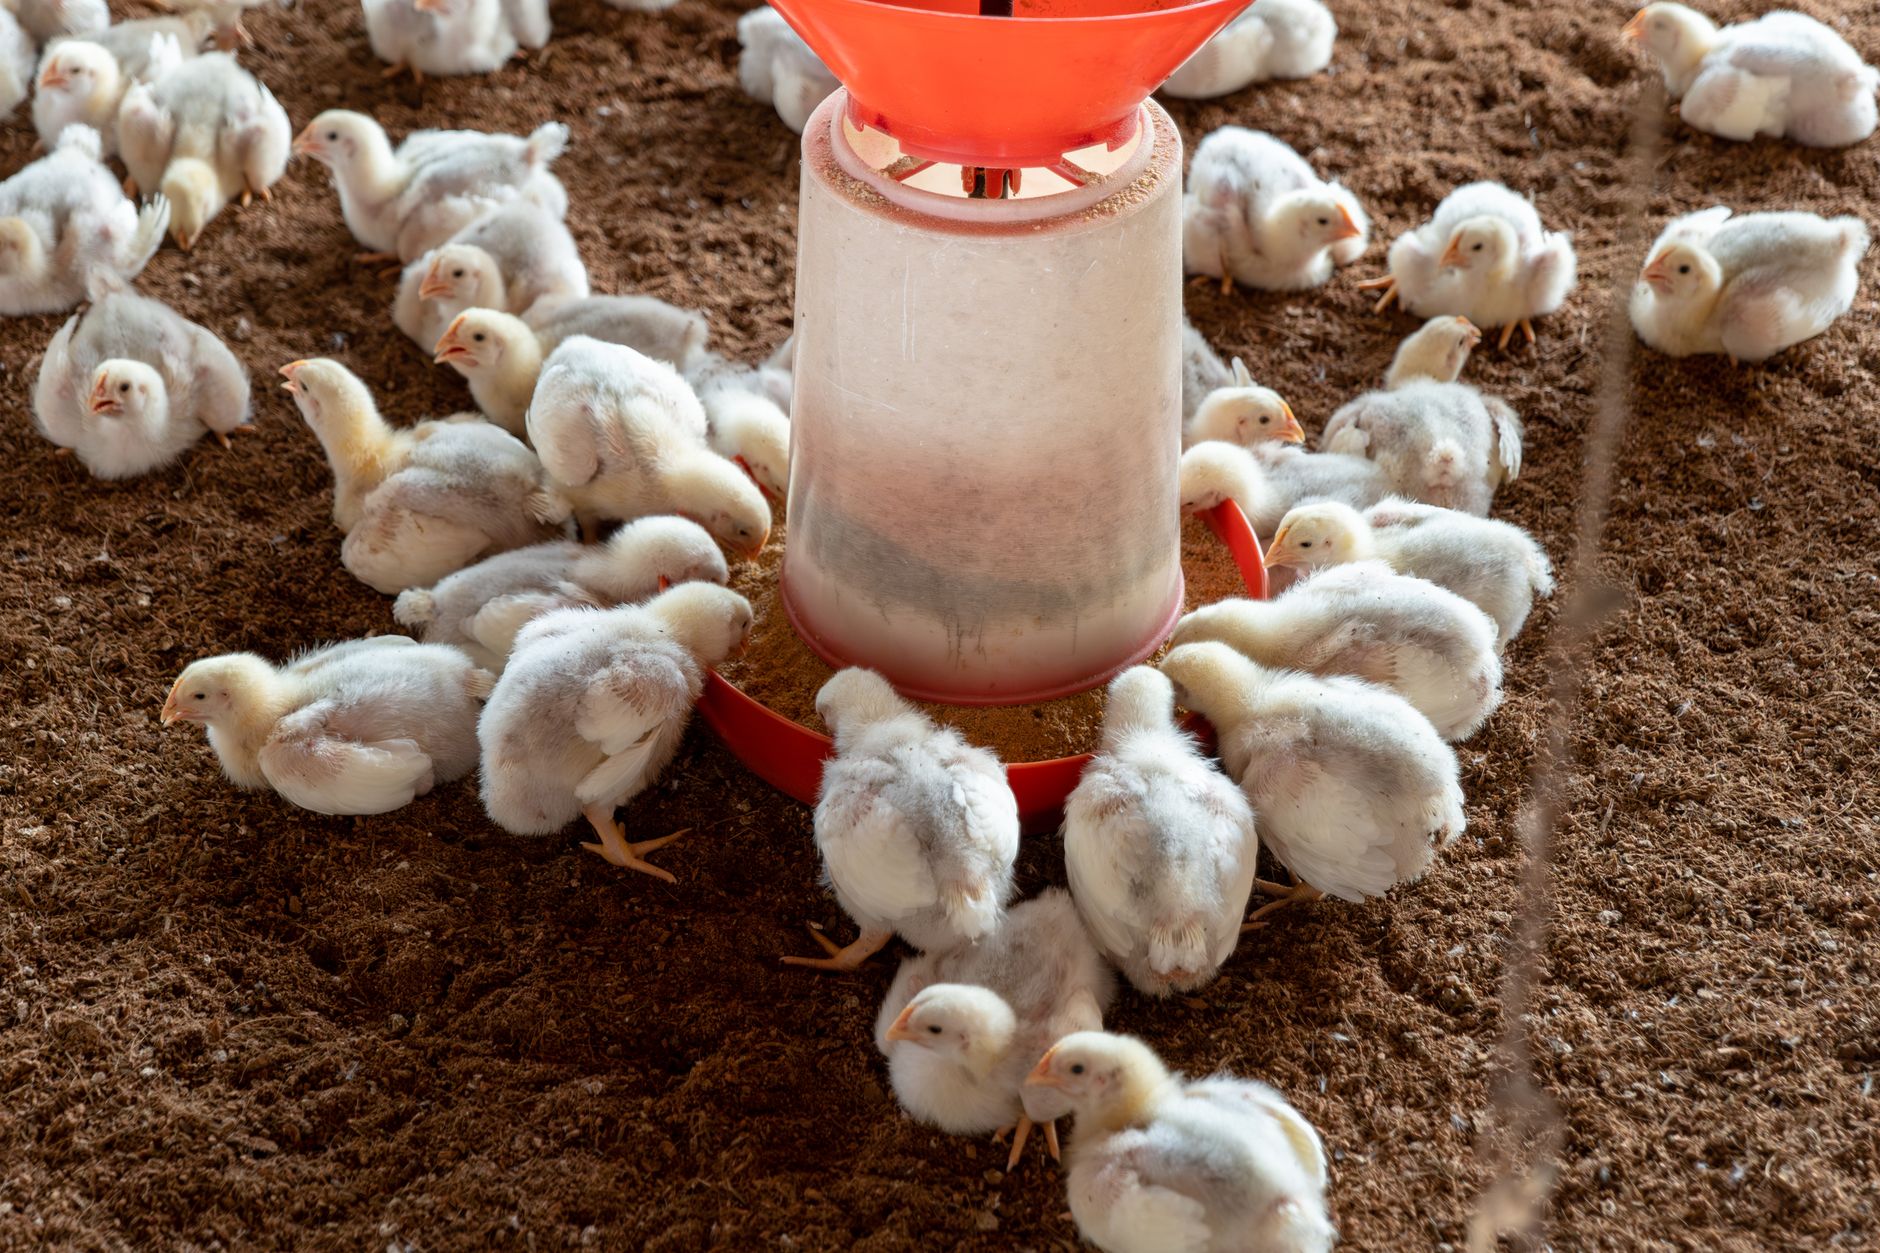
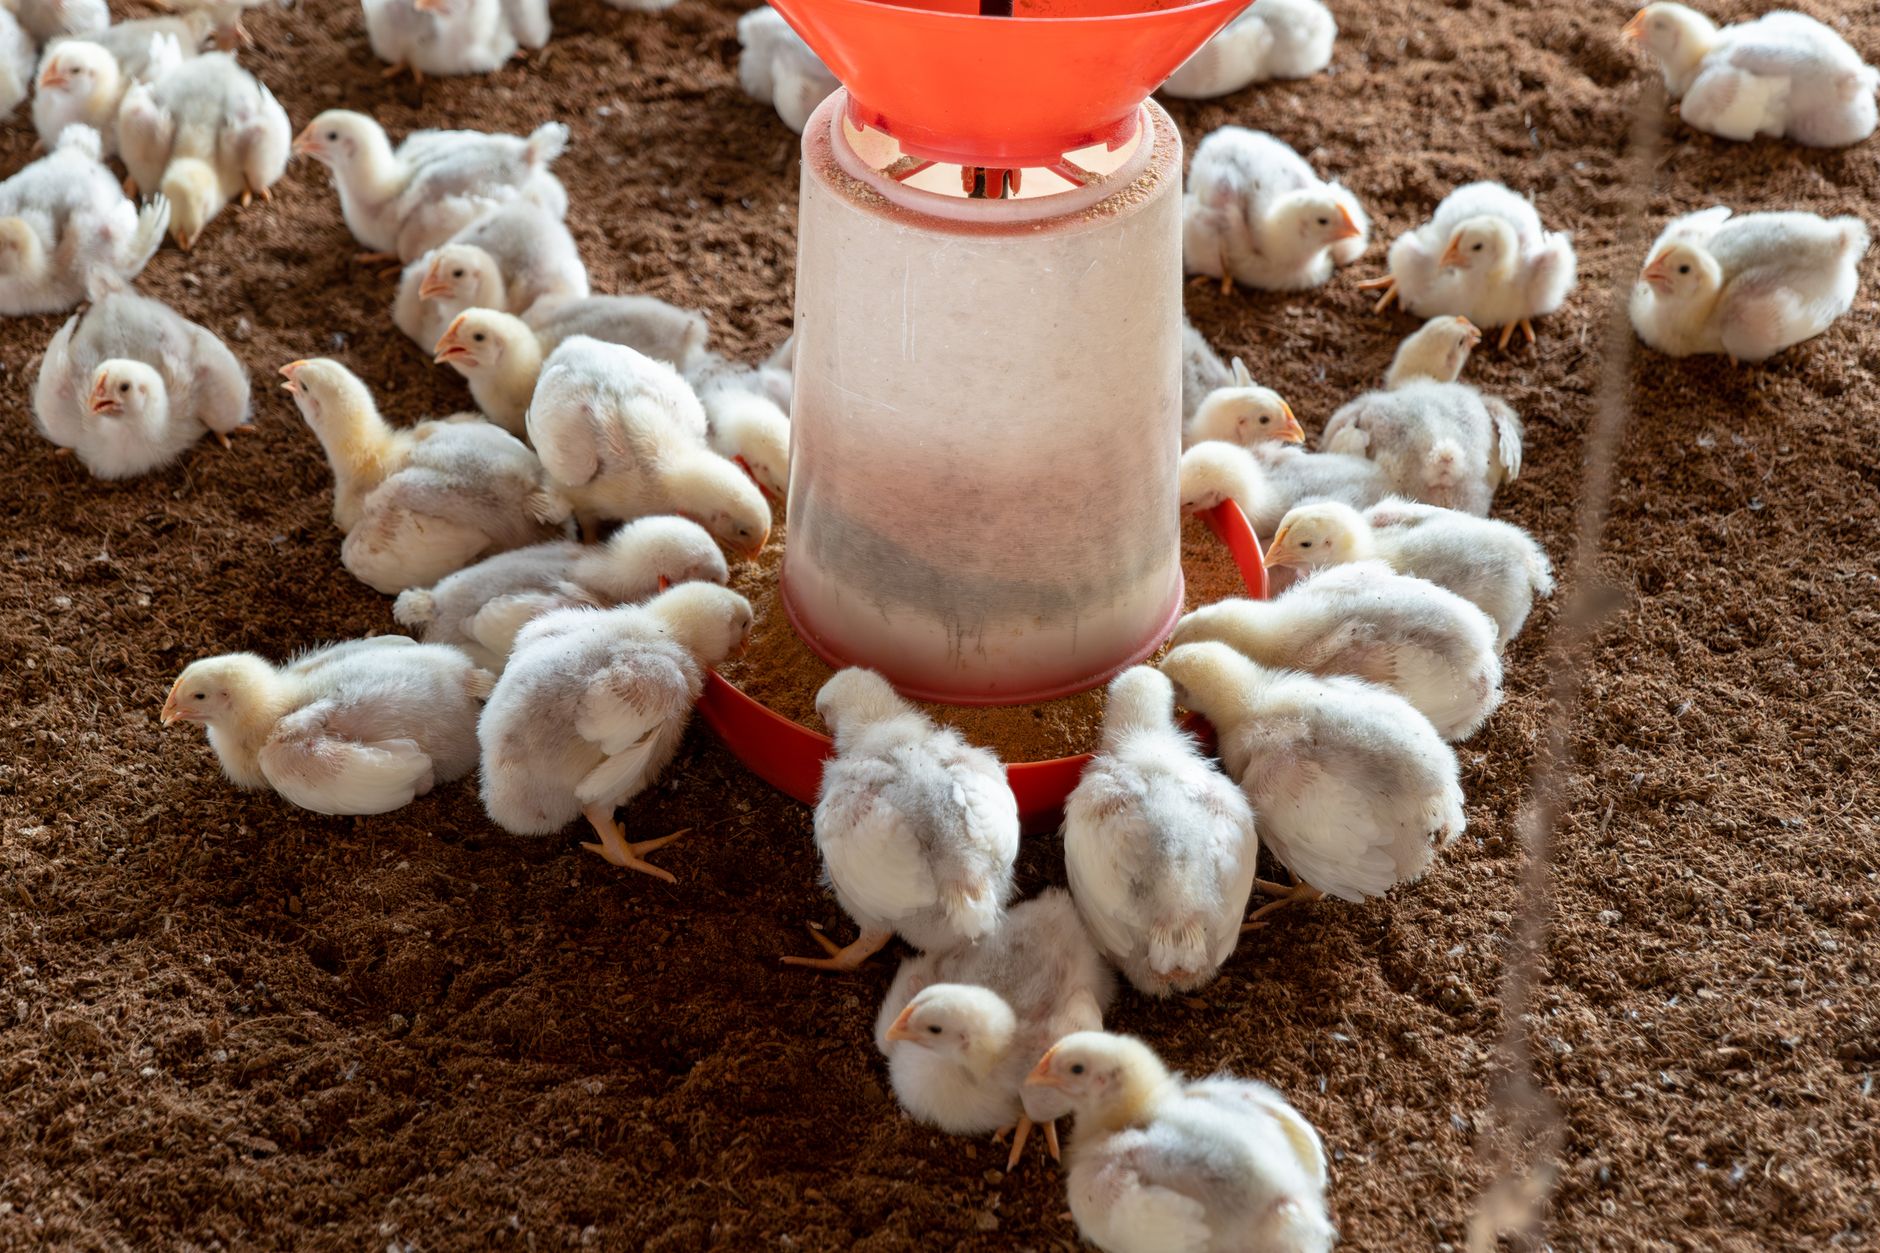
    For beginners, the answer is almost always Cornish Cross (also called Cornish Rock). They’re the same breed used commercially, and they grow fast — ready to process in about 8 weeks. That’s it. Eight weeks from chick to freezer.

    The tradeoff is that they are not graceful birds. They eat constantly, grow so fast their legs can struggle to keep up, and they are not going to be winning any personality awards. But they are efficient, and for a first-time family just trying to figure this out, efficiency is your friend.

    Once you’ve done a batch of Cornish Cross, you might want to explore Freedom Rangers — a slower-growing heritage-style broiler that does really well on pasture. Here in the Florida Panhandle heat, we actually found Freedom Rangers held up a little better in the summer months since they’re not packing on weight quite as fast.


    Setting Up Your Brooder

    Chicks arrive tiny and fragile and need warmth, food, water, and protection for the first few weeks. Your brooder doesn’t have to be fancy — we’ve used a large plastic storage tote, a stock tank, and a section of our coop all at different times.

    What they need:

    • Heat: A heat lamp or brooder plate, keeping temps around 95°F the first week and dropping 5° each week after.
    • Bedding: Pine shavings work great. Change it often — meat birds poop a lot.
    • Clean water: A nipple-style chicken waterer keeps things much cleaner than an open dish and cuts down on the bacteria buildup that can happen fast in Florida humidity.
    • Feed: Start with a high-protein chick starter (22-24% protein is ideal for broilers).

    For predator protection and general flock health, we use food grade diatomaceous earth in the bedding — it’s one of those simple, non-toxic tools that just works.


    Feeding Your Meat Birds

    Cornish Cross chicks eat a lot. Like, a lot a lot. They do best on a high-protein broiler feed for the first few weeks, then you can transition to a lower-protein grower ration closer to processing.

    One thing we do differently than some folks: we pull feed overnight starting around week 3. This slows their growth just slightly and seems to help with leg problems. It also just feels more humane to us.

    If you have the space to let them range on pasture even for part of the day, do it. They won’t range like your layers do — they mostly just sit near the food — but fresh air and grass do make a difference in the final flavor. And the kids love taking them scraps from the garden.


    📌 Love this? Save it to Pinterest so you can find it later!

    The Part Everyone Asks About: Processing Day

    Okay. Let’s talk about it.

    Processing day is the hardest part — emotionally and physically. I won’t sugarcoat it. But it is also one of the most profound experiences our family has shared, and I don’t regret doing it with our kids present one single bit.

    A few things that helped us:

    • We talked about it ahead of time. A lot. The kids knew from week one that these birds were for food. We used that language consistently, not euphemistically.
    • We found a local processor first. For your first batch, I’d highly recommend finding a USDA-inspected or small local processor in your area rather than doing it yourself. In Northwest Florida, there are a handful of small farms and co-ops that process for a per-bird fee. It is absolutely worth it for round one.
    • If you do it yourself: Get a good kill cone, a scalding pot, and a plucker if you can rent or borrow one. Doing 25 birds by hand is a serious day’s work.

    If you want to go deeper into the how-to before you start, Storey’s Guide to Raising Chickens is the reference book I keep on my shelf for both layers and broilers — genuinely the best all-in-one resource out there. For getting the kids involved in understanding the whole process, the Kid’s Guide to Keeping Chickens is sweet and age-appropriate without being watered down.


    Involving the Kids (Charlotte Mason Style)

    This is where homeschooling and homesteading overlap in the most beautiful way. Our meat chicken batches have given us:

    • Science: Life cycles, digestion, anatomy (yes, even on processing day — my oldest was fascinated)
    • Math: Calculating feed costs, cost per pound, comparing to grocery store prices
    • Nature journaling: Sketching the chicks as they grew each week using their nature journals and watercolor paints
    • Life skills: Chores, responsibility, showing up even when you don’t feel like it

    We also wrote a simple observation log — nothing formal, just notes and drawings — and tracked the birds’ weight gain week by week. That kind of living, hands-on learning is what Charlotte Mason was pointing to all along. If you want to read more about how we structure chores and farm work with kids at different ages, check out How to Involve Kids in Homestead Chores by Age.


    What to Do With All That Chicken

    Fill your freezer, friend. Whole birds, halved birds, a few cut into parts — we do a mix. Then we render the fat, make bone broth, and nothing gets wasted.

    There is something deeply satisfying about pulling a bird out of your own freezer, knowing you raised it, fed it well, and processed it yourself. My kids have started asking where store chicken comes from now. That’s the whole point.

    And when you’re cooking it up? Pull out the cast iron skillet. Pasture-raised homegrown chicken in cast iron is a different experience entirely — we have a whole post on getting started with cast iron if you need it.


    A Few Quick Florida-Specific Notes

    • Heat is the biggest challenge. Florida summers will stress your meat birds fast. Raise your spring batch so they’re processing before June if possible, or plan a fall batch that starts in September.
    • Ventilation matters more than insulation here. Your brooder and grow-out space need airflow, not warmth-trapping.
    • Pests: Flies are relentless in the Florida heat around a meat bird setup. Wondercide is our go-to for keeping things manageable without spraying anything toxic near our food animals.

    I won’t pretend raising meat chickens is easy or that processing day is fun. It’s not. But it’s real, and real is exactly what I want for our kids and our family. There’s a reason the 1990s version of childhood felt more grounded — kids saw where things came from and understood that the world took work. This is just one of the ways we’re trying to bring that back.

    If you’re on the fence, start small. Order 10 birds. Give it one round. I genuinely think you’ll be glad you did.


    📖 You Might Also Like:

    Frequently Asked Questions

    What is the easiest meat chicken breed for beginners?

    Cornish Cross is the most beginner-friendly meat bird because they grow fast (ready in about 8 weeks) and are widely available. They’re efficient and predictable, which makes them ideal for your first batch. Freedom Rangers are a good second option if you want a slower-growing, more pasture-adapted bird.

    How many meat chickens should a beginner start with?

    Starting with 10–25 birds is a sweet spot for beginners. Ten birds gives you a low-pressure learning experience, while 25 birds will meaningfully stock a chest freezer. Most hatcheries have minimum order requirements, so check before you order.

    How long does it take to raise meat chickens from chick to freezer?

    Cornish Cross broilers are typically ready to process at 6–8 weeks of age. Freedom Rangers and other heritage-style broilers take 10–12 weeks. The faster timeline of Cornish Cross is one reason they’re recommended for beginners.

    Do I need a lot of space to raise meat chickens?

    Not necessarily. Cornish Cross don’t range much, so even a modest backyard setup works. A simple tractor (a movable pen on grass) is ideal because it keeps them on fresh ground and reduces waste buildup. In Florida, shade and ventilation matter more than square footage.

    How do I process meat chickens at home if I’ve never done it before?

    For your first batch, strongly consider using a local small-scale processor — it removes a major barrier and lets you focus on the raising side first. If you want to do it yourself, invest in a kill cone, a large scalding pot, and either a hand plucker or a rental mechanical plucker. Storey’s Guide to Raising Chickens walks through the full process in detail and is a great reference to have on hand.

  • Best Container Vegetable Garden for Florida Summer Heat (What Actually Grows When It’s 95 Degrees Outside)

    Best Container Vegetable Garden for Florida Summer Heat (What Actually Grows When It’s 95 Degrees Outside)

    Best Container Vegetable Garden for Florida Summer Heat (What Actually Grows When It’s 95 Degrees Outside)

    🌿 The Short Version: Florida summers are brutal, but container gardening gives you control over soil, drainage, and placement — which is exactly what heat-stressed plants need. This post covers the best vegetables to grow in containers during Florida’s summer, plus practical tips for keeping them alive when it feels like the surface of the sun outside.

    This post contains affiliate links. I may earn a small commission at no extra cost to you.

    If you’ve ever tried to grow a garden in a Florida summer and watched everything bolt, wilt, or just give up by July, you are not alone. I have killed more tomato plants than I care to admit. The heat index hits 105, the afternoon thunderstorms flood the beds, and somehow the bugs find every single thing you planted with love.

    But here’s what I’ve figured out after a few seasons of trial and error in our little Pensacola backyard: container gardening is actually a gift in Florida summer heat. You can move things. You can control the soil. You can tuck pots up under the porch overhang when a tropical storm rolls through the Gulf. And when the kids are helping you tend the garden between morning lessons and chicken chores, containers are the perfect size for small hands to manage.

    This isn’t a perfect-garden post. It’s a real-life, what-actually-survived post. Let’s get into it.


    Why Container Gardening Works So Well in a Florida Summer

    In-ground gardening in Florida summer is a whole thing. Our soil in the Panhandle can be sandy and nutrient-poor, drainage is unpredictable, and the afternoon heat radiating off the ground can cook roots from below. Containers let you sidestep a lot of that.

    Here’s why we love growing in containers during the hot months:

    • Drainage control. You can set up a mix that doesn’t waterlog after our daily 3pm thunderstorm.
    • Mobility. If a spot gets too much afternoon sun, you move the pot. Done.
    • Soil quality. You fill it yourself. No fighting our native sand.
    • Kid-sized gardening. My kids each have their own pot or two. It’s theirs to tend, observe, and harvest. Very Charlotte Mason, very 1990s — go outside, grow something, take care of it.

    If you’re just getting started with growing food in Florida, I’d also point you to my post on How to Start a Homestead Garden in Florida for Beginners (What Actually Works Down Here) — it covers a lot of the foundational stuff that applies to containers too.


    The Best Vegetables to Grow in Containers During Florida Summer

    Not everything survives our summers. But some things genuinely thrive — and those are the ones we focus on. Here’s our actual list.

    1. Sweet Potatoes

    This is our number one summer container crop. Sweet potatoes love heat, tolerate drought once established, and produce like crazy in Florida. Use a large container — we’re talking at least a 15-gallon pot or a fabric grow bag — and let the vines spill over the sides. The leaves are actually edible too, which our kids think is wild.

    2. Southern Peas (Cowpeas / Black-Eyed Peas)

    These are made for the South. Heat-tolerant, drought-tolerant, and they fix nitrogen. Grow them in a deep 5-gallon container and they’ll keep producing through the worst of summer. We’ve had great luck with Iron and Clay and Zipper Cream varieties.

    3. Okra

    Okra in a container sounds a little ambitious, but honestly? It works. Use a 5-gallon pot minimum and a full-sun spot. Okra is basically a Florida summer weed — in the best way. My kids love picking it before it gets too big and woody.

    4. Cherry Tomatoes (Heat-Tolerant Varieties Only)

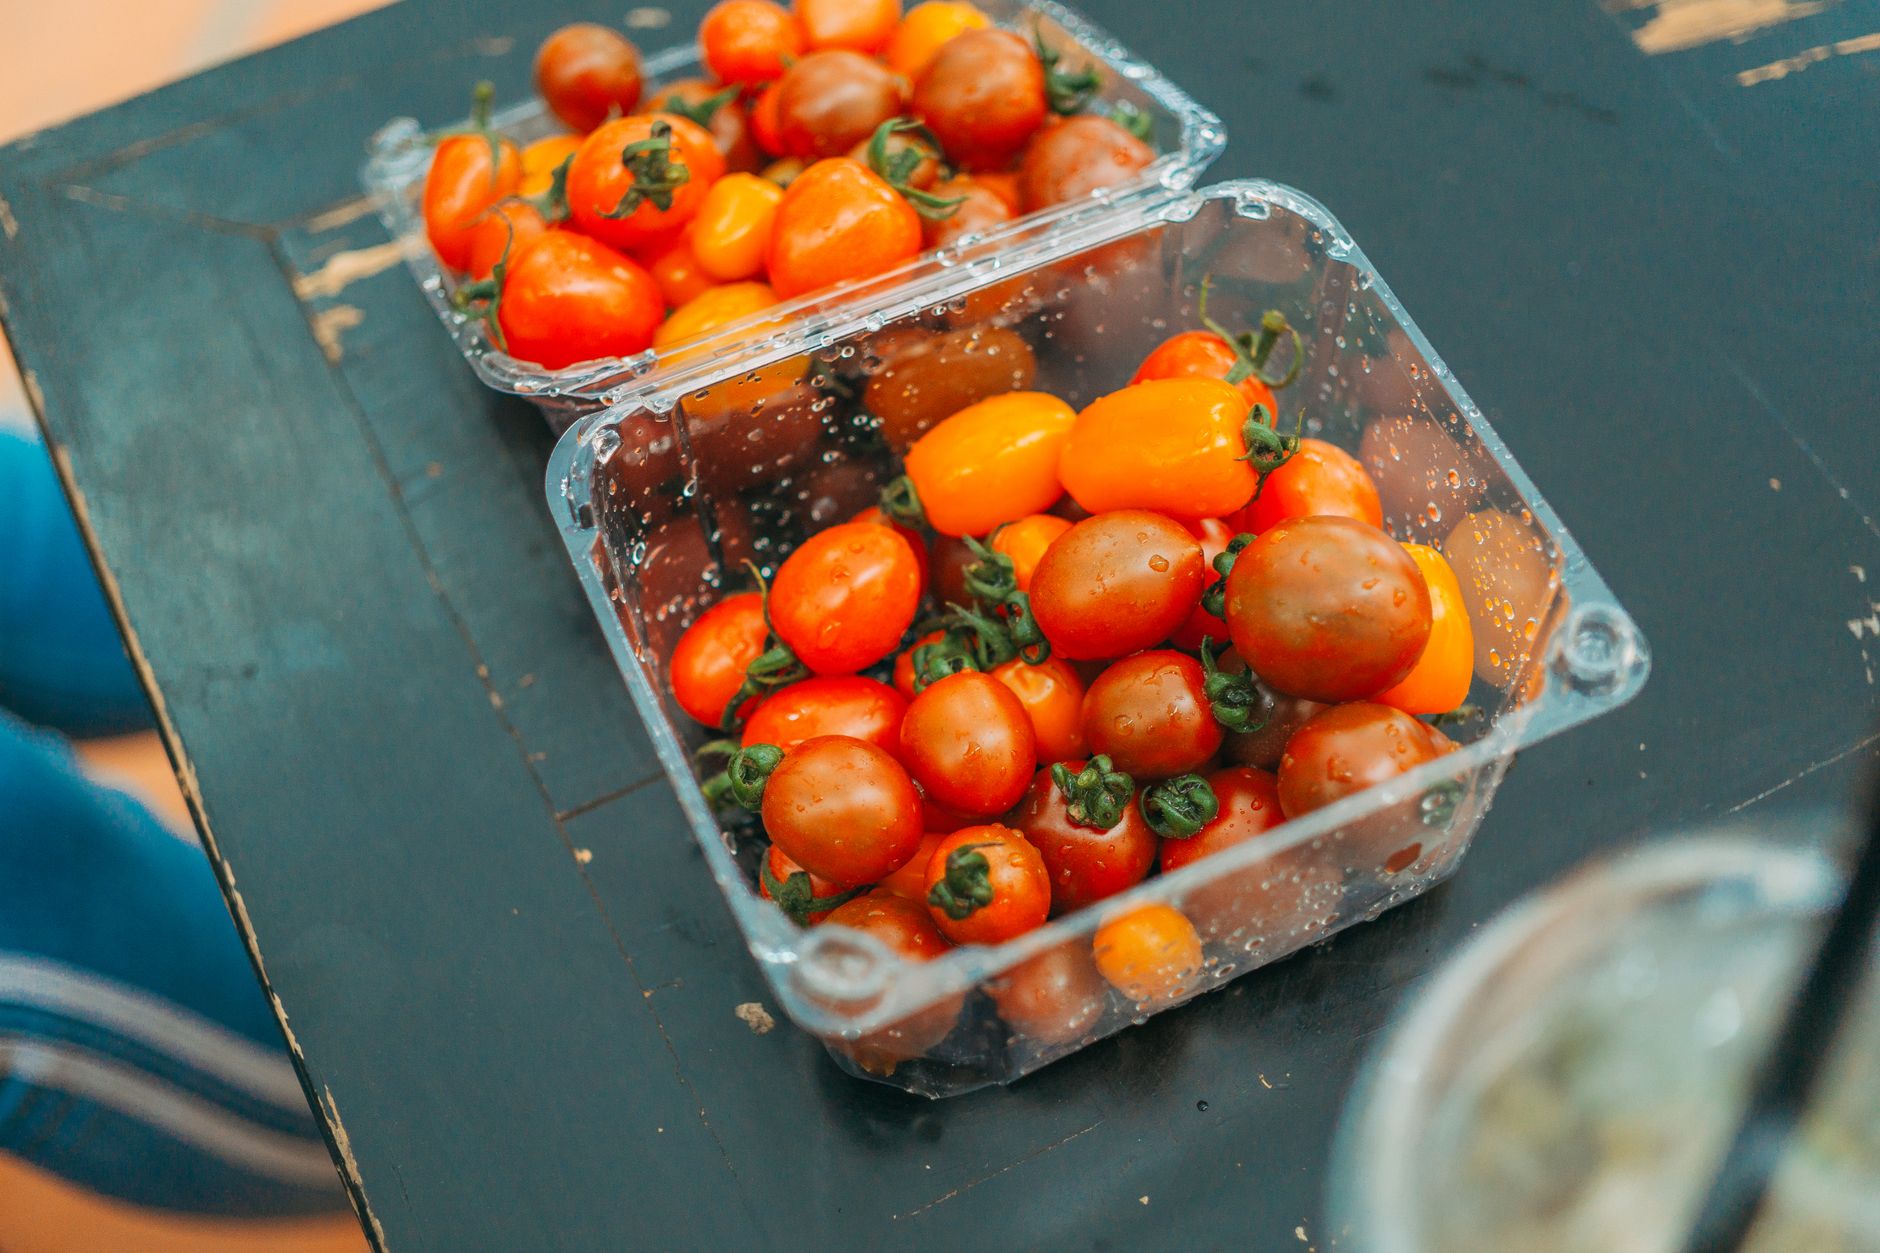
    Regular tomatoes basically tap out in Florida summer, but heat-tolerant cherry tomatoes like Solar Fire, Sweet 100, or Florida 91 will keep going if you give them afternoon shade, consistent watering, and good airflow. A large container (10+ gallons) is a must.

    5. Herbs — Especially Basil, Lemongrass, and Rosemary

    Herbs in containers are a summer win. Basil loves the heat. Lemongrass grows enormous and you can use it in cooking and keep the mosquitoes guessing. Rosemary is drought-tolerant once established. We keep herb pots right by the back door so the kids can snip things while I’m cooking.

    6. Peppers

    Peppers are slower to produce but they are genuinely summer-hardy in Florida. Hot peppers especially. Once established, they can handle the heat better than almost anything else. Keep them in at least a 5-gallon pot with good drainage.

    7. Malabar Spinach

    This is not your grocery-store spinach. Malabar spinach is a tropical climbing vine that thrives in heat and humidity — totally unlike regular spinach which bolts immediately down here. It’s great in stir-fries and the kids love watching it climb a small trellis in a container.


    📌 Love this? Save it to Pinterest so you can find it later!

    Tips for Keeping Container Vegetables Alive in Florida Heat

    Water Deeply and Consistently

    Containers dry out fast — especially dark-colored pots sitting in full sun. In peak summer, we water morning and evening. A thick layer of mulch on top of the soil (yes, even in a container) helps hold moisture. A stainless steel kids water bottle for the kids doubles as their personal watering tool for their own pots — they take that job seriously.

    Choose the Right Container Size

    When in doubt, go bigger. Larger containers hold moisture longer and give roots more room to stay cool. Fabric grow bags are actually fantastic for drainage and air pruning roots. We use them constantly.

    Use a Quality Potting Mix

    Don’t use straight garden soil in containers — it compacts and doesn’t drain well. We use a quality potting mix and amend with compost. Speaking of compost, our kitchen compost bin feeds straight into our garden soil amendments. Nothing wasted.

    Strategic Sun and Shade

    Morning sun, afternoon shade is the sweet spot for most summer vegetables in Florida. That harsh 2-5pm western sun will stress plants hard. Move containers accordingly — this is the biggest advantage containers have over in-ground beds.

    Feed Regularly

    Because you’re watering so much, nutrients leach out of containers faster. A balanced organic liquid fertilizer every couple of weeks keeps things going.


    Making the Garden a Learning Space for Kids

    This is genuinely one of my favorite parts of container gardening with kids — it’s so approachable. Each child can have ownership over one or two pots. They plant it, water it, observe it, sketch it in their nature journal, and eventually harvest from it.

    We’ll often do a simple nature study around what’s growing — drawing the flowers, looking at the roots when we repot something, noticing the insects that visit (good and bad). A pocket microscope is amazing for looking at leaves up close, checking for pests, or examining soil structure. My kids have spent a solid 45 minutes examining one tomato hornworm. No curriculum required.

    Our chickens also benefit from the garden — they love any extras we pull. Spent okra pods, overgrown basil, bolted anything. It’s a whole little ecosystem back there and the kids see all of it connecting. That’s the kind of learning I’m after.

    If you want ideas for getting kids more involved in the backyard and garden space in general, my post on How to Involve Kids in Homestead Chores by Age (Without the Meltdowns or Doing It All Yourself) is worth a read.

    And if your kids want to do the actual planting and digging, a good pair of kids garden gloves goes a long way — especially when okra leaves get prickly or fire ants show up (because they always show up).

    Don’t forget the sunscreen if you’re out there during the day. We use non-toxic sunscreen and reapply constantly because Northwest Florida sun is no joke even before 10am.


    A Few Things That Haven’t Worked for Us (So You Don’t Have to Find Out the Hard Way)

    • Cucumbers in summer — they hate the heat and humidity combo and mildew takes over fast
    • Zucchini — same issue, plus squash vine borers are relentless down here
    • Lettuce and regular spinach — gone by May, don’t even try in a Florida summer
    • Standard tomato varieties — they’ll produce for a minute and then just stop setting fruit once temps are consistently above 90

    Save your energy and focus on what loves the heat. You’ll have a much better summer.


    You Don’t Have to Do It All at Once

    Start with one or two containers. One sweet potato grow bag. One pot of cherry tomatoes on the porch. One herb cluster by the back door. See what works in your specific yard, with your specific sun exposure and water habits. Florida gardening has a learning curve and every yard is different — even within the same neighborhood.

    The goal isn’t Instagram-perfect rows of produce. It’s connection — kids who know where food comes from, who helped grow it, who watched a seed turn into something edible. That’s the whole thing. That’s worth every wilted plant and fire ant encounter.

    If this sparked some ideas for your backyard, I’d love to know what you end up growing. Drop a comment below or come find me over on Pinterest. Happy gardening, friends — and drink water. It’s hot out there.


    📖 You Might Also Like:

    Frequently Asked Questions

    What vegetables grow best in containers in Florida summer heat?

    The best bets for container gardening in Florida summer are sweet potatoes, southern peas (cowpeas), okra, heat-tolerant cherry tomatoes, peppers, Malabar spinach, and herbs like basil and lemongrass. These crops are adapted to high heat and humidity and will outperform cool-season vegetables that bolt and fail in the summer months.

    How do I keep container vegetables from drying out in Florida heat?

    Water deeply morning and evening during peak summer, mulch the top of the soil in your containers, choose larger pots that hold moisture longer, and position containers to get morning sun with afternoon shade. Fabric grow bags also help regulate soil temperature and drainage, which makes a big difference in the Florida heat.

    Can you grow tomatoes in containers in Florida summer?

    Yes, but you need to choose heat-tolerant varieties specifically. Look for Solar Fire, Sweet 100, or Florida 91 tomatoes. Standard varieties stop setting fruit when temperatures are consistently above 90°F. Give them a large container (10+ gallons), afternoon shade, and consistent watering for the best chance of success.

    What size containers do I need for a Florida summer vegetable garden?

    Bigger is almost always better in Florida because larger containers hold moisture longer and keep roots cooler. Aim for at least 5 gallons for peppers and herbs, 10+ gallons for tomatoes, and 15-gallon fabric grow bags for sweet potatoes. Smaller containers dry out too quickly in Florida’s summer heat.

    Is it worth gardening in Florida during summer or should I wait until fall?

    It depends on what you want to grow. Florida’s best gardening seasons are fall and spring, but summer container gardening absolutely works if you stick to heat-loving crops like sweet potatoes, okra, southern peas, and peppers. Many Florida gardeners take a partial summer break and then go big again in September and October when temperatures start to drop.

  • How to Teach Kids to Cook Basic Skills by Age (A Real Kitchen Guide for Homeschool Families)

    How to Teach Kids to Cook Basic Skills by Age (A Real Kitchen Guide for Homeschool Families)

    How to Teach Kids to Cook Basic Skills by Age (A Real Kitchen Guide for Homeschool Families)

    🌿 The Short Version: Teaching kids to cook doesn’t have to be complicated or messy-stressful — it just takes matching the task to the age and letting them actually do it. This guide breaks down realistic cooking skills by age so your kids grow up capable, confident, and at home in the kitchen.

    This post contains affiliate links. I may earn a small commission at no extra cost to you.

    Here’s something I think about a lot: my grandmother never once sat down and formally “taught” anyone to cook. She just cooked, and her kids were there. They stirred, they tasted, they peeled, they watched. And somehow — by the time they were teenagers — they knew how to feed themselves and a crowd.

    We’ve made this so much harder than it has to be.

    I’m not saying throw a four-year-old at a hot stove and call it a lesson. But I am saying that if we’re waiting until kids are old enough to “really help,” we’re waiting too long. The kitchen is one of the most natural places to live out that whole 1990s-childhood philosophy — real work, real life, real skills. No worksheet required.

    Our homeschool days weave right through the kitchen. Math lives in measuring cups. Reading lives in recipe cards. Science lives in what happens when you mix baking soda and vinegar, or why bread rises, or what exactly our backyard chickens give us every single morning. Cooking is living curriculum, and I want my kids soaking it up for years before they ever leave this house.

    So here’s what’s actually working for us — broken down by age, no fluff.


    Ages 2–4: The “I Do Too” Stage

    This age is less about skills and more about belonging. They want to be where you are. Use that.

    What they can genuinely do:

    • Wash fruits and vegetables (they love this)
    • Tear salad greens or fresh herbs
    • Stir cold ingredients in a bowl
    • Pour pre-measured ingredients
    • Mash soft things like bananas or cooked sweet potatoes
    • Help set the table

    Get a sturdy learning tower or pull a chair up to the counter. Keep your expectations low and your patience high. The goal here is presence, not perfection. Let them be part of it.

    This is also a great age to introduce the idea that food comes from somewhere — our garden, our chickens, our farmers market. Even little ones can connect eggs in the carton to the hens outside.


    Ages 5–7: Building Real Skills

    This is where things get genuinely exciting. Kindergarten and first grade kids are ready to do more than stir — they can start learning actual techniques with the right supervision.

    Skills to introduce:

    • Cracking eggs (yes, there will be shells — that’s fine)
    • Spreading butter or nut butter with a butter knife
    • Peeling soft vegetables like cucumbers or cooked potatoes
    • Measuring and leveling dry ingredients
    • Simple salad assembly
    • Making sandwiches and simple snacks independently
    • Helping read recipes aloud (hello, reading practice)

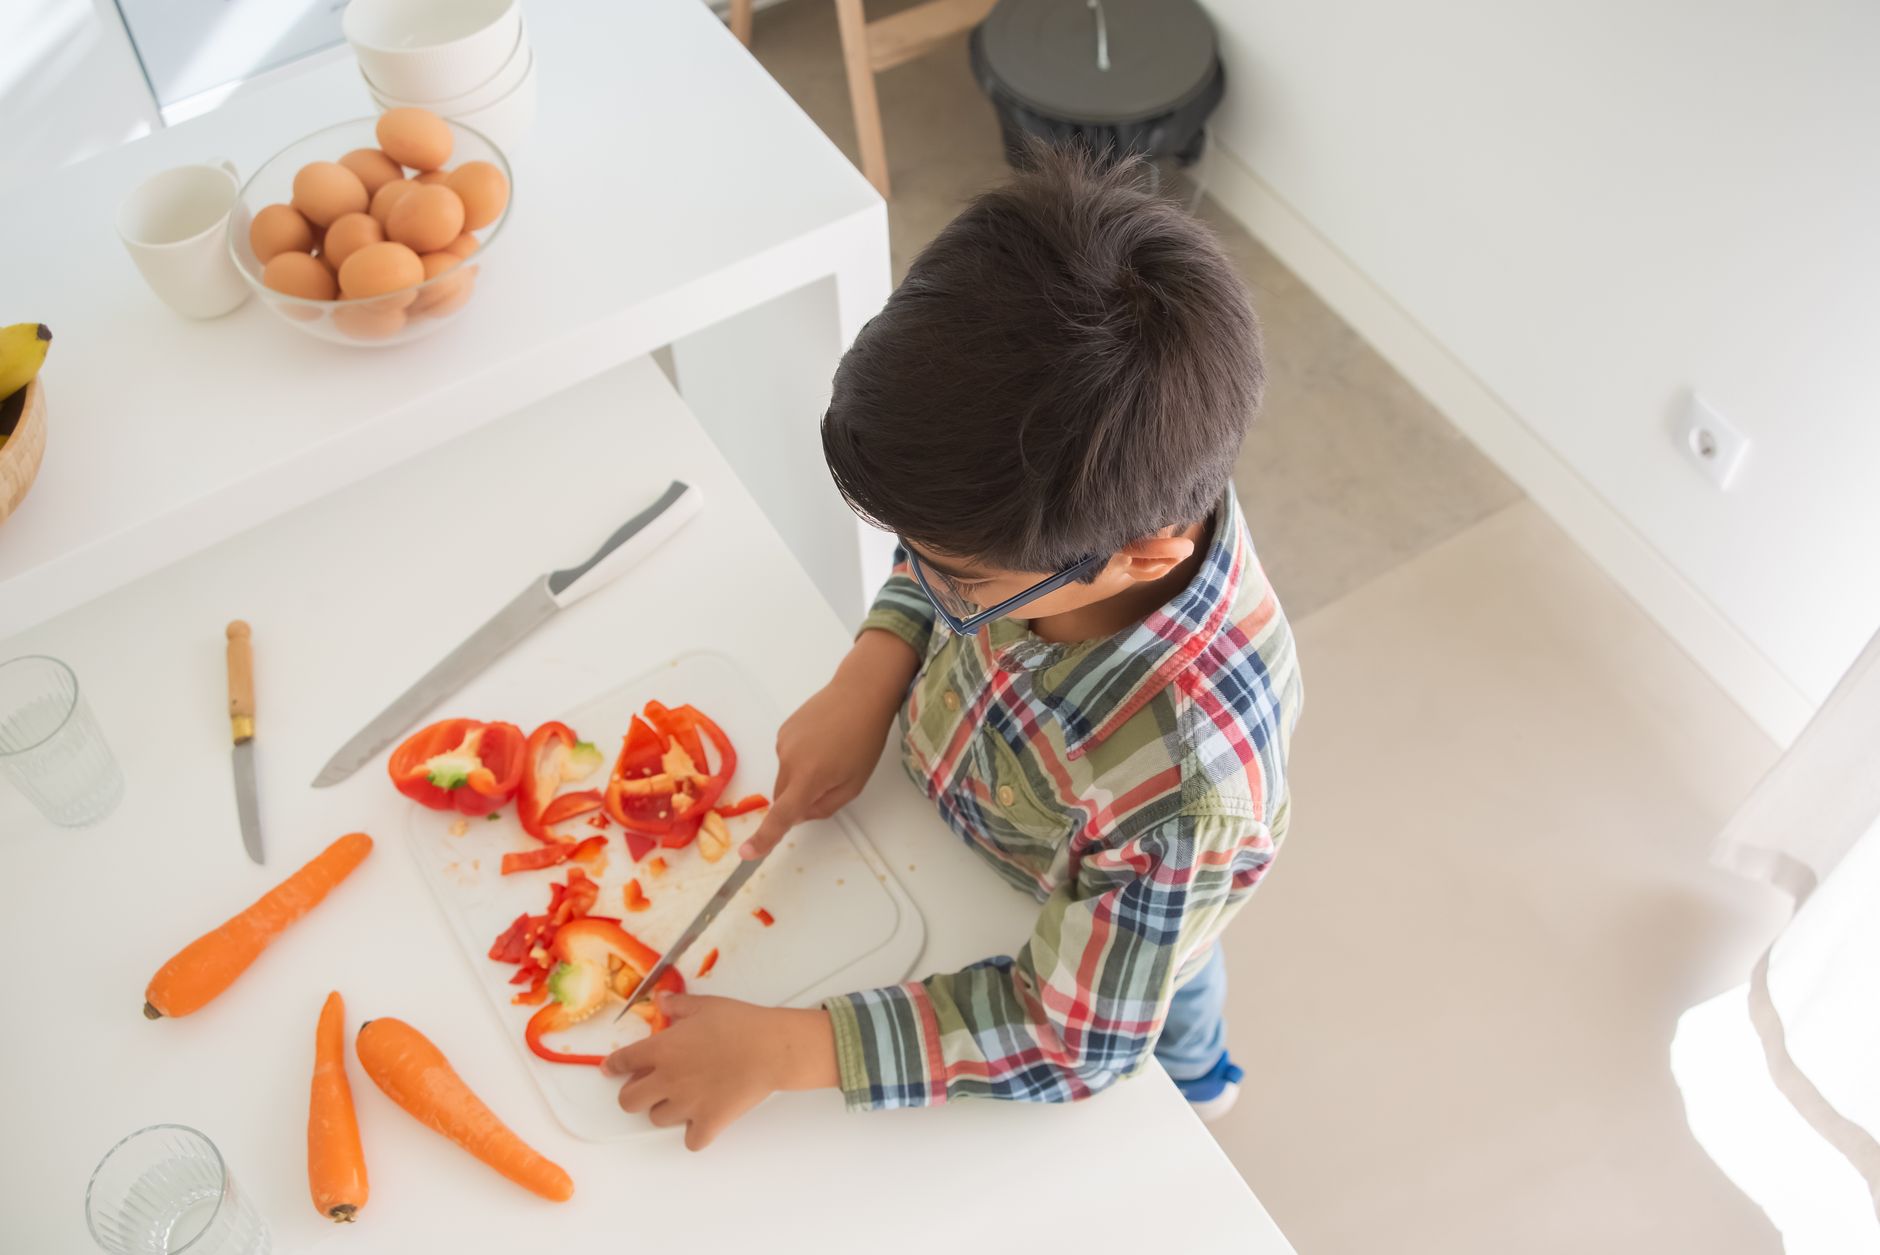
    We started cracking eggs around age five, and honestly it became a morning ritual. Our kids check on the hens, collect eggs, and then help make scrambled eggs for breakfast. That loop — from coop to kitchen to table — is worth more than any lesson I could plan.

    If you’re using a Charlotte Mason approach, recipes are wonderful for copywork and narration, too. Have them dictate what they made and how, then illustrate it in their nature journal. Food journaling is an underrated homeschool gem.


    Ages 8–10: Real Responsibility in the Kitchen

    This is the sweet spot. Third through fifth grade kids can handle a lot more than we usually give them credit for — and they genuinely want to feel capable.

    Skills to build here:

    • Using a sharp knife with supervision (start with a chef’s knife on soft vegetables, proper grip, curled fingers)
    • Operating the stovetop with an adult nearby
    • Following a recipe mostly independently
    • Making scrambled eggs, pasta, rice, and simple soups
    • Baking from scratch — muffins, cookies, quick breads
    • Learning basic food safety (handwashing, cross-contamination, temperatures)
    • Cleaning up as they go

    The knife skill thing feels scary, but a sharp knife with proper technique is actually safer than a dull one. Teach the “claw grip,” stay nearby, and let them practice on bananas or mushrooms first. My kids were so proud the first time they chopped onions for soup. Like, genuinely beaming.

    This is also the age to connect math to cooking more intentionally. Doubling a recipe, converting measurements, fractions in the measuring cups — it’s all right there. We use Math-U-See for our formal math, but honestly some days the kitchen does it better.

    📌 Love this? Save it to Pinterest so you can find it later!


    A Few Things That Make This Actually Work

    Lower the bar on “clean”

    I’ll just say it — teaching kids to cook is messier than doing it yourself. The flour goes on the floor. The eggs have shells in them. The sauce gets a little scorched. That’s the tuition cost of raising a kid who can feed themselves at eighteen, and it is absolutely worth it. Take a breath, hand them the spoon.

    Cook together, not just side by side

    There’s a difference between having a kid stand next to you while you cook and actually handing over a task. Let them own something in the meal — the salad dressing, the garlic bread, the dessert. When it comes to the table, make sure everyone knows that they made that part. Watch their face.

    Tie it to your homestead rhythm

    In Florida, we’ve got a long growing season and chickens producing eggs most of the year. Our kids are involved in homestead chores from early on, and the kitchen is just a natural extension of that. What grows in the garden this week? What did the hens lay? What can we make from it? That question alone drives more meaningful cooking than any curriculum could.

    If you have backyard chickens and want to lean into the educational side, Storey’s Guide to Raising Chickens and the Kid’s Guide to Keeping Chickens are both wonderful for older elementary kids to read alongside the real-life experience.

    Keep the kitchen non-toxic

    This is one area where our intentional home philosophy really shows up. We cook in cast iron and stainless, keep the cleaning products simple (I order ours through Grove Collaborative), and use real ingredients. When kids are in the kitchen constantly, it matters what they’re touching and breathing. It doesn’t have to be complicated — just thoughtful.


    Simple First Recipes by Age

    Ages 4–5: Banana pancakes (2 ingredients), yogurt parfaits, trail mix

    Ages 6–7: Scrambled eggs, toast with toppings, simple green salad with dressing

    Ages 8–10: Pasta with marinara, homemade muffins, fried rice with veggies and eggs, simple soups

    Start simple, repeat often, and let them request their favorites. When a kid asks to make their muffins on Saturday morning, you’ve won.


    The Long Game

    We’re not teaching cooking for fun (well, it is fun). We’re teaching it because we believe kids who grow up in the kitchen grow up capable. They know how to nourish themselves and the people they love. They’re not afraid of a recipe or a knife or a hot pan. They understand where food comes from — from the soil, from the hens, from their own two hands.

    That’s the whole thing, really. This is part of raising kids the slow way, the rooted way. Less convenience, more competence. And honestly? The food is better, too.

    If you’re looking for ways to build more of this kind of real-life learning into your days, you might also love our post on how to involve kids in homestead chores by age and what intentional parenting actually looks like day to day. We’re all just figuring this out together, one cracked egg at a time.


    📖 You Might Also Like:

    Frequently Asked Questions

    What age should kids start learning to cook?

    Kids can start participating in the kitchen as young as 2–3 years old with simple tasks like washing vegetables or stirring cold ingredients. Real skill-building — measuring, cracking eggs, using a knife with supervision — typically starts around ages 5–7 and grows from there.

    What cooking skills should a 10-year-old have?

    By age 10, kids can reasonably follow a simple recipe independently, use a sharp knife with supervision, operate the stovetop with an adult nearby, make basic meals like scrambled eggs, pasta, and muffins, and understand basic food safety practices like handwashing and proper temperatures.

    How do I get my kid interested in cooking?

    Let them own a piece of the meal rather than just helping you. Give them a dish that’s ‘theirs’ to make and make sure the family knows it at the table. Kids are also much more interested in cooking food they’ve helped grow or raise — connecting the garden or backyard chickens to the kitchen makes a huge difference.

    Is teaching kids to cook part of a Charlotte Mason education?

    Absolutely. Charlotte Mason emphasized practical life skills, real work alongside real people, and learning through living. Cooking fits naturally into a Charlotte Mason homeschool — it covers math, reading, science, and life skills all at once in a meaningful, hands-on way.

    What are good first recipes for kids to learn?

    Great starter recipes by age: ages 4–5 can make banana pancakes (just banana and egg), yogurt parfaits, and trail mix. Ages 6–7 can tackle scrambled eggs, toast with toppings, and simple salads. By ages 8–10, kids are ready for pasta with marinara, homemade muffins, fried rice, and simple soups.

  • Natural Chicken Coop Deodorizer and Cleaning Routine That Actually Works

    Natural Chicken Coop Deodorizer and Cleaning Routine That Actually Works

    Natural Chicken Coop Deodorizer and Cleaning Routine That Actually Works

    🌿 The Short Version: You don’t need bleach or harsh chemicals to keep your coop smelling fresh — a few natural ingredients and a consistent routine are all it takes. This post walks you through exactly what we use and how we do it, even in the swampy Florida summer heat.

    This post contains affiliate links. I may earn a small commission at no extra cost to you.

    Let me be real with you for a second. When we first got our backyard flock, I was so excited about the fresh eggs and the kids running out to the coop every morning in their pajamas. What I was not prepared for was the smell.

    We live in Northwest Florida — Pensacola area — and if you know, you know. The heat and humidity down here turn a neglected chicken coop into something truly offensive by about July. I was out there every few days just dumping store-bought coop spray on things and wondering why it wasn’t working. It took me a couple of years to figure out that the solution wasn’t more product — it was a better routine using simple, non-toxic ingredients I mostly already had.

    Now I spend less time fighting the smell and more time actually enjoying our little backyard flock. Here’s exactly what we do.

    Why the Coop Smells in the First Place

    Before we fix the problem, it helps to understand it. Coop odor almost always comes down to three things:

    • Moisture — wet bedding breeds ammonia and bacteria fast
    • Ammonia buildup — from chicken droppings breaking down
    • Poor airflow — especially brutal in a Florida summer

    Harsh chemical cleaners can actually make this worse over time because they disrupt the natural microbial balance in the coop and can irritate your chickens’ respiratory systems. And honestly, if my kids are out there every single day collecting eggs and helping with chores — which is one of my favorite parts of our homeschool day — I don’t want them breathing in bleach fumes or touching surfaces covered in synthetic sprays.

    Natural solutions work with the biology of the coop instead of against it.

    Our Weekly Coop Cleaning Routine

    Consistency is everything. A quick tidy a few times a week beats a massive overhaul once a month every single time.

    Daily (Takes 5 Minutes)

    This is a great job for the kids, honestly. My elementary-age crew takes turns on coop duty, and it’s become one of those real-life responsibility moments I love about our homeschool life.

    • Remove any visibly soiled bedding from the nest boxes
    • Refresh waterers — we switched to a nipple-style chicken waterer and it cut down dramatically on the wet bedding situation
    • Do a quick visual check on the flock

    Weekly Deep Tidy

    • Remove the top layer of bedding and add fresh pine shavings
    • Dust the coop floor and roost bars with food-grade diatomaceous earth — this is our number one natural deodorizer and it also helps keep mites and lice at bay
    • Sprinkle a thin layer of baking soda under fresh bedding to absorb ammonia
    • Wipe down waterers with white vinegar

    Monthly Full Clean

    This is the one where you pull everything out.

    1. Remove all bedding completely
    2. Scrub the walls, roost bars, and nest boxes with a diluted white vinegar solution (about 1 part vinegar to 1 part water)
    3. Let it air dry fully before adding new bedding — in our Florida heat this takes maybe 30 minutes
    4. Dust everything down with diatomaceous earth before laying new bedding
    5. Add fresh herbs to the nest boxes (more on that in a second)

    📌 Love this? Save it to Pinterest so you can find it later!

    The Natural Deodorizers We Actually Use

    Food-Grade Diatomaceous Earth

    This is the backbone of our coop smell management. Food-grade diatomaceous earth is a fine powder made from fossilized algae, and it works in a couple of ways — it absorbs moisture, reduces ammonia odor, and physically deters parasites like mites and lice. We sprinkle it on the coop floor, in the dust bath area, and sometimes right into the bedding.

    Just wear a simple dust mask when you’re applying it, and keep the chickens out until it settles. It’s safe and natural, but fine powder and lungs don’t love each other in the moment of application.

    White Vinegar

    Plain distilled white vinegar is my go-to cleaner for surfaces. It cuts through grime, neutralizes odor at the source, and dries without leaving any residue that would concern me around my flock or my kids. I keep a big spray bottle mixed 50/50 with water in the coop area.

    Fresh Herbs

    Okay this one sounds fancy but it’s genuinely simple and the kids love helping. Lavender, mint, rosemary, and thyme all have natural antimicrobial properties and smell wonderful. We tuck sprigs of dried or fresh herbs into the nest boxes during our monthly clean. It keeps things smelling sweet and the chickens seem to enjoy it.

    If you’re growing herbs in your backyard or in containers — which is very doable here in the Panhandle — this costs you essentially nothing.

    Baking Soda

    Basic, cheap, and effective. A thin layer under fresh bedding absorbs ammonia and helps keep the floor of the coop drier. Don’t go overboard — a light dusting is plenty.

    What We Use to Spray Between Cleanings

    For a quick refresh between deep cleans, I mix water, a splash of white vinegar, and a few drops of tea tree oil or lavender essential oil in a spray bottle. Spritz the walls and roost bars, let it dry, done. It takes two minutes and keeps things from getting funky between weekly tidies.

    For pest control in and around the coop, we also love Wondercide — it’s plant-based, non-toxic, and actually works on the bugs that like to hang around chicken areas.

    Tips for Florida Specifically

    If you’re keeping chickens down here in the heat and humidity, a few extra things matter:

    • Ventilation is non-negotiable. Your coop needs serious airflow. A stuffy coop in August is an ammonia factory. We added extra ventilation to ours and it made an enormous difference.
    • Deep litter method works well here in the cooler months but needs more attention in summer. The composting action generates heat, which is the last thing you need in July.
    • Check for moisture daily. A waterer that spills or a surprise Florida rainstorm through an open vent can soak bedding fast. Wet bedding in humid heat is a recipe for serious odor and respiratory illness in your flock.

    If you’re just getting started with your flock or thinking about your coop setup, I’d also point you to our post on best egg laying chickens for Florida heat — breed choice actually affects how much waste you’re managing, and some breeds do much better in our climate than others.

    Making It a Homeschool Moment

    One of my favorite things about keeping backyard chickens alongside our Charlotte Mason homeschool is how naturally it teaches real science. Coop care is a living lesson in biology, chemistry, and ecology.

    Why does baking soda neutralize ammonia smell? That’s acid-base chemistry. Why does diatomaceous earth kill mites? That’s a lesson in physical vs. chemical pest control. Why do fresh herbs deter certain insects? Plant biology and natural medicine.

    We’ve done nature journal entries on our chickens, their behavior, and even the insects we find in and around the coop. If you want ideas for how to make that work, our post on Charlotte Mason nature journal ideas for kids has a lot of practical starting points. A simple nature journal and some Faber-Castell watercolors are all they need to turn coop observations into real nature study.

    And for more on the chicken side of things — including feed and health — check out Storey’s Guide to Raising Chickens. It’s the reference book I reach for most, and it has a great section on coop sanitation that helped inform a lot of what we do.

    The Honest Truth About Coop Smell

    A coop that smells isn’t a sign that you’re doing it wrong — it’s just a sign that something in the routine needs adjusting. Nine times out of ten it’s moisture or not-quite-frequent-enough bedding changes. Once you dial in the routine and start using natural deodorizers consistently, it gets so much easier.

    Our coop smells like pine shavings and herbs now. My kids spend time out there every day. That’s exactly what I wanted when we started this whole backyard chicken adventure, and it’s totally achievable without a single harsh chemical in sight.

    You’ve got this, mama. One clean coop at a time.


    📖 You Might Also Like:

    Frequently Asked Questions

    What is the best natural deodorizer for a chicken coop?

    Food-grade diatomaceous earth is one of the best natural coop deodorizers because it absorbs moisture and neutralizes ammonia while also helping control mites and lice. Baking soda sprinkled under bedding and white vinegar used as a surface cleaner are also highly effective and completely non-toxic to your flock and your family.

    How often should I clean my chicken coop to prevent odor?

    A quick daily spot-clean of soiled bedding and waterers, combined with a weekly partial bedding refresh and a monthly full cleanout, is the sweet spot for most backyard flocks. In hot, humid climates like Florida, you may need to check moisture levels daily and refresh bedding more frequently in summer to stay ahead of ammonia buildup.

    Is it safe to use diatomaceous earth in a chicken coop?

    Yes — food-grade diatomaceous earth is safe to use in a chicken coop and is widely recommended by natural chicken keepers. It’s non-toxic to chickens and humans. Apply it when chickens are out of the coop and wear a dust mask during application, as fine powders of any kind can be irritating to breathe in the moment of use.

    Can I use bleach to clean a chicken coop?

    It’s generally best to avoid bleach in a chicken coop. Bleach fumes can irritate your chickens’ sensitive respiratory systems, and residue left on surfaces can be harmful if ingested. White vinegar diluted with water is an effective, non-toxic alternative that cleans and deodorizes without the risks.

    Why does my chicken coop smell so bad even after cleaning?

    Persistent odor after cleaning usually points to a moisture problem. Check that your waterers aren’t leaking, that your coop has adequate ventilation, and that bedding isn’t sitting damp against the floor. In humid climates especially, wet bedding breaks down quickly into ammonia. Switching to nipple-style waterers and increasing coop ventilation often makes a dramatic difference.

  • How to Ferment Chicken Feed (And Why Your Flock Will Thank You For It)

    How to Ferment Chicken Feed (And Why Your Flock Will Thank You For It)

    How to Ferment Chicken Feed (And Why Your Flock Will Thank You For It)

    🌿 The Short Version: Fermenting chicken feed boosts nutrition, cuts feed costs, and supports gut health in your flock — and it takes about five minutes of hands-on time. This post walks you through exactly how we do it, what supplies you actually need, and the real benefits we’ve noticed in our own backyard hens.

    This post contains affiliate links. I may earn a small commission at no extra cost to you.

    If you’ve been raising backyard chickens for any length of time, you’ve probably gone down at least a few rabbit holes trying to figure out how to keep your flock healthier, cut your feed bill, or just do things a little more naturally. That was us about two years ago. I stumbled onto fermented feed almost by accident — saw it mentioned in a chicken-keeping group, thought it sounded complicated, ignored it for six months, and then finally tried it on a slow Tuesday afternoon.

    Y’all. It is so simple. And the difference in our hens has been genuinely noticeable.

    So let me break it all down for you — the why, the how, and the honest truth about what it looks like in real life with kids underfoot and a mini labradoodle trying to steal everything.

    What Is Fermented Chicken Feed, Exactly?

    Fermenting feed is just the process of soaking your regular chicken feed in water and letting naturally occurring beneficial bacteria (lactobacillus, specifically) do their thing over a few days. It’s the same basic science as making sourdough, sauerkraut, or yogurt. You’re not adding anything funky — you’re just creating the right environment for good bacteria to multiply and pre-digest the feed.

    The result is a wet, slightly tangy, probiotic-rich feed that your chickens will go absolutely wild for.

    Why Bother? The Real Benefits of Fermented Feed

    I’m not someone who does things just because they sound wholesome. I need it to actually work. Here’s what we’ve genuinely noticed — and what the research backs up:

    Better Nutrient Absorption

    Grains and seeds naturally contain something called phytic acid, which actually blocks your chickens from absorbing a lot of the nutrients in their feed. Fermentation breaks down phytic acid, which means the same cup of feed delivers significantly more nutrition than it would dry. More bioavailable vitamins, minerals, and protein from what you’re already buying.

    Lower Feed Costs

    This one surprised me the most. Fermented feed is more filling and more nutritious, so your chickens eat less of it. We noticed our flock eating roughly 20-30% less after switching to fermented feed most days. Over time, that adds up.

    Gut Health and Fewer Health Issues

    The probiotics in fermented feed support a healthy gut biome in your hens — which means better immunity, fewer digestive issues, and generally hardier birds. Down here in the Florida heat and humidity, keeping our flock healthy is no small thing. A strong gut goes a long way. (For more on keeping Florida chickens thriving, check out Best Egg Laying Chickens for Florida Heat (What Actually Works in Our Backyard Flock).)

    Better Egg Quality

    We’ve noticed richer yolks and stronger shells since incorporating fermented feed regularly. Some folks report increased laying too, though I’d say ours has stayed pretty consistent rather than dramatically increased.

    Less Waste and Less Mess

    Wet feed doesn’t blow around or kick out of the feeder the way dry feed does. Less waste on the ground means less attracting unwanted visitors — which, in Florida, we really don’t need help with.

    📌 Love this? Save it to Pinterest so you can find it later!

    What You Need to Get Started

    This is genuinely a low-supply project. Here’s what we use:

    • A wide-mouth jar or food-grade bucket — I use a half-gallon mason jar for small batches and a 2-gallon bucket when I do a bigger batch. You want something you can stir easily.
    • Your regular chicken feed — layer pellets, crumbles, or scratch grains all work. We use a mix.
    • Non-chlorinated water — chlorine can kill the beneficial bacteria you’re trying to grow. We use filtered water or let tap water sit out uncovered overnight.
    • A breathable cover — a cloth or paper towel secured with a rubber band works great. You don’t want an airtight lid because the fermentation process releases gases.
    • A stirring spoon or stick

    That’s genuinely it. No starter culture needed — wild lactobacillus bacteria are already present on the grains.

    If you want to keep your coop set-up just as intentional as your feed routine, we love our automatic chicken coop door for early mornings, and nipple chicken waterers to keep fresh clean water available without the algae mess.

    How to Ferment Chicken Feed: Step by Step

    Day 1:

    Fill your jar or bucket about halfway with feed. Cover with non-chlorinated water — you want at least 2-3 inches of water above the feed because it will absorb a lot as it swells. Stir it well, cover with your breathable cloth, and set it somewhere at room temperature out of direct sunlight.

    Day 2:

    Stir it again. You might start to see small bubbles forming near the top — that’s exactly what you want. That’s the fermentation starting. If the water level has dropped below the feed, add a little more. You always want the feed submerged.

    Day 3:

    It should smell pleasantly tangy — like sourdough or yogurt. That’s the good bacteria at work. If it smells rotten or you see fuzzy mold (not just a thin white film, which is usually harmless kahm yeast), toss it and start fresh. Give it one more good stir.

    Day 3-4: Ready to Feed

    Scoop out what you need for the day, drain off excess liquid if you like (though your chickens may love drinking the liquid too — it’s full of probiotics), and serve it up. Refill with fresh feed and water to keep your batch going continuously.

    The leftover liquid from the ferment acts as a starter culture, so your next batch will ferment faster and more reliably.

    Tips for Making It Work in Real Life

    Keep 2-3 jars going on rotation. We start a new jar every day or two so we always have something ready. Day 1 jar, Day 2 jar, Day 3 jar — rotate through.

    Don’t stress about exact ratios. More water is better than not enough. Just keep the feed submerged.

    Florida heat speeds things up. In our Pensacola summers, fermentation can happen faster — sometimes fully ready by day 2. In the cooler months (yes, we have a few of those), it might take closer to 4 days. Just go by smell and bubble activity, not the clock.

    Combine with diatomaceous earth in your coop routine for a well-rounded approach to flock health that stays non-toxic. We use food-grade DE in the coop bedding and dust bath area.

    Involve your kids. Seriously. My kids check on the ferment jars every morning like they’re science experiments — because they are. This is living, breathing biology happening right on your counter. It’s a perfect low-key lesson in fermentation, microbes, and why what we feed our animals matters. If you’re looking for more ways to bring real-life science into your days, our Charlotte Mason Nature Journal Ideas for Kids (That Actually Get Used) has a lot of good ideas for capturing observations like this.

    Is It Worth It?

    Honestly? Yes — but only if it fits your life. We don’t ferment 100% of the time. Some weeks are busy and our girls get dry feed. But when we’re consistent with it, we see the difference in egg quality, flock health, and our feed bill. It’s one of those small, simple things that feels very aligned with the way we try to do everything else around here — real food, less processing, letting nature do the work.

    For more on keeping a healthy, low-tox backyard flock, I’ve also written about How to Build a Simple Chicken Tractor for Your Backyard Flock if you want fresh-pasture access for your hens without free-ranging the whole yard.

    If you want to go deeper into chicken keeping in general, Storey’s Guide to Raising Chickens is the reference book I keep going back to — it’s thorough without being overwhelming. And if your kids want their own chicken book, the Kid’s Guide to Keeping Chickens is genuinely wonderful and something mine have read cover to cover.

    A Note on Keeping It Non-Toxic

    One thing I love about fermented feed is that it fits right into our non-toxic, intentional approach to the whole homestead. Less reliance on supplements, no additives, just letting a simple biological process do what it does. That’s kind of our whole philosophy — work with nature instead of against it. Same reason we use Wondercide around the coop and yard instead of conventional pesticides, and why we lean toward real food approaches for our animals the same way we do for our family.

    If you’re just getting started on the non-toxic path for your home overall, I have a whole post on that too: How to Detox Your Home from Toxins Room by Room.

    Alright friend — go grab a mason jar and try it this week. Seriously, your hens will notice. And honestly? So will you.


    📖 You Might Also Like:

    Frequently Asked Questions

    How long does it take to ferment chicken feed?

    Typically 3-4 days at room temperature. In warmer climates like Florida, fermentation can happen faster — sometimes ready in 2-3 days in summer. You’ll know it’s ready when it smells pleasantly tangy (like sourdough or yogurt) and you can see small bubbles forming on the surface.

    Can you ferment any type of chicken feed?

    Yes! Layer pellets, crumbles, whole grains, and scratch all ferment well. Pellets will break down and get mushy, which is totally fine — your chickens won’t mind. Some people prefer fermenting whole or cracked grains because they hold their texture better, but either works.

    How much fermented feed should I give my chickens?

    A good starting point is about the same volume you’d normally feed in dry feed, but you’ll likely find your hens eat less of it because it’s more filling and nutritious. Many chicken keepers report feeding 20-30% less volume once they switch to fermented feed regularly. Offer it fresh daily and remove any uneaten feed after a few hours so it doesn’t spoil in the heat.

    Is fermented chicken feed safe? Can it go bad?

    Properly fermented feed is very safe — the acidic environment created by beneficial bacteria actually prevents harmful bacteria from growing. The signs that something has gone wrong are a rotten (not tangy) smell or fuzzy mold growth. A thin white film on the surface is usually harmless kahm yeast and can be stirred in or skimmed off. When in doubt, toss it and start fresh — it’s just feed.

    Do I need to add anything to start fermenting chicken feed?

    No starter culture needed! Beneficial lactobacillus bacteria are naturally present on grain and in the environment. All you need is your regular feed, non-chlorinated water (chlorine can inhibit fermentation), and a breathable cover over your container. After your first successful batch, you can use a bit of the liquid left in the jar as a starter for your next batch to speed things up.

  • Best Egg Laying Chickens for Florida Heat (What Actually Works in Our Backyard Flock)

    Best Egg Laying Chickens for Florida Heat (What Actually Works in Our Backyard Flock)

    Best Egg Laying Chickens for Florida Heat (What Actually Works in Our Backyard Flock)

    🌿 The Short Version: Not every chicken breed handles Florida summers gracefully — some will stop laying, get stressed, and just look miserable. This post breaks down the best egg laying chickens for Florida heat based on real backyard experience, so you can build a flock that actually thrives down here year-round.

    This post contains affiliate links. I may earn a small commission at no extra cost to you.

    If you’ve ever stood in your backyard in July — sweat dripping, heat index hovering around 105°F — watching your chickens pant in the shade and wondering why your egg basket is suddenly empty, you already know the problem. Florida heat is no joke, y’all. And a lot of the “popular” chicken breeds you see on every homestead blog? They were not designed with the Florida panhandle in mind.

    We’ve kept backyard chickens here in the Pensacola area for several years now, and I’ll be honest — our first flock was a bit of a trial-and-error situation. We started with what looked pretty, not what was practical. Live and learn. These days our girls are laying consistently through most of the summer, and a big part of that comes down to choosing the right breeds from the start.

    So let me save you some of that trial and error.

    Why Breed Choice Matters So Much in Florida

    Chickens are warm-blooded animals that regulate body temperature by panting and holding their wings out from their bodies. When the ambient temperature stays above 90°F for weeks at a stretch (which is basically June through September here), breeds that weren’t developed in hot climates start to really struggle. Heat stress causes hens to slow or stop laying, makes them more susceptible to illness, and in extreme cases can be fatal.

    The breeds that thrive in Florida tend to share a few common traits:

    • Smaller or medium body size — less body mass means less heat generated
    • Lighter feathering or loose feather structure — not dense, fluffy breeds
    • Larger combs — the comb acts as a radiator; bigger combs dissipate heat better
    • Mediterranean or tropical heritage — these breeds were literally developed in hot climates

    Keep those traits in mind and you’ll start to see a pattern in the breeds below.

    The Best Egg Laying Chickens for Florida Heat

    1. Leghorn

    The Leghorn is basically the gold standard for hot-climate egg laying. These birds were developed in the Mediterranean and they are made for heat. They’re lean, they have large single combs, and they are egg-laying machines — we’re talking 280–320 white eggs per year from a good hen. They’re a little flighty and not the cuddliest bird, but if consistent production through the summer is your goal, Leghorns deliver.

    2. Easter Egger

    Our family’s personal favorite, and honestly a great kid bird. Easter Eggers are mixed-heritage chickens (often carrying Ameraucana or Araucana genes) that lay blue, green, or pink-tinted eggs. The kids go absolutely wild collecting them every morning — it turns into a real nature study moment. Easter Eggers tend to be heat tolerant, relatively calm, and curious little birds. They’re not quite as prolific as Leghorns but they’re consistent, and those colorful eggs never get old.

    If your kids are interested in learning more about your flock, we love Storey’s Guide to Raising Chickens as a family reference — and the Kid’s Guide to Keeping Chickens is perfect for elementary-age kids to read alongside you.

    3. Black Australorp

    Australorps are one of those breeds that surprises people. They’re a heavier bird, which you wouldn’t expect to thrive in heat — but they’re remarkably adaptable and known for exceptional egg production (they actually hold the world record for eggs laid in a year). In Florida, they do best with good shade, plenty of fresh water, and airflow in the coop. We’ve had great luck with ours. They’re also incredibly gentle, which matters a lot when little hands are involved.

    4. Rhode Island Red

    Another workhorse breed that handles Florida reasonably well. Rhode Island Reds are tough, adaptable, and lay large brown eggs consistently. They’re not as heat-specialized as Leghorns but they’re resilient birds that don’t fuss too much. Good for beginners and great for families who want a friendly, predictable flock.

    5. Buff Orpington — With Caveats

    I know. Every chicken list includes Buff Orpingtons, and I get why — they’re beautiful, gentle, and wonderful with children. But I’d be doing you a disservice if I didn’t give you the honest Florida caveat: those fluffy feathers are gorgeous and absolutely terrible in August heat. If you want Orpingtons (and honestly, they’re hard to resist), plan to give them extra shade, a dedicated misting area, and close attention during heat waves. They can do fine here with the right setup — just go in with eyes open.

    6. Dominique

    This is an underrated breed that I wish more Florida families knew about. Dominiques are America’s oldest chicken breed, historically raised across the South, and they are genuinely heat-hardy. They have a rose comb (which is less prone to frostbite, though that’s less relevant here), they’re self-sufficient foragers, and they lay a solid number of brown eggs. They tend to be calm and friendly too. If you’re looking for something a little different and historically interesting — great for Charlotte Mason-style nature study — the Dominique is a fantastic choice.

    📌 Love this? Save it to Pinterest so you can find it later!

    What We Do to Keep Our Flock Laying Through Summer

    Breed choice is step one, but management matters just as much. Here’s what we actually do to keep our girls happy and producing through the hottest months:

    Fresh, cool water constantly. We use a nipple chicken waterer that keeps the water cleaner and cooler than open dishes. In peak summer we’ll add ice to the water in the afternoon.

    Deep shade. Our coop is positioned under a big oak tree, and we have a shadecloth run extension. If your coop is sitting in full Florida sun all day, that’s your first problem to solve. If you’re building or moving a coop, check out my post on How to Build a Simple Chicken Tractor for Your Backyard Flock — a tractor gives you flexibility to move your birds to shadier spots seasonally.

    Automatic coop door. An automatic coop door lets the girls get outside in the cooler early morning hours without us having to be out there at 6am — which, in summer, is honestly the most comfortable time to be outside anyway.

    Diatomaceous earth in the coop. We use food-grade diatomaceous earth in our nesting boxes and coop floor to keep mites and lice under control naturally. Stressed birds in heat are more susceptible to parasites, so staying ahead of it matters.

    Ventilation, ventilation, ventilation. More important than almost anything else in a Florida summer coop. Airflow over shade any day.

    Chickens as a Nature Study — Yes, Really

    One of my favorite things about keeping a backyard flock is how naturally it folds into our homeschool days. My kids track which hens lay which eggs, we talk about chicken biology, and caring for the flock is genuinely part of how they’re learning responsibility and observation skills — the kind of slow, attentive noticing that Charlotte Mason was all about.

    We’ve even done nature journal entries on the chickens — sketching them, noting behavior changes in summer heat versus cooler months, documenting which breeds seem most comfortable in different temperatures. It sounds simple, but that kind of careful observation is real science. If you want ideas for getting your kids journaling about animals and nature, peek at Charlotte Mason Nature Journal Ideas for Kids (That Actually Get Used) — we use a simple nature journal and Faber-Castell watercolors for illustrations.

    This is the 1990s-childhood thing I always come back to. Kids learning by doing. Real animals, real responsibility, real life. No worksheet required.

    A Quick Note on Flock Size and Getting Started

    For most backyard families in Northwest Florida, a small flock of 4–6 hens is plenty to keep a family supplied with eggs. A mix of breeds works beautifully — we run Easter Eggers and Black Australorps together right now and they get along wonderfully. Starting with pullets (young hens) from a reputable local feed store or hatchery in late winter or early spring means they’ll be fully laying before summer hits.

    For deeper reading on setting up a healthy flock from scratch, I really do recommend Storey’s Guide to Raising Chickens — it’s the one chicken book I’d want if I could only keep one.


    If you’ve been on the fence about starting a backyard flock, I hope this helps you feel a little more confident about which birds will actually do well here in Florida. It doesn’t have to be complicated. Pick heat-tolerant breeds, give them shade and water, and let the kids collect eggs every morning. That right there — that small, simple, rooted thing — it really does change the texture of daily life in the best way.

    We’d love to hear what breeds are working for your Florida flock! Drop a comment below and let me know. 🐓


    📖 You Might Also Like:

    Frequently Asked Questions

    What is the best egg laying chicken breed for Florida heat?

    Leghorns are considered the top choice for hot climates because of their Mediterranean heritage, lean build, and large combs that help dissipate heat. Easter Eggers and Black Australorps are also excellent options for Florida backyard flocks, offering good production and heat tolerance with the right management.

    Do chickens stop laying eggs in Florida summer heat?

    Yes, heat stress can significantly slow or stop egg production in hens. When temperatures stay above 90°F for extended periods, chickens focus their energy on staying cool rather than laying. Choosing heat-tolerant breeds and providing deep shade, consistent fresh water, and good coop ventilation can help keep production more consistent through summer.

    Are Buff Orpingtons a good choice for Florida?

    Buff Orpingtons can be kept in Florida, but they’re not the most heat-tolerant breed due to their dense, fluffy feathering. If you want Orpingtons, plan to give them extra shade, a misting area, and close monitoring during heat waves. They’re wonderful, gentle birds — just not ideally suited to Florida summers without thoughtful management.

    How do I keep backyard chickens cool in Florida summers?

    The most important things are deep shade throughout the day, constant access to fresh cool water (nipple waterers help keep water cleaner and cooler), strong airflow and ventilation in the coop, and choosing heat-tolerant breeds to begin with. Some families also add ice to water in the afternoons during peak heat weeks.

    How many chickens do I need to keep a family in eggs in Florida?

    Most families find that 4–6 hens is plenty to keep a household supplied with fresh eggs, even accounting for summer slowdowns. A small mixed flock of heat-tolerant breeds started in late winter or early spring will typically be in full production by summer. Some hens will slow down in extreme heat, so a slightly larger flock gives you a buffer.

  • How to Build a Simple Chicken Tractor for Your Backyard Flock (Even If You’re Not Handy)

    How to Build a Simple Chicken Tractor for Your Backyard Flock (Even If You’re Not Handy)

    How to Build a Simple Chicken Tractor for Your Backyard Flock (Even If You’re Not Handy)

    🌿 The Short Version: A chicken tractor is a movable coop that lets your flock forage on fresh grass without destroying your whole yard — and you can build a basic one over a weekend with minimal tools. This post walks you through exactly what we did, what materials we used, and how it changed the way our chickens (and our kids) interact with the backyard.

    This post contains affiliate links. I may earn a small commission at no extra cost to you.

    If you’ve had backyard chickens for more than about five minutes, you already know the problem. You let them free range, they’re happy as can be — and within a week your yard looks like a moonscape. Bare dirt, scratched-up garden beds, and enough chicken poop on the back porch to make you question every decision you’ve ever made.

    We love our little flock more than is probably reasonable, but we also love our yard. And our garden. And not stepping in something unpleasant on the way to the clothesline.

    That’s exactly why we built a chicken tractor. And honestly? It’s been one of the best things we’ve done for our backyard setup here in Northwest Florida. If you’ve been curious about building one but assumed it required serious carpentry skills or a big budget, I promise you — it does not. Our kids helped build ours, and the whole project cost us less than a nice dinner out.

    What Even Is a Chicken Tractor?

    A chicken tractor is just a bottomless, movable coop. No floor — so your chickens have direct access to the ground, the grass, and all the bugs they can find. You move it every day or two to a fresh patch of yard, and the chickens do what chickens do: scratch, eat, fertilize, and move on. Your grass recovers, your birds get real forage time, and your permanent coop doesn’t get as nasty because the flock isn’t confined to it all day.

    It’s not a replacement for a permanent coop — your birds still need a secure place to sleep at night. Think of it as a daytime grazing pen that you drag around the yard like a slow, feathery lawnmower.

    For a deeper dive into caring for your flock day-to-day, Storey’s Guide to Raising Chickens is the book I recommend to every new chicken keeper. It covers everything from coop setup to flock health in plain, practical language.

    Why We Love Ours (Especially in Florida)

    Here in the Pensacola area, our summers are long and brutally hot. One thing a chicken tractor does really well is give you flexibility — you can position it under a shade tree in July and out in the open sun in January when the flock wants the warmth. That kind of control matters when you’re managing bird health through Florida’s extreme seasons.

    It also keeps things cleaner around the permanent coop. Less concentrated waste in one spot means less flies, less smell, and less diatomaceous earth battles. We still use DE regularly, but we’re definitely using less of it since we started rotating the tractor.

    And honestly? The kids are more engaged with the chickens when there’s a daily chore that involves actual movement and decision-making — like figuring out which section of the yard to move to next, checking the grass quality, watching what the hens find to eat. It’s quiet, real-life science happening right in the backyard.

    If you’re just getting started with chickens and want a kid-friendly resource, the Kid’s Guide to Keeping Chickens is sweet and genuinely useful — my kids have read it cover to cover.

    What You’ll Need to Build a Basic A-Frame Chicken Tractor

    There are a dozen styles of chicken tractors — hoop tractors, A-frames, box styles. We went with a simple A-frame because it’s structurally solid, sheds rain well (important in Florida), and the angle gives the birds a nice shaded corner even on sunny days.

    Materials list for a 4×8 A-frame (holds 3-4 standard hens comfortably):

    • (6) 2x4x8 boards
    • (2) 2x4x4 boards for the base
    • 1 roll of hardware cloth, 1/2 inch mesh (NOT chicken wire — predators can tear through chicken wire)
    • 1 small roll of 1-inch chicken wire for the upper sleeping section if desired
    • Wood screws (exterior grade, 2.5 inch and 1.5 inch)
    • 2 hinges + 1 latch for the access door
    • 2 handles or a length of rope for dragging
    • Staple gun with heavy-duty staples
    • Optional: 1 small piece of plywood or tin for the top peak if you want a fully weatherproof upper section

    Total cost for us: around $60-75 depending on what you already have in the garage.

    📌 Love this? Save it to Pinterest so you can find it later!

    Step-by-Step: How We Built Ours

    Step 1: Build the Base Rectangle

    Cut your 2x4s to form a 4×8 rectangle frame. This is your ground-level perimeter. Use exterior screws and predator-proof corners — nothing fancy, just solid. This base sits directly on the grass.

    Step 2: Build the A-Frame Sides

    Cut four boards at an angle to form the two triangular end pieces. The peak of our A-frame sits about 4 feet high, which gives the birds plenty of headroom and gives you enough access through the door without crouching all the way to the ground.

    Screw the angled boards into the base corners and connect them at the top with a ridge board running the full 8-foot length.

    Step 3: Add the Ridge Board and Rafters

    Run your ridge board along the top. We added a couple of cross-supports along the length for rigidity — this matters in our area because Gulf Coast storms are not gentle. If you’re in Northwest Florida, overbuild this part. You’ll thank yourself in August.

    Step 4: Wrap It in Hardware Cloth

    This is where the kids can really help. Unroll the hardware cloth and staple it across all open sections of the frame. Pull it taut before you staple — loose wire sags and creates weak points. We fold the raw edges over and staple them down so there are no sharp bits sticking out at chicken (or child) height.

    Use your staple gun generously. More staples = more predator resistance. We have raccoons and opossums here, and they are persistent.

    Step 5: Build the Access Door

    We framed a simple door on one of the end triangles using scrap 2×2 material, covered it in hardware cloth, and hung it with two hinges. A simple barrel latch keeps it closed. This is where you collect eggs if you add a nest box, and how you access the birds for health checks.

    Step 6: Add Handles

    Attach a handle or rope loop to each short end. This makes it a two-person drag — one of us on each end, kids helping push from the sides. Moving it every day or two takes about two minutes and the kids treat it like an event.

    A Few Things We’ve Learned Along the Way

    Move it more than you think you need to. Seriously. Two days in one spot in a Florida summer and you’ll have mud. Move it every day if you can.

    Add a waterer inside. We use a simple nipple chicken waterer mounted on the side of the frame. Keeping water accessible inside the tractor means the birds aren’t stressed when they’re in there during the hottest part of the day.

    The tractor doesn’t replace your permanent coop. Close your birds in their main coop at night — every single night. A tractor is not Fort Knox after dark.

    We also have an automatic coop door on our permanent coop that closes at dusk. Absolute game-changer for peace of mind.

    How This Became a Homeschool Thing

    I didn’t plan for the chicken tractor to become a nature study unit, but here we are.

    My kids started tracking which section of yard the chickens preferred, noticing what bugs they found in different spots, sketching what they observed in their nature journals. We talked about soil health, about how chicken manure works as a fertilizer, about the difference between the grass in the tractor path versus the untouched sections. My youngest started calling the chickens her “little farmers” and honestly, she’s not wrong.

    This is exactly the kind of living, hands-on learning I was hoping for when we started homeschooling. No worksheet could teach what fifteen minutes of chicken-watching actually does. If you want more ideas like this, check out our post on Charlotte Mason Nature Journal Ideas for Kids (That Actually Get Used) — the chickens show up there too.

    And if you’re raising your kids more like it’s 1990 — more dirt, more real work, less screen time — you might enjoy Raising Kids Without Screens: What We Actually Do Every Day. Projects like this one are a big part of how we fill those hours.

    You Really Can Do This

    I’m not a carpenter. My husband is handy but not professionally so. We built our first chicken tractor on a Saturday morning while the kids ran around the yard, and we’ve tweaked it a little every season since. It’s not perfect. There’s a slightly crooked door and one section of hardware cloth that we had to re-staple after a particularly ambitious raccoon incident.

    But it works. Our hens are healthier, our yard is in better shape, and our kids have learned more about chickens, soil, and real-life problem-solving from this one project than from any book I could have handed them.

    If you’ve been sitting on the idea, just start. Cut the boards, buy the hardware cloth, and build the thing. Your flock will love you for it.


    📖 You Might Also Like:

    Frequently Asked Questions

    How big should a chicken tractor be for 4 chickens?

    A 4×8 foot chicken tractor works well for 3-4 standard-sized hens as a daytime grazing space. Remember, a chicken tractor is supplemental to a permanent coop — it’s not where they sleep at night, so the space requirements are a little more flexible than a full coop. As a general rule, plan for at least 8-10 square feet of tractor space per bird.

    How often do you need to move a chicken tractor?

    In most climates, moving a chicken tractor every 1-3 days is ideal to keep the grass from getting destroyed and to prevent a buildup of waste in one spot. In hot, humid climates like Florida, moving it daily during summer is even better — the combination of heat and moisture means things get muddy and smelly faster than in cooler regions.

    What’s the difference between a chicken tractor and a regular chicken coop?

    A regular coop is a permanent, stationary structure where your chickens roost and sleep safely at night. A chicken tractor is a bottomless, movable enclosure used during the day to let chickens forage on fresh grass. Most backyard flocks do best with both — a secure permanent coop for nighttime and a chicken tractor for daytime foraging and rotational grazing.

    Can a chicken tractor protect chickens from predators?

    A well-built chicken tractor with 1/2-inch hardware cloth (not chicken wire) provides good daytime protection from most predators. However, it is not secure enough for overnight use. Always move your flock into a locked, solid permanent coop at night. Raccoons, foxes, and other predators are much more active after dark and can defeat most tractor designs with enough time and motivation.

    What is the cheapest way to build a chicken tractor?

    The most budget-friendly chicken tractors use basic 2×4 lumber, hardware cloth, and whatever hinges and screws you have on hand. A simple A-frame or hoop-style design can be built for $50-80 in materials depending on your local lumber prices. Check Facebook Marketplace or your local buy-nothing group for scrap lumber to bring the cost down even further. Avoid cutting corners on the hardware cloth — that’s where predator protection comes from, so buy quality 1/2-inch mesh.

  • Raising Meat Chickens at Home: A Beginner’s Guide for Real Families

    Raising Meat Chickens at Home: A Beginner’s Guide for Real Families

    Raising Meat Chickens at Home: A Beginner’s Guide for Real Families

    🌿 The Short Version: Raising meat chickens at home is more doable than you think — even with kids underfoot and a busy homeschool schedule. This guide walks you through breeds, brooder setup, feeding, processing day, and everything in between so your family can actually do this with confidence.

    This post contains affiliate links. I may earn a small commission at no extra cost to you.

    I’ll be honest with you — the first time my husband suggested we raise meat chickens, I thought he had lost his mind. We already had our laying hens. We had the dog. We had the garden. I was knee-deep in homeschool planning and barely keeping up with laundry. Adding chickens we were actually going to eat felt like a line I wasn’t ready to cross.

    But then one of my kids asked where chicken nuggets came from. And I mean really asked — with follow-up questions I didn’t have great answers for. And something in me said: this is exactly the kind of thing we should know how to do.

    So we did it. And y’all — it was one of the most grounding, meaningful things our family has done together. It was also simpler than I expected once I stopped overthinking it.

    If you’re on the fence about raising meat chickens at home, this guide is for you.


    Why Families Like Ours Are Raising Meat Chickens

    This isn’t just a homestead trend. For intentional families who care about what goes into their bodies, raising your own meat chickens is one of the most direct ways to know exactly how your food was raised — what it ate, how it lived, and how it was treated.

    For our family specifically, it checked a lot of boxes:

    • We control the inputs. No mystery additives, no overcrowded commercial conditions.
    • It’s a living lesson. Life cycles, animal husbandry, nutrition, responsibility — all of it unfolds right in your backyard.
    • It connects kids to real food. There’s something powerful about a child who understands where their dinner actually comes from.
    • It fits our values. We’re not anti-meat. We’re pro-knowing.

    If you’ve already got laying hens, you’re more ready for this than you think. If you haven’t started with chickens at all yet, I’d recommend reading up with something like Storey’s Guide to Raising Chickens — it’s the book I refer back to most often and it covers both layers and meat birds thoroughly.


    Choosing Your Breed: Cornish Cross vs. Freedom Rangers

    For most beginners, you’re going to hear about two main options:

    Cornish Cross

    These are the standard commercial meat bird. They grow fast — ready to process in about 6–8 weeks. They put on weight so efficiently it can honestly feel a little unnatural, but they produce a lot of meat per bird. The tradeoff is that they’re not very active, they eat constantly, and they need close management (especially in Florida heat) because they can have heart and leg issues if not monitored.

    Freedom Rangers

    These take a little longer — 9–11 weeks — but they’re hardier, more active, and better suited for pastured setups. They do well in our Florida climate because they’re more heat-tolerant and can forage more effectively. The meat has a slightly different texture (more like heritage chicken) and many families prefer the flavor.

    For your first batch, either works. We started with Cornish Cross just to keep it simple, but I’d do Freedom Rangers next time.


    Setting Up Your Brooder

    Meat chicks need the same brooder basics as laying chicks — warmth, water, feed, and space — but they grow SO fast you’ll want to make sure you have room to expand quickly.

    Here’s what you’ll need:

    • A brooder box — a large plastic tote, stock tank, or even a kiddie pool with cardboard walls works fine
    • A heat lamp or plate brooder — start at 95°F and drop 5 degrees per week
    • Bedding — pine shavings work great; change often because meat birds are messy
    • A good waterer — we love a nipple-style chicken waterer because it stays cleaner and reduces waste
    • Chick starter feed — high protein (22–24%) for meat birds specifically

    One thing Florida families need to keep in mind: if you’re brooding in late spring or summer, you may need less supplemental heat than you think. Our garage gets warm fast. Watch your chicks — if they’re huddled under the lamp, they’re cold; if they’re spread to the edges, they’re too warm.

    For pest control around the brooder and coop, we use Wondercide and food-grade diatomaceous earth — both non-toxic and effective for keeping things clean without harsh chemicals.


    Moving to Pasture (or a Tractor)

    Around 2–3 weeks, your meat birds are ready to start transitioning outside during warm parts of the day. If you can build or buy a simple chicken tractor — basically a moveable bottomless pen — you can rotate them around your yard and let them access fresh grass and bugs daily.

    This is also where the magic happens for your homeschool kids. Moving the tractor, filling the waterer, watching the chickens scratch and peck — it becomes part of the rhythm of your day in the best way.

    Our kids started keeping a nature journal around our flock, and it was a natural extension of everything we were already doing. A simple nature journal and some Faber-Castell watercolors are all they need to start sketching and recording observations — very Charlotte Mason, very low-key.

    For a deeper dive on how we weave this kind of thing into our actual school days, check out Homeschool Spring Florida Nature Study Ideas Your Kids Will Actually Want to Do.


    Feeding Meat Chickens: What to Expect

    Meat birds eat. A LOT. Plan for it.

    • Weeks 1–3: Chick starter (22–24% protein)
    • Weeks 3–6: Grower/finisher (18–20% protein)
    • Week before processing: Some people do a brief withdrawal from medicated feed if applicable — check your feed label

    For Cornish Cross especially, some experienced raisers recommend limiting feed access overnight during the middle weeks to reduce the risk of heart issues. It sounds counterintuitive, but it keeps them from growing too fast for their bodies. Ask at your local feed store — they’ll have opinions.


    Processing Day: The Part Everyone Worries About

    I’m not going to sugarcoat this section, but I’m also not going to be dramatic about it.

    Processing day is hard the first time. Emotionally and physically. But it is also deeply clarifying.

    Your options:

    1. DIY at home — requires equipment (a killing cone, scalding pot, plucker if you want to save time) and a plan. There are great YouTube tutorials. Storey’s Guide walks through the process step by step.
    2. Find a local processor — in the Pensacola area, there are small-scale processors who handle pastured poultry. Call around to local farms or ask in your county’s homesteading Facebook groups. It costs more but takes the hardest part off your plate.
    3. Co-op with friends — get a few families together, share equipment and labor. Makes it faster and honestly less heavy.

    As for the kids — we let ours be involved at whatever level felt right for their age and temperament. Watching from a distance is okay. Asking questions is okay. Participating in wrapping and packaging is okay. You know your children. Follow their lead.


    What We’ve Learned After a Few Batches

    • Start small. 10–15 birds is plenty for a first batch. You’ll learn a lot.
    • Pick the right season. Here in NW Florida, spring and fall are your friends. Raising meat birds in July is miserable for everyone.
    • Build your infrastructure first. Waterer, brooder, tractor — have it ready before chicks arrive.
    • Involve the kids from day one. The feeding, the moving, the observation — it’s all school. Real, living, beautiful school.

    If you’re also growing a garden alongside your chickens (the compost connection alone is worth it), take a look at How to Start a Homestead Garden in Florida for Beginners — we’ve woven the two together in ways that make both more productive.

    And if your kids are getting into the chicken world and want their own resource, the Kid’s Guide to Chickens is genuinely great — age-appropriate, engaging, and it gets them invested in what’s happening in the backyard.


    One Last Thing

    Raising meat chickens at home is one of those decisions that sounds complicated from the outside and feels completely natural once you’re in it. It’s the kind of thing our grandparents just did — part of knowing where food comes from, taking responsibility for it, and teaching children that life has weight and meaning.

    We’re not doing this perfectly over here. But we’re doing it intentionally, and our kids are better for it. If this is something your family has been circling around, I hope this gives you the push to just start. Your first batch will teach you more than any blog post can — including this one.

    You’ve got this, mama.


    📖 You Might Also Like:

    Frequently Asked Questions

    How many meat chickens should a beginner start with?

    For your first batch, 10–15 birds is a great starting point. It’s enough to get a meaningful amount of meat while keeping the learning curve manageable. You’ll figure out your brooder setup, feeding routine, and processing plan on a smaller scale before committing to a larger flock.

    How long does it take to raise meat chickens from chick to freezer?

    It depends on the breed. Cornish Cross are typically ready to process in 6–8 weeks, making them the fastest option. Freedom Rangers take 9–11 weeks but are hardier and better suited to pasture-based setups. Either way, you’re looking at under 3 months from chick arrival to finished meat.

    Can you raise meat chickens in Florida heat?

    Yes, but timing matters a lot. Spring (February–April) and fall (September–November) are ideal in Northwest Florida. Summer heat is genuinely hard on meat birds, especially Cornish Cross, who are prone to heat stress. If you must raise in summer, make sure they have deep shade, constant fresh water, and good airflow in their housing.

    What’s the difference between meat chickens and laying hens?

    Meat chickens (broilers) are bred specifically to put on muscle mass quickly — they’re not great egg layers and aren’t meant to live long lives. Laying hens are bred for egg production and can live 5–7 years. You can keep both, but they have different feed, space, and management needs. Most families start with layers and add a meat flock once they feel comfortable.

    Do I need a lot of space to raise meat chickens at home?

    Not as much as you’d think. A moveable chicken tractor is one of the most space-efficient setups — it lets you rotate birds over your yard so they get fresh forage without needing a large dedicated pasture. For a batch of 10–15 birds, a modest backyard is workable. Check your local ordinances, though — some neighborhoods or municipalities have restrictions on poultry even if laying hens are allowed.

  • Screen-Free Summer Activities for Florida Kids (When They Say They’re Bored)

    Screen-Free Summer Activities for Florida Kids (When They Say They’re Bored)

    Screen-Free Summer Activities for Florida Kids (When They Say They’re Bored)

    🌿 The Short Version: Screen-free summers in Florida don’t have to mean miserable, sweaty kids standing at the back door complaining. This post shares what we actually do — backyard adventures, nature study, chicken chores, and old-school boredom busters that keep our kids busy, curious, and genuinely happy all summer long.

    This post contains affiliate links. I may earn a small commission at no extra cost to you.

    It happens every single year. School wraps up, the kids are thrilled, and roughly forty-eight hours into summer break, someone appears in the kitchen looking absolutely devastated and says the words: “I’m booooored.”

    And my first instinct — I’ll be honest — is to hand them a tablet just to get five minutes of peace.

    But that’s not the summer I want for them. And honestly? It’s not the summer they want either, even if they don’t know it yet. I grew up in the ’90s with a backyard, a bike, and a mom who said “go outside and don’t come back until dinner.” Those were the best days of my childhood. I want that for my kids too — especially living here in Northwest Florida where we have so much wild, beautiful, bug-filled, sun-soaked outdoor space to work with.

    So over the years I’ve built up a real toolkit of screen-free summer activities that actually work for our family. Not Pinterest-perfect crafts that take three hours to set up. Real stuff. Stuff my kids actually do and ask for again.

    First: Embrace the Boredom (Just for a Minute)

    Before we get into the list, I want to say something that took me a while to really believe: a little boredom is good. It’s the soil that creativity grows in. When kids aren’t immediately entertained, their brains start working. They invent games. They notice things. They get weird and imaginative in the best possible way.

    So when the “I’m bored” chorus starts up, my first move is not to immediately fill the void. I let it sit for a bit. Sometimes that’s all it takes — ten minutes later they’ve turned the backyard into an elaborate spy headquarters and are asking for walkie talkies so they can communicate between “bases.”

    But when they genuinely need a nudge? Here’s what we reach for.

    Backyard Nature Study (Charlotte Mason Style)

    This is where we spend a huge chunk of our summer, and honestly it never gets old because Florida’s backyard ecosystem is wild. We’re talking lizards, butterflies, Gulf fritillaries on the passionflower vine, dragonflies at the fence, and whatever new creature has decided to move in since last week.

    Our kids each have a nature journal and we keep a set of Faber-Castell watercolors on the back porch specifically for nature sketching. They draw what they find, try to identify it, and write or dictate a few sentences about it. Charlotte Mason called it “living education” and I call it keeping them busy for two hours without a single screen involved.

    We also keep a Sibley Birds guide on the porch table so they can look up whatever’s landed at the feeder. Bird ID has become a genuine hobby for my oldest — she can now identify a brown-headed nuthatch on sight, which is more than most adults can say.

    For bug hunting, a bug collection kit and a pocket microscope turn an ordinary afternoon into a full science lesson. Florida summers bring out so many interesting insects. We’ve identified luna moth caterpillars, giant millipedes, and more species of spider than I personally ever wanted to know existed.

    If you want more ideas for getting outside with kids in our Florida climate, I shared a lot of what we do in Outdoor Activities for Kids in Florida’s Winter Months — and most of those ideas translate to summer mornings before the heat really kicks in.

    Chicken Chores as Real-Life Learning

    Our backyard flock has been one of the best things we’ve ever added to our family’s life — not just for the eggs, but for what it gives the kids to do every single day. Morning chicken chores are non-negotiable in the summer: check the water, fill the feeder, collect eggs, observe the flock.

    It sounds simple, but there is so much learning packed into those twenty minutes. My kids have learned animal husbandry, responsibility, biology, and more patience than I ever could have taught in a formal lesson. My youngest has started noticing which hen lays which egg just by the color and size — that’s real observational science.

    If your kids are into the chicken side of things, Storeys Guide to Raising Chickens is the one we keep on our shelf, and A Kid’s Guide to Keeping Chickens is genuinely written for children and makes a great summer read. We’ve also been using Wondercide around the coop this summer to keep pests down without worrying about what the kids are touching — if you haven’t seen my full review, I wrote about it in our Wondercide Honest Review.

    The Garden (Even a Small One)

    Summer in Florida is actually tricky for vegetable gardening because of the heat, but we grow sweet potatoes, okra, herbs, and some fall crops we start in late summer. Getting kids involved in the garden — even just watering, weeding, and watching things grow — is endlessly engaging.

    We give each kid their own little patch and their own garden gloves. They make the decisions for their space. Some things die, some things thrive, and all of it is a lesson. We also started a compost bin this year and the kids are obsessed with checking on it — which, honestly, I did not see coming, but I’ll take it.

    Old-School Free Play and Outdoor Games

    This is the one that I think gets underestimated the most: just playing. Running around. Making up games. Getting dirty.

    We keep a basket of outdoor supplies near the back door: sidewalk chalk, jump ropes, a few lawn games, and a good set of kids rain boots for stomping in puddles after our daily Florida afternoon thunderstorm. Those afternoon storms are practically a summer institution around here — and my kids have learned to love them instead of fear them because we’ve made puddle-stomping into a whole event.

    The rain boots are genuinely used almost every day from June through September. Non-negotiable gear for Florida kids in summer.

    Beat-the-Heat Morning Rhythm

    One thing that makes Florida summers work for us: we lean hard into morning hours and don’t fight the afternoon heat. We’re outside by 7:30 or 8am, doing our nature walk, chicken chores, or garden work. By 11am we’re usually back inside for our quieter activities — read-alouds, nature journal painting, building projects, or working through some light summer skill-building.

    For kids who need something structured in those quiet afternoon hours, we keep it gentle. Light math, reading practice, or a good stack of library books. We’ve found this rhythm keeps the screen temptation low because the kids have already had so much input and movement by mid-morning that they’re actually happy to slow down.

    Make sure you’re protecting those morning outdoor hours with good sunscreen — we don’t mess around with that here in Florida. I broke down exactly what we use and what I actually trust in our post on Best Non-Toxic Sunscreen for Kids in Florida.

    A Quick List for the “I’m Bored” Moments

    When they need a concrete idea fast, here’s what I actually suggest:

    • Go find three bugs and draw them in your nature journal
    • Fill the chicken waterer and sit with the hens for a while
    • Build something with whatever’s in the backyard (sticks, rocks, whatever)
    • Make a mud kitchen meal for the dog
    • Find the coolest leaf in the yard and look it up
    • Set up an obstacle course
    • Write a letter to a grandparent
    • Catch something (anything) and look at it under the pocket microscope

    None of these require me to set anything up. That matters a lot by week six of summer.

    The Real Goal: Kids Who Can Entertain Themselves

    Here’s what I’ve realized after a few summers of doing this intentionally: the goal isn’t to keep them entertained. The goal is to raise kids who know how to not be bored — kids who look at a backyard and see possibilities, not emptiness.

    That doesn’t happen overnight. It takes a summer or two of leaning into the discomfort of boredom and resisting the easy screen fix. But once it clicks? They’re off. They’re outside. They’re building, discovering, arguing about the best way to catch a lizard, and honestly? They’re becoming the kind of kids I always hoped I’d raise.

    The backyard is out there waiting. Go ahead and kick them out of the kitchen. Dinner’s not for hours.


    📖 You Might Also Like:

    Frequently Asked Questions

    What can Florida kids do outside in the summer without screens?

    Florida summers are hot, but mornings are magical — nature journaling, bug hunting, chicken chores, garden tending, puddle stomping after afternoon thunderstorms, and old-school lawn games are all things real Florida kids can do and genuinely enjoy before the heat kicks in.

    How do I get my kids to stop asking for screens during summer break?

    The short answer is to fill their environment with interesting alternatives and then let a little boredom do its work. Kids who have access to nature journals, bug catchers, outdoor games, and real responsibilities like animal chores tend to self-direct toward those things once screens aren’t the easiest option available.

    Is it safe for kids to play outside in Florida summer heat?

    Yes, with smart timing and good sunscreen. The key in Florida is to be outside early — by 7:30 or 8am — and head in before the worst heat of midday. Afternoons are great for quieter indoor activities, reading, or art. Don’t forget non-toxic sunscreen and good hydration for those morning hours.

    What are some Charlotte Mason summer activities for elementary kids?

    Charlotte Mason summers are wonderfully simple: daily nature walks, nature journaling with watercolors, bird and insect identification, read-alouds, narration, and free outdoor play. The goal is living books, real-world observation, and unhurried time in nature — which Florida summers are genuinely perfect for.

    How can backyard chickens be part of kids’ summer routine?

    Giving kids real responsibility for the flock — checking water, refilling feed, collecting eggs, and observing hen behavior — makes chickens one of the best screen-free activities available. It builds daily routine, teaches animal care, and keeps kids engaged and outside every single morning of the summer.