Category: Homesteading & Simple Living

  • Natural Ways to Keep Ants Out of Your House in Florida (What Actually Works for Our Family)

    Natural Ways to Keep Ants Out of Your House in Florida (What Actually Works for Our Family)

    Natural Ways to Keep Ants Out of Your House in Florida (What Actually Works for Our Family)

    🌿 The Short Version: Florida ants are relentless, but you don’t need toxic sprays to fight back. This post covers the natural, non-toxic methods our family actually uses — from barrier ingredients to coop-safe outdoor treatments — that keep ants out without chemicals we don’t want around our kids or animals.

    This post contains affiliate links. I may earn a small commission at no extra cost to you.

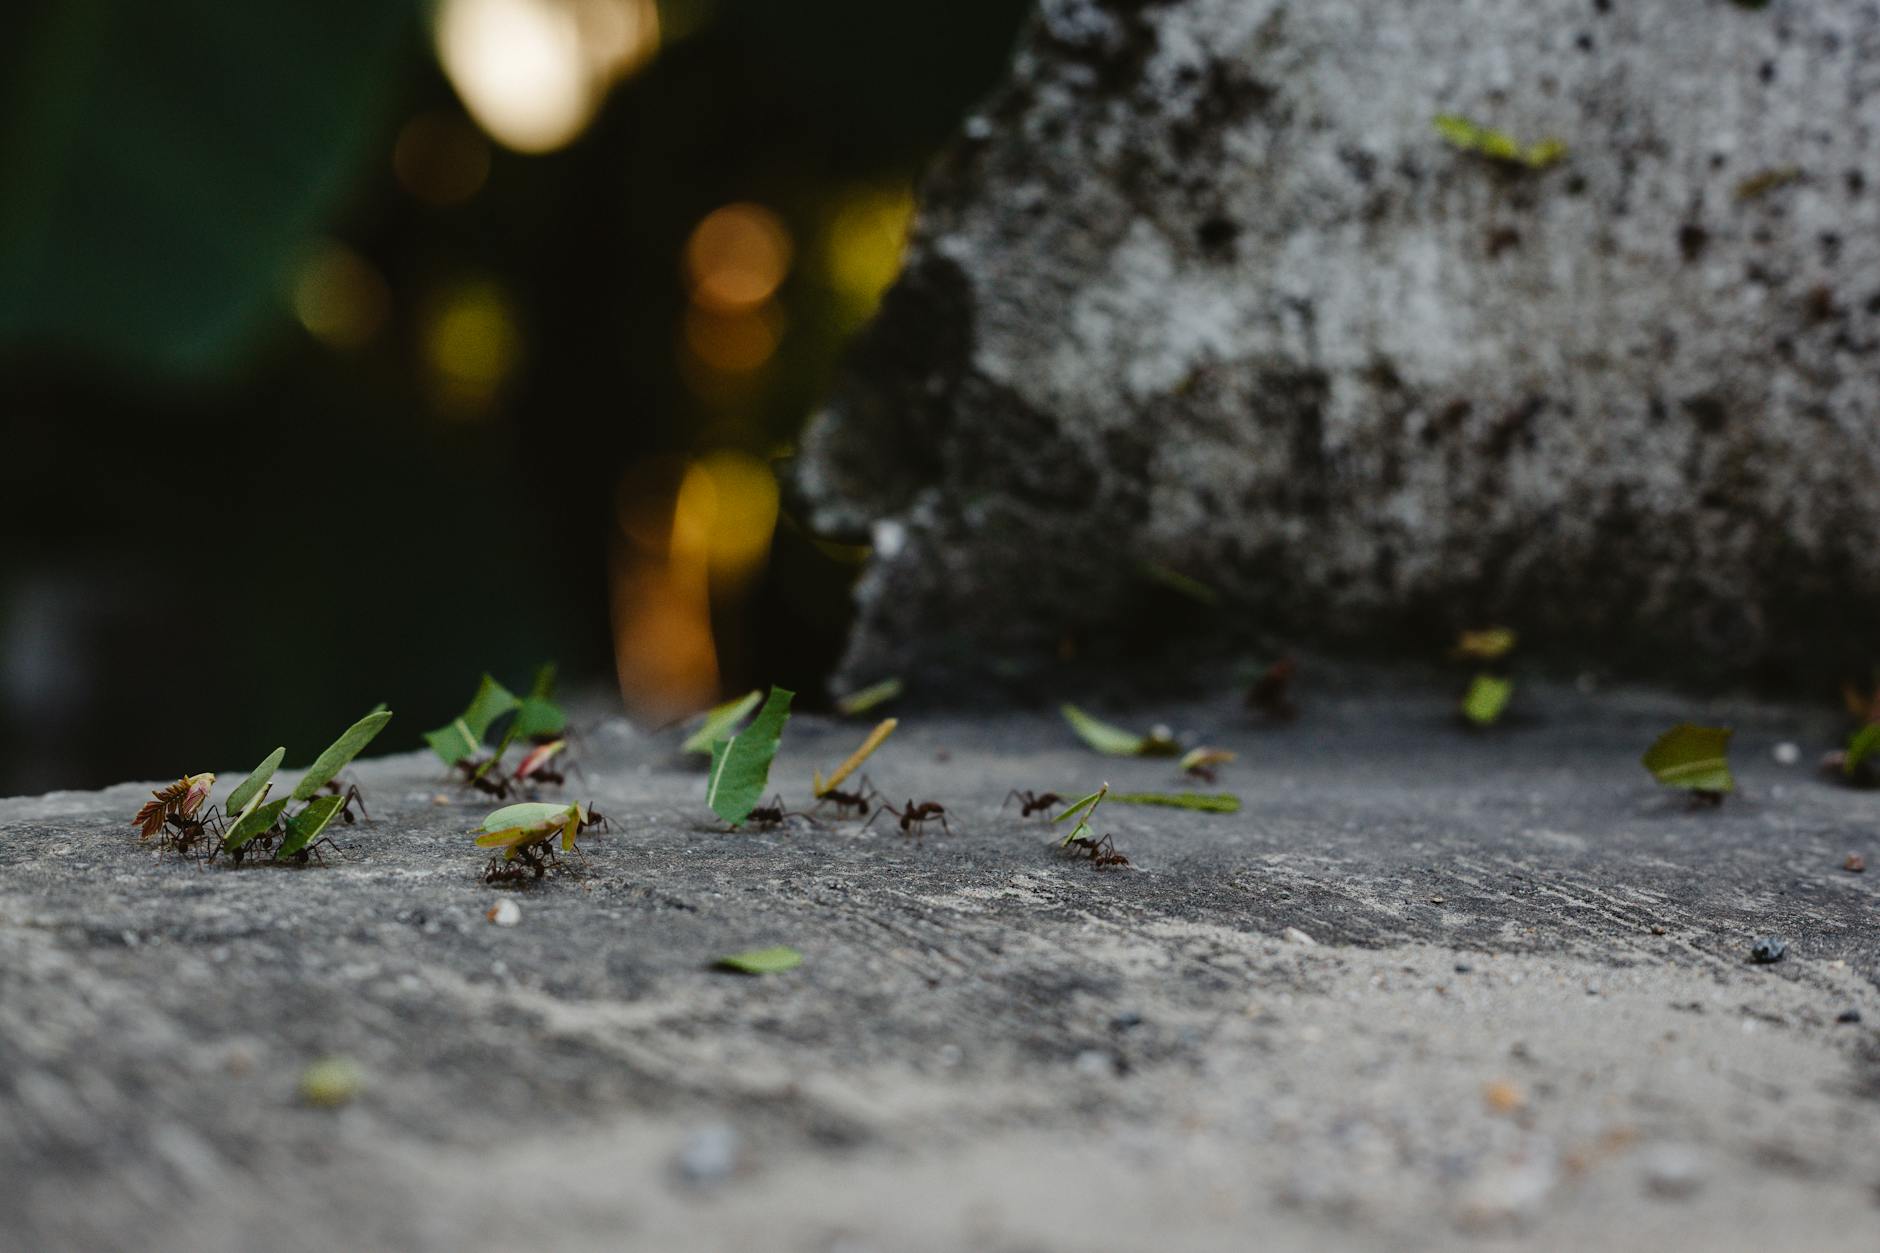
    If you live in Florida, you already know. You set a single crumb on the counter and within twenty minutes there’s a whole ant highway running across your kitchen. It doesn’t matter how clean your house is. It doesn’t matter what season it is. Down here in Northwest Florida, ants are just… a fact of life. Especially in summer when the rain drives them inside looking for dry ground.

    For a long time I just dealt with it — or I’d grab whatever was under the sink and spray, not really thinking about what was in it. Then I started paying more attention to what we were bringing into our home, and I realized I didn’t want to use harsh chemical pesticides around my kids, our mini labradoodle, or especially our backyard chickens who free range near the house. So I started researching and testing. Some things flopped. Some things actually worked.

    Here’s what we’ve landed on.


    Why Florida Ants Are Especially Stubborn

    We’re not dealing with one species here. Florida has fire ants, ghost ants, carpenter ants, Argentine ants, and the infamous crazy ants — and they all behave a little differently. Ghost ants are the tiny ones that swarm your kitchen counters. Fire ants build those sandy mounds in the yard that your kids inevitably step in barefoot. Carpenter ants go after wood (which is very much not what you want in a Florida home).

    The other thing working against us is our climate. The heat and humidity that Florida is famous for creates the perfect environment for ants to thrive year-round. After heavy rains — which we get plenty of from May through October — colonies move to higher, drier ground. That often means inside your walls or under your floors.

    All of that to say: this isn’t a one-and-done situation. It’s an ongoing habit of small, consistent actions. But they genuinely work.


    The Natural Methods We Actually Use

    Diatomaceous Earth — Our Biggest Win

    This is hands-down our most-used tool. Food-grade diatomaceous earth is a fine powder made from fossilized algae, and it works mechanically — not chemically. It damages the exoskeleton of insects so they dry out and die. It’s completely safe around kids, dogs, and importantly for us, our chickens. We actually use it in the coop too for pest control.

    We apply a thin line of it along baseboards, around door frames, under appliances, and anywhere we see ant trails starting. Outside, we dust it around the foundation of the house after dry weather. (It loses effectiveness when wet, so reapply after rain.)

    If you’re curious about how we use it in the chicken yard too, check out Non-Toxic Pest Control for Florida Homes: What’s Actually Safe for Kids, Chickens, and Pets — I go into a lot more detail there.

    Peppermint Oil and Other Essential Oil Barriers

    Ants navigate by scent trails. Disrupting those trails with strong smells throws them off. We mix about 15-20 drops of peppermint essential oil with water in a spray bottle and wipe down counters, window sills, and door thresholds regularly. It actually smells really good in the kitchen, which is a bonus.

    Other oils that work similarly: tea tree, clove, and cinnamon. I rotate them so the ants don’t adapt. Cinnamon powder itself sprinkled along entry points also acts as a physical deterrent — they won’t cross it.

    White Vinegar for Counters and Trails

    When I see an active trail, I spray undiluted white vinegar directly on it. This destroys the pheromone trail so other ants can’t follow. Then I wipe it clean. It smells strong for a minute but dissipates quickly and leaves no residue I’m worried about on food prep surfaces.

    For ongoing cleaning, we use Grove Collaborative products for our everyday counters — their concentrates are non-toxic and we’ve found the clean surfaces genuinely reduce ant interest in the kitchen.

    Wondercide for the Perimeter

    Wondercide is something I recommend to every Florida mama in our homeschool co-op. It’s a plant-based pest spray that’s safe to use around kids, pets, and chickens. We spray it around the foundation of our house, on the porch, and along the fence line every few weeks — especially heading into rainy season. It handles ants but also mosquitoes and other pests, which is a huge deal down here in Pensacola where the bugs come in waves.

    I actually wrote more about how we handle bugs outside in Natural Mosquito Repellent That’s Actually Safe for Kids in Florida if you want the full outdoor pest picture.

    Borax Bait for Serious Infestations

    Okay, this one requires a little more care because borax shouldn’t be left where toddlers or pets can get into it directly. But in the right spots — inside a bait station, tucked under the fridge or behind the stove — it’s incredibly effective and still far safer than commercial ant killers.

    The recipe is simple: mix 1/2 teaspoon of borax with 8 teaspoons of sugar and enough warm water to dissolve it. Soak a cotton ball and place it inside a small lidded container with tiny holes poked in the sides. Worker ants carry the bait back to the colony and it kills it from the inside out. This works especially well for ghost ants, which are the ones most likely to be all over your kitchen.

    Seal Everything — Seriously, Everything

    This sounds obvious but it made a huge difference for us. We went around the house with clear caulk and sealed every gap we could find around baseboards, pipe entry points, window frames, and door sweeps. Florida homes have a lot of tiny entry points because of how they’re built and how much the wood expands and contracts with our humidity.

    Pair that with keeping food in sealed containers (we use glass jars for pantry staples) and making sure the trash has a tight lid, and you remove a lot of the reason ants want to come inside in the first place.


    Keeping Ants Away From the Chicken Coop Area

    Fire ants are a real problem near chicken coops. They’ll get into feed, swarm chicks, and can actually harm young birds. We keep the area around our coop dry and clean, remove spilled feed promptly, and use diatomaceous earth around the perimeter of the run. We’ve had good luck with it.

    If you’re newer to keeping chickens and want the bigger picture on coop setup and keeping things healthy, our Backyard Chicken Starter Guide covers a lot of this.


    Making It a Learning Moment

    One thing I love about this whole natural pest control approach is that it turns into actual nature study. My kids are fascinated by ants — we’ve spent more than one morning watching a trail with a pocket microscope and sketching what we see in their nature journals. We’ve talked about why ants come inside after rain, how they communicate through pheromones, and why diatomaceous earth works the way it does.

    That’s the thing about living intentionally — even the annoying stuff, like a line of ants across your counter, becomes an opportunity to slow down and actually look. My kids now know more about ant biology than most adults, and we learned it in our kitchen while making breakfast.

    Very 1990s of us, honestly. No app required.


    A Few Quick Reminders

    • Reapply diatomaceous earth after every rain
    • Rotate your essential oils so ants don’t habituate
    • Borax bait is effective but keep it away from very young children and pets
    • Consistency matters more than any single product — make these habits, not one-time fixes
    • Address moisture issues inside and outside your home — ants follow water

    We’re not a pest-free house — this is Florida and that’s probably not realistic. But we’ve gone from full-on ant invasions to occasional scouts that don’t find anything worth reporting back about. And we’ve done it without a single can of chemical spray. That feels really good.

    If you’re just starting to move toward a less-toxic home and feel a little overwhelmed by where to start, my How to Detox Your Home Room by Room checklist is a great first step. Small changes add up faster than you’d think.

    You’ve got this, mama. Even with the ants.


    📖 You Might Also Like:

    Frequently Asked Questions

    What is the most effective natural way to keep ants out of the house in Florida?

    A combination approach works best in Florida’s climate. Food-grade diatomaceous earth applied along baseboards and entry points, peppermint oil sprays on surfaces, and Wondercide around the home’s exterior perimeter together form a strong, non-toxic barrier. Sealing entry points with caulk and keeping food in sealed containers removes the reason ants want to come inside in the first place.

    Is diatomaceous earth safe to use around kids and chickens?

    Yes — food-grade diatomaceous earth is considered safe around children, dogs, cats, and backyard chickens. It works mechanically rather than chemically, damaging insect exoskeletons without leaving toxic residue. Just avoid applying it in a way that creates a large dust cloud that could irritate lungs. A light, targeted application is all you need.

    Why are there so many ants in Florida homes after rain?

    Florida’s heavy rains — especially common from May through October — flood ant colonies in the ground, forcing them to relocate to higher, drier spaces. Your home’s foundation, walls, and kitchen are prime targets. This is why ant pressure increases noticeably after summer storms in Northwest Florida and throughout the state.

    Does peppermint oil actually repel ants?

    Yes, and fairly reliably. Ants navigate using pheromone scent trails, and strong essential oils like peppermint disrupt those trails and deter scouts from marking new paths. Spraying a diluted peppermint oil mixture along windowsills, countertops, and door thresholds is a genuinely effective deterrent, though it needs to be reapplied regularly — especially in Florida’s humidity.

    How do I get rid of fire ants in my yard naturally without harming my chickens?

    For fire ant mounds in the yard, diatomaceous earth dusted directly into and around the mound is a chicken-safe option. Boiling water poured directly into the mound is also effective and leaves no residue. Some families use beneficial nematodes applied to the lawn as a longer-term biological control. Avoid boric acid or chemical fire ant baits in areas where chickens free range.
  • Natural Mosquito Repellent That’s Actually Safe for Kids in Florida (What We’ve Tested and Trust)

    Natural Mosquito Repellent That’s Actually Safe for Kids in Florida (What We’ve Tested and Trust)

    Natural Mosquito Repellent That’s Actually Safe for Kids in Florida (What We’ve Tested and Trust)

    🌿 The Short Version: Not all natural mosquito repellents hold up in Florida’s brutal heat and humidity — but a few genuinely do. I’m sharing what our family has actually tested in the backyard, on nature walks, and around the chicken coop so your kids can stay outside longer without the toxic chemical load.

    This post contains affiliate links. I may earn a small commission at no extra cost to you.

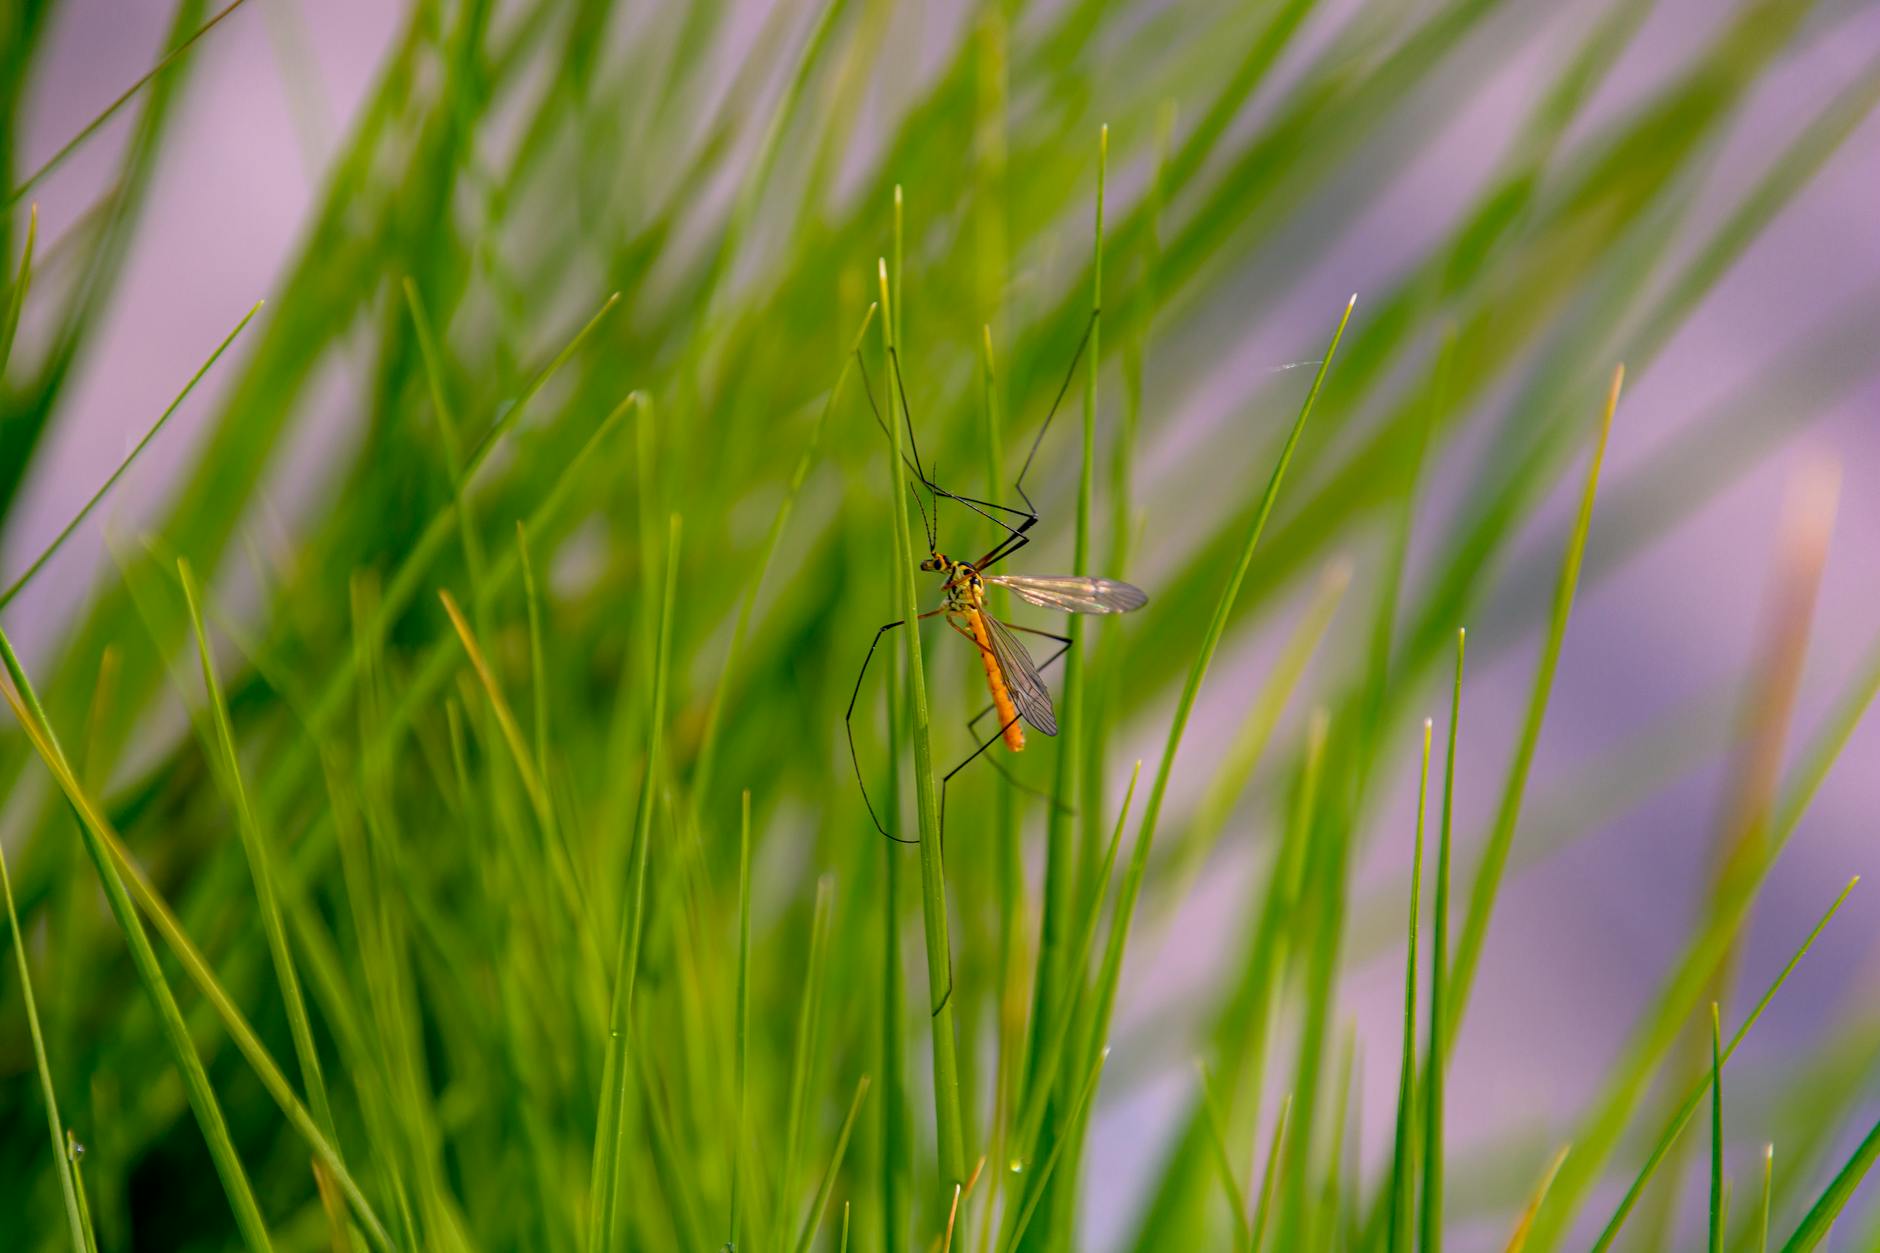
    If you live in Florida, you already know mosquitoes are not a minor inconvenience. They are a lifestyle. From April through November — honestly sometimes longer here in the Pensacola area — you cannot step into the backyard after 5 PM without getting eaten alive. And if you’re trying to raise your kids the old-fashioned way, outside and in the dirt, that is a real problem.

    For years I just grabbed whatever was on the shelf at Target. Then I started reading labels and realized I was spraying DEET on my kids’ arms multiple times a day, every single day of the Florida summer. That didn’t sit right with me anymore. So I went down the rabbit hole of natural alternatives — tested a lot of them, threw some away, and kept a few. This is what I actually know after several summers of outdoor Charlotte Mason nature walks, backyard chicken chores, and kids who think the best part of summer is catching bugs until dark.

    Why Florida Is a Whole Different Animal

    Here’s the thing about natural mosquito repellent reviews: most of them are written by people in places where mosquitoes are a seasonal annoyance, not a year-round, Biblical-plague situation. Florida humidity and heat break down plant-based oils faster than in drier climates. That essential oil blend that works great for an hour in Tennessee might give you fifteen minutes here before you’re getting bit again.

    So when I say “tested in Florida,” I mean tested during afternoon chicken chores in July when it’s 94 degrees and 90% humidity. That’s my measuring stick.

    What’s Actually in Most Conventional Repellents (And Why I Moved Away)

    The most common active ingredient in conventional repellents is DEET. It works — nobody is arguing that. But the CDC and AAP both recommend using it cautiously on children, and when your kids are outside for hours every day doing nature study, gardening, playing with the chickens, and just being kids, “cautious” starts to feel like a lot. There’s also permethrin, which is effective but is genuinely toxic to cats, and I’ve seen enough warnings about it around chickens to make me nervous using it anywhere near our coop.

    If you want a deeper dive into what’s safe to use around your animals and kids, I wrote about this in more detail in Non-Toxic Pest Control for Florida Homes: What’s Actually Safe for Kids, Chickens, and Pets — that post covers the bigger picture beyond just mosquitoes.

    Natural Ingredients That Actually Work

    Before I get into specific products, here’s what the research (and my personal experience) backs up:

    Picaridin

    Okay, picaridin is synthetic, but it’s worth including here because it’s significantly lower-risk than DEET, approved by the EPA, and recommended by the EWG as a safer alternative. It doesn’t have that greasy DEET feel, it doesn’t melt plastic, and it’s gentle enough that I use it on my younger kids when we’re going to be out for several hours. It’s my “we’re hiking the nature trail” option when I need something heavy duty.

    Oil of Lemon Eucalyptus (OLE)

    This one is CDC-approved for mosquito repellency and it genuinely works — but it is not the same as lemon eucalyptus essential oil. OLE is a refined extract with a concentrated active compound called PMD. It’s not recommended for kids under 3, and I use it on my older elementary kids when we’re spending a lot of time near standing water (which in Northwest Florida is basically everywhere after a rain).

    Citronella, Peppermint, Lavender, and Clove

    These are the ingredients you’ll see in most “all natural” sprays. Citronella is probably the most effective of the bunch, but on its own, it burns off fast in heat. Products that combine several of these oils tend to last longer. Lavender is actually my favorite for the little ones because it’s gentle and smells wonderful.

    Witch Hazel as a Base

    Most quality natural sprays use witch hazel or alcohol as the carrier instead of water, and that matters for how long it clings to skin in humidity. Water-based sprays? They sweat right off. Look for this on the label.

    Specific Products We’ve Actually Used

    Wondercide is what I reach for most often. It’s plant-based, works well around our chickens and our mini labradoodle without worry, and I feel good spraying it on the kids before they head out to collect eggs in the evening. They also make a yard spray that we use around the perimeter of the coop area. You can grab it through Wondercide — I’ve ordered from them several times and always been happy.

    Murphy’s Naturals makes a good picaridin spray that holds up well in Florida conditions. Not fully plant-based, but genuinely low-toxicity and effective for longer outdoor sessions.

    DIY blends — I’ve made my own with witch hazel, distilled water, a little vegetable glycerin, and a combination of citronella, lavender, and peppermint essential oils. Does it work as long as commercial stuff? Honestly, no. But for a quick 30-minute nature walk or backyard play session, it’s fine and the kids love helping make it.

    For application, I use non-toxic sunscreen first, let it absorb, then apply repellent over top. That combo is our warm-weather daily routine from about March through October.

    Making It Part of Our Outdoor Routine

    One thing I’ve learned: natural repellents require a little more intentionality. You have to reapply more often, usually every 60-90 minutes outdoors in peak mosquito hours. We’ve just made it part of our rhythm.

    The kids do their morning nature journaling with their nature journal and Faber-Castell watercolors on the back porch during the cooler part of the morning when mosquitoes are less active. Afternoon chicken chores and free play are when we spray down. Evening bug catching with the bug collection kit is prime mosquito hour, so that’s when we’re most careful about coverage.

    I also keep kids’ rain boots by the back door — bare ankles are mosquito magnets, and after every afternoon thunderstorm there are puddles everywhere. Covered feet make a real difference.

    Around the Coop Specifically

    Standing water is the main mosquito breeding ground, and if you have chickens, you know water management is already something you’re thinking about. We switched to a nipple-style chicken waterer partly for cleanliness and partly because open water dishes were breeding mosquitoes like crazy in summer. That single change made a noticeable difference in the mosquito population right around the coop.

    We also use diatomaceous earth in the run for general pest control — it doesn’t specifically target mosquitoes but it’s part of our overall non-toxic pest management approach out there. For more on keeping things non-toxic around the flock, check out Common Chicken Health Problems in Florida Humidity — and How We Actually Fix Them for context on why we keep the chemical load low around our birds.

    The 1990s Kid Approach to Mosquito Season

    Here’s the honest truth: growing up in the ’90s, we played outside all summer in Florida and got mosquito bites. Our moms would spray us down with OFF and send us back out. I’m not trying to raise kids in a bubble — I want them outside, dirty, free-ranging like our chickens. But I also have more information now than my mama had then, and I’d rather not spray neurotoxins on my kids every day of their childhood if I have a real alternative.

    The goal isn’t perfect protection. It’s reasonable protection with ingredients I understand, so my kids can stay outside as long as they want. That’s the whole point of this intentional life we’re building — more outside time, not less.


    📖 You Might Also Like:

    Frequently Asked Questions

    What is the safest natural mosquito repellent for young kids in Florida?

    For young children (under 3), stick to lavender and citronella-based sprays with a witch hazel carrier, like Wondercide. For kids 3 and up, Oil of Lemon Eucalyptus (OLE) is CDC-approved and effective. For longer outdoor sessions in Florida heat, a low-concentration picaridin spray is a well-tolerated, low-toxicity option that performs better than most plant-only alternatives in high humidity.

    Do natural mosquito repellents actually work in Florida’s heat and humidity?

    Some do, but you have to be realistic about reapplication. Florida’s heat and humidity break down plant-based oils faster than in cooler climates. Most natural sprays last 45–90 minutes rather than several hours. Using a witch hazel or alcohol base (not water) helps them stay on skin longer. Products like Wondercide and Murphy’s Naturals hold up better than DIY water-based blends in Florida conditions.

    Is DEET safe to use on kids every day during Florida summer?

    The CDC and AAP say DEET is safe when used as directed, but both recommend using the lowest effective concentration on children and avoiding daily repeated use when possible. For families spending hours outside every single day — gardening, playing, doing outdoor school — many parents prefer lower-risk alternatives like picaridin or OLE for regular use, reserving DEET for high-exposure situations like hiking near wetlands.

    What natural mosquito repellents are safe around backyard chickens?

    Avoid permethrin around chickens — it’s commonly used in conventional repellents but can be toxic to birds. Wondercide’s plant-based sprays are generally considered safe around poultry and are what many backyard chicken keepers use. Also focus on eliminating standing water near your coop, since that’s where mosquitoes breed. Switching to a nipple-style waterer removes one of the biggest water sources in a chicken run.

    How do I make my own natural mosquito repellent for kids?

    A basic DIY recipe: combine 2 oz witch hazel, 2 oz distilled water, ½ tsp vegetable glycerin, and 20–30 drops of essential oils (citronella, lavender, and peppermint work well together). Shake before each use. This works for shorter outdoor sessions but needs reapplication every 30–45 minutes in Florida heat. It’s a great option for morning nature walks or quick backyard play, but for longer outdoor time you may want a commercial product with better staying power.

  • All About Reading Honest Review: The Real Pros and Cons After Using It With Our Kids

    All About Reading Honest Review: The Real Pros and Cons After Using It With Our Kids

    All About Reading Honest Review: The Real Pros and Cons After Using It With Our Kids

    🌿 The Short Version: All About Reading is a structured, Orton-Gillingham-based phonics program that works really well for kids who need a clear, step-by-step approach to reading — but it’s more teacher-led and formal than some Charlotte Mason families expect. Here’s what we actually experienced using it, and how we made it work in our nature-based homeschool.

    This post contains affiliate links. I may earn a small commission at no extra cost to you.

    If you’ve been in homeschool circles for more than five minutes, you’ve probably heard someone swear by All About Reading. And you’ve probably also heard someone say it felt too scripted, too slow, or too much. So which is it?

    We’ve now used it with two of our kids at different levels, and I want to give you the real, unfiltered version — not a sales pitch, not a panic-pass either. Just what we actually saw happen at our kitchen table (and sometimes out on the back porch while the chickens free-ranged and our labradoodle did his best to steal the letter tiles).

    What Is All About Reading, Exactly?

    All About Reading (AAR) is a multi-level phonics and reading program based on the Orton-Gillingham method — which is the gold standard for structured literacy, especially for kids who struggle with reading or show signs of dyslexia. It’s systematic, sequential, and explicit. That means nothing is left to chance. Every phonics rule is introduced one at a time, practiced, reviewed, and built upon.

    There are four levels (Pre-Reading through Level 4), and each one comes with a teacher’s manual, student activity book, and a set of letter tiles. The lesson plans are fully written out, which either sounds like a lifesaver or a straitjacket depending on where you are in your homeschool journey.

    Who It’s Made For

    AAR works beautifully for:

    • Kids who are just starting to read (Pre-Reading or Level 1)
    • Kids who are struggling or stuck and need a methodical reset
    • Kids who may be dyslexic or have other learning differences
    • Moms who want a done-for-you reading plan with zero guesswork

    It’s worth knowing upfront that this isn’t a Charlotte Mason living-books-by-the-fireplace kind of curriculum. It’s structured. But that doesn’t make it wrong — it just means you go in with clear eyes.

    What We Loved: The Honest Pros

    It Actually Works

    I’ll start here because it matters most. My daughter was stuck. We’d tried a more relaxed, CM-style approach to phonics — reading poems aloud, gentle copywork, letting things click naturally — and it just wasn’t clicking. At all. We started AAR Level 1 in the fall, and by spring she was reading simple readers on her own. That’s not nothing. That’s everything.

    The Orton-Gillingham method works because it uses all the senses — hearing the sound, seeing the letter, touching the tile, saying it out loud. For kids who need that multi-sensory hook, AAR delivers.

    The Lesson Plans Are Genuinely Easy to Use

    I don’t have to think when I open this book. The script is right there. On mornings when I’ve already handled a chicken waterer leak and broken up a sibling argument before 8 a.m., having a curriculum that just tells me exactly what to say? Priceless.

    Each lesson is also short — usually 20 minutes or less. That fits beautifully with a Charlotte Mason short-lesson philosophy, even if the approach itself is more structured.

    The Letter Tiles Are Genuinely Fun

    My kids treated those letter tiles like toys. They built words on the floor, sorted them by color, and yes, occasionally launched them across the room. But they worked. Hands-on, tactile, moveable — it beat worksheets every single time.

    It Pairs Naturally With Nature Study

    This one surprised me. The decodable readers that come with AAR have simple, sweet stories — and we started narrating them, CM-style, after each one. We’d read about a bug in the reader and then go outside with our bug collection kit to find a real one. Reading as a doorway to the living world — that felt very us.

    What Was Hard: The Honest Cons

    It’s a Lot of Teacher Time

    This is a one-on-one program. You can’t hand it to your kid and walk away to start dinner. Every lesson requires you, sitting there, present and engaged. If you’re juggling multiple kids at different grade levels (hi, that’s us), scheduling that one-on-one time takes real intention.

    The Cost Adds Up

    Each level runs $90–$100+, and you need a new activity book for each child (the teacher’s manual is reusable, but the student workbook isn’t). If you have three kids who each go through four levels… you do the math. The good news is that if you’re on the Florida PEP Scholarship, All About Reading is an approved vendor — so that funding can help cover it.

    It Can Feel Dry If You Let It

    The curriculum itself is warm and encouraging, but it’s still phonics practice. There’s nothing inherently beautiful or inspiring about drilling the /sh/ blend for the fourth day in a row. We had to bring the life to it ourselves — outside lessons when possible, nature journals nearby, watercolor paints on the table so she could illustrate the word of the day.

    It’s Slower Than You Might Hope

    AAR doesn’t rush. And honestly, that’s a feature, not a bug — but if you’re hoping your kindergartner will be reading chapter books by Christmas, you might feel impatient. Trust the pace. It’s doing its job.

    How We Made It Work in a Charlotte Mason Home

    We don’t use AAR as our whole language arts approach. We use it for phonics instruction only, and then we layer everything else around it the CM way — living books, narration, copywork from beautiful passages, nature journaling, poetry teatime.

    If you want to see how we structure our days around this kind of balance, our Charlotte Mason Daily Schedule for Elementary Ages walks through exactly what that looks like in real life.

    We also pair it with Handwriting Without Tears for penmanship, which has a similar clear, structured feel that complements AAR well without adding complexity.

    Is It Worth the Money?

    For us? Yes — especially for the child who needed it. If I’d had a kid who picked up reading easily and naturally, I might have just kept it gentle and let it unfold. But when a child is struggling, you don’t need beautiful. You need effective. AAR was effective.

    For a fuller picture of how we choose and mix curricula, you might also enjoy our Ambleside Online Curriculum Honest Review — because we absolutely do both, and they play nicer together than you’d think.

    The Bottom Line

    All About Reading isn’t the most Charlotte Mason-flavored program on the shelf. But it’s one of the most reliable. If your child is struggling to read, or if you just want a structured, foolproof phonics foundation before you let the living books do their magic — it’s absolutely worth looking into.

    Just don’t forget to take your lesson outside sometimes. Spell words in the dirt. Find the bug from the reader in the backyard. Let the chickens wander nearby while you practice. That’s still school. That’s actually the best school.


    📖 You Might Also Like:

    Frequently Asked Questions

    Is All About Reading worth it for homeschoolers?

    For most families, yes — especially if your child is struggling with reading or if you want a reliable, no-guesswork phonics foundation. It’s a more expensive and teacher-intensive program, but it consistently delivers results, particularly for kids who need a structured, multi-sensory approach.

    Is All About Reading a Charlotte Mason curriculum?

    Not exactly. All About Reading is an Orton-Gillingham-based structured literacy program, which is more systematic and scripted than traditional Charlotte Mason methods. However, many CM families use it just for phonics instruction and layer living books, narration, and nature study around it.

    Can I use All About Reading with the Florida PEP Scholarship?

    Yes! All About Reading is an approved vendor under the Florida PEP Scholarship program, so eligible families can use their scholarship funds to purchase it. Always verify the current approved vendor list at Step Up For Students before purchasing.

    How long does each All About Reading lesson take?

    Most AAR lessons take between 15 and 20 minutes, which fits nicely with the Charlotte Mason philosophy of short, focused lessons. Lessons are designed to be done one-on-one with a parent or teacher.

    What’s the difference between All About Reading and All About Spelling?

    All About Reading focuses on decoding — teaching kids to read phonetically. All About Spelling uses the same Orton-Gillingham method but teaches encoding — how to spell words correctly. They’re companion programs designed to work together, and many families use both.

  • How to Apply for the Florida PEP Scholarship Step by Step (From a Mama Who’s Done It)

    How to Apply for the Florida PEP Scholarship Step by Step (From a Mama Who’s Done It)

    How to Apply for the Florida PEP Scholarship Step by Step (From a Mama Who’s Done It)

    🌿 The Short Version: The Florida PEP scholarship can cover curriculum, supplies, and more for your homeschool — but the application process has some specific steps you don’t want to miss. This post walks you through exactly how to apply, what to expect, and how to set yourself up so funding actually hits your account.

    This post contains affiliate links. I may earn a small commission at no extra cost to you.

    When I first heard about the Florida PEP scholarship, I did what any overwhelmed homeschool mama does — I googled it at 10pm, ended up in three different Facebook groups, got four conflicting answers, and closed my laptop more confused than when I started.

    Sound familiar?

    Here’s the thing: the application process is actually pretty manageable once someone just walks you through it clearly. So that’s what I’m doing today. No jargon, no fluff — just the real steps, in order, from someone who has applied, been approved, and is actively using PEP funds for our Charlotte Mason homeschool right here in Northwest Florida.

    Let’s get into it.


    What Is the Florida PEP Scholarship, Really?

    The Personal Education Pathway (PEP) scholarship is Florida’s education savings account program for homeschoolers. It’s funded through the state and administered by approved Scholarship Funding Organizations (SFOs). Once approved, you get a set amount of money loaded into an account that you can spend on approved educational expenses — curriculum, books, tutoring, therapies, certain classes, and more.

    It is not a voucher for private school. It’s specifically designed for families who are directing their own child’s education at home. If you’re already homeschooling in Florida (or thinking about it seriously), this scholarship is worth your full attention.

    We use PEP funds for things like our reading curriculum, math program, nature study supplies, and art materials. It’s genuinely changed what’s possible for our homeschool.


    Step 1: Make Sure Your Child Is Eligible

    Before you do anything else, confirm your child qualifies. To be eligible for the PEP scholarship, your child generally needs to meet one of these criteria:

    • Currently enrolled in a Florida public school (or has been)
    • A rising kindergartner who would otherwise be eligible to enroll in a Florida public school
    • Previously received a Florida scholarship (like FES-UA or Gardiner)
    • Meets certain household income thresholds (for priority consideration)

    Income is not a hard barrier — PEP has expanded significantly and many families qualify regardless of income — but lower-income families may receive priority or higher funding amounts. Check the current guidelines on your SFO’s website because the rules do get updated.


    Step 2: Choose a Scholarship Funding Organization (SFO)

    This tripped me up at first. You don’t apply directly to the state of Florida — you apply through an approved SFO. As of now, the main SFOs handling PEP include:

    • Step Up For Students (the most widely used)
    • AAA Scholarship Foundation
    • Family Empowerment Scholarship administrators

    Most Florida homeschool families I know use Step Up For Students. Their website is pretty user-friendly and their support team is responsive. Go to their website, navigate to the PEP scholarship page, and that’s where you’ll start your application.


    Step 3: Create Your Parent Account

    Once you’re on the SFO’s site, you’ll create a parent account. Have this information ready:

    • Your contact information
    • Your child’s full legal name, birthdate, and Social Security Number
    • Your child’s current or most recent school enrollment information (if applicable)
    • Proof of Florida residency

    The SSN requirement makes some parents nervous — I get it. But it’s standard for any state-funded scholarship program and it’s how they verify identity and eligibility.


    Step 4: Complete and Submit the Application

    Once your account is set up, you’ll fill out the actual scholarship application for each child you’re enrolling. The application asks about:

    • Your child’s educational history
    • Your homeschool setup (you’ll need to have an active Florida homeschool notice of intent on file with your county superintendent — if you haven’t done that yet, do it first)
    • Your intended use of funds

    Double-check everything before you submit. Errors or missing information slow the process down significantly, and approval windows can be competitive.

    For more on keeping your homeschool documentation solid throughout the year, I wrote about how to document homeschool for the Florida PEP scholarship — it’s a system that’s saved me so much stress.


    Step 5: Wait for Approval and Set Up Your Scholarship Account

    After submitting, you’ll receive a notification about your application status. If approved, you’ll be given access to your scholarship spending account — this is where your funds live.

    The money is disbursed in installments throughout the school year (not all at once), so plan accordingly. You’ll use the account to either:

    • Purchase directly from approved vendors through the SFO’s marketplace
    • Submit receipts for reimbursement from approved outside purchases

    Not everything is reimbursable, so always check the approved expense list before you buy something and expect to be reimbursed for it. I learned that one the hard way.


    Step 6: Know What You Can Spend PEP Funds On

    This is where it gets fun, honestly. Approved expenses typically include:

    For our Charlotte Mason approach, I’ve used funds on nature study supplies — including a pocket microscope that my kids use constantly — as well as Faber-Castell watercolors for nature journaling and our nature journals themselves. When purchases are tied to your documented educational plan, they tend to qualify.

    Curriculum retailers like Rainbow Resource and Timberdoodle are popular among PEP families — Rainbow Resource especially has a huge selection and is familiar to many SFO reviewers.


    Step 7: Keep Your Records Clean All Year

    This is the part nobody talks about enough. Getting approved is only step one. Staying in good standing — and actually getting reimbursed without headaches — means keeping tidy records throughout the year.

    I keep a simple folder (digital and paper) for every receipt, every curriculum purchase, and every educational activity I document. Having a clear system from day one makes renewal time so much smoother.

    I go deep on this in my post about documenting your homeschool for the Florida PEP scholarship — highly recommend reading that alongside this one.


    A Few Extra Tips From Our Experience

    Apply as early as you possibly can. PEP funding has caps and priority windows. Families who apply early tend to get more funding and better placement in the approval queue.

    File your Notice of Intent first. You cannot be a legitimate homeschooler in Florida without this. It’s filed with your county school superintendent and it’s a simple form — but it needs to be done before your PEP application is complete.

    Connect with a local homeschool community. Other Pensacola-area PEP families have been my best resource for navigating quirks in the process. Facebook groups specific to Florida PEP scholarship families are genuinely helpful.

    Don’t stress about perfection. This process feels overwhelming the first time and almost routine by year two. You’ve got this.


    If you’re sitting on the fence about applying — wondering if it’s worth the paperwork, the account management, the documentation — I’ll just say this: our homeschool looks different because of PEP. My kids get better resources. I can say yes to more field trips, more hands-on materials, better curriculum. It funds the kind of slow, rich, 1990s-style childhood I’m trying to give them — more dirt, more books, more real learning — and I’m so glad I pushed through the confusion to figure it out.

    You can do this, mama. And if you have questions, drop them in the comments. I answer every single one.


    📖 You Might Also Like:

    Frequently Asked Questions

    How do I apply for the Florida PEP scholarship?

    You apply through an approved Scholarship Funding Organization (SFO) — most Florida homeschool families use Step Up For Students. You’ll create a parent account on their website, submit your child’s information and educational history, and wait for an approval notification. Make sure your Florida homeschool Notice of Intent is filed with your county superintendent before you apply.

    Who is eligible for the Florida PEP scholarship?

    Children who are currently enrolled in a Florida public school, rising kindergartners eligible for Florida public school enrollment, or children who have previously received a Florida education scholarship may be eligible. Income is not a hard cutoff, but lower-income families may receive priority consideration or higher funding amounts. Always check the current eligibility guidelines with your SFO since they are updated periodically.

    What can Florida PEP scholarship funds be spent on?

    PEP scholarship funds can be used for approved educational expenses including curriculum and instructional materials, tutoring, educational therapies (such as speech or occupational therapy for eligible children), educational technology, homeschool classes and co-ops, and certain homeschool conventions. Always verify a purchase is on the approved expense list before expecting reimbursement.

    How much money does the Florida PEP scholarship give per child?

    The funding amount varies by year and is influenced by the state’s education budget as well as your household income level. Amounts have ranged from a few hundred to several thousand dollars per child per year. Check the current amounts directly with Step Up For Students or your chosen SFO, as the numbers change with each legislative session.

    Do I need to be already homeschooling to apply for the Florida PEP scholarship?

    You do need to have an active homeschool set up in Florida — which means filing a Notice of Intent with your county school superintendent — before your PEP application can be complete. However, you can begin the application process while you are in the process of transitioning from public school to homeschool, especially if your child is currently enrolled in a Florida public school.

  • How to Teach Kids About Nutrition the Homestead Way (From the Backyard to the Table)

    How to Teach Kids About Nutrition the Homestead Way (From the Backyard to the Table)

    How to Teach Kids About Nutrition the Homestead Way (From the Backyard to the Table)

    🌿 The Short Version: You don’t need a nutrition textbook to teach your kids about healthy eating — you need a garden, a few chickens, and some time in the kitchen together. This post walks through how our family uses a real-food, homestead-based approach to make nutrition something kids actually understand and live out.

    This post contains affiliate links. I may earn a small commission at no extra cost to you.

    Here’s something nobody tells you when you start homeschooling: the best nutrition lesson you’ll ever give your kids happens before breakfast.

    It happens when your seven-year-old runs out to the coop in her rain boots, collects warm eggs with her own hands, and then cracks them into a cast iron pan twenty minutes later. She doesn’t need a worksheet telling her eggs have protein. She knows it — the way kids know things when they’ve lived it.

    That’s the whole philosophy behind how we approach nutrition in our homeschool. We’re not sitting down with a food pyramid chart (does anyone even use those anymore?). We’re learning about food by growing it, raising it, cooking it, and eating it together. Very 1990s. Very Charlotte Mason. Very us.

    If you’ve been wondering how to teach kids about nutrition in a way that actually sticks — especially with a homestead-leaning, nature-based homeschool — I hope this gives you some real, practical ideas you can start using this week.


    Start Where the Food Starts: The Backyard

    The single most powerful nutrition lesson we’ve ever given our kids costs nothing and requires no curriculum. It’s just this: let them see where food comes from.

    When kids understand that a tomato grew from a tiny seed in the dirt, or that the egg in their lunchbox came from a hen they named and fed — food becomes real to them in a way no poster or documentary can replicate.

    Chickens as Living Nutrition Teachers

    Our little flock has been one of the best homeschool investments we’ve ever made — not just for eggs, but for everything that comes along with it. When the kids help care for the chickens, they naturally start asking questions: Why do the hens need oyster shell? What makes the yolk so orange? Why is our egg yolk darker than the ones at the grocery store?

    Those are real science and nutrition conversations happening organically, sparked by curiosity rather than a lesson plan. We’ve loved using Storey’s Guide to Raising Chickens as a family reference book — my older kids can actually flip through it on their own — and the Kid’s Guide to Keeping Chickens has been fantastic for my elementary-age ones who want something written just for them.

    We’ve talked about how pasture-raised hens produce eggs with more omega-3s. We’ve compared our deep orange yolks to pale store-bought ones. We’ve talked about what the hens eat and how that affects what we eat. That’s nutrition education. And nobody groaned or asked when it would be over.

    If you’re curious about getting more from your flock nutrition-wise, I also wrote about how to get chickens to lay more eggs naturally — some of it ties right into what the hens are eating and why it matters.

    Gardening Together in a Florida Backyard

    Now, I’ll be honest — gardening in Northwest Florida is humbling. The heat is real, the sandy soil is a challenge, and our growing season looks nothing like what you’d see in a northern homesteading book. But that’s actually a gift when it comes to teaching kids. We grow through the fall and winter, take stock in summer, and the kids learn real-world lessons about seasons, patience, and why certain foods grow where they grow.

    Getting kids involved with a seed starting kit and their own pair of garden gloves makes such a difference. There’s something about ownership — this is MY row of beans — that makes a child actually want to eat what they grew. We’ve had kids who claimed to hate vegetables happily eat cherry tomatoes warm off the vine because they picked them themselves.


    Bring It Into Your Homeschool Intentionally

    Okay, so you’ve got the backyard piece. But how do you actually weave nutrition into your school day in a Charlotte Mason-friendly way?

    Nature Journaling Food and Plants

    One of my favorite overlaps between nutrition and nature study is having the kids sketch and journal what they’re growing and eating. My daughter has entire pages in her nature journal dedicated to our garden plants — labeled drawings of bean plants, notes on when we harvested, observations about what the hens ate versus what we ate. She used her Faber Castell watercolors to paint a beautiful cross-section of a sweet potato we dug up last fall.

    This is living science. It’s real observation, real learning, and it builds a relationship with food that lasts.

    Simple Kitchen Lessons That Teach Nutrition Naturally

    We cook together. That sounds simple, but it’s probably the most underrated homeschool tool in existence. When kids are in the kitchen — measuring, stirring, tasting — they’re learning:

    • Where nutrients come from and what they do (“Why do we add butter to the vegetables?” “Because fat helps your body absorb the vitamins in them, babe.”)
    • How to read an ingredient label
    • What whole food looks like versus processed food
    • Why what we eat actually matters for how we feel

    Our cast iron skillet sees more homeschool action than most of our curriculum materials, honestly.

    For composting food scraps, which ties nutrition back to the garden cycle beautifully, check out how to teach kids about composting with a simple worm bin setup. My kids fully understand now that food waste feeds the soil that feeds our plants that feed us. That’s a complete nutrition ecosystem lesson right there.

    Making It a Little More Formal When Needed

    For families using the Florida PEP scholarship, nutrition can absolutely count toward your science documentation hours. We log it under life science — food systems, human biology, ecology of food. If you want to make sure you’re documenting it well, I have a whole post on how to document homeschool for the Florida PEP scholarship that breaks down how we keep it simple without losing our minds.


    The 1990s Secret Ingredient: Less Overthinking

    Here’s the thing I keep coming back to. Kids in the 80s and 90s weren’t given nutrition curricula. They weren’t tracked and optimized. They ate what was on the table, helped in the garden when told to, and went outside until the streetlights came on.

    And most of them were fine.

    I think we’ve overcomplicated this. The goal isn’t for your eight-year-old to be able to explain macronutrients on a quiz. The goal is for them to grow up with a healthy relationship with real food — to know that food comes from somewhere, that what we eat matters, that cooking is a skill worth having, and that eating together around a table is one of the best things a family can do.

    That’s what the homestead approach gives you. Not a perfect diet. Not a nutrition expert at age nine. Just kids who know their food, respect where it comes from, and actually enjoy eating it.

    We also try to keep what goes on our food as clean as what goes in it — which is why we use Grove Collaborative for our kitchen and household cleaners, and Wondercide around the yard and coop instead of conventional pesticides. All of it is connected.


    A Few Practical Ideas to Start This Week

    • Let your kids collect eggs and ask questions about what they notice
    • Plant one thing — even in a pot — and watch it together
    • Cook one meal a week with your kids fully involved in prep
    • Start a food page in their nature journal
    • Visit a local farmers market and let them ask the growers questions
    • Talk at the dinner table about what’s on the plate and where it came from

    None of this is fancy. All of it works.


    Teaching kids about nutrition doesn’t need a curriculum box or a color-coded food chart on the refrigerator. It needs time, intention, and a willingness to let messy, real-life experiences be the teacher. Our backyard, our chickens, our garden, and our kitchen table have done more for our kids’ understanding of food than anything I could have purchased or planned. And honestly? That’s the most Charlotte Mason thing I can think of.

    Start where you are. Grow what you can. Cook together. The rest follows naturally.


    📖 You Might Also Like:

    Frequently Asked Questions

    How do I teach kids about nutrition without making it a boring lesson?

    The best way is to make food tangible — let kids grow something, collect eggs, or help cook a meal. When children are involved in where food comes from and how it’s prepared, nutrition becomes something they experience rather than memorize. Hands-on activities like gardening, raising chickens, and cooking together are far more effective than worksheets or lectures.

    Can teaching nutrition count toward our homeschool science hours for the Florida PEP scholarship?

    Yes! Nutrition fits naturally under life science — topics like food systems, human biology, plant biology, and ecology of food all qualify. Make sure you’re documenting activities like garden journaling, cooking projects, and animal care. Keep a simple log with dates and descriptions and you’re covered.

    What age can kids start learning about nutrition in a homestead homeschool?

    Honestly, from toddlerhood. Even very young children can help collect eggs, water plants, and stir ingredients in the kitchen. The concepts grow with the child — a five-year-old learns that eggs come from hens, while a ten-year-old can explore why pasture-raised eggs have more nutrients. You don’t need to wait until they’re ‘old enough’ for a formal lesson.

    How do backyard chickens help teach kids about nutrition?

    Chickens are incredible living classrooms. Kids naturally ask questions about what hens eat and how it affects the eggs they produce. Comparing the deep orange yolks of pasture-raised eggs to pale store-bought ones sparks real conversations about nutrients, diet, and food quality. Caring for chickens also builds responsibility and a deeper respect for where food comes from.

    What are some simple homestead-style nutrition activities for elementary-age kids?

    Try having kids sketch and watercolor the foods they grow in a nature journal, cook one meal together per week with full kid involvement in prep, start a small container garden and track growth, visit a local farmers market, or set up a simple compost bin to show the full food cycle. All of these are low-cost, high-impact, and work beautifully within a Charlotte Mason or nature-based homeschool approach.

  • Best Nature Table Items to Collect by Season in Florida: A Year-Round Guide

    Best Nature Table Items to Collect by Season in Florida: A Year-Round Guide

    If you’ve ever tried to follow a nature study curriculum written for someone in New England, you know the struggle. “Collect colorful fall leaves!” they say, while your Florida kids are still running around in shorts and your oak trees haven’t dropped a thing. Living in the Sunshine State means we get to rewrite the rules on seasonal nature study — and honestly? I think we get the better deal.

    This post contains affiliate links. I may earn a small commission at no extra cost to you.

    Our family keeps a nature table year-round, and it’s become one of my favorite parts of our Charlotte Mason homeschool rhythm. It’s simple — just a corner of our dining room with a wooden tray, a few treasures, and whatever the kids have dragged in from the backyard that week. But it sparks so much wonder and observation. The key is knowing what to look for each season here in Florida, because our calendar doesn’t match the textbooks.

    What Is a Nature Table (And Why Bother)?

    A nature table is just a dedicated space to display natural items your children find and collect. It’s a living, changing exhibit of the world right outside your door. For us Charlotte Mason families, it ties beautifully into nature study — giving kids a reason to observe closely, ask questions, and make connections.

    My kids will spend twenty minutes examining a shed snakeskin or comparing two different seed pods. That’s the kind of slow, curious learning we’re after. The kind that doesn’t require a screen or a worksheet.

    We keep our nature journals nearby so the kids can sketch what’s on the table. Sometimes we pull out our pocket microscope to look at feather details or leaf structures. It doesn’t have to be fancy — just intentional.

    Florida Winter Nature Table (December – February)

    I know, I know — “winter” in Northwest Florida is a relative term. But we do get a season shift, and there’s plenty to collect.

    What to Look For

    • Camellia blooms — These beauties are everywhere in Pensacola from December through February. Float them in a small dish of water on your table.
    • Pine cones and pine needles — Longleaf pine cones are especially gorgeous. Talk about fire ecology and how these trees are adapted to Florida’s natural burn cycles.
    • Shed feathers — Migratory birds are passing through, and resident birds are more visible without dense summer foliage. Keep your Sibley Birds guide handy for identification.
    • Lichen and moss — Winter moisture makes these pop on tree bark. Collect a fallen branch with some attached.
    • Empty bird nests — Once leaves drop from deciduous trees, old nests become visible. These are safe to collect after nesting season.
    • Interesting bark pieces — Peeling bark from river birch or crape myrtle makes for great texture study.

    Florida-Specific Notes

    This is also when our backyard chickens are molting heavily, so we always have an interesting feather or two to compare with wild bird feathers. The kids love noticing the differences in structure between our hens’ fluffy down feathers and the sleek flight feathers they find from wild birds.

    Florida Spring Nature Table (March – May)

    Spring hits fast here. One week it’s still jacket weather, and the next everything is blooming and buzzing.

    What to Look For

    • Azalea petals — These are everywhere in our area. Collect fallen petals for pressing or just display a small branch in water.
    • Butterfly specimens or photos — Gulf fritillaries, zebra longwings, and swallowtails are active. We don’t collect live butterflies, but shed wings or photos work great.
    • Caterpillars and chrysalises — If you’re lucky, you’ll find a chrysalis to observe. Keep your bug catcher kit ready.
    • Wildflower pressings — Blanket flowers, coreopsis, and black-eyed Susans are blooming. Press them between heavy books for a week.
    • Eggshells — From wild birds (and our chicken coop). Compare colors, thickness, and speckle patterns.
    • Snake skins — Spring means snakes are active and shedding. We find these along fence lines and in the garden.
    • Seed pods — Redbud trees and other early bloomers drop interesting pods.

    Spring Activities

    This is prime time for nature journaling. We try to get outside early before the heat builds, and the kids have been known to spend an entire morning sketching butterflies with their Faber-Castell watercolor pencils. There’s something about spring that makes everyone want to draw.

    Florida Summer Nature Table (June – August)

    Summer in Florida is intense. We adjust our schedule to be outside early morning and late evening, and our nature table reflects what we find during those cooler windows.

    What to Look For

    • Cicada shells — These are abundant and fascinating. The kids can examine them for hours.
    • Lightning bug jars — Okay, we don’t keep them, but we observe and release. Talk about bioluminescence.
    • Sea treasures — If you’re near the Gulf like we are, summer beach trips yield sand dollars, sea glass, shells, and shark teeth.
    • Magnolia seed pods and leaves — Southern magnolias are iconic, and those big waxy leaves and red-seeded pods are perfect for display.
    • Interesting insects — Dragonflies, beetles, grasshoppers. A bug collection kit is helpful for temporary observation.
    • Storm treasures — After summer thunderstorms, look for fallen palm fronds, broken seed heads, and wind-scattered finds.
    • Feathers — Molting season continues. We find blue jay and cardinal feathers regularly.

    Beating the Heat

    We do a lot of our summer nature study from the porch or during quick backyard expeditions. The chickens are usually hiding in the shade, and our dog gives up on outdoor adventures by 10 AM. Smart animals. But those early morning hunts can be magical — the light is golden, the birds are singing, and there’s dew on everything.

    Florida Fall Nature Table (September – November)

    Fall in Florida is subtle, but it’s there. You just have to know what to look for.

    What to Look For

    • Sweetgum balls — These spiky seed pods are everywhere and perfect for counting, sorting, and crafts.
    • Acorns and oak galls — Live oaks drop acorns in fall, and oak galls make for great biology discussions.
    • Goldenrod and native asters — These fall wildflowers attract migrating butterflies.
    • Monarch butterfly sightings — October and November bring monarchs through Florida. Watch for them on goldenrod.
    • Spanish moss — Always available but especially atmospheric in fall. Discuss its role as an epiphyte (not a parasite!).
    • Persimmons and native fruits — Wild persimmons ripen in fall. Beautyberries turn bright purple.
    • Interesting leaves — We don’t get dramatic color change, but some maples and sweetgums do turn, and fallen leaves still have beautiful vein patterns.

    Making It Special

    Fall is when I refresh our nature table setup and bring out candles and warmer colors. Even though we’re still in shorts most days, there’s something about the light changing that makes us crave coziness. The kids love adding dried elements and making little seasonal arrangements.

    Tips for Maintaining Your Florida Nature Table

    1. Rotate regularly — Things get buggy and moldy in Florida humidity. Swap items out every week or two.

    2. Use natural pest control — A light dusting of food-grade diatomaceous earth can help preserve items and deter pests.

    3. Keep it simple — A wooden tray, a magnifying glass, and a few treasures are all you need.

    4. Let kids lead — The best nature tables are kid-curated. Let them decide what’s display-worthy.

    5. Connect to learning — Use items as jumping-off points for nature journals, research, and field guides.

    The Heart of It All

    A nature table isn’t about having the prettiest Pinterest setup. It’s about creating space for wonder. It’s about your kids coming inside with dirty hands and bright eyes, holding something they want to examine and understand. It’s about slowing down enough to notice the world right outside your door.

    Here in Florida, we get to do that year-round. No snow days keeping us inside (though we do hide from summer heat). Just twelve months of treasures waiting to be discovered — whether that’s a perfect shark tooth from the beach, a cicada shell from the oak tree, or a beautiful blue egg from our favorite hen.

    So grab a basket, head outside with your kids, and see what you find. Your nature table is waiting.

  • How to Teach Kids About Composting: A Simple Worm Bin Setup for Curious Families

    How to Teach Kids About Composting: A Simple Worm Bin Setup for Curious Families

    If you’ve ever watched your kids poke at a worm on the sidewalk after a Florida rainstorm, you already know—there’s something magnetic about these wiggly little creatures. And here’s the beautiful thing: that natural curiosity can turn into one of the best hands-on science lessons your homeschool will ever see.

    This post contains affiliate links. I may earn a small commission at no extra cost to you.

    Our family started vermicomposting (that’s the fancy word for worm composting) about two years ago, and honestly? It’s become one of those things the kids just get now. They understand where food scraps go, what decomposition looks like, and why healthy soil matters. And they learned it all by doing—not from a worksheet.

    If you’ve been wanting to teach your kids about composting but aren’t sure where to start, a worm bin is the perfect entry point. It’s small, manageable, and endlessly fascinating for elementary-age kids.

    Why a Worm Bin is Perfect for Teaching Kids About Composting

    Here in Northwest Florida, we’re blessed with a long growing season and plenty of opportunities to dig in the dirt. But even if you’re not a gardener (yet), a worm bin makes sense for families who want to:

    • Reduce kitchen waste without maintaining a big outdoor compost pile
    • Create rich fertilizer for houseplants, garden beds, or even your chicken run
    • Give kids a living science lesson they can observe week after week

    This is Charlotte Mason nature study at its best, y’all. We’re not reading about decomposition from a textbook—we’re watching it happen in our own home.

    My kids have sketched worms in their nature journals, counted cocoons, and made predictions about which food scraps would disappear fastest. (Spoiler: banana peels win every time.)

    What You’ll Need to Set Up a Simple Worm Bin

    The good news? You don’t need anything fancy to get started. Here’s our basic setup:

    The Bin

    A simple 10-gallon plastic storage tote works great. Drill small holes in the lid and upper sides for airflow, and a few in the bottom for drainage. Set it on a tray or inside a slightly larger bin to catch any liquid (that’s “worm tea”—liquid gold for plants).

    The Bedding

    Shredded newspaper, cardboard, or coconut coir makes excellent bedding. You want it damp like a wrung-out sponge—not soggy. We save our egg cartons and Amazon boxes for this.

    The Worms

    You’ll need red wigglers (Eisenia fetida), not the earthworms from your yard. You can order them online or sometimes find them locally at bait shops. Start with about a pound—roughly 1,000 worms.

    The Food

    Fruit and veggie scraps, coffee grounds, eggshells, and tea bags are all fair game. Avoid citrus, onions, meat, dairy, and anything oily. We keep a small countertop bin and let the kids take turns being “worm feeders” each week.

    Step-by-Step: Setting Up Your Worm Bin Together

    This is the fun part—and it’s completely kid-friendly.

    Step 1: Prepare the Bedding

    Let the kids shred newspaper or tear up cardboard into strips. This is great for little hands and teaches them that “trash” can become something useful. Fluff it up and mist it until it’s evenly damp.

    Step 2: Add the Worms

    Dump your red wigglers right on top of the bedding. They’ll burrow down to escape the light. Let the kids use a pocket microscope to look closely at the worms before they disappear—so cool.

    Step 3: Add a Little Food

    Start small. Bury a handful of food scraps under the bedding in one corner of the bin. The worms will find it. Overfeeding is the number one mistake new worm bin owners make, so resist the urge to dump your whole compost bucket in there.

    Step 4: Find the Right Spot

    Worms like it dark and temperate—between 55-77°F is ideal. In Florida, that usually means keeping the bin indoors or in a shaded garage. Ours lives in the laundry room, and no, it doesn’t smell. A healthy worm bin just smells like earth.

    Making It a Learning Experience

    Here’s where homeschool magic happens. A worm bin isn’t just a chore—it’s a living laboratory.

    Nature Journaling

    Once a week, we pull back the bedding and observe. The kids sketch what they see—worms, cocoons, decomposing food—and write a few sentences about changes. Over time, their journals become a beautiful record of the composting process.

    If your kids love art, a set of quality watercolor pencils makes nature journaling even more inviting.

    Science Connections

    We talk about the nitrogen cycle, decomposers, and how healthy soil grows healthy food. It ties right into our backyard chickens, too—because guess where a lot of that finished compost ends up? In their run, helping break down bedding and control odor. (If you’re curious about keeping chickens, Storey’s Guide to Raising Chickens is a great resource, and there’s a kid-friendly version too.)

    Math Moments

    How much food did we add this week? How many days until it’s gone? How many worms do we think we have now? Even simple estimation and measurement practice counts—especially when it’s hands-on. That’s the same philosophy behind programs like Math-U-See, which we love for its manipulative-based approach.

    Tips for Keeping Your Worm Bin Thriving

    Once your bin is established, it’s pretty low-maintenance. Here are a few things we’ve learned along the way:

    • Chop scraps small. The smaller the pieces, the faster the worms can process them.
    • Bury food under bedding. This prevents fruit flies and keeps things tidy.
    • Add bedding regularly. As food breaks down, you’ll need to replenish the brown material.
    • Don’t panic about moisture. If it gets too wet, add dry bedding. Too dry? Mist lightly.
    • Harvest castings every few months. Push everything to one side, add fresh bedding and food to the empty side, and the worms will migrate over. Then you can scoop out the finished compost.

    We sprinkle food-grade diatomaceous earth around the outside of the bin occasionally—it helps deter any unwanted pests without harming the worms.

    Why This Matters More Than You Think

    In a world full of screens and shortcuts, there’s something deeply grounding about teaching kids to participate in natural cycles. Composting with worms shows them that nothing is truly “waste”—that banana peel becomes soil, that soil grows food, and that we’re all part of something bigger.

    It’s the kind of 1990s-childhood experience I want for my kids. Less consuming, more creating. Less passivity, more participation.

    And honestly? Watching a five-year-old gently pick up a worm and say, “Thanks for helping, little guy”—that’s worth more than any curriculum could teach.

    Ready to Start Your Own Worm Bin?

    If you’ve been on the fence, just go for it. Grab a bin, order some worms, and let your kids lead the way. They’ll surprise you with their observations, their questions, and their willingness to get their hands dirty.

    That’s the whole point, right? Raising kids who aren’t afraid of a little dirt—or a lot of worms.

    Happy composting, friend. 🌿

  • Florida Gulf Coast Shells Identification: A Kid-Friendly Guide for Little Beachcombers

    Florida Gulf Coast Shells Identification: A Kid-Friendly Guide for Little Beachcombers

    This post contains affiliate links. I may earn a small commission at no extra cost to you.

    There’s something almost magical about watching your child spot their first lightning whelk half-buried in the sand, wet and glistening in the morning light. They don’t just see a shell — they see treasure. And honestly? They’re right.

    If you’ve spent any time on the beaches around Pensacola or anywhere along the Florida Gulf Coast, you know our shores are absolutely loaded with shells. But when your kindergartner holds up shell number forty-seven and asks “Mama, what’s THIS one?” — well, let’s just say I got tired of saying “I don’t know, baby” and finally did something about it.

    So here’s everything our family has learned about identifying Gulf Coast shells, plus how we’ve turned beachcombing into real nature study that sticks.

    Why Shell Identification Makes Perfect Nature Study

    In our Charlotte Mason-inspired homeschool, we believe kids learn best when they’re handling real things in real places. There’s no worksheet that can replace the feeling of running your fingers over the ridges of a scallop shell or noticing how a moon snail shell spirals just so.

    Shell hunting teaches observation, patience, and wonder — all things I want my kids to carry with them long after they’ve forgotten what year the War of 1812 started (it’s in the name, y’all).

    And here in Northwest Florida, we have easy access to some of the best shelling beaches in the state. Pensacola Beach, Navarre, Fort Pickens, the whole Gulf Islands National Seashore — these are our classrooms, and admission is free.

    The Shells You’ll Actually Find on Florida Gulf Coast Beaches

    Let me save you some time. You’re not going to find a perfect conch shell just sitting there on Pensacola Beach (I know, I was disappointed too at first). But what you WILL find is honestly just as interesting once you know what you’re looking at.

    Bivalves (Two-Shelled Creatures)

    Scallops — These are the ones with the fan-shaped ridges. We find calico scallops constantly, usually in pieces but sometimes whole. The kids love how they come in different colors.

    Coquinas — Tiny, colorful, and if you catch them at the right time, you’ll see them burrowing back into the wet sand. My kids call them “butterfly shells” because of how they look when open.

    Arks — Look for thick, ribbed shells that are often a bit lopsided. Turkey wings (a type of ark) are especially pretty with their brown and white stripes.

    Cockles — Heart-shaped when viewed from the side, with pronounced ridges. We find giant Atlantic cockles fairly often after storms.

    Oysters — Not glamorous, but everywhere. Good for talking about how creatures adapt to their environment.

    Gastropods (Single-Spiral Shells)

    Lightning Whelks — The crown jewel of Gulf shelling. These spiral “backwards” (left-handed) compared to most shells. Finding a whole one with good color is a BIG deal in our house.

    Pear Whelks — Smaller and more pear-shaped than lightning whelks. Still exciting!

    Moon Snails — Round, smooth, and often a pretty grayish-blue. These are the creatures responsible for those perfectly drilled holes you see in other shells.

    Murex — Spiky and dramatic. We don’t find these as often, but when we do, the kids lose their minds.

    Olive Shells — Smooth, shiny, and cylindrical. These feel like polished stone.

    How We Document Our Finds

    Here’s where homeschool magic happens. We don’t just collect shells and dump them in a bucket (okay, sometimes we do). But our best beach days include a little documentation.

    We bring a simple nature journal and some Faber-Castell watercolor pencils for sketching shells right there on the beach. Watercolors are forgiving, and even my youngest can capture the basic shape and colors of what we find.

    Sometimes we bring a pocket microscope to look at shell textures up close. The tiny ridges and patterns are wild when magnified, and it gets the kids thinking about WHY shells have the structures they do.

    Making Beach Days Work (Practically Speaking)

    Okay, real talk. Taking elementary-age kids to the beach for “nature study” can devolve into chaos pretty quickly. Here’s what helps us actually accomplish something:

    Go early. We try to hit the beach by 8 AM. The shells are better (fewer people have picked through), the heat is manageable, and everyone’s in a better mood.

    Bring a mesh bag. Dollar store finds work great. We each get one so there’s no fighting over who found what.

    Wear protective footwear. Broken shells are sharp, and Florida sand gets scorching hot by midday. Good rain boots actually work surprisingly well for wet sand and tidepools.

    Sunscreen matters. We slather everyone in non-toxic sunscreen before we leave the house. Reapplying at the beach is a sandy nightmare, so front-load that protection.

    Don’t forget water and snacks. Hungry kids don’t care about gastropods.

    The Science Behind the Shells

    For older elementary kids, shells open up great conversations about marine biology. We talk about:

    • How shells form — Creatures build them from calcium carbonate, adding layers as they grow
    • Predator/prey relationships — Those drill holes mean a moon snail ate somebody’s lunch
    • Habitats — Why certain shells show up after storms (they’re washing in from deeper water)
    • Classification — Sorting shells into bivalves vs. gastropods is real taxonomy work

    This is living science, the kind Charlotte Mason talked about. No textbook needed — just attention and curiosity.

    Creating a Shell Collection at Home

    We keep our best finds in a shadow box in our school room. Each shell gets labeled with what it is, where we found it, and the date. It’s become a visual timeline of our beach adventures.

    Fair warning: shells can smell. Soak anything questionable in a diluted bleach solution outside for a day, then let it dry completely in the sun. Your future self will thank you.

    Resources We Love

    We don’t use a formal curriculum for shell study, but a few things have helped:

    • Local field guides from the library (the Audubon Society has good ones)
    • The Bailey-Matthews National Shell Museum website has great ID resources
    • Rainbow Resource carries nature study guides if you want something more structured

    Honestly though? The best teacher is repetition. The more beaches you visit, the more you start recognizing shells instantly.

    It’s About More Than Shells

    I think about how I spent summers as a kid in the 90s — no phones, no schedules, just hours of unstructured exploration. My parents weren’t teaching me anything “official” when we walked the beach. They were just… there. Present. Letting me discover.

    That’s what I want for my kids. Yes, we’re homeschoolers. Yes, I care about education. But some of the best learning happens when we put away the plans and just see what the tide brought in.

    So grab your bucket, pack your sunscreen, and get out there. The Gulf is waiting, and so are about a thousand shells your kids are dying to show you.

    —

    What’s the best shell your family has ever found? I’d love to hear about it — come share with us!

  • How to Teach Kids to Bake from Scratch: A Homestead Mama’s Guide

    How to Teach Kids to Bake from Scratch: A Homestead Mama’s Guide

    This post contains affiliate links. I may earn a small commission at no extra cost to you.

    There’s flour on the floor, eggshell in the bowl (again), and my youngest is elbow-deep in butter. This is not a Pinterest moment. But you know what? This is exactly what teaching kids to bake from scratch looks like on a real homestead — messy, slow, and absolutely worth it.

    If you’ve been wanting to get your kids more involved in the kitchen but feel overwhelmed by the chaos, I get it. I’ve been there, standing in my Florida kitchen wondering if it would just be faster to do it myself. (It would be. But that’s not the point.) The point is raising kids who know where their food comes from, who can follow instructions, who understand that good things take time and effort. The point is building humans, not just baking bread.

    Why Baking From Scratch Matters for Homestead Kids

    On our little homestead here in Northwest Florida, we’re trying to raise kids the way many of us grew up in the ’90s — with more hands-on experiences and fewer screens. Baking from scratch fits right into that vision. It’s tactile. It requires patience. And honestly? It’s one of the best ways I’ve found to sneak in some real-world learning without anyone realizing they’re being educated.

    When my kids crack eggs from our backyard chickens into a mixing bowl, they’re connecting dots that most adults never think about anymore. They watched those hens grow from fluffy chicks. They collected those eggs that morning. And now those eggs are becoming banana bread. That’s a full-circle moment you just can’t manufacture.

    Start Where They Are (Not Where You Think They Should Be)

    Here’s the thing about teaching kids to bake: you have to meet them where they are developmentally. A kindergartener isn’t going to measure flour accurately, and that’s okay. An older elementary kid might be ready to read a recipe independently but still need help with the oven.

    Ages 4-6: The Dumpers and Stirrers

    Little ones are perfect for:

    • Dumping pre-measured ingredients into bowls
    • Stirring (with supervision and a good grip on the bowl)
    • Washing fruits or vegetables
    • Pressing cookie cutters
    • Cracking eggs (with lots of practice and patience)

    At this age, it’s less about the end product and more about the sensory experience. Let them feel the flour, smell the vanilla, taste the batter (I know, I know — we use pastured eggs and take our chances).

    Ages 7-10: Building Real Skills

    This is where it gets fun. Kids in this range can start:

    • Reading simple recipes
    • Measuring ingredients themselves
    • Learning fractions through real application
    • Using the mixer with supervision
    • Beginning to understand oven safety

    I’ll be honest — this is where baking has become one of our secret weapons for math. When my kids are doubling a recipe or figuring out what half of ¾ cup is, they’re doing the kind of practical math that actually sticks. We use hands-on learning for most of our math instruction (we love Math-U-See for this reason), and baking reinforces those concepts beautifully.

    Essential Skills to Teach Along the Way

    Reading and Following Instructions

    Charlotte Mason talked about training habits of attention, and baking is perfect for this. A recipe requires you to focus, follow steps in order, and not skip ahead. These are life skills disguised as chocolate chip cookies.

    I have my kids read the entire recipe out loud before we start. We talk about what we’re going to do, gather all our ingredients (mise en place, fancy folks call it), and then begin. This prevents the mid-recipe panic of realizing you’re out of baking powder.

    Kitchen Safety

    We talk about hot surfaces, sharp tools, and hand washing constantly. Not in a fearful way — in a matter-of-fact, “this is how we work in a kitchen” way. Kids rise to expectations when we give them real responsibility paired with real instruction.

    Cleanup as Part of the Process

    This might be the most important lesson of all. Baking isn’t done when the cookies come out of the oven. It’s done when the kitchen is clean. We’re raising adults here, not just little bakers.

    Our Favorite Starter Recipes

    Not all recipes are created equal when you’re teaching kids. Here are some that have worked well for our family:

    For beginners:

    • Banana bread (very forgiving)
    • Drop biscuits (no rolling required)
    • Muffins (individual portions = instant gratification)

    For kids building confidence:

    • Simple yeast bread (teaches patience like nothing else)
    • Homemade pizza dough (kneading is great for sensory input)
    • Sugar cookies (decorating is half the fun)

    For your more experienced little bakers:

    • Pie crust from scratch (a true skill)
    • Cinnamon rolls (weekend project)
    • Quick breads with mix-ins they choose themselves

    Connecting Baking to Your Homestead Life

    One thing I love about homestead baking is how it ties into everything else we’re doing. Those eggs from our chickens? We know exactly what those hens eat and how they live. If you’re interested in getting started with backyard chickens, Storey’s Guide to Raising Chickens is an excellent resource for beginners, and there’s even a kid-friendly version that my kids have enjoyed.

    We talk about where our ingredients come from — which ones we could grow ourselves, which ones we buy, and why. This naturally leads to conversations about seasons, agriculture, and making intentional choices about our food.

    Making It Work in a Florida Kitchen

    I’ll be real with you: baking in Florida during summer requires some creativity. Our kitchen gets warm, and butter softens faster than you can say “pie crust disaster.” We do a lot of our from-scratch baking in the cooler months, or we start early in the morning before the heat builds.

    This is actually a great lesson in seasonal living. We don’t have to have everything all the time. Summer here is for no-bake treats, smoothies, and ice cream. Fall and winter? That’s when we break out the sourdough starter and make the house smell amazing.

    The Charlotte Mason Connection

    If you’re familiar with Charlotte Mason’s approach to education, you know she valued “the science of relations” — helping children make connections between different areas of life and learning. Baking is rich with these connections:

    • Science: What does yeast do? Why do we sift flour? What happens when baking soda meets acid?
    • Math: Fractions, measurement, doubling and halving
    • Reading: Following written instructions
    • History: Where did this recipe originate? What did people eat 100 years ago?
    • Life skills: Feeding yourself and others is fundamental

    We often record our baking adventures in nature journals, which might seem odd, but hear me out. My kids sketch the process, note what worked and what didn’t, and paste in recipes they want to remember. We use simple nature journals for this, and they’ve become little keepsakes of our homeschool years.

    Embrace the Mess (And the Failures)

    I want to leave you with this encouragement: it will be messy. Recipes will flop. There will be tears (maybe yours, maybe theirs). The bread might not rise, the cookies might burn, and someone will definitely spill the vanilla extract all over the counter.

    But here’s what I’ve learned watching my kids grow into confident little bakers — they remember the failures almost as fondly as the successes. The flat birthday cake we frosted anyway. The bread that could have doubled as a doorstop. The time we forgot the sugar entirely.

    These are the stories they’ll tell their own kids someday. And more importantly, they’re learning that mistakes are part of the process. That you can try again. That sometimes the best things in life require a little patience and a lot of practice.

    So grab your apron, gather your helpers, and make something delicious together. Your kitchen might be a disaster by the end, but your kids will be learning skills that last a lifetime. And really, isn’t that what this whole homestead life is about?

    Now if you’ll excuse me, someone’s calling me to come see if the bread has risen yet. For the fourteenth time in twenty minutes. Patience, friends. We’re all learning together.

  • How to Build a Raised Garden Bed Kids Can Help With (The Simple Way)

    How to Build a Raised Garden Bed Kids Can Help With (The Simple Way)

    This post contains affiliate links. I may earn a small commission at no extra cost to you.

    If you’ve been dreaming about a garden where your kids can dig in the dirt, watch seeds sprout, and maybe — just maybe — get excited about eating vegetables they grew themselves, you’re in the right place. Building a raised garden bed doesn’t have to be complicated, and honestly? The simpler the project, the more your kids can actually participate.

    We built our first raised bed three years ago, and I’ll be the first to admit I overthought it. Pinterest had me convinced I needed cedar planks, corner brackets, landscape fabric, and some kind of fancy irrigation system. What we actually needed was a Saturday morning, some basic lumber, and kids who wanted to help swing a hammer.

    Let me walk you through how we do it now — the uncomplicated version that gets little hands involved from start to finish.

    Why Raised Beds Work So Well for Families

    Better Soil, Less Frustration

    Here in Northwest Florida, our native soil is basically sand with a side of more sand. Trying to grow tomatoes directly in the ground meant endless amending, constant watering, and mediocre results. Raised beds let you start fresh with good soil — and in our humid climate, the improved drainage helps prevent the root rot that claims so many summer gardens.

    Kid-Height Access

    There’s something magical about a garden bed that meets your kindergartener at waist level. No bending down into fire ant territory, no accidentally stepping on seedlings. My kids can weed, water, and harvest without me hovering over them worried about what they’re squashing.

    Perfect for Nature Study

    If you follow a Charlotte Mason approach like we do, a raised bed becomes an outdoor classroom. We’ve spent entire mornings watching bees move between squash blossoms, sketching the stages of bean germination, and yes — observing the circle of life when a hornworm finds our tomatoes. Our nature journals are full of garden sketches at this point.

    Gathering Your Materials

    Here’s what you’ll need for a basic 4×4 foot raised bed:

    • Four 4-foot boards (2×10 or 2×12 untreated pine or cedar)
    • Sixteen 3-inch exterior wood screws
    • A drill
    • A level (helpful but not essential)
    • Quality garden soil and compost mix

    That’s it. I promise.

    We grab our lumber from the local hardware store — nothing fancy. Cedar lasts longer but costs more. Untreated pine works fine for several seasons and keeps the budget reasonable, especially if you’re building multiple beds.

    A note on treated lumber: We avoid it for vegetable gardens. The newer treatments are supposedly safer than the old arsenic-based ones, but I’d rather not take chances with something my kids are eating from.

    Step-by-Step: Building Together

    Step 1: Pick Your Spot

    This is a great job for kids. Walk around your yard together and talk about what plants need — sunlight, water access, maybe some afternoon shade in our brutal Florida summers. We learned the hard way that full blazing sun all day will cook lettuce by April.

    Let your kids help measure and mark the corners with sticks. Even my youngest can handle this part.

    Step 2: Assemble the Frame

    Lay two boards parallel on the ground. Have your child hold one end board in place while you drive in the screws. Then repeat on the other side. Flip it over and add screws from the opposite direction for extra stability.

    My elementary-age kids can handle the drill with supervision. The younger ones? They’re on “board holding duty” and take the job very seriously.

    Step 3: Level and Fill

    Place your frame where you want it. You can set it directly on grass — the grass underneath will die back. If you want to suppress weeds, lay down cardboard first (another excellent kid task — stomping cardboard flat is very satisfying when you’re six).

    Now comes the fun part: filling it up. This is all-hands-on-deck time. Shoveling soil, mixing in compost, smoothing it out. Don’t forget your rain boots — this gets messy and somehow always turns into mud play.

    Step 4: Plan and Plant

    Once filled, let the soil settle overnight. Then grab some graph paper and plan your layout together. We usually do one large crop per bed — this year it’s peppers in one, herbs in another, and cherry tomatoes in the third.

    This is living math, by the way. Spacing plants, calculating how many will fit, measuring rows — it reinforces what they’re learning without worksheets. (Speaking of which, if you use manipulatives for math like Math-U-See, garden planning is a great real-world extension.)

    What We’ve Learned Along the Way

    The Chickens Will Find It

    If you have backyard chickens, they will discover your raised beds and consider them a personal salad bar and dust bath combo. We ended up adding simple frames with hardware cloth on top of our beds until plants are established. The girls are helpful for pest control, but only when supervised.

    Florida Timing Matters

    Our planting calendar is weird compared to the rest of the country. Fall is actually our prime growing season for many vegetables. We plant tomatoes in late February, again in August. Lettuce goes in around October. If you’re new to gardening here, the UF IFAS Extension has Florida-specific guides that have saved me a lot of trial and error.

    Imperfect Is Fine

    Our first raised bed is definitely not level. One corner is slightly higher than the others. It’s been producing vegetables for three years and nobody cares. Don’t let perfectionism keep you from starting.

    Tools That Make It Even Better

    A few things have made our garden time more educational and fun:

    Growing Something More Than Vegetables

    Here’s the thing about building a raised bed with your kids: the garden is almost secondary. What you’re really building is competence. Patience. The understanding that good things take time and effort and sometimes fail anyway — and that’s okay.

    My kids have experienced the disappointment of a crop that didn’t make it and the absolute joy of picking a sun-warm cherry tomato and eating it right there in the yard. Both lessons matter.

    This is the kind of childhood I wanted for them — hands in the dirt, learning by doing, spending more time outside than in front of screens. It’s how I grew up, and it’s how I want them to grow up too.

    So grab some boards this weekend. Let the measurements be slightly off. Let your six-year-old hammer a nail crooked. Build something together.

    That’s where the real growing happens.