Blog

  • How to Make Homemade Laundry Detergent That’s Actually Non-Toxic (And Works in Florida Heat)

    How to Make Homemade Laundry Detergent That’s Actually Non-Toxic (And Works in Florida Heat)

    How to Make Homemade Laundry Detergent That’s Actually Non-Toxic (And Works in Florida Heat)

    🌿 The Short Version: This post walks you through a simple, non-toxic homemade laundry detergent recipe using just a few real ingredients — no synthetic fragrance, no mystery chemicals, no jug of blue liquid you can’t pronounce. It’s what our family actually uses, it works on muddy kid clothes and chicken-coop-smelling everything, and it costs a fraction of what you’d spend at the store.

    This post contains affiliate links. I may earn a small commission at no extra cost to you.

    If you’ve got kids who play outside like it’s their job — and at our house, it genuinely is — then you already know what laundry looks like around here. We’re talking grass-stained knees, sandy cuffs from the creek, and shirts that somehow always find the chicken coop right before dinner. My kids are out there the way we grew up in the ’90s: barefoot, unsupervised-ish, and completely filthy by 4pm. And I love every bit of it.

    What I don’t love? Pouring a jug of synthetic, fragrance-loaded, who-knows-what-else detergent onto all those clothes that go right back onto my kids’ skin. We’ve been on a slow, steady journey to detox our home room by room, and laundry was one of the easiest places to make a swap that actually stuck.

    This recipe is the one we’ve landed on after trying a few different versions. It works. It’s simple. And you probably have most of the ingredients already.


    Why I Stopped Buying Store-Bought Detergent

    I’m not here to scare you. But once I started reading labels and realized that most conventional detergents are full of synthetic fragrances, optical brighteners, and surfactants that don’t fully rinse out? I couldn’t un-know it.

    Down here in Florida, our kids are sweating through their clothes, swimming, rolling in dirt, and spending long hours outside. Their skin is their largest organ, and it’s in contact with whatever is left in those fibers all day long. That matters to me.

    Switching to a homemade version also ended up being way cheaper — we’re talking pennies per load versus dollars. And when you’re washing three or four loads a day because someone thought it was a great idea to let the chickens into the mudroom again… that adds up fast.


    What You’ll Need

    This recipe is a dry powder detergent, which is what I prefer because it stores well in our Florida humidity (just keep it in an airtight container), mixes easily, and doesn’t have the gloppy, hard-to-measure issues of a liquid version.

    Ingredients:

    • 1 bar of pure castile soap or Fels-Naptha (grated)
    • 1 cup washing soda (sodium carbonate — NOT baking soda)
    • 1 cup borax
    • Optional: 20-30 drops of essential oil if you want a light scent (we skip it most of the time)

    That’s genuinely it. Three ingredients.

    Tools:

    • Box grater or food processor
    • Large mixing bowl
    • Airtight container for storage

    How to Make It — Step by Step

    Step 1: Grate the Soap

    This is the most “labor intensive” part, and I use that term loosely. Grab your box grater and grate the bar of soap like you’re grating cheese. If you have older kids (mine are in the K-5 range and my older ones can definitely handle this), let them do it — it’s a great fine motor activity and they think it’s hilarious that soap looks like Parmesan.

    If you have a food processor, you can pulse the soap into a fine crumble instead. That actually gives you a finer powder that dissolves better in cold water.

    Step 2: Mix Everything Together

    Combine the grated soap, washing soda, and borax in your large bowl. Stir it well until it’s evenly mixed. If you’re adding essential oils, drizzle them in now and stir again.

    Step 3: Store It Properly

    Transfer to an airtight container — this is important in Florida because humidity is not our friend. I use a glass jar with a tight lid and keep a small wooden scoop in it. Label it clearly, especially if you have little ones around.

    To use: 1–2 tablespoons per load. Use 2 tablespoons for heavily soiled loads (hi, every load at our house).


    📌 Love this? Save it to Pinterest so you can find it later!


    Does It Actually Work on Real Kid Messes?

    Yes. And I say that as someone whose kids come in smelling like sunscreen, dirt, and chicken on a regular basis. (Sidenote: if you’re dealing with coop smell on clothes or work gear, check out our post on natural chicken coop deodorizer and cleaning routines — same philosophy, different application.)

    For tough stains, I’ll spray the spot with a little undiluted white vinegar or dab with a paste of washing soda and water before tossing the item in. Works on grass, dirt, food, and most of what our days involve.

    One note: this detergent is NOT sudsy. If you’re used to a big foamy wash, this will feel weird at first. But suds don’t actually clean — that’s mostly a marketing thing. Your clothes are getting clean, I promise.

    A Note on Borax

    I know some people have concerns about borax, and I want to be honest with you: it is a naturally occurring mineral, and at the levels used in laundry detergent, it has a long safety record. That said, you should store it out of reach of children, avoid inhaling the powder when mixing, and make your own call about whether it fits your family’s standards. If you’d rather skip it, you can double the washing soda and the detergent still works — just slightly less so on hard stains.

    For our family, this sits comfortably within our non-toxic goals. We also pair it with wool dryer balls instead of dryer sheets (which are loaded with fragrance and chemicals) and use beeswax wrap in the kitchen — same idea of swapping synthetic for simple wherever we can.

    Making It a Learning Moment

    This is one of those kitchen-table activities that fits right into our Charlotte Mason days. We’ve talked about what soap actually does at a molecular level (simplified, obviously), why washing soda is different from baking soda, and how people washed clothes before detergent even existed. My kids were genuinely fascinated.

    If you want to extend it further, you could do a simple science experiment: test how different soaps interact with water using a pocket microscope to look at soap bubbles up close, or have them sketch and label the ingredients in their nature journal as a household science entry. Charlotte Mason believed that learning happened in the context of real life — and making the family’s laundry detergent is about as real-life as it gets.

    For more ideas on how we weave learning into our everyday rhythms, you might enjoy our post on Morning Basket ideas for Charlotte Mason homeschool.

    Keeping the Rest of Your Laundry Routine Clean

    Once you’ve made the switch on detergent, here are a few other easy swaps we’ve made:

    • Dryer sheets → Wool dryer balls: They reduce static, speed up drying time, and last for years.
    • Fabric softener → White vinegar in the rinse cycle: A quarter cup softens clothes naturally and neutralizes any detergent residue.
    • Plastic detergent jugs → Glass or stainless storage: Better for the environment, better for your shelves.

    We also love ordering some of our non-toxic household supplies through Grove Collaborative — they carry a lot of clean-ingredient brands and make it easy to stay consistent without spending hours reading labels at the store.


    The Bottom Line

    Making your own laundry detergent isn’t a huge time commitment. Honestly, the whole batch takes maybe fifteen minutes, lasts us a couple of months, and costs somewhere around three to five dollars total. That’s a win for our budget, a win for our kids’ skin, and a win for our overall goal of keeping our home a little cleaner in every sense of the word.

    If you’re just starting out on the non-toxic home journey, this is genuinely one of the easiest places to begin. You don’t need a perfectly curated pantry or a big investment. Just a few simple ingredients and a willingness to try something your grandma probably would’ve recognized.

    Around here, that’s usually a good sign.


    📖 You Might Also Like:

    Frequently Asked Questions

    Is homemade laundry detergent actually effective on heavily soiled clothes?

    Yes — especially this powder version with washing soda and borax. For really tough stains like grass, mud, or food, pre-treat the spot with a paste of washing soda and water or a spritz of white vinegar before washing. It handles kid messes and farm smells just fine.

    Is borax safe to use in homemade laundry detergent for kids’ clothes?

    Borax is a naturally occurring mineral with a long history of use in laundry. At the small amounts used per load, it rinses out and is generally considered safe for most families. That said, you should store it away from children and avoid inhaling it when mixing. If you prefer to skip it, double the washing soda instead.

    Can I use homemade laundry detergent in a high-efficiency (HE) washing machine?

    Yes! This dry powder recipe is low-sudsing, which actually makes it better suited for HE machines than many commercial detergents. Use 1 tablespoon for a regular load and 2 tablespoons for heavily soiled loads. The low-foam formula won’t interfere with your machine’s sensors.

    How long does a batch of homemade laundry detergent last?

    One batch made with a single bar of soap, 1 cup washing soda, and 1 cup borax typically yields around 30–40 tablespoons of detergent, which translates to roughly 20–40 loads depending on how much you use per load. Most families find one batch lasts 4–8 weeks.

    What’s the difference between washing soda and baking soda in laundry recipes?

    They’re chemically different — washing soda (sodium carbonate) is much more alkaline than baking soda (sodium bicarbonate), which makes it a stronger cleaner and better at cutting grease and lifting stains. You can find washing soda in the laundry aisle of most grocery stores or order it online. Don’t substitute baking soda — it won’t clean as well.
  • Rainwater Harvesting in Florida: What’s Legal, What Works, and How to Set It Up

    Rainwater Harvesting in Florida: What’s Legal, What Works, and How to Set It Up

    Rainwater Harvesting in Florida: What’s Legal, What Works, and How to Set It Up

    🌿 The Short Version: Rainwater harvesting is completely legal in Florida and actually encouraged by the state. This guide covers what the law actually says, how to set up a simple rain barrel system at home, and how we use ours for the garden and chickens.

    This post contains affiliate links. I may earn a small commission at no extra cost to you.

    If you live in Florida, you know we are not exactly short on rain. From May through October, afternoon storms roll in like clockwork, dump an inch of water on your yard in twenty minutes, and then disappear before you can even get the kids back inside. And yet somehow, the second you actually need water — for the garden, for the chickens, for anything — the sky turns blue and stays that way for two weeks straight.

    That is what pushed me to finally look into rainwater harvesting a couple of years ago. I kept watering our raised beds with treated city water, and it felt like such a waste when we were getting soaked with free water every few days. I’d heard other homesteading families talk about rain barrels, but I had this nagging worry in the back of my mind — is that even legal in Florida? Don’t some states have weird restrictions about that?

    Short answer: Florida is actually great for this. Let me tell you what I found out.

    Is Rainwater Harvesting Legal in Florida?

    Yes — and not just legal, but genuinely encouraged. Florida Statute 570.07 specifically promotes rainwater harvesting as a water conservation practice, and the state has made it clear that homeowners have the right to collect rainwater from their rooftops.

    Many Florida counties and water management districts will even give you a rebate or discount on rain barrels through their conservation programs. Our water management district in Northwest Florida has offered them at reduced prices through local hardware stores and utility programs. It’s worth checking with your county before you buy anything at full price.

    Some HOAs may have their own rules about aesthetics — barrel placement, color, that kind of thing — so if you’re in an HOA, skim your docs first. But from a state law standpoint, you’re completely in the clear.

    One important caveat: Collected rainwater in Florida is considered non-potable, meaning it’s not approved for drinking water. We use ours for the garden and the chickens’ outdoor area, which is exactly what it’s best suited for anyway.

    What We Actually Use Ours For

    Honestly, once we got our system set up, I wondered why we waited so long. Here’s where our collected rainwater goes:

    • The garden beds — especially useful during our dry spells in fall and spring
    • The chicken run — we top off the outdoor water dishes from it regularly
    • Starting seeds — rainwater is naturally slightly acidic, which seedlings love
    • Rinsing off muddy boots and tools at the end of the day

    If you’re also raising backyard hens, check out my post on Best Egg Laying Chickens for Florida Heat (What Actually Works in Our Backyard Flock) — keeping birds hydrated in our climate is a real thing, and having a supplemental water source makes it easier.

    📌 Love this? Save it to Pinterest so you can find it later!

    How to Set Up a Simple Rain Barrel System

    You don’t need to be handy to do this. My husband and I set ours up on a Saturday morning while the kids chased the dog around the yard. It’s genuinely simple.

    What You’ll Need

    • A food-grade barrel (55-gallon is a great starting size — you can often find used food-grade barrels locally for around $20-30)
    • A diverter kit or spigot kit (most hardware stores carry these, or find them online)
    • Basic tools: drill, hole saw bit, and some screen mesh to keep mosquitoes out — this is critical in Florida
    • A downspout to connect to your existing gutters

    Step-by-Step Setup

    1. Choose your placement. Find a downspout on your house that drains a large section of roof. Gutters near your garden or chicken area are ideal — shorter hose run means less hassle.

    2. Elevate the barrel. Setting your barrel on cinder blocks or a simple wooden platform gives you enough gravity pressure to actually get water out of the spigot. Even 12-18 inches of elevation helps a lot.

    3. Install your diverter or drill your inlet hole. A first-flush diverter is worth the extra few dollars — it directs the first few gallons of runoff (which carry the most debris and bird droppings from your roof) away from your barrel before it starts filling. You can find these at most garden centers.

    4. Screen everything. Drill your overflow hole near the top of the barrel, and cover every opening with fine mesh screen secured tightly. Mosquitoes will absolutely try to breed in standing water if you give them half a chance. This step is non-negotiable in Florida.

    5. Add your spigot. Drill a hole near the bottom of the barrel, seal it with a rubber washer, and attach a standard hose bib spigot. This is where you’ll attach a garden hose or fill your watering cans.

    6. Connect your overflow hose. When the barrel is full, water needs somewhere to go. Run overflow away from your foundation and ideally toward a garden bed or rain garden area.

    Scaling Up

    One 55-gallon barrel fills up fast in a Florida storm. We eventually linked two barrels together with a connector hose, which gives us about 110 gallons before overflow kicks in. For a larger setup or if you want to water a bigger garden, look into IBC totes (275-330 gallon food-grade containers) — they’re bulkier but hold a lot more water for the price.

    We also grow a good portion of our garden through our dry seasons, and having that reserve makes a huge difference. If you’re working on a homestead garden here in Florida, I talk more about that in How to Start a Homestead Garden in Florida for Beginners (What Actually Works Down Here).

    Making It a Learning Moment

    This is one of those backyard projects that naturally pulls the kids in. My crew has learned more about the water cycle from watching rain fill that barrel than from any worksheet, and I say that as a Charlotte Mason mama who loves a good nature study.

    We’ve talked about where rain comes from, why Florida gets so much of it in summer, and why clean water is something worth conserving. My older two started drawing the water cycle in their nature journals after one of our afternoon storms — completely their idea. That’s the kind of learning I’m here for.

    We also keep a small notebook by the barrel to log rainfall — date, estimated inches, how full the barrel got. It’s a simple math and observation exercise that even my youngest can participate in. Pair it with a pocket microscope to look at what’s actually living in collected water (there’s a lot, it turns out), and you’ve got a full nature study afternoon without trying.

    A Few Maintenance Notes

    • Clean your barrel at least once a year. Scrub it out, check the screen mesh for holes, and make sure your overflow is clear.
    • Empty or treat your barrel if you’re leaving for a stretch. Standing water + Florida heat = mosquito nursery if the screens fail.
    • Keep diatomaceous earth on hand — we use it in and around the coop and garden area, and it helps manage pests naturally around the barrel setup too.
    • Disconnect your diverter before hurricane season storms if you’re expecting heavy, sustained rainfall. You don’t want to overwhelm your system or your foundation drainage.

    Speak of which — if you’re prepping your home and property for storm season, I’ve got a whole post on Florida Hurricane Preparedness for Families With Kids: What We Actually Do Before the Storm that covers the full picture.

    This Is One of Those Simple Things That Just Makes Sense

    Rainwater harvesting isn’t complicated, it isn’t expensive to start, and here in Florida, it genuinely pays off. We’re not off-grid — not even close — but every gallon of rainwater that goes into the garden instead of down the street drain feels like a small win. The kids helped set it up, they check on it after storms, and our garden has been better for it.

    If you’ve been on the fence about this, I’d really encourage you to just start with one barrel. Find a used food-grade barrel locally if you can, pick up a basic spigot kit, and give it one growing season. I think you’ll wonder, like I did, why you didn’t do it sooner.


    📖 You Might Also Like:

    Frequently Asked Questions

    Is it legal to collect rainwater in Florida?

    Yes, rainwater harvesting is completely legal in Florida. Florida Statute 570.07 actually encourages it as a water conservation practice. Many counties and water management districts even offer rebates or discounted rain barrels through conservation programs. Just note that collected rainwater is considered non-potable — it’s approved for garden, landscaping, and similar uses, but not for drinking water.

    How much rainwater can I collect in Florida?

    Florida doesn’t cap how much rainwater residents can collect — there’s no state limit on quantity for residential use. A standard 55-gallon rain barrel can fill up completely during a single typical Florida afternoon storm. Many families link multiple barrels together or use larger IBC totes (275-330 gallons) for bigger gardens or livestock.

    Can I use collected rainwater for my chickens?

    Many backyard chicken keepers use rainwater to supplement their flocks’ outdoor water sources, and it works well for that purpose. Because it’s classified as non-potable in Florida, you’ll want to use your judgment — most homesteaders are comfortable using it for outdoor waterers and run cleanup, while keeping a fresh treated water source available inside the coop as well.

    How do I keep mosquitoes out of my rain barrel in Florida?

    This is the most important maintenance step in Florida’s climate. Cover every opening — your inlet, overflow hole, and any gaps — with fine mesh screen secured tightly to the barrel. A first-flush diverter also helps by directing the first runoff away from your barrel before it starts filling. Check your screens regularly for any holes or gaps, and clean or empty your barrel at least once a year.

    What is the best rain barrel setup for a beginner in Florida?

    For a beginner, start with a single 55-gallon food-grade barrel elevated on cinder blocks, a basic spigot kit, a first-flush diverter, and fine mesh screen over all openings. Connect it to a downspout near your garden or chicken area. You can often find food-grade barrels locally for $20-30 through Facebook Marketplace or feed stores. Once you see how quickly it fills, you’ll likely want to add a second barrel linked to the first.

  • Best Cover Crops for Florida Gardens in Summer (What Actually Survives the Heat)

    Best Cover Crops for Florida Gardens in Summer (What Actually Survives the Heat)

    Best Cover Crops for Florida Gardens in Summer (What Actually Survives the Heat)

    🌿 The Short Version: Florida summers are brutal, but the right cover crops can actually build your soil while everything else is resting. We’re breaking down the best heat-tolerant options for Northwest Florida gardens — including what we grow, how the kids help, and how it all connects to the chickens.

    This post contains affiliate links. I may earn a small commission at no extra cost to you.

    If you’ve ever stared at your Florida garden in July and thought, “There is absolutely nothing I can do with this scorched earth until October” — I felt that in my soul for a long time. The heat index hits triple digits, the afternoon thunderstorms are violent and fast, and anything delicate just gives up and melts into the mulch.

    But here’s what changed things for us: cover crops. Specifically, summer cover crops — the kind that don’t just survive Florida’s brutal growing season but actually work during it. They fix nitrogen, suppress weeds, hold moisture, and feed the soil biology that makes your fall garden explode with life.

    And honestly? They’ve become one of our favorite summer homeschool lessons too.

    Why Bother With Cover Crops in a Florida Summer?

    Most gardening advice you’ll find online is written for temperate climates where summer is prime growing season. Down here in the Panhandle, summer is basically the off-season for food crops. But that doesn’t mean your soil should just sit there baking.

    Left bare, Florida soil — especially our sandy Northwest Florida stuff — loses moisture fast, compacts under heavy rain, and invites weeds like it’s hosting a party. Cover crops solve all of that at once.

    They:

    • Add organic matter when you chop and drop them before fall planting
    • Fix atmospheric nitrogen (legumes especially) so you’re not buying as much fertilizer
    • Keep weed pressure down with a living mulch
    • Give beneficial insects somewhere to live
    • And if you’re raising backyard chickens like we are, they become a free food source for your flock

    That last one alone sold me. If you’re moving a chicken tractor around your property, a section of cowpeas or sunnhemp is basically a salad bar on legs for your girls.

    The Best Cover Crops for Florida Gardens in Summer

    1. Iron & Clay Cowpeas (Southern Peas)

    This is my number one recommendation for Northwest Florida, full stop. Cowpeas are basically made for our climate. They germinate fast in warm soil, handle drought once established, fix nitrogen like crazy, and the chickens lose their minds over the leaves and pods.

    Plant them in May or June, let them grow all summer, and then either chop and drop them before fall planting or let the chickens work them over first. We do a little of both.

    Bonus: our kids love watching the pods develop — it’s a real natural science lesson that costs almost nothing.

    2. Sunn Hemp (Crotalaria juncea)

    Sunn hemp is one of those crops that looks almost too good to be true. It grows fast — we’re talking 6 feet tall in a Florida summer — and it fixes a tremendous amount of nitrogen. The University of Florida IFAS actually recommends it specifically for our region.

    It’s not edible for chickens in large quantities (it can be mildly toxic in excess), so we keep the hens out of the sunn hemp patch. But it chops down beautifully before fall, and the biomass it adds to the soil is just remarkable. If your soil is really depleted, start here.

    3. Buckwheat

    Okay, buckwheat isn’t technically a legume — it doesn’t fix nitrogen — but it earns its spot in the summer garden rotation for other reasons. It grows in about 30 days, smothers weeds aggressively, and the flowers attract beneficial insects like nothing else we’ve grown.

    In late summer when we’re starting to think about fall transplants, we’ll let a section of buckwheat bloom, then chop it right before planting. It breaks down quickly in our heat and adds a nice flush of organic matter.

    The kids also love pressing the little heart-shaped seeds in their nature journals — it’s one of those small things that makes a morning in the garden feel like a real lesson.

    4. Velvet Bean (Mucuna pruriens)

    Velvet bean is a powerhouse legume that handles Florida summer heat and humidity like it was born for it — because essentially, it was. It’s a tropical vine that fixes nitrogen aggressively and creates a dense ground cover that’s almost weed-proof once established.

    Fair warning: the pods are very itchy if you handle them without gloves (definitely grab some kids’ garden gloves before letting little hands near a mature velvet bean patch). We treat this one as a “look but don’t touch” lesson and it’s been a great conversation about plant defense mechanisms.

    5. Hairy Indigo (Indigofera hirsuta)

    This one’s a Florida native — or close to it — and it shows. Hairy indigo tolerates our poor sandy soils and summer rains without complaint. It’s a nitrogen-fixer and it’s incredibly low maintenance once established. We’ve let it naturalize in a corner of our property and it just comes back every year.

    It also makes beautiful purple flowers that our kids like to sketch with their Faber-Castell watercolors during nature study time. Charlotte Mason would absolutely approve.

    📌 Love this? Save it to Pinterest so you can find it later!

    How We Teach Cover Crops as a Homeschool Lesson

    This is honestly one of my favorite parts. Cover crops are a living, hands-on science lesson that runs all summer long without me having to do much extra planning.

    We use them to talk about:

    • The nitrogen cycle (even my youngest can explain that cowpeas “feed the dirt”)
    • Plant observation — sketching growth stages in nature journals over several weeks
    • Soil science — we pull up roots and look at the nodules on cowpea roots with a pocket microscope, which never gets old
    • The food web — watching what insects show up on buckwheat flowers and recording them with the Sibley Birds guide nearby (because where there are insects, birds follow)

    If you want to dig deeper into the journaling side of things, I wrote a whole post on Charlotte Mason nature journal ideas for kids that pairs perfectly with this kind of summer observation work.

    Connecting It to the Chickens

    One of the things I love most about our little backyard setup is how everything connects. The cover crops feed the soil, the soil grows the food, the food scraps go to the chickens, and the chickens add to our compost that goes back to the garden.

    Cowpeas in particular are like a treat garden for our flock. We’ll let a section go to seed and then turn the hens loose on it — they scratch it up, eat the seeds and bugs, and leave behind their own nitrogen deposit. It’s the most satisfying closed-loop thing we do around here.

    If you’re newer to keeping chickens and want to know more about the management side, Storey’s Guide to Raising Chickens has a great section on pasture and forage crops that I’ve referred back to more than once.

    A Few Practical Tips Before You Plant

    • Inoculate your legume seeds before planting. A legume inoculant (you can find it at most farm supply stores or online) contains the rhizobium bacteria that actually does the nitrogen-fixing work. Skip this and you’re leaving a lot of benefit on the table.
    • Plant after a rain or water in well. Florida summer soil can get a surface crust that makes germination spotty.
    • Don’t till them in too close to planting day. Give chopped-down cover crops at least 2-3 weeks to start breaking down before you transplant fall seedlings.
    • Let the kids be involved from the beginning. Sowing seeds by hand, marking rows with sticks, checking for germination — this is exactly the kind of slow, real-world work that we’re trying to give our kids more of. No screens required.

    If you’re also starting to think about what to actually grow come fall, our post on how to start a homestead garden in Florida for beginners lays out the whole seasonal rhythm really well.

    You’ve Got This, Mama

    I know summer gardening in Florida can feel discouraging. Everything bolts or wilts or just disappears, and it’s hard not to feel like you failed somehow. But planting cover crops reframes the whole thing. You’re not not gardening — you’re investing in the garden that’s coming. You’re building something underground that will pay off in October when your beds are overflowing.

    And in the meantime, you’ve got a living classroom growing in your backyard, kids who know what a nitrogen nodule looks like, and chickens who are absolutely thrilled about the cowpeas. That’s a pretty good summer if you ask me.


    📖 You Might Also Like:

    Frequently Asked Questions

    What cover crops grow best in Florida summer heat?

    The best cover crops for Florida summers are heat-tolerant and humidity-resistant varieties like iron and clay cowpeas, sunn hemp, buckwheat, velvet bean, and hairy indigo. Cowpeas and sunn hemp are especially popular in Northwest Florida because they fix nitrogen aggressively and handle our sandy soil and intense summer rain without skipping a beat.

    When should I plant summer cover crops in Florida?

    In most of Florida, you can plant summer cover crops from late April through July. The soil is warm enough for fast germination, and most heat-tolerant varieties will have plenty of time to establish before you need to chop them down ahead of fall planting in September or October.

    Can my backyard chickens eat cover crops?

    Yes — many cover crops are excellent forage for chickens! Cowpeas (southern peas) are a favorite, and chickens will happily eat the leaves, vines, and seeds. Buckwheat is also safe and they enjoy the seeds. Sunn hemp should be kept away from chickens in large quantities, as it can be mildly toxic when consumed excessively. Always research any specific variety before turning your flock loose on a new crop.

    Do I need to till in cover crops before planting vegetables?

    Not necessarily — you can chop and drop cover crops and let them decompose as a mulch layer on top of the soil. If you do incorporate them, give it at least 2-3 weeks before transplanting seedlings so the decomposition process doesn’t interfere with your plants. In Florida’s heat, organic matter breaks down quickly, so you don’t have to wait long.

    Are cover crops a good homeschool activity for kids?

    Absolutely! Cover crops make a wonderful hands-on science lesson that stretches over an entire season. Kids can observe germination, sketch plant growth stages in nature journals, examine root nodules under a microscope, and track which insects visit the flowers. It naturally covers soil science, plant biology, and ecology — all without a textbook in sight.

  • How to Grow Sweet Potatoes in Your Florida Backyard (Even If You’re a Total Beginner)

    How to Grow Sweet Potatoes in Your Florida Backyard (Even If You’re a Total Beginner)

    How to Grow Sweet Potatoes in Your Florida Backyard (Even If You’re a Total Beginner)

    🌿 The Short Version: Sweet potatoes are one of the easiest, most forgiving crops you can grow in a Florida backyard — and they thrive in our heat and sandy soil. This post walks you through exactly when to plant, how to get slips started, and what to do come harvest time, even if you’ve never grown a vegetable in your life.

    This post contains affiliate links. I may earn a small commission at no extra cost to you.

    If you’ve ever walked out into a Florida summer garden and felt like everything was either fried, flooded, or eaten by something — you are my people. Tomatoes bolt, lettuce gives up before June, and squash becomes a full-time bug-monitoring job. But sweet potatoes? Y’all. Sweet potatoes don’t care. They actually love it here. The heat, the humidity, the sandy Northwest Florida soil that drains like crazy — sweet potatoes are practically made for this climate.

    We started growing them a couple of years ago almost by accident. One of my kids left a sweet potato on the counter too long and it started sprouting. We stuck it in a jar of water on a whim, and four weeks later we had slips ready to plant. Now it’s one of our favorite parts of the backyard garden, and honestly one of the best nature study + real-life math + hands-in-the-dirt experiences we’ve found for our elementary-age crew.

    Let me walk you through exactly how we do it.

    Why Sweet Potatoes Are Perfect for Florida Backyards

    Florida’s long, hot growing season is basically a sweet potato’s dream. They need 90–120 days of warm soil, and in Pensacola and the rest of Northwest Florida, we’ve got that from roughly April through October. They’re drought-tolerant once established, they handle our sandy soil beautifully, and the vines act as a living ground cover that chokes out weeds.

    Bonus: they’re genuinely nutritious, the kids will actually eat them, and the leftover greens are edible too — we’ve tossed the young leaves into stir-fries and the chickens go absolutely wild for any scraps.

    If you’re just getting started with gardening down here, I also really recommend checking out our How to Start a Homestead Garden in Florida for Beginners (What Actually Works Down Here) — it gives you the full big-picture breakdown of Florida-specific gardening seasons.

    When to Plant Sweet Potatoes in Florida

    The sweet spot (pun intended) for planting sweet potato slips in North Florida is late March through May. You want soil temps consistently above 65°F — which honestly happens fast around here. Planting too early risks rot in cooler, wetter soil. Planting in summer is fine too as long as you’re watering consistently through the heat.

    In Central and South Florida, you have an even longer window — some folks plant fall crops down there too.

    How to Grow Your Own Sweet Potato Slips

    This is the part my kids get the most excited about, and it’s the perfect slow-observation science project for a Charlotte Mason nature study.

    What You’ll Need

    • 1–2 organic sweet potatoes (grocery store ones sometimes have a growth inhibitor sprayed on them — organic is safer)
    • A jar of water
    • Toothpicks (optional, to suspend the potato half-submerged)
    • A sunny windowsill
    • Patience — usually 3–6 weeks

    How to Do It

    1. Cut your sweet potato in half or use it whole.
    2. Suspend it in a jar with the bottom third submerged in water.
    3. Set it in a warm, sunny spot.
    4. Change the water every few days.
    5. Slips (little sprouts with leaves) will start growing from the eyes. Once they’re 4–6 inches long, you can twist them off gently.
    6. Place slips in a separate jar of water until they develop roots — about a week.
    7. Plant them outside once roots are established.

    We track growth in our nature journals — my kids draw the slips at different stages and note how many new leaves appeared each week. Simple, beautiful, and genuinely educational without feeling like school.

    📌 Love this? Save it to Pinterest so you can find it later!

    Planting Your Slips in the Ground

    Preparing Your Bed

    Sweet potatoes love loose, well-draining soil — which means Florida’s sandy soil is actually an asset here, not a liability. If your soil is very compacted, loosen it about 12 inches deep and add some compost to improve nutrients. (We keep a kitchen compost bin going year-round, and that finished compost is gold for the garden. Check out our Composting at Home with Kids post if you’re not already doing this.)

    Avoid heavy clay amendments — sweet potatoes need room to expand underground and clay will misshape or crack them.

    How to Plant

    • Space slips 12–18 inches apart in rows about 3 feet apart (the vines spread a LOT)
    • Plant deep enough that at least 2–3 nodes are buried
    • Water well right after planting
    • Mulch around the base to retain moisture and keep soil temps even

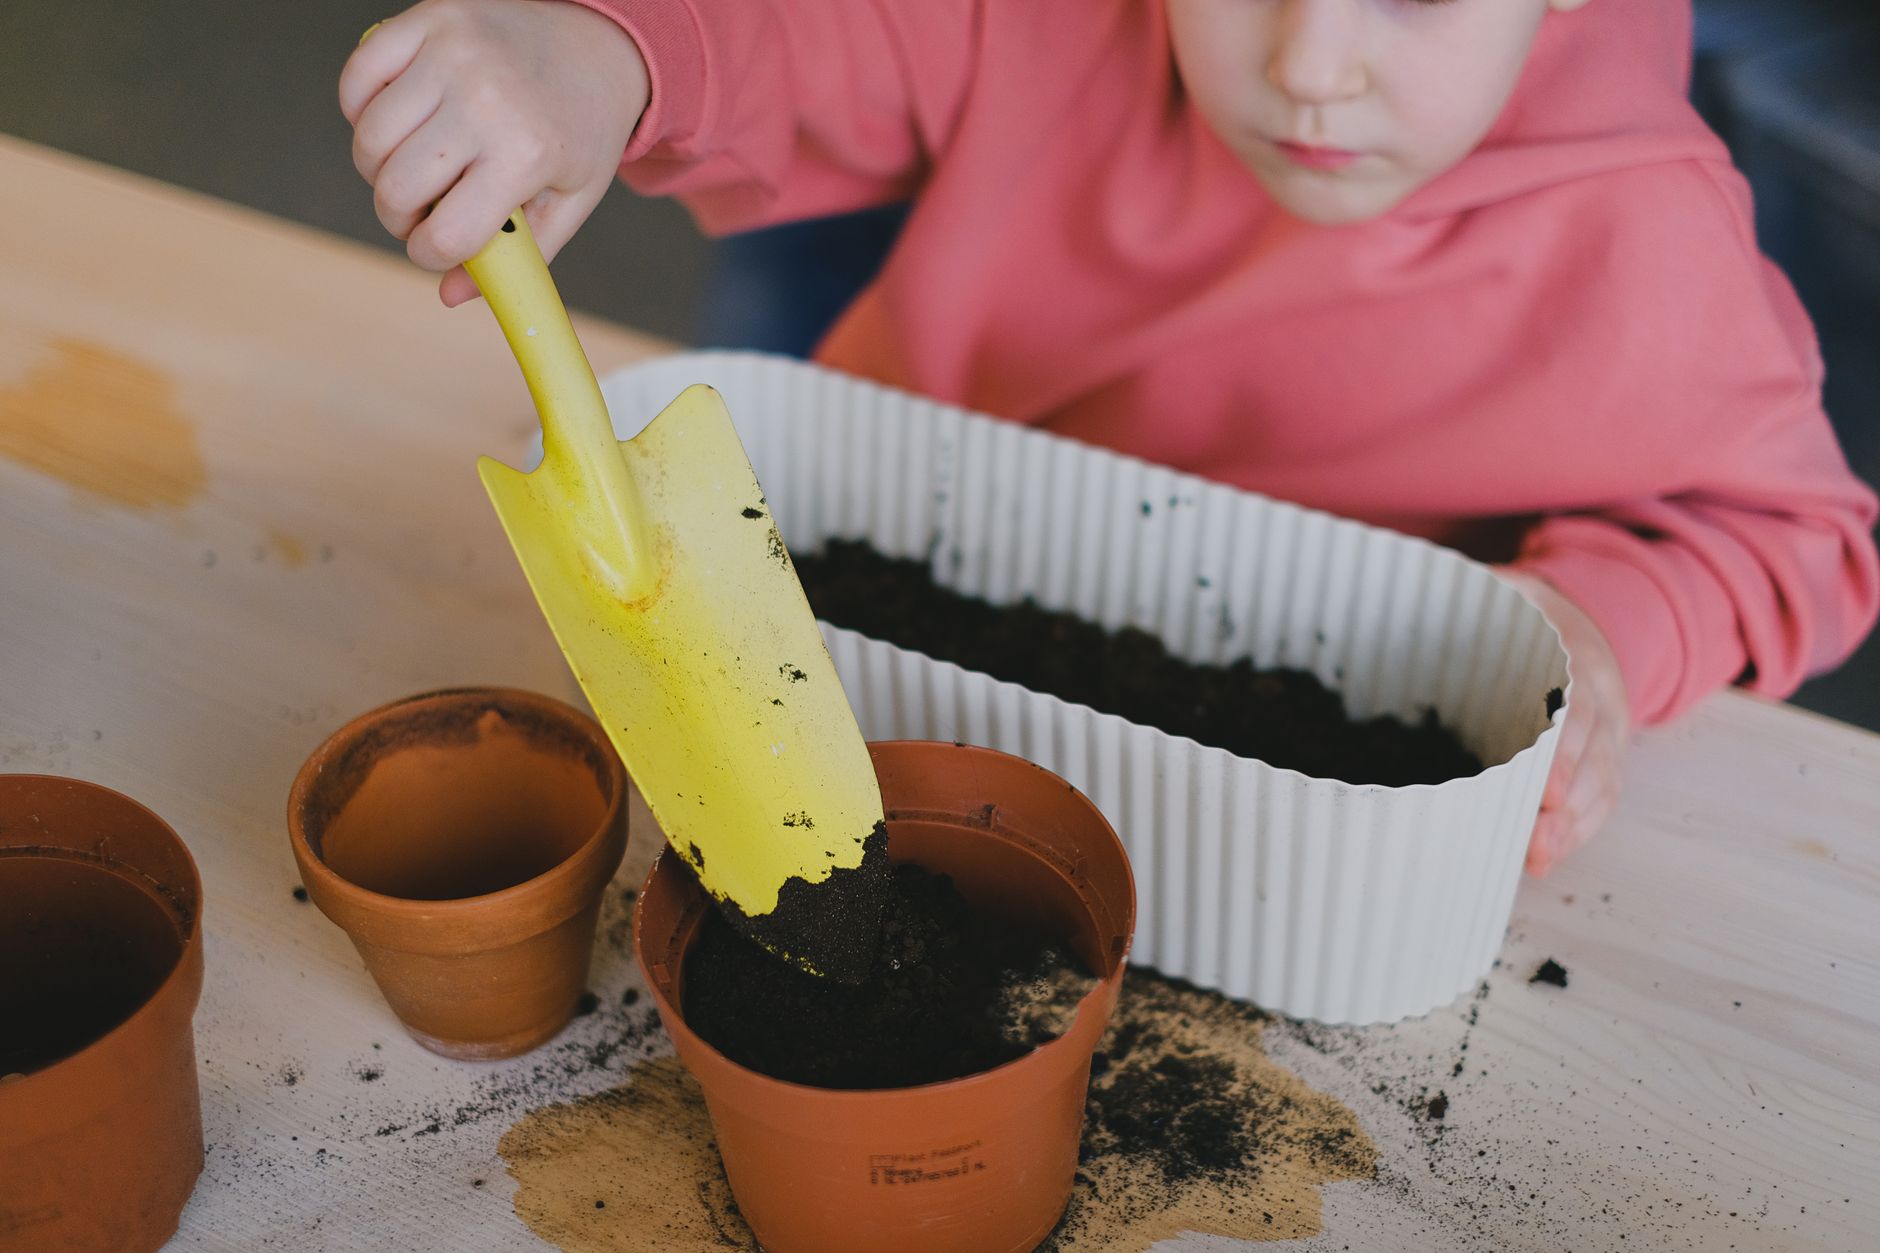
    Give the kids their own garden gloves and let them do the planting. There is nothing like the look on a six-year-old’s face when they dig up a sweet potato four months later and realize they grew that.

    Caring for Sweet Potatoes Through a Florida Summer

    Once they’re established — usually within two to three weeks — sweet potatoes are genuinely low-maintenance. Here’s what we pay attention to:

    Watering: Deep water once or twice a week. They’re fairly drought-tolerant but consistent moisture during vine development gives you better yields.

    Fertilizing: Go easy on nitrogen or you’ll get beautiful vines and tiny potatoes. We side-dress once with a balanced organic fertilizer about 4 weeks after planting and leave it at that.

    Pests: In North Florida, sweet potato weevils can be an issue. Rotating your planting location each year helps a lot. We also use Wondercide around the garden perimeter — it’s safe for kids, pets, and our chickens who free-range nearby.

    Vines: Don’t trim the vines obsessively. Let them sprawl. They’re doing their job. You can pin down wandering vines and they’ll root, which is kind of fun for the kids to observe.

    How to Know When Sweet Potatoes Are Ready to Harvest

    Harvest time is the big payoff — and possibly the most exciting digging activity outside of an actual treasure hunt. Plan on 90–120 days from planting. Some signs it’s time:

    • Vines start to yellow and die back
    • The skin on any peeking-through potatoes looks firm and set
    • You’ve hit the 100-day mark and it’s still warm

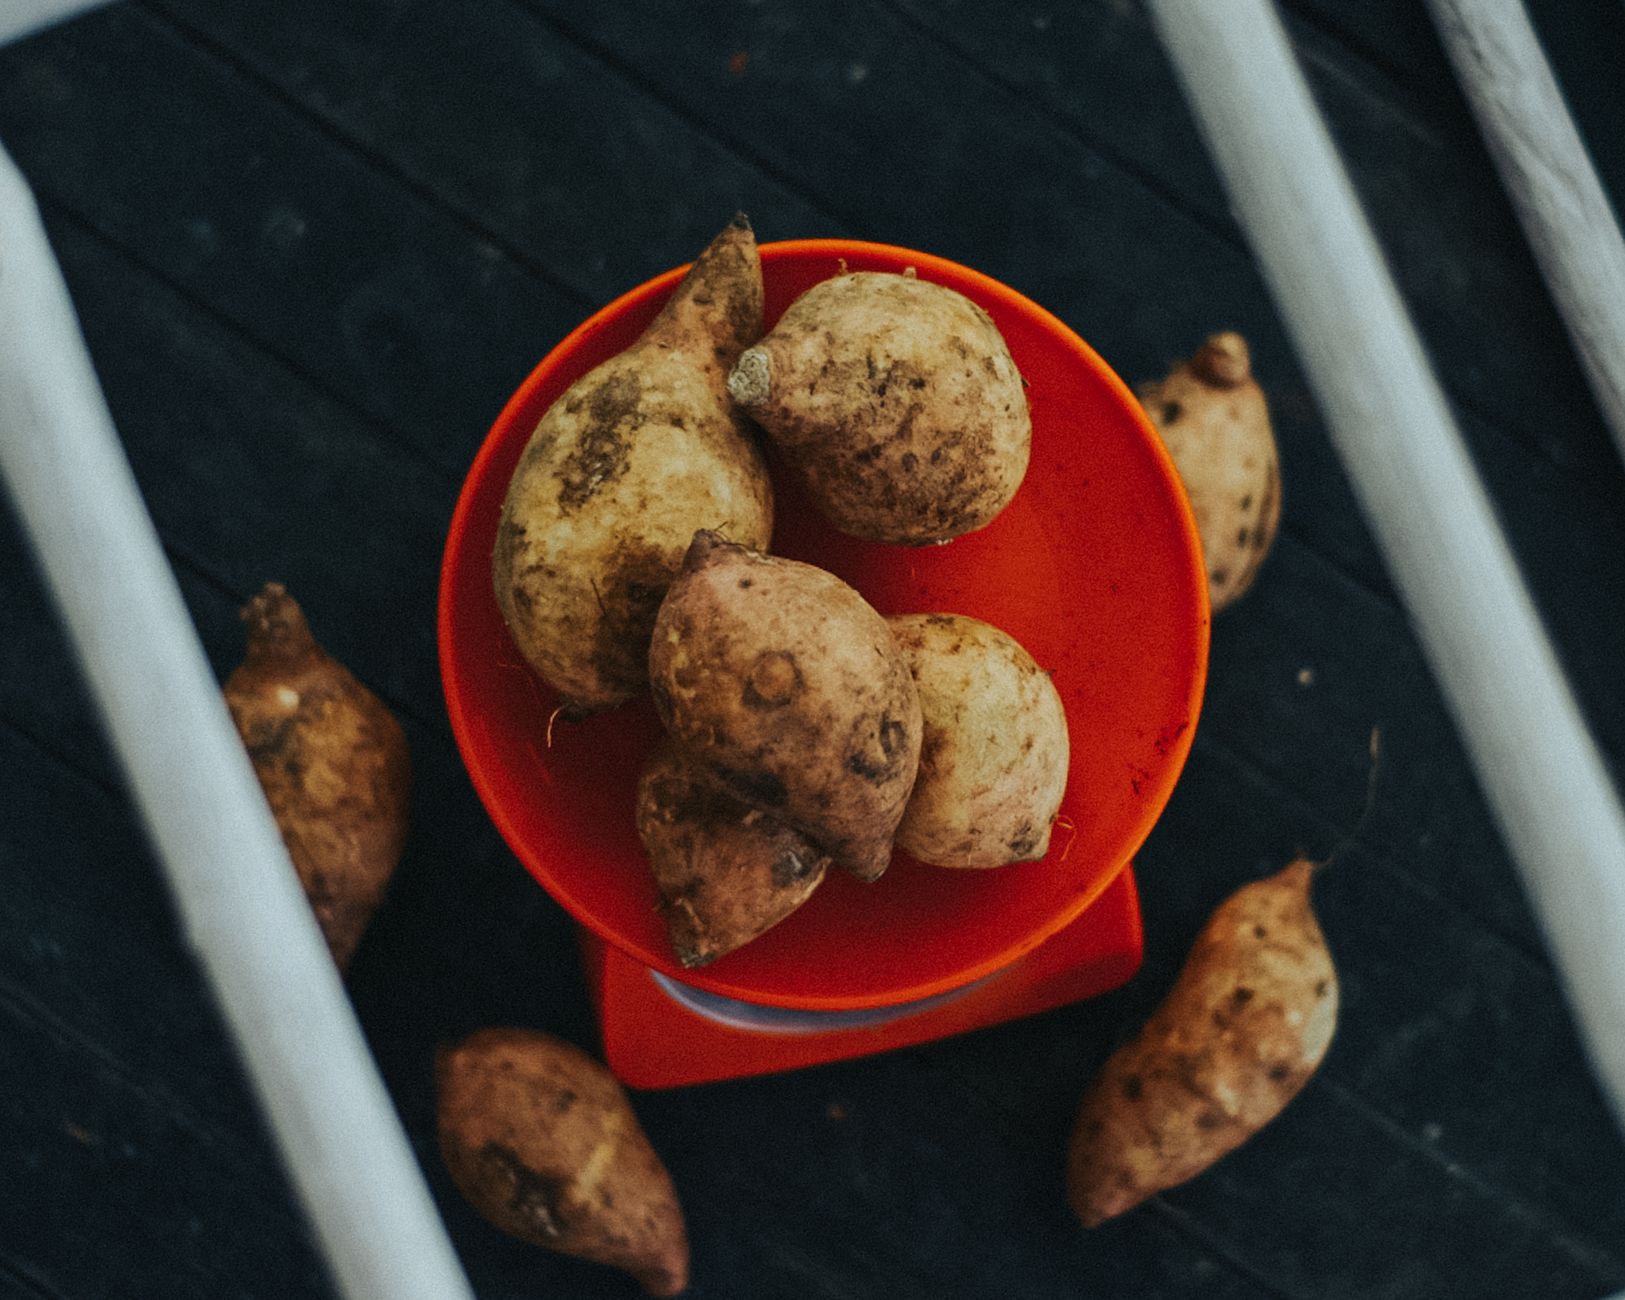
    How to harvest: Use a garden fork or your hands to gently loosen the soil around the plants, then dig carefully. Sweet potatoes bruise easily, so slow and gentle wins here. Expect to find them 6–12 inches down and spreading outward from the original plant.

    We lay them out on a table and count, weigh, and measure them — easy real-life math that fits right into our homeschool day.

    Curing Sweet Potatoes After Harvest

    Here’s the step most beginners skip and then wonder why their sweet potatoes taste starchy: curing. You need to cure freshly harvested sweet potatoes before eating them.

    Place them somewhere warm (80–85°F) with good airflow for 7–10 days. This converts the starches to sugars and heals any small nicks or cuts in the skin. After curing, store them somewhere cool and dark — not the fridge.

    Florida porches in late spring are naturally perfect for this.

    Tying It Into Your Homeschool

    Beyond the obvious science of plant life cycles, growing sweet potatoes touches on so many subjects naturally:

    • Math: measuring vine growth, counting yield, weighing the harvest
    • Nature journaling: sketching slips, leaves, and root development with Faber-Castell watercolors
    • Life skills: planting, tending, harvesting, cooking
    • History/geography: sweet potatoes are native to the Americas — great rabbit trail into indigenous food traditions

    For more ideas on weaving the garden into your nature study year, our Homeschool Spring Florida Nature Study Ideas Your Kids Will Actually Want to Do post has a ton of practical starting points.

    A Few Extra Tips for Florida Specifically

    • Raised beds work great if you have particularly poor or compacted soil, but in-ground works fine in most of Northwest Florida
    • Container growing is possible — use at least a 15-gallon container with drainage
    • If you have backyard chickens, keep them out of the sweet potato bed until after harvest — they will absolutely eat those vines down to nothing and scratch up your crop. We use a simple chicken tractor to rotate the girls through after harvest for cleanup duty — they do a fantastic job
    • You can also try a seed starting kit to start your slips indoors earlier in the season if you want a head start before the last cool nights pass

    If you’re new to the backyard garden and feeling like it’s too much to figure out, I just want to say: start with sweet potatoes. Seriously. They are forgiving, productive, and they turn even kids who claim to hate vegetables into proud little farmers the moment they pull one out of the ground. There’s something about growing your own food — especially something this easy and this good — that just quietly changes how your family relates to the land, to their food, and to each other. That’s the whole point for us. Fewer screens, more dirt, and a sweet potato harvest that makes everybody proud.

    Happy growing, friend. 🌿


    📖 You Might Also Like:

    Frequently Asked Questions

    When should I plant sweet potatoes in Florida?

    In North Florida (including Pensacola), the best time to plant sweet potato slips is late March through May, once soil temperatures are consistently above 65°F. Central and South Florida gardeners have an even longer window and can sometimes plant a fall crop as well.

    Can I grow sweet potatoes in containers in Florida?

    Yes! Sweet potatoes can grow in containers in Florida as long as the pot is large enough — aim for at least a 15-gallon container with good drainage holes. Use a loose, well-draining potting mix and water consistently since containers dry out faster in the Florida heat.

    How do I make sweet potato slips at home?

    Place an organic sweet potato in a jar with the bottom third submerged in water and set it in a warm, sunny window. In 3–6 weeks, slips (sprouts) will appear. Once they’re 4–6 inches long, twist them off and root them in a separate jar of water for about a week before planting outside.

    Do sweet potatoes grow well in Florida’s sandy soil?

    Actually, yes — Florida’s sandy, well-draining soil is one reason sweet potatoes do so well here. They need loose soil to expand underground, so heavy clay is the real enemy. Amending with compost helps add nutrients without reducing drainage.

    How long does it take to harvest sweet potatoes in Florida?

    Sweet potatoes are typically ready to harvest 90–120 days after planting slips. Watch for the vines to start yellowing and dying back as a sign they’re ready. After harvest, cure them at 80–85°F for 7–10 days before eating to develop their full sweetness.

  • Composting at Home with Kids: A Real Beginner’s Guide That Actually Gets Done

    Composting at Home with Kids: A Real Beginner’s Guide That Actually Gets Done

    Composting at Home with Kids: A Real Beginner’s Guide That Actually Gets Done

    🌿 The Short Version: Composting at home doesn’t have to be complicated or messy — even with little kids involved. This guide walks you through exactly how our family started, what setup actually works, and how to make it a natural part of your kids’ everyday learning.

    This post contains affiliate links. I may earn a small commission at no extra cost to you.

    I’m going to be honest with you — the first time I tried composting, I did it completely wrong. I threw a bunch of watermelon rinds in a pile in the back corner of our yard, forgot about it for three weeks, and came back to something that smelled like a Florida swamp in August. Not exactly what the Pinterest boards had promised me.

    But here’s the thing: I didn’t give up on it, I just got smarter about it. And now? Composting is one of those quiet, steady rhythms in our home that the kids actually look forward to. My seven-year-old calls herself the “compost manager.” My youngest drags the kitchen bin out to the pile like it’s his most important job of the day. And honestly, it kind of is.

    If you’ve been wanting to start composting at home but feel like it’s one more complicated thing to figure out, this post is for you. We’re going to keep it simple, real, and totally doable — even in the middle of a full homeschool day.

    Why Composting Is Such a Good Fit for Homeschool Families

    Composting is basically a living science experiment sitting in your backyard. For those of us using a Charlotte Mason or nature-based approach, it checks so many boxes — biology, earth science, stewardship, real-world math (yes, really), and observation skills.

    We talk about decomposers, the food chain, nutrient cycles. My kids have watched a banana peel disappear completely over the course of a few weeks and thought it was genuinely magical. That kind of hands-on learning sticks in a way that no worksheet ever will.

    If you’re building out a nature study practice with your kids, composting pairs beautifully with a nature journal — they can sketch what they see, track changes over time, and record which scraps break down fastest. We have a whole post on Charlotte Mason Nature Journal Ideas for Kids (That Actually Get Used) if you want ideas for how to make that work.

    What You Actually Need to Get Started

    Good news: you don’t need much.

    The Kitchen Bin

    First, you need a way to collect scraps inside before you haul them out. We keep a small kitchen compost bin on our counter. It has a charcoal filter in the lid so it doesn’t smell, and the kids know exactly what goes in it — fruit scraps, veggie peels, eggshells (yes, especially eggshells since we have chickens), coffee grounds, tea bags, and torn-up cardboard.

    Having a designated spot makes it a habit. Without it, we were constantly debating whether something went in the trash or the compost, and that’s when things fall apart.

    The Outdoor Pile or Bin

    For your actual compost pile, you’ve got a couple of options. A simple open pile in a corner of your yard works fine — that’s what we started with. You can also use a dedicated bin, which tends to be tidier and keeps critters out (important here in Florida where we have armadillos and raccoons who have absolutely no shame).

    Either way, the location matters more than the container. You want somewhere with partial shade — full sun in a Pensacola summer will dry out your pile too fast and slow decomposition way down.

    The Browns and Greens Rule

    This is the one thing you actually need to understand. Composting is all about balance:

    • Greens = nitrogen-rich stuff: fruit scraps, veggie peels, coffee grounds, fresh grass clippings, chicken manure
    • Browns = carbon-rich stuff: dry leaves, cardboard, paper bags, straw, wood chips

    You want roughly a 3:1 ratio of browns to greens. Too many greens and your pile gets slimy and smelly. Too many browns and it just… sits there. In Florida, we tend to have more greens than we think because of how fast everything grows, so keep extra leaves or cardboard nearby to balance it out.

    📌 Love this? Save it to Pinterest so you can find it later!

    How We Actually Do It With Kids

    Here’s our real-life routine, because theory is nice but you need something practical.

    Morning chores include emptying the kitchen compost bin when it’s full — usually every two to three days. One of the kids carries it out, and the other uses a stick to stir the pile a little. We call this “waking up the pile” and I’m not even sure where that phrase came from but they love it.

    After chicken chores, any leftover feed, used bedding straw, and yes — chicken manure — goes into the pile. Chicken manure is high-nitrogen gold for compost. If you’re new to backyard chickens and wondering what to do with the coop cleanout, this is the answer. (And if you want our full coop cleaning routine, check out Natural Chicken Coop Deodorizer and Cleaning Routine That Actually Works.)

    Once a week or so, someone gives the pile a real turn with a pitchfork or shovel. This introduces oxygen and speeds everything up. My older kids can do this themselves now. My youngest mostly just pokes it enthusiastically, which honestly still counts.

    What NOT to Compost (Especially With Kids)

    Keep this list somewhere the kids can see it:

    • Meat, fish, or bones
    • Dairy products
    • Oils or greasy food
    • Dog or cat waste (chicken waste is fine, but not carnivore pet waste)
    • Diseased plants
    • Anything treated with pesticides

    We keep a simple handwritten list on the inside of our cabinet door. Very 1990s of us, but it works.

    Connecting It to Your Garden

    Once your compost is dark, crumbly, and smells like earth — usually 2-4 months in Florida’s heat — it’s ready to use. We mix it into our garden beds and containers. If you’re growing food with your kids, finished compost is genuinely exciting because they can see the full circle: scraps become soil, soil grows food, food scraps go back in.

    We also sprinkle diatomaceous earth around the base of the pile occasionally to manage pests without chemicals — same stuff we use in the chicken coop.

    If you’re just getting your garden started, I’d love for you to read How to Start a Homestead Garden in Florida for Beginners (What Actually Works Down Here) — composting and gardening really do go hand in hand.

    Making It a Nature Study Moment

    One of my favorite things is pulling back the corner of the pile with the kids and looking at what’s living in there. Pill bugs, red wigglers, fungal threads — it’s a whole ecosystem. A pocket microscope makes this even more fun. We’ve spent entire afternoons just watching the decomposers do their thing.

    For the older kids, we use the compost pile as a jumping-off point for talking about nutrient cycles, soil health, and why healthy soil matters for the whole food system. It’s one of those things that sounds dry on paper but comes alive when they’re literally watching it happen in the backyard.

    Pair it with some watercolor paints and nature journal time and you’ve got a full morning of real learning — no curriculum required.

    You Don’t Have to Be Perfect at This

    Our pile has gotten too dry. It’s gotten too wet. I’ve thrown in something I shouldn’t have and had to fish it back out. None of that derailed us. That’s kind of the whole point — composting is forgiving, and so is learning alongside your kids.

    The goal isn’t a perfect pile. It’s building a habit of stewardship, teaching our kids that nothing is really waste, and connecting them to the slow, beautiful rhythms of the natural world. That’s worth a little trial and error.

    If you’re looking for a non-toxic cleaning routine to pair with this kind of intentional home shift, we love Grove Collaborative for our household products — and How to Detox Your Home from Toxins Room by Room (A Real Family’s Guide) is a great place to start if you haven’t gone through your home yet.

    Start small. Get a counter bin. Pick a spot outside. Let your kids carry the scraps out. That’s it. Everything else figures itself out from there.


    📖 You Might Also Like:

    Frequently Asked Questions

    How do I start composting at home for beginners?

    Start with two things: a small counter bin for collecting kitchen scraps inside, and a designated spot outside for your pile or bin. Learn the basics of balancing browns (dry leaves, cardboard) and greens (food scraps, grass clippings), and just begin. You don’t need special equipment to get started — a pile in a corner of your yard works fine.

    What can kids put in the compost bin?

    Kids can add fruit and vegetable scraps, eggshells, coffee grounds, tea bags, torn cardboard, dry leaves, and plain paper. Keep a simple visual list on the inside of a cabinet door so they can check before adding anything. Avoid meat, dairy, oily foods, and pet waste from cats or dogs.

    How long does composting take in Florida?

    Florida’s heat actually speeds up decomposition significantly. A well-balanced, regularly turned pile can produce finished compost in as little as 6 to 8 weeks in summer. Cooler winter months will slow things down a bit, but you’re still looking at faster results than most of the country gets.

    Does composting smell bad?

    A healthy compost pile should smell earthy, not rotten. Bad smells usually mean too many greens (nitrogen-rich scraps) and not enough browns (carbon-rich material like leaves or cardboard). Add more dry browns, give it a stir to introduce oxygen, and the smell should correct itself within a day or two.

    Can I compost chicken manure?

    Yes — chicken manure is actually one of the best things you can add to a compost pile. It’s high in nitrogen and speeds up decomposition. Just make sure it gets mixed in well and balanced with plenty of carbon-rich browns. Fresh chicken manure is too strong to apply directly to plants but composted manure is excellent for garden beds.

  • Natural Chicken Coop Deodorizer and Cleaning Routine That Actually Works

    Natural Chicken Coop Deodorizer and Cleaning Routine That Actually Works

    Natural Chicken Coop Deodorizer and Cleaning Routine That Actually Works

    🌿 The Short Version: You don’t need bleach or harsh chemicals to keep your coop smelling fresh — a few natural ingredients and a consistent routine are all it takes. This post walks you through exactly what we use and how we do it, even in the swampy Florida summer heat.

    This post contains affiliate links. I may earn a small commission at no extra cost to you.

    Let me be real with you for a second. When we first got our backyard flock, I was so excited about the fresh eggs and the kids running out to the coop every morning in their pajamas. What I was not prepared for was the smell.

    We live in Northwest Florida — Pensacola area — and if you know, you know. The heat and humidity down here turn a neglected chicken coop into something truly offensive by about July. I was out there every few days just dumping store-bought coop spray on things and wondering why it wasn’t working. It took me a couple of years to figure out that the solution wasn’t more product — it was a better routine using simple, non-toxic ingredients I mostly already had.

    Now I spend less time fighting the smell and more time actually enjoying our little backyard flock. Here’s exactly what we do.

    Why the Coop Smells in the First Place

    Before we fix the problem, it helps to understand it. Coop odor almost always comes down to three things:

    • Moisture — wet bedding breeds ammonia and bacteria fast
    • Ammonia buildup — from chicken droppings breaking down
    • Poor airflow — especially brutal in a Florida summer

    Harsh chemical cleaners can actually make this worse over time because they disrupt the natural microbial balance in the coop and can irritate your chickens’ respiratory systems. And honestly, if my kids are out there every single day collecting eggs and helping with chores — which is one of my favorite parts of our homeschool day — I don’t want them breathing in bleach fumes or touching surfaces covered in synthetic sprays.

    Natural solutions work with the biology of the coop instead of against it.

    Our Weekly Coop Cleaning Routine

    Consistency is everything. A quick tidy a few times a week beats a massive overhaul once a month every single time.

    Daily (Takes 5 Minutes)

    This is a great job for the kids, honestly. My elementary-age crew takes turns on coop duty, and it’s become one of those real-life responsibility moments I love about our homeschool life.

    • Remove any visibly soiled bedding from the nest boxes
    • Refresh waterers — we switched to a nipple-style chicken waterer and it cut down dramatically on the wet bedding situation
    • Do a quick visual check on the flock

    Weekly Deep Tidy

    • Remove the top layer of bedding and add fresh pine shavings
    • Dust the coop floor and roost bars with food-grade diatomaceous earth — this is our number one natural deodorizer and it also helps keep mites and lice at bay
    • Sprinkle a thin layer of baking soda under fresh bedding to absorb ammonia
    • Wipe down waterers with white vinegar

    Monthly Full Clean

    This is the one where you pull everything out.

    1. Remove all bedding completely
    2. Scrub the walls, roost bars, and nest boxes with a diluted white vinegar solution (about 1 part vinegar to 1 part water)
    3. Let it air dry fully before adding new bedding — in our Florida heat this takes maybe 30 minutes
    4. Dust everything down with diatomaceous earth before laying new bedding
    5. Add fresh herbs to the nest boxes (more on that in a second)

    📌 Love this? Save it to Pinterest so you can find it later!

    The Natural Deodorizers We Actually Use

    Food-Grade Diatomaceous Earth

    This is the backbone of our coop smell management. Food-grade diatomaceous earth is a fine powder made from fossilized algae, and it works in a couple of ways — it absorbs moisture, reduces ammonia odor, and physically deters parasites like mites and lice. We sprinkle it on the coop floor, in the dust bath area, and sometimes right into the bedding.

    Just wear a simple dust mask when you’re applying it, and keep the chickens out until it settles. It’s safe and natural, but fine powder and lungs don’t love each other in the moment of application.

    White Vinegar

    Plain distilled white vinegar is my go-to cleaner for surfaces. It cuts through grime, neutralizes odor at the source, and dries without leaving any residue that would concern me around my flock or my kids. I keep a big spray bottle mixed 50/50 with water in the coop area.

    Fresh Herbs

    Okay this one sounds fancy but it’s genuinely simple and the kids love helping. Lavender, mint, rosemary, and thyme all have natural antimicrobial properties and smell wonderful. We tuck sprigs of dried or fresh herbs into the nest boxes during our monthly clean. It keeps things smelling sweet and the chickens seem to enjoy it.

    If you’re growing herbs in your backyard or in containers — which is very doable here in the Panhandle — this costs you essentially nothing.

    Baking Soda

    Basic, cheap, and effective. A thin layer under fresh bedding absorbs ammonia and helps keep the floor of the coop drier. Don’t go overboard — a light dusting is plenty.

    What We Use to Spray Between Cleanings

    For a quick refresh between deep cleans, I mix water, a splash of white vinegar, and a few drops of tea tree oil or lavender essential oil in a spray bottle. Spritz the walls and roost bars, let it dry, done. It takes two minutes and keeps things from getting funky between weekly tidies.

    For pest control in and around the coop, we also love Wondercide — it’s plant-based, non-toxic, and actually works on the bugs that like to hang around chicken areas.

    Tips for Florida Specifically

    If you’re keeping chickens down here in the heat and humidity, a few extra things matter:

    • Ventilation is non-negotiable. Your coop needs serious airflow. A stuffy coop in August is an ammonia factory. We added extra ventilation to ours and it made an enormous difference.
    • Deep litter method works well here in the cooler months but needs more attention in summer. The composting action generates heat, which is the last thing you need in July.
    • Check for moisture daily. A waterer that spills or a surprise Florida rainstorm through an open vent can soak bedding fast. Wet bedding in humid heat is a recipe for serious odor and respiratory illness in your flock.

    If you’re just getting started with your flock or thinking about your coop setup, I’d also point you to our post on best egg laying chickens for Florida heat — breed choice actually affects how much waste you’re managing, and some breeds do much better in our climate than others.

    Making It a Homeschool Moment

    One of my favorite things about keeping backyard chickens alongside our Charlotte Mason homeschool is how naturally it teaches real science. Coop care is a living lesson in biology, chemistry, and ecology.

    Why does baking soda neutralize ammonia smell? That’s acid-base chemistry. Why does diatomaceous earth kill mites? That’s a lesson in physical vs. chemical pest control. Why do fresh herbs deter certain insects? Plant biology and natural medicine.

    We’ve done nature journal entries on our chickens, their behavior, and even the insects we find in and around the coop. If you want ideas for how to make that work, our post on Charlotte Mason nature journal ideas for kids has a lot of practical starting points. A simple nature journal and some Faber-Castell watercolors are all they need to turn coop observations into real nature study.

    And for more on the chicken side of things — including feed and health — check out Storey’s Guide to Raising Chickens. It’s the reference book I reach for most, and it has a great section on coop sanitation that helped inform a lot of what we do.

    The Honest Truth About Coop Smell

    A coop that smells isn’t a sign that you’re doing it wrong — it’s just a sign that something in the routine needs adjusting. Nine times out of ten it’s moisture or not-quite-frequent-enough bedding changes. Once you dial in the routine and start using natural deodorizers consistently, it gets so much easier.

    Our coop smells like pine shavings and herbs now. My kids spend time out there every day. That’s exactly what I wanted when we started this whole backyard chicken adventure, and it’s totally achievable without a single harsh chemical in sight.

    You’ve got this, mama. One clean coop at a time.


    📖 You Might Also Like:

    Frequently Asked Questions

    What is the best natural deodorizer for a chicken coop?

    Food-grade diatomaceous earth is one of the best natural coop deodorizers because it absorbs moisture and neutralizes ammonia while also helping control mites and lice. Baking soda sprinkled under bedding and white vinegar used as a surface cleaner are also highly effective and completely non-toxic to your flock and your family.

    How often should I clean my chicken coop to prevent odor?

    A quick daily spot-clean of soiled bedding and waterers, combined with a weekly partial bedding refresh and a monthly full cleanout, is the sweet spot for most backyard flocks. In hot, humid climates like Florida, you may need to check moisture levels daily and refresh bedding more frequently in summer to stay ahead of ammonia buildup.

    Is it safe to use diatomaceous earth in a chicken coop?

    Yes — food-grade diatomaceous earth is safe to use in a chicken coop and is widely recommended by natural chicken keepers. It’s non-toxic to chickens and humans. Apply it when chickens are out of the coop and wear a dust mask during application, as fine powders of any kind can be irritating to breathe in the moment of use.

    Can I use bleach to clean a chicken coop?

    It’s generally best to avoid bleach in a chicken coop. Bleach fumes can irritate your chickens’ sensitive respiratory systems, and residue left on surfaces can be harmful if ingested. White vinegar diluted with water is an effective, non-toxic alternative that cleans and deodorizes without the risks.

    Why does my chicken coop smell so bad even after cleaning?

    Persistent odor after cleaning usually points to a moisture problem. Check that your waterers aren’t leaking, that your coop has adequate ventilation, and that bedding isn’t sitting damp against the floor. In humid climates especially, wet bedding breaks down quickly into ammonia. Switching to nipple-style waterers and increasing coop ventilation often makes a dramatic difference.

  • How to Ferment Chicken Feed (And Why Your Flock Will Thank You For It)

    How to Ferment Chicken Feed (And Why Your Flock Will Thank You For It)

    How to Ferment Chicken Feed (And Why Your Flock Will Thank You For It)

    🌿 The Short Version: Fermenting chicken feed boosts nutrition, cuts feed costs, and supports gut health in your flock — and it takes about five minutes of hands-on time. This post walks you through exactly how we do it, what supplies you actually need, and the real benefits we’ve noticed in our own backyard hens.

    This post contains affiliate links. I may earn a small commission at no extra cost to you.

    If you’ve been raising backyard chickens for any length of time, you’ve probably gone down at least a few rabbit holes trying to figure out how to keep your flock healthier, cut your feed bill, or just do things a little more naturally. That was us about two years ago. I stumbled onto fermented feed almost by accident — saw it mentioned in a chicken-keeping group, thought it sounded complicated, ignored it for six months, and then finally tried it on a slow Tuesday afternoon.

    Y’all. It is so simple. And the difference in our hens has been genuinely noticeable.

    So let me break it all down for you — the why, the how, and the honest truth about what it looks like in real life with kids underfoot and a mini labradoodle trying to steal everything.

    What Is Fermented Chicken Feed, Exactly?

    Fermenting feed is just the process of soaking your regular chicken feed in water and letting naturally occurring beneficial bacteria (lactobacillus, specifically) do their thing over a few days. It’s the same basic science as making sourdough, sauerkraut, or yogurt. You’re not adding anything funky — you’re just creating the right environment for good bacteria to multiply and pre-digest the feed.

    The result is a wet, slightly tangy, probiotic-rich feed that your chickens will go absolutely wild for.

    Why Bother? The Real Benefits of Fermented Feed

    I’m not someone who does things just because they sound wholesome. I need it to actually work. Here’s what we’ve genuinely noticed — and what the research backs up:

    Better Nutrient Absorption

    Grains and seeds naturally contain something called phytic acid, which actually blocks your chickens from absorbing a lot of the nutrients in their feed. Fermentation breaks down phytic acid, which means the same cup of feed delivers significantly more nutrition than it would dry. More bioavailable vitamins, minerals, and protein from what you’re already buying.

    Lower Feed Costs

    This one surprised me the most. Fermented feed is more filling and more nutritious, so your chickens eat less of it. We noticed our flock eating roughly 20-30% less after switching to fermented feed most days. Over time, that adds up.

    Gut Health and Fewer Health Issues

    The probiotics in fermented feed support a healthy gut biome in your hens — which means better immunity, fewer digestive issues, and generally hardier birds. Down here in the Florida heat and humidity, keeping our flock healthy is no small thing. A strong gut goes a long way. (For more on keeping Florida chickens thriving, check out Best Egg Laying Chickens for Florida Heat (What Actually Works in Our Backyard Flock).)

    Better Egg Quality

    We’ve noticed richer yolks and stronger shells since incorporating fermented feed regularly. Some folks report increased laying too, though I’d say ours has stayed pretty consistent rather than dramatically increased.

    Less Waste and Less Mess

    Wet feed doesn’t blow around or kick out of the feeder the way dry feed does. Less waste on the ground means less attracting unwanted visitors — which, in Florida, we really don’t need help with.

    📌 Love this? Save it to Pinterest so you can find it later!

    What You Need to Get Started

    This is genuinely a low-supply project. Here’s what we use:

    • A wide-mouth jar or food-grade bucket — I use a half-gallon mason jar for small batches and a 2-gallon bucket when I do a bigger batch. You want something you can stir easily.
    • Your regular chicken feed — layer pellets, crumbles, or scratch grains all work. We use a mix.
    • Non-chlorinated water — chlorine can kill the beneficial bacteria you’re trying to grow. We use filtered water or let tap water sit out uncovered overnight.
    • A breathable cover — a cloth or paper towel secured with a rubber band works great. You don’t want an airtight lid because the fermentation process releases gases.
    • A stirring spoon or stick

    That’s genuinely it. No starter culture needed — wild lactobacillus bacteria are already present on the grains.

    If you want to keep your coop set-up just as intentional as your feed routine, we love our automatic chicken coop door for early mornings, and nipple chicken waterers to keep fresh clean water available without the algae mess.

    How to Ferment Chicken Feed: Step by Step

    Day 1:

    Fill your jar or bucket about halfway with feed. Cover with non-chlorinated water — you want at least 2-3 inches of water above the feed because it will absorb a lot as it swells. Stir it well, cover with your breathable cloth, and set it somewhere at room temperature out of direct sunlight.

    Day 2:

    Stir it again. You might start to see small bubbles forming near the top — that’s exactly what you want. That’s the fermentation starting. If the water level has dropped below the feed, add a little more. You always want the feed submerged.

    Day 3:

    It should smell pleasantly tangy — like sourdough or yogurt. That’s the good bacteria at work. If it smells rotten or you see fuzzy mold (not just a thin white film, which is usually harmless kahm yeast), toss it and start fresh. Give it one more good stir.

    Day 3-4: Ready to Feed

    Scoop out what you need for the day, drain off excess liquid if you like (though your chickens may love drinking the liquid too — it’s full of probiotics), and serve it up. Refill with fresh feed and water to keep your batch going continuously.

    The leftover liquid from the ferment acts as a starter culture, so your next batch will ferment faster and more reliably.

    Tips for Making It Work in Real Life

    Keep 2-3 jars going on rotation. We start a new jar every day or two so we always have something ready. Day 1 jar, Day 2 jar, Day 3 jar — rotate through.

    Don’t stress about exact ratios. More water is better than not enough. Just keep the feed submerged.

    Florida heat speeds things up. In our Pensacola summers, fermentation can happen faster — sometimes fully ready by day 2. In the cooler months (yes, we have a few of those), it might take closer to 4 days. Just go by smell and bubble activity, not the clock.

    Combine with diatomaceous earth in your coop routine for a well-rounded approach to flock health that stays non-toxic. We use food-grade DE in the coop bedding and dust bath area.

    Involve your kids. Seriously. My kids check on the ferment jars every morning like they’re science experiments — because they are. This is living, breathing biology happening right on your counter. It’s a perfect low-key lesson in fermentation, microbes, and why what we feed our animals matters. If you’re looking for more ways to bring real-life science into your days, our Charlotte Mason Nature Journal Ideas for Kids (That Actually Get Used) has a lot of good ideas for capturing observations like this.

    Is It Worth It?

    Honestly? Yes — but only if it fits your life. We don’t ferment 100% of the time. Some weeks are busy and our girls get dry feed. But when we’re consistent with it, we see the difference in egg quality, flock health, and our feed bill. It’s one of those small, simple things that feels very aligned with the way we try to do everything else around here — real food, less processing, letting nature do the work.

    For more on keeping a healthy, low-tox backyard flock, I’ve also written about How to Build a Simple Chicken Tractor for Your Backyard Flock if you want fresh-pasture access for your hens without free-ranging the whole yard.

    If you want to go deeper into chicken keeping in general, Storey’s Guide to Raising Chickens is the reference book I keep going back to — it’s thorough without being overwhelming. And if your kids want their own chicken book, the Kid’s Guide to Keeping Chickens is genuinely wonderful and something mine have read cover to cover.

    A Note on Keeping It Non-Toxic

    One thing I love about fermented feed is that it fits right into our non-toxic, intentional approach to the whole homestead. Less reliance on supplements, no additives, just letting a simple biological process do what it does. That’s kind of our whole philosophy — work with nature instead of against it. Same reason we use Wondercide around the coop and yard instead of conventional pesticides, and why we lean toward real food approaches for our animals the same way we do for our family.

    If you’re just getting started on the non-toxic path for your home overall, I have a whole post on that too: How to Detox Your Home from Toxins Room by Room.

    Alright friend — go grab a mason jar and try it this week. Seriously, your hens will notice. And honestly? So will you.


    📖 You Might Also Like:

    Frequently Asked Questions

    How long does it take to ferment chicken feed?

    Typically 3-4 days at room temperature. In warmer climates like Florida, fermentation can happen faster — sometimes ready in 2-3 days in summer. You’ll know it’s ready when it smells pleasantly tangy (like sourdough or yogurt) and you can see small bubbles forming on the surface.

    Can you ferment any type of chicken feed?

    Yes! Layer pellets, crumbles, whole grains, and scratch all ferment well. Pellets will break down and get mushy, which is totally fine — your chickens won’t mind. Some people prefer fermenting whole or cracked grains because they hold their texture better, but either works.

    How much fermented feed should I give my chickens?

    A good starting point is about the same volume you’d normally feed in dry feed, but you’ll likely find your hens eat less of it because it’s more filling and nutritious. Many chicken keepers report feeding 20-30% less volume once they switch to fermented feed regularly. Offer it fresh daily and remove any uneaten feed after a few hours so it doesn’t spoil in the heat.

    Is fermented chicken feed safe? Can it go bad?

    Properly fermented feed is very safe — the acidic environment created by beneficial bacteria actually prevents harmful bacteria from growing. The signs that something has gone wrong are a rotten (not tangy) smell or fuzzy mold growth. A thin white film on the surface is usually harmless kahm yeast and can be stirred in or skimmed off. When in doubt, toss it and start fresh — it’s just feed.

    Do I need to add anything to start fermenting chicken feed?

    No starter culture needed! Beneficial lactobacillus bacteria are naturally present on grain and in the environment. All you need is your regular feed, non-chlorinated water (chlorine can inhibit fermentation), and a breathable cover over your container. After your first successful batch, you can use a bit of the liquid left in the jar as a starter for your next batch to speed things up.

  • Best Egg Laying Chickens for Florida Heat (What Actually Works in Our Backyard Flock)

    Best Egg Laying Chickens for Florida Heat (What Actually Works in Our Backyard Flock)

    Best Egg Laying Chickens for Florida Heat (What Actually Works in Our Backyard Flock)

    🌿 The Short Version: Not every chicken breed handles Florida summers gracefully — some will stop laying, get stressed, and just look miserable. This post breaks down the best egg laying chickens for Florida heat based on real backyard experience, so you can build a flock that actually thrives down here year-round.

    This post contains affiliate links. I may earn a small commission at no extra cost to you.

    If you’ve ever stood in your backyard in July — sweat dripping, heat index hovering around 105°F — watching your chickens pant in the shade and wondering why your egg basket is suddenly empty, you already know the problem. Florida heat is no joke, y’all. And a lot of the “popular” chicken breeds you see on every homestead blog? They were not designed with the Florida panhandle in mind.

    We’ve kept backyard chickens here in the Pensacola area for several years now, and I’ll be honest — our first flock was a bit of a trial-and-error situation. We started with what looked pretty, not what was practical. Live and learn. These days our girls are laying consistently through most of the summer, and a big part of that comes down to choosing the right breeds from the start.

    So let me save you some of that trial and error.

    Why Breed Choice Matters So Much in Florida

    Chickens are warm-blooded animals that regulate body temperature by panting and holding their wings out from their bodies. When the ambient temperature stays above 90°F for weeks at a stretch (which is basically June through September here), breeds that weren’t developed in hot climates start to really struggle. Heat stress causes hens to slow or stop laying, makes them more susceptible to illness, and in extreme cases can be fatal.

    The breeds that thrive in Florida tend to share a few common traits:

    • Smaller or medium body size — less body mass means less heat generated
    • Lighter feathering or loose feather structure — not dense, fluffy breeds
    • Larger combs — the comb acts as a radiator; bigger combs dissipate heat better
    • Mediterranean or tropical heritage — these breeds were literally developed in hot climates

    Keep those traits in mind and you’ll start to see a pattern in the breeds below.

    The Best Egg Laying Chickens for Florida Heat

    1. Leghorn

    The Leghorn is basically the gold standard for hot-climate egg laying. These birds were developed in the Mediterranean and they are made for heat. They’re lean, they have large single combs, and they are egg-laying machines — we’re talking 280–320 white eggs per year from a good hen. They’re a little flighty and not the cuddliest bird, but if consistent production through the summer is your goal, Leghorns deliver.

    2. Easter Egger

    Our family’s personal favorite, and honestly a great kid bird. Easter Eggers are mixed-heritage chickens (often carrying Ameraucana or Araucana genes) that lay blue, green, or pink-tinted eggs. The kids go absolutely wild collecting them every morning — it turns into a real nature study moment. Easter Eggers tend to be heat tolerant, relatively calm, and curious little birds. They’re not quite as prolific as Leghorns but they’re consistent, and those colorful eggs never get old.

    If your kids are interested in learning more about your flock, we love Storey’s Guide to Raising Chickens as a family reference — and the Kid’s Guide to Keeping Chickens is perfect for elementary-age kids to read alongside you.

    3. Black Australorp

    Australorps are one of those breeds that surprises people. They’re a heavier bird, which you wouldn’t expect to thrive in heat — but they’re remarkably adaptable and known for exceptional egg production (they actually hold the world record for eggs laid in a year). In Florida, they do best with good shade, plenty of fresh water, and airflow in the coop. We’ve had great luck with ours. They’re also incredibly gentle, which matters a lot when little hands are involved.

    4. Rhode Island Red

    Another workhorse breed that handles Florida reasonably well. Rhode Island Reds are tough, adaptable, and lay large brown eggs consistently. They’re not as heat-specialized as Leghorns but they’re resilient birds that don’t fuss too much. Good for beginners and great for families who want a friendly, predictable flock.

    5. Buff Orpington — With Caveats

    I know. Every chicken list includes Buff Orpingtons, and I get why — they’re beautiful, gentle, and wonderful with children. But I’d be doing you a disservice if I didn’t give you the honest Florida caveat: those fluffy feathers are gorgeous and absolutely terrible in August heat. If you want Orpingtons (and honestly, they’re hard to resist), plan to give them extra shade, a dedicated misting area, and close attention during heat waves. They can do fine here with the right setup — just go in with eyes open.

    6. Dominique

    This is an underrated breed that I wish more Florida families knew about. Dominiques are America’s oldest chicken breed, historically raised across the South, and they are genuinely heat-hardy. They have a rose comb (which is less prone to frostbite, though that’s less relevant here), they’re self-sufficient foragers, and they lay a solid number of brown eggs. They tend to be calm and friendly too. If you’re looking for something a little different and historically interesting — great for Charlotte Mason-style nature study — the Dominique is a fantastic choice.

    📌 Love this? Save it to Pinterest so you can find it later!

    What We Do to Keep Our Flock Laying Through Summer

    Breed choice is step one, but management matters just as much. Here’s what we actually do to keep our girls happy and producing through the hottest months:

    Fresh, cool water constantly. We use a nipple chicken waterer that keeps the water cleaner and cooler than open dishes. In peak summer we’ll add ice to the water in the afternoon.

    Deep shade. Our coop is positioned under a big oak tree, and we have a shadecloth run extension. If your coop is sitting in full Florida sun all day, that’s your first problem to solve. If you’re building or moving a coop, check out my post on How to Build a Simple Chicken Tractor for Your Backyard Flock — a tractor gives you flexibility to move your birds to shadier spots seasonally.

    Automatic coop door. An automatic coop door lets the girls get outside in the cooler early morning hours without us having to be out there at 6am — which, in summer, is honestly the most comfortable time to be outside anyway.

    Diatomaceous earth in the coop. We use food-grade diatomaceous earth in our nesting boxes and coop floor to keep mites and lice under control naturally. Stressed birds in heat are more susceptible to parasites, so staying ahead of it matters.

    Ventilation, ventilation, ventilation. More important than almost anything else in a Florida summer coop. Airflow over shade any day.

    Chickens as a Nature Study — Yes, Really

    One of my favorite things about keeping a backyard flock is how naturally it folds into our homeschool days. My kids track which hens lay which eggs, we talk about chicken biology, and caring for the flock is genuinely part of how they’re learning responsibility and observation skills — the kind of slow, attentive noticing that Charlotte Mason was all about.

    We’ve even done nature journal entries on the chickens — sketching them, noting behavior changes in summer heat versus cooler months, documenting which breeds seem most comfortable in different temperatures. It sounds simple, but that kind of careful observation is real science. If you want ideas for getting your kids journaling about animals and nature, peek at Charlotte Mason Nature Journal Ideas for Kids (That Actually Get Used) — we use a simple nature journal and Faber-Castell watercolors for illustrations.

    This is the 1990s-childhood thing I always come back to. Kids learning by doing. Real animals, real responsibility, real life. No worksheet required.

    A Quick Note on Flock Size and Getting Started

    For most backyard families in Northwest Florida, a small flock of 4–6 hens is plenty to keep a family supplied with eggs. A mix of breeds works beautifully — we run Easter Eggers and Black Australorps together right now and they get along wonderfully. Starting with pullets (young hens) from a reputable local feed store or hatchery in late winter or early spring means they’ll be fully laying before summer hits.

    For deeper reading on setting up a healthy flock from scratch, I really do recommend Storey’s Guide to Raising Chickens — it’s the one chicken book I’d want if I could only keep one.


    If you’ve been on the fence about starting a backyard flock, I hope this helps you feel a little more confident about which birds will actually do well here in Florida. It doesn’t have to be complicated. Pick heat-tolerant breeds, give them shade and water, and let the kids collect eggs every morning. That right there — that small, simple, rooted thing — it really does change the texture of daily life in the best way.

    We’d love to hear what breeds are working for your Florida flock! Drop a comment below and let me know. 🐓


    📖 You Might Also Like:

    Frequently Asked Questions

    What is the best egg laying chicken breed for Florida heat?

    Leghorns are considered the top choice for hot climates because of their Mediterranean heritage, lean build, and large combs that help dissipate heat. Easter Eggers and Black Australorps are also excellent options for Florida backyard flocks, offering good production and heat tolerance with the right management.

    Do chickens stop laying eggs in Florida summer heat?

    Yes, heat stress can significantly slow or stop egg production in hens. When temperatures stay above 90°F for extended periods, chickens focus their energy on staying cool rather than laying. Choosing heat-tolerant breeds and providing deep shade, consistent fresh water, and good coop ventilation can help keep production more consistent through summer.

    Are Buff Orpingtons a good choice for Florida?

    Buff Orpingtons can be kept in Florida, but they’re not the most heat-tolerant breed due to their dense, fluffy feathering. If you want Orpingtons, plan to give them extra shade, a misting area, and close monitoring during heat waves. They’re wonderful, gentle birds — just not ideally suited to Florida summers without thoughtful management.

    How do I keep backyard chickens cool in Florida summers?

    The most important things are deep shade throughout the day, constant access to fresh cool water (nipple waterers help keep water cleaner and cooler), strong airflow and ventilation in the coop, and choosing heat-tolerant breeds to begin with. Some families also add ice to water in the afternoons during peak heat weeks.

    How many chickens do I need to keep a family in eggs in Florida?

    Most families find that 4–6 hens is plenty to keep a household supplied with fresh eggs, even accounting for summer slowdowns. A small mixed flock of heat-tolerant breeds started in late winter or early spring will typically be in full production by summer. Some hens will slow down in extreme heat, so a slightly larger flock gives you a buffer.

  • How to Build a Simple Chicken Tractor for Your Backyard Flock (Even If You’re Not Handy)

    How to Build a Simple Chicken Tractor for Your Backyard Flock (Even If You’re Not Handy)

    How to Build a Simple Chicken Tractor for Your Backyard Flock (Even If You’re Not Handy)

    🌿 The Short Version: A chicken tractor is a movable coop that lets your flock forage on fresh grass without destroying your whole yard — and you can build a basic one over a weekend with minimal tools. This post walks you through exactly what we did, what materials we used, and how it changed the way our chickens (and our kids) interact with the backyard.

    This post contains affiliate links. I may earn a small commission at no extra cost to you.

    If you’ve had backyard chickens for more than about five minutes, you already know the problem. You let them free range, they’re happy as can be — and within a week your yard looks like a moonscape. Bare dirt, scratched-up garden beds, and enough chicken poop on the back porch to make you question every decision you’ve ever made.

    We love our little flock more than is probably reasonable, but we also love our yard. And our garden. And not stepping in something unpleasant on the way to the clothesline.

    That’s exactly why we built a chicken tractor. And honestly? It’s been one of the best things we’ve done for our backyard setup here in Northwest Florida. If you’ve been curious about building one but assumed it required serious carpentry skills or a big budget, I promise you — it does not. Our kids helped build ours, and the whole project cost us less than a nice dinner out.

    What Even Is a Chicken Tractor?

    A chicken tractor is just a bottomless, movable coop. No floor — so your chickens have direct access to the ground, the grass, and all the bugs they can find. You move it every day or two to a fresh patch of yard, and the chickens do what chickens do: scratch, eat, fertilize, and move on. Your grass recovers, your birds get real forage time, and your permanent coop doesn’t get as nasty because the flock isn’t confined to it all day.

    It’s not a replacement for a permanent coop — your birds still need a secure place to sleep at night. Think of it as a daytime grazing pen that you drag around the yard like a slow, feathery lawnmower.

    For a deeper dive into caring for your flock day-to-day, Storey’s Guide to Raising Chickens is the book I recommend to every new chicken keeper. It covers everything from coop setup to flock health in plain, practical language.

    Why We Love Ours (Especially in Florida)

    Here in the Pensacola area, our summers are long and brutally hot. One thing a chicken tractor does really well is give you flexibility — you can position it under a shade tree in July and out in the open sun in January when the flock wants the warmth. That kind of control matters when you’re managing bird health through Florida’s extreme seasons.

    It also keeps things cleaner around the permanent coop. Less concentrated waste in one spot means less flies, less smell, and less diatomaceous earth battles. We still use DE regularly, but we’re definitely using less of it since we started rotating the tractor.

    And honestly? The kids are more engaged with the chickens when there’s a daily chore that involves actual movement and decision-making — like figuring out which section of the yard to move to next, checking the grass quality, watching what the hens find to eat. It’s quiet, real-life science happening right in the backyard.

    If you’re just getting started with chickens and want a kid-friendly resource, the Kid’s Guide to Keeping Chickens is sweet and genuinely useful — my kids have read it cover to cover.

    What You’ll Need to Build a Basic A-Frame Chicken Tractor

    There are a dozen styles of chicken tractors — hoop tractors, A-frames, box styles. We went with a simple A-frame because it’s structurally solid, sheds rain well (important in Florida), and the angle gives the birds a nice shaded corner even on sunny days.

    Materials list for a 4×8 A-frame (holds 3-4 standard hens comfortably):

    • (6) 2x4x8 boards
    • (2) 2x4x4 boards for the base
    • 1 roll of hardware cloth, 1/2 inch mesh (NOT chicken wire — predators can tear through chicken wire)
    • 1 small roll of 1-inch chicken wire for the upper sleeping section if desired
    • Wood screws (exterior grade, 2.5 inch and 1.5 inch)
    • 2 hinges + 1 latch for the access door
    • 2 handles or a length of rope for dragging
    • Staple gun with heavy-duty staples
    • Optional: 1 small piece of plywood or tin for the top peak if you want a fully weatherproof upper section

    Total cost for us: around $60-75 depending on what you already have in the garage.

    📌 Love this? Save it to Pinterest so you can find it later!

    Step-by-Step: How We Built Ours

    Step 1: Build the Base Rectangle

    Cut your 2x4s to form a 4×8 rectangle frame. This is your ground-level perimeter. Use exterior screws and predator-proof corners — nothing fancy, just solid. This base sits directly on the grass.

    Step 2: Build the A-Frame Sides

    Cut four boards at an angle to form the two triangular end pieces. The peak of our A-frame sits about 4 feet high, which gives the birds plenty of headroom and gives you enough access through the door without crouching all the way to the ground.

    Screw the angled boards into the base corners and connect them at the top with a ridge board running the full 8-foot length.

    Step 3: Add the Ridge Board and Rafters

    Run your ridge board along the top. We added a couple of cross-supports along the length for rigidity — this matters in our area because Gulf Coast storms are not gentle. If you’re in Northwest Florida, overbuild this part. You’ll thank yourself in August.

    Step 4: Wrap It in Hardware Cloth

    This is where the kids can really help. Unroll the hardware cloth and staple it across all open sections of the frame. Pull it taut before you staple — loose wire sags and creates weak points. We fold the raw edges over and staple them down so there are no sharp bits sticking out at chicken (or child) height.

    Use your staple gun generously. More staples = more predator resistance. We have raccoons and opossums here, and they are persistent.

    Step 5: Build the Access Door

    We framed a simple door on one of the end triangles using scrap 2×2 material, covered it in hardware cloth, and hung it with two hinges. A simple barrel latch keeps it closed. This is where you collect eggs if you add a nest box, and how you access the birds for health checks.

    Step 6: Add Handles

    Attach a handle or rope loop to each short end. This makes it a two-person drag — one of us on each end, kids helping push from the sides. Moving it every day or two takes about two minutes and the kids treat it like an event.

    A Few Things We’ve Learned Along the Way

    Move it more than you think you need to. Seriously. Two days in one spot in a Florida summer and you’ll have mud. Move it every day if you can.

    Add a waterer inside. We use a simple nipple chicken waterer mounted on the side of the frame. Keeping water accessible inside the tractor means the birds aren’t stressed when they’re in there during the hottest part of the day.

    The tractor doesn’t replace your permanent coop. Close your birds in their main coop at night — every single night. A tractor is not Fort Knox after dark.

    We also have an automatic coop door on our permanent coop that closes at dusk. Absolute game-changer for peace of mind.

    How This Became a Homeschool Thing

    I didn’t plan for the chicken tractor to become a nature study unit, but here we are.

    My kids started tracking which section of yard the chickens preferred, noticing what bugs they found in different spots, sketching what they observed in their nature journals. We talked about soil health, about how chicken manure works as a fertilizer, about the difference between the grass in the tractor path versus the untouched sections. My youngest started calling the chickens her “little farmers” and honestly, she’s not wrong.

    This is exactly the kind of living, hands-on learning I was hoping for when we started homeschooling. No worksheet could teach what fifteen minutes of chicken-watching actually does. If you want more ideas like this, check out our post on Charlotte Mason Nature Journal Ideas for Kids (That Actually Get Used) — the chickens show up there too.

    And if you’re raising your kids more like it’s 1990 — more dirt, more real work, less screen time — you might enjoy Raising Kids Without Screens: What We Actually Do Every Day. Projects like this one are a big part of how we fill those hours.

    You Really Can Do This

    I’m not a carpenter. My husband is handy but not professionally so. We built our first chicken tractor on a Saturday morning while the kids ran around the yard, and we’ve tweaked it a little every season since. It’s not perfect. There’s a slightly crooked door and one section of hardware cloth that we had to re-staple after a particularly ambitious raccoon incident.

    But it works. Our hens are healthier, our yard is in better shape, and our kids have learned more about chickens, soil, and real-life problem-solving from this one project than from any book I could have handed them.

    If you’ve been sitting on the idea, just start. Cut the boards, buy the hardware cloth, and build the thing. Your flock will love you for it.


    📖 You Might Also Like:

    Frequently Asked Questions

    How big should a chicken tractor be for 4 chickens?

    A 4×8 foot chicken tractor works well for 3-4 standard-sized hens as a daytime grazing space. Remember, a chicken tractor is supplemental to a permanent coop — it’s not where they sleep at night, so the space requirements are a little more flexible than a full coop. As a general rule, plan for at least 8-10 square feet of tractor space per bird.

    How often do you need to move a chicken tractor?

    In most climates, moving a chicken tractor every 1-3 days is ideal to keep the grass from getting destroyed and to prevent a buildup of waste in one spot. In hot, humid climates like Florida, moving it daily during summer is even better — the combination of heat and moisture means things get muddy and smelly faster than in cooler regions.

    What’s the difference between a chicken tractor and a regular chicken coop?

    A regular coop is a permanent, stationary structure where your chickens roost and sleep safely at night. A chicken tractor is a bottomless, movable enclosure used during the day to let chickens forage on fresh grass. Most backyard flocks do best with both — a secure permanent coop for nighttime and a chicken tractor for daytime foraging and rotational grazing.

    Can a chicken tractor protect chickens from predators?

    A well-built chicken tractor with 1/2-inch hardware cloth (not chicken wire) provides good daytime protection from most predators. However, it is not secure enough for overnight use. Always move your flock into a locked, solid permanent coop at night. Raccoons, foxes, and other predators are much more active after dark and can defeat most tractor designs with enough time and motivation.

    What is the cheapest way to build a chicken tractor?

    The most budget-friendly chicken tractors use basic 2×4 lumber, hardware cloth, and whatever hinges and screws you have on hand. A simple A-frame or hoop-style design can be built for $50-80 in materials depending on your local lumber prices. Check Facebook Marketplace or your local buy-nothing group for scrap lumber to bring the cost down even further. Avoid cutting corners on the hardware cloth — that’s where predator protection comes from, so buy quality 1/2-inch mesh.

  • Raising Kids Without Screens: What We Actually Do Every Day

    Raising Kids Without Screens: What We Actually Do Every Day

    Raising Kids Without Screens: What We Actually Do Every Day

    🌿 The Short Version: Raising kids with less screen time isn’t about saying no all day — it’s about filling their world with something better. In this post I’m sharing exactly what our low-screen days look like, from chicken chores to nature journaling to good old-fashioned boredom that actually leads somewhere beautiful.

    This post contains affiliate links. I may earn a small commission at no extra cost to you.

    Somebody asked me recently — kind of sideways, the way people do when they’re not sure if they’ll offend you — “So what do your kids actually do all day if they’re not watching TV?”

    And I laughed, because I get it. We are living in a world where screens are the default answer to everything. Bored? Here’s a tablet. Long car ride? Here’s a show. Rainy afternoon? Here’s YouTube. I’m not judging — I’ve handed over a phone in a pinch too. But the way we live on purpose most days? It looks a lot more like 1990s childhood than anything you’d find on an app store, and honestly? My kids are thriving in the most grounded, creative, connected way.

    So let me actually answer that question. Here’s what we do.


    Why We Made the Choice to Limit Screens (And Didn’t Look Back)

    This wasn’t some overnight decision or a dramatic purge. It started slowly — noticing how my kids acted after screen time versus after a morning outside. The difference was stark. After screens: cranky, disconnected, asking for more screens. After time outside or doing something with their hands: calm, creative, actually talking to each other.

    We’re a Charlotte Mason homeschool family here in the Florida Panhandle, and the whole philosophy is built around living ideas, real experiences, and the natural world. Screens don’t fit that vision very well. So we just… started filling our days differently. And the kids stopped asking as much, because they had better things to do.


    What a Low-Screen Day Actually Looks Like for Us

    Morning Chores — Starting the Day With Purpose

    Every single morning, my kids go out and tend to our backyard chickens before anything else. They refill the nipple waterer, check for eggs, scatter some scratch. It sounds small but it’s huge — they wake up with responsibility. Something is counting on them. That feeling of being needed by a living creature? No screen can replicate it.

    If you’re thinking about adding chickens to your family, Storey’s Guide to Raising Chickens is the one I always recommend for adults, and the Kid’s Guide to Backyard Chickens has been such a hit with my elementary-age crew — they genuinely read it on their own.

    Morning Basket and Read-Alouds

    After chores and breakfast, we gather for our morning basket. This is one of my favorite parts of our day — picture books, poetry, a chapter of whatever we’re reading together, maybe some picture study. If you want to peek inside what ours actually looks like, I wrote all about it here: Morning Basket Ideas for Charlotte Mason Homeschool (What Ours Actually Looks Like).

    No screens needed. Just books, voices, and a cup of coffee I may or may not have to reheat three times.

    Nature Study — The Heart of Our Homeschool

    This is where the magic lives. We go outside — even in the brutal Florida summer heat (hello, 7am nature walks before it hits 90°) — and we pay attention. We look at bugs, we sketch birds, we notice what’s blooming.

    Every child has their own nature journal and we use Faber-Castell watercolors for their nature sketches — quality tools matter, even for little kids. My oldest has gotten so good at identifying local birds that she’ll just casually announce “that’s a red-bellied woodpecker, Mom” like it’s nothing. We use the Sibley Birds guide and a pocket microscope for closer looks at things they find.

    For more ideas on keeping nature journals alive and actually used, pop over to Charlotte Mason Nature Journal Ideas for Kids (That Actually Get Used).

    📌 Love this? Save it to Pinterest so you can find it later!

    Free Play — The Underrated Secret Weapon

    After our structured morning, I basically kick them outside. This is the part people look at me funny about. I don’t schedule their play. I don’t facilitate it. I give them walkie talkies and a bug catcher kit and let them figure it out.

    Some days they build elaborate forts. Some days they dig up earthworms and experiment with which ones move fastest. Some days they fight and work it out and learn something about conflict resolution I could never have taught in a lesson. This is 1990s childhood on purpose, and I will defend it forever.

    Boredom is the doorway to creativity. I know that sounds like a bumper sticker, but I’ve watched it happen too many times to doubt it.

    Hands-On Learning Instead of Screen Time

    Our academic time is largely hands-on too. We use Math-U-See with its physical blocks — no app, no video game. My younger ones work through All About Reading with actual tiles and books. We cook together. We garden. We do experiments.

    If you’re new to the Charlotte Mason / nature-based approach and wondering how reading fits in, I wrote about that here: How to Teach Reading Naturally Without a Formal Curriculum (What Actually Works).


    What About Rainy Days? Or Really Bored Kids?

    Oh, we have those. Florida gets real rain — like, the sky-opening-up-sideways kind. On those days we:

    And honestly? Sometimes I let them be bored for a while. I sit nearby and do my own thing. They grumble, they wander, and then about 15 minutes later I hear giggling from the other room and they’ve invented something.


    Do We Ever Use Screens?

    Yes. I want to be real with you here — we do sometimes watch a nature documentary together, or use a specific educational video for a topic we’re studying. My kids know screen time exists. We’re not trying to raise them in a bubble.

    But screens are a planned, occasional thing in our house, not the background hum of every day. And the difference in my kids’ attention spans, their creativity, their ability to entertain themselves and each other — it’s not subtle. It’s significant.


    The Thing Nobody Tells You About Low-Screen Life

    It’s harder on you at first. When your kids can’t default to a show, they default to you. That’s an adjustment. But it gets easier — really fast — once they build the muscle for independent play and self-directed learning. Within a few weeks of pulling back on screens, my kids started playing longer, fighting less, and coming to me with genuinely curious questions instead of just wanting entertainment.

    That’s the childhood I wanted to give them. Messy, curious, a little dirty, deeply alive.


    I won’t tell you it’s perfect or that I have it all figured out. Some days everybody is grumpy and nothing flows and I question every choice I’ve ever made. But then my daughter runs in from outside with a luna moth cupped in her bug catcher and her eyes are absolutely wild with wonder, and I think — yeah. This is it. This is exactly what I was trying to build.

    If you’re just starting to pull back on screens, be gentle with yourself and your kids. It’s a process. But you’ll be amazed how quickly they find their footing — and how much color comes back into their days.


    📖 You Might Also Like:

    Frequently Asked Questions

    How do I get my kids to stop asking for screens all the time?

    The key is filling the gap *before* they ask. When kids have meaningful things to do — chores that matter, outdoor time, hands-on projects — they naturally ask for screens less. It takes a few weeks of staying consistent, but most families find kids stop asking as much once they rebuild the habit of self-directed play.

    Is it realistic to raise kids with almost no screen time in today’s world?

    Absolutely — but it requires being intentional about what you fill their days with instead. Families who do it successfully tend to prioritize outdoor time, hands-on learning, real books, and free play. You don’t have to be screen-free forever; just purposeful about when and how screens are used.

    What do kids do without screens when they’re bored?

    At first, they complain! But boredom is actually productive — it’s the doorway to creativity. Kids who are given space to be bored typically start inventing games, building things, exploring outside, or diving into books within a short window. Keep materials accessible: art supplies, building toys, outdoor gear, and books.

    How do Charlotte Mason homeschoolers limit screen time?

    Charlotte Mason homeschooling is naturally low-screen because it prioritizes living books, nature study, real-world experiences, and hands-on learning. Most Charlotte Mason families fill their days with nature journals, read-alouds, narration, outdoor time, and handicrafts — leaving little room or desire for screens.

    What are good screen-free activities for elementary-age kids?

    Some of our favorites: nature journaling and watercolor sketching, backyard chicken keeping, bug collecting, board games, baking, free outdoor play, building forts, reading physical books, gardening, and hands-on math and reading curricula. The best activities are ones that give kids agency and let them get a little messy.